LaTeX学习笔记 时间 :2022/3/11
0. 简介:
这是我第一次写文章,一方面是为了记录自己的学习内容,以方便今后的复习与查阅,另一方面也是为了与大家分享自己的学习内容,希望喜欢的同学们可以点个赞哦!(给我一点鼓励)。另外,文章中有不对的地方,欢迎在评论区中指出呀!
下面的学习内容是我在B站上的《latex中文教程-15集从入门到精通包含各种latex操作》学习的。
1. LaTeX文件的基本格式
1.1 Hello World
%导言区
\doucumentclass{article}%book, report, letter

%正文区
\begin{document}

\end{doucument}
以上就是latex文件的文本区域
注意:一个latex文件有且只能有一个document
代码中的%: %的是用来注释的
下面在正文区中增加内容:
%导言区
\doucumentclass{article}%book, report, letter

%正文区
\begin{document}
    Hello World!
\end{doucument}
运行程序,结果如下:
1.2 title,author, date
加入标题,作者,时间等要素,代码如下:
%导言区
\documentclass{article}%book, report, letter

\title{My First Document}
\author{Xu Jun}
\date{\today}

%正文区
\begin{document}
	Hello World!
\end{document}
代码运行结果如下:
发现并没有出现导言区的内容,为了解决这个问题,我们还需要在正文区增加一行代码:
\maketitle
完整代码如下:
%导言区
\documentclass{article}%book, report, letter

\title{My First Document}
\author{Xu Jun}
\date{\today}

%正文区
\begin{document}
	\maketitle
	Hello World!
\end{document}
运行结果:
注意我们还可以通过更改文档类来更改文档结构
什么是文档类:
在导言区中的 \documentclass{class} 即为文档类
{} 中的 class 可以为 article, book, report, letter
我们试试令 class = book ,结果如下:
首先第一面是封面:
第二面是正文:
注意,当 class 为 letter 时,不能加入 \maketitle
否则会报错
class 为 letter 时的代码和结果如下:
%导言区
\documentclass{letter}%book, report, letter

\title{My First Document}
\author{Xu Jun}
\date{\today}

%正文区
\begin{document}
	%\maketitle
	Hello World!
\end{document}
在 LaTeX 里, 我们在修改代码时,不会直接删除某一段代码,而是直接使用 % 将其注释,方便我们以后进行修改和编写。
1.3 公式
在写论文时,公式也是必不可少的,LaTeX的公式分为行内公式和行间公式,下面我们通过实例来了解它们
%导言区
\documentclass{article}%book, report, letter

\title{My First Document}
\author{Xu Jun}
\date{\today}

%正文区
\begin{document}
	\maketitle
	%%行内公式
	Let $f(x)$ be defined by the formula $f(x) = (x + 1)^2$.
	%%行间公式
	Let $$f(x)$$ be defined by the formula $$f(x) = (x + 1)^2$$.
\end{document}
代码结果:
根据实例我们可以总结:
$…$ 是行内公式,在文本内显示
而 $$…$$ 是行间公式,在新的一行中显示
1.3 实现换行
在LaTeX的文本区中怎么实现换行呢?
下面我们进行一些尝试:
直接按下回车键:
代码:
%导言区
\documentclass{article}%book, report, letter

\title{My First Document}
\author{Xu Jun}
\date{\today}

%正文区
\begin{document}
\maketitle
The first sentence.
The second sentence.
\end{document}
结果如下: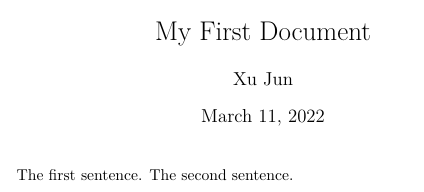
发现没有实现换行,失败
按两次回车键:
代码如下:
%导言区
\documentclass{article}%book, report, letter

\title{My First Document}
\author{Xu Jun}
\date{\today}

%正文区
\begin{document}
	\maketitle
	The first sentence.

	The second sentence.
\end{document}
代码结果:
发现成功实现换行
如果在换行的那一部分代码中加入 %… 注释内容会怎么样呢?
代码如下:
%导言区
\documentclass{article}%book, report, letter

\title{My First Document}
\author{Xu Jun}
\date{\today}

%正文区
\begin{document}
	\maketitle
	The first sentence.
	%......
	The second sentence.
\end{document}
代码结果: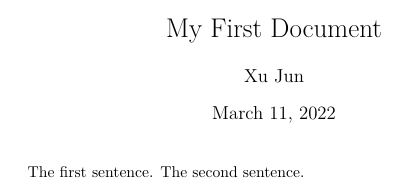
发现,又没有实现换行
为了解决这一问题,我们在 %… 注释行结束后,再换行
结果如下:
发现换行成功
另外我们也可以直接使用符号 \\ 来进行换行
代码示例:
%导言区
\documentclass{article}%book, report, letter

\title{My First Document}
\author{Xu Jun}
\date{\today}

%正文区
\begin{document}
	\maketitle
	The first sentence.\\
	The second sentence.\\
	The third sentence.
\end{document}
代码结果:
换行成功
总结
要实现换行要在两个行间在加一个空白行,从而实现换行
如果在那个空白行里添加注释,应当在注释行结束后,在进行换行。
也可以直接使用 \\ 来实现换行
2. LaTeX中的中文处理方法
2.1 提前准备工作
打开->选项,然后点击->设置 TeXstudio
在《构建》模块中选择这些选项:

在《编辑器》的编码格式设置为 [ UTF-8 ]
在导言区我们要引入包:\usepackage{ctex}
2.2 示例代码
代码:
%导言区
\documentclass{article}%book, report, letter

\usepackage{ctex}

\title{我的第一个中文LaTeX文档}
\author{徐骏}
\date{\today}

%正文区
\begin{document}
	\maketitle
	你好,我来自华东师范大学。
\end{document}
代码结果:
可以看到,我们能够输出中文
2.3 定义新的命令
类似于C语言中的宏定义,我们在导言区定义一个新的命令,然后在文本区使用这个命令
下面来看一个示例:
%导言区
\documentclass{article}%book, report, letter

\newcommand\degree{^\circ}

\usepackage{ctex}

\title{定义新的命令}
\author{徐骏}
\date{\today}

%正文区
\begin{document}
	\maketitle
	$C = 90\degree$
\end{document}
代码结果:
在导言区,我们使用 \newcommand 定义了一个新的命令:
\newcommand\degree{^\circ}
2.4 使用带有编号的公式
论文中,当我们写公式推导时,会在每个公式后面进行标号。方便进行推导,并且让文章更加简洁
下面举个这样的示例:
代码:
%导言区
\documentclass{article}%book, report, letter

\usepackage{ctex}

\newcommand\degree{^\circ}

\title{带有序号的公式}
\author{徐骏}
\date{\today}

%正文区
\begin{document}
	\maketitle
	\begin{equation}
		A^2 + B^2 = C^2
	\end{equation}
    \begin{equation}
    	\angle A + \angle B + \angle C = 180\degree.
    \end{equation}
\end{document}
代码结果:
在上述代码中,我们使用到的格式为:
\begin{equation}
…
\end{equation}
便可实现对 … 中的公式的编号,另外公式编号是自动进行的,就是说,会按照顺序对公式进行 (1), (2) … 的编号
3. LaTeX的字体与字号的设置
3.1 字体族的设置
3.1.1 字体族的第一种设置方法
字体族有:罗马字体,无衬线字体,打字机字体
罗马字体命令:\textrm{ … }
无衬线字体命令:\textsf{ … }
打字机字体命令:\texttt{ … }
代码示例:
%导言区
\documentclass{article}%book, report, letter

\usepackage{ctex}

\title{字体族}
\author{徐骏}
\date{\today}

%正文区
\begin{document}
	\maketitle
	\textrm{罗马字体, Roman Family}

	\textsf{无衬线字体, Sans Serif Family}

	\texttt{打字机字体, Typewriter Family}
\end{document}
代码结果:
3.1.2 字体族的第二种设置方法
第二种方法与第一种类似:
{ \rmfamily … … } 花括号{}表示声明限制范围,意思是在花括号内的字体格式全为罗马字体
{ \sffamily … … } 和 { \ttfamily … … } 类似
代码示例:
%导言区
\documentclass{article}%book, report, letter

\usepackage{ctex}

\title{字体族}
\author{徐骏}
\date{\today}

%正文区
\begin{document}
	\maketitle
	{\rmfamily 罗马字体, Roman Family}

	{\sffamily 无衬线字体, Sans Serif Family}

	{\ttfamily 打字机字体, Typewriter Family}
\end{document}
代码结果:
3.2 字体系列的设置
与字体族的设置的方法一样,字体系列设置也有两种表示方法:
\textmd{ … … }
或者
{\mdseries … … }字体系列设置用到的有(粗细,宽度):
\textmd 和 \textbf
代码示例:
%导言区
\documentclass{article}%book, report, letter

\usepackage{ctex}

\title{字体系列}
\author{徐骏}
\date{\today}

%正文区
\begin{document}
	\maketitle
	\textmd{Medium Series} \textbf{Boldface Series}

	{\mdseries Medium Series} {\bfseries Boldface Series}
\end{document}
代码结果:
3.3 字体形状的设置
同样的字体形状的设置也有两种代码:
\textup{ … … }
和
{ \upshape … … }字体形状有:直立,斜体,伪斜体,小型大写…
示例代码:
%导言区
\documentclass{article}%book, report, letter

\usepackage{ctex}

\title{字体形状}
\author{徐骏}
\date{\today}

%正文区
\begin{document}
	\maketitle
	\textup{直立, Upright Shape} \textit{斜体, Italic Shape} \textsl{伪斜体, Slanted Shape} \textsc{小型大写, Small Caps Shape}

	{\upshape 直立, Upright Shape} {\itshape 斜体, Italic Shape}  {\slshape 伪斜体, Slanted Shape} {\scshape Small Caps Shapes}

\end{document}
代码结果:
3.4 中文字体的设置
3.4.1 中文字体样式的设置
LaTeX中也用对中文字体的设置:
{\songti 宋体}
和
{\heiti 黑体}
和
{\fangsong 仿宋}
和
{\kaishu 楷书}
代码示例:
%导言区
\documentclass{article}%book, report, letter

\usepackage{ctex}

\title{中文字体的样式}
\author{徐骏}
\date{\today}

%正文区
\begin{document}
	\maketitle
	{\songti 宋体字体}

	{\heiti 黑体字体}

	{\fangsong 仿宋字体}

	{\kaishu 楷书字体}

\end{document}
代码结果:
3.4.2 中文字体的形状
中文字体也可以进行加粗和斜体等操作
代码示例:
%导言区
\documentclass{article}%book, report, letter

\usepackage{ctex}

\title{中文字体的形状}
\author{徐骏}
\date{\today}

%正文区
\begin{document}
	\maketitle
	中文字体的\textbf{加粗}与\textit{斜体}
\end{document}

3.5 字体大小的设置
在LaTeX中字体大小是有一个标准参数的
而这个标准参数在 \document[…]{class} 中的 […] 设置
可设置为 [10], [11], [12], [13]。一般只有10,11,12磅
代码示例:
%导言区
\documentclass{article}%book, report, letter

\usepackage{ctex}

\title{字体的大小}
\author{徐骏}
\date{\today}

%正文区
\begin{document}
	\maketitle
	{\tiny  Hello}\\
	{\scriptsize  Hello}\\
	{\footnotesize  Hello}\\
	{\small  Hello}\\
	{\normalsize  Hello}\\
	{\large  Hello}\\
	{\Large  Hello}\\
	{\LARGE  Hello}\\
	{\huge  Hello}\\
	{\Huge  Hello}\\
\end{document}
代码结果如下:
在上述代码中,我们使用到了 \\ ,含义为 换行
3.6 中文字体的设置命令
中文字体字号设置使用命令:
\zihao{ … }
{}花括号中的内容时字号大小
代码示例:
%导言区
\documentclass{article}%book, report, letter

\usepackage{ctex}

\title{中文字体的大小}
\author{徐骏}
\date{\today}

%正文区
\begin{document}
	\maketitle
	\zihao{0}你好!\\
	\zihao{2}你好!\\
	\zihao{4}你好!\\
	\zihao{5}你好!\\
\end{document}
代码结果:
3.7 自定义格式的字体(更加方便使用)
在写论文时,不建议大龄的使用上述的定义,过于复杂。
下面介绍自定义字体的命令,使得写作更加方便:使用的是前面介绍的 \newcommand 命令
示例代码:
%导言区
\documentclass{article}%book, report, letter

\usepackage{ctex}

\newcommand{\myfont}{\textbf{\textsf{我的字体}}}

\title{字体的大小}
\author{徐骏}
\date{\today}

%正文区
\begin{document}
	\maketitle
	\myfont
\end{document}
代码结果: