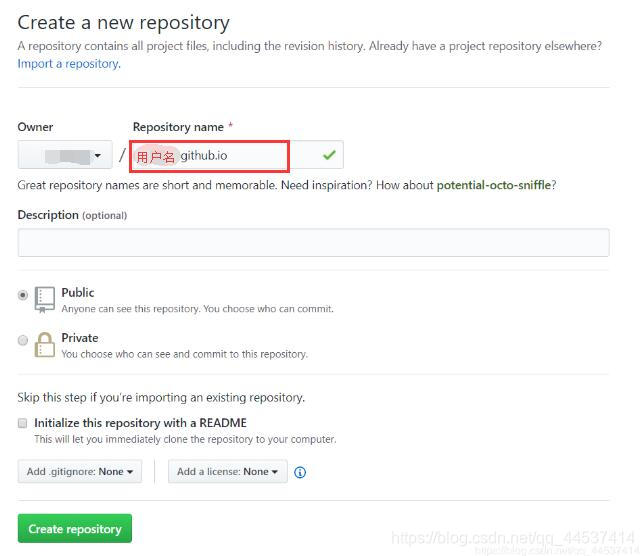
1.创建 GitHub 仓库
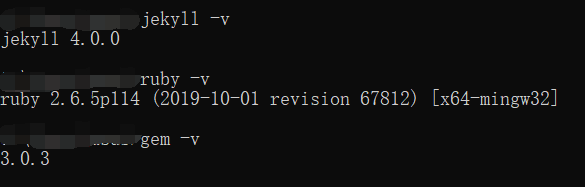
2.安装 Jekyll
参考文档:https://jekyllrb.com/docs/installation/windows/
- 下载 RubyInstaller 时,如速度很慢很慢,可以考虑尝试打开 科学 上网工具
- Could not find a valid gem ‘jekyll’
- Error fetching http://ruby.taobao.org/
Error fetching https://gems.ruby-china.org/
以上三个报错的解决办法为 -> 换为国内的源
//更换源
gem sources --remove https://rubygems.org/
gem sources -a https://gems.ruby-china.com/

gem sources -l
//显示以下内容 为换源成功
*** CURRENT SOURCES ***
https://gems.ruby-china.com/

//开始安装....
gem install jekyll bundler
3.参考主题 修改样式
仓库推荐
1.huxpro.github.io
中文文档链接
另一个修改了模板仓库的说明,建议结合使用
效果预览
本文选择了第一个仓库链接作为博客模板
如果你喜欢该主题,不要忘记给原作者黄玄的 huxpro.github.io 一个 Star
步骤罗列
1.文件 clone 到本地
git clone git@github.com:Huxpro/huxblog-boilerplate.git
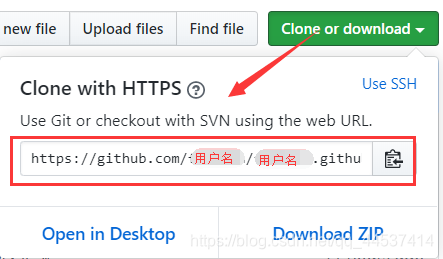
2. 将自己的仓库 clone 到本地
git clone https://github.com/用户名/用户名.github.io.git
3.本地预览主题jekyll serve
4.将 huxblog-boilerplate 中的内容 复制到 用户名.github.io 文件夹中
5.根据仓库的文档,修改_config.yml
6.修改其他页面,如 index.html , about.html, tag.html
注意修改的不是文件夹 _site 中页面
7.将文件上传到远程仓库中
在 用户名.github.io 文件夹 下打开 git
git add .    //添加所有文件到版本库
git commit -m "some msg" //提交修改
git push -u origin master //将本地仓库push到github上
8.打开 用户名.github.io 网页
可能有的疑问
- 网页中的标签是根据
_post文件夹中文件里的tag显示的,不用纠结于修改 - 仓库上传后,用户名.github.io 网页 404
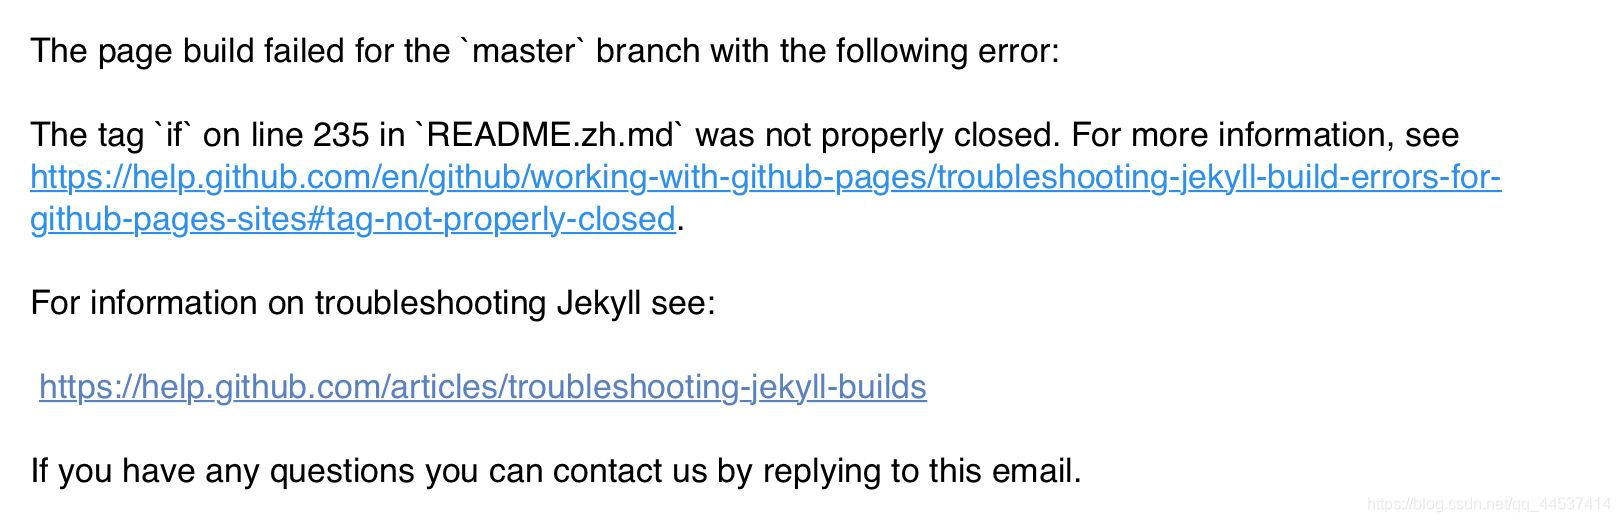
根据提示,最简单粗暴的办法是 删除文件README.zh.md - 打开页面,样式无法正常渲染,控制台报错找不到文件
Failed to load resource: the server responded with a status of 404 ()
GET ... net::ERR_ABORTED 404
对比原仓库文件,检查_config.yml中关于路径的设置 - 模板文件为
_layouts文件夹下的default.html - 上传带本地图片的文章,设置图片地址,形如
/img/in-post/文件夹/....jpg
版权声明:本文为qq_44537414原创文章,遵循CC 4.0 BY-SA版权协议,转载请附上原文出处链接和本声明。