参考:
0. RESTFUL 使用规范
传统的url:GET : /user/findById?id=21,这种写法可行,但是太过繁琐。
RESTFUL原则:
- 定义:
GET查询;POST添加;PUT全字段更新;PATCH部分字段更新;DELETE删除 - 使用复数名词,如
user->users - 请求和响应时指定accept:
@RequestBody,response:@ResponseBody - 资源唯一标识在传递参数时使用路径传参:
users?id=21->users/21;而具体业务传参可以是:sort?=bubble、?page=1
1. 第一个SpringMVC程序
实现SpringMVC分为两种方式:
一、配置版(繁琐,适合用来理解原理逻辑)
二、注解版(快捷,适合运用在实际开发中)
使用配置文件,需要我们手动配置控制器映射器,控制器适配器和视图解析器;使用注解,不用再配置控制器映射器和控制器适配器,而只需要配置视图解析器。
web.xml
在SpringMVC里,只需要配置DispathcerServlet这一个Servlet即可。
<?xml version="1.0" encoding="UTF-8"?>
<web-app xmlns="http://xmlns.jcp.org/xml/ns/javaee"
         xmlns:xsi="http://www.w3.org/2001/XMLSchema-instance"
         xsi:schemaLocation="http://xmlns.jcp.org/xml/ns/javaee http://xmlns.jcp.org/xml/ns/javaee/web-app_4_0.xsd"
         version="4.0">

<!--  以下代码,可以通用,不要重复写  -->
    <servlet>
        <servlet-name>springmvc</servlet-name>
        <servlet-class>org.springframework.web.servlet.DispatcherServlet</servlet-class>
        <!--    关联一个SpringMVC的配置文件:[servlet-name]-servlet.xml    -->
        <init-param>
            <param-name>contextConfigLocation</param-name>
            <param-value>classpath:springmvc-servlet.xml</param-value>
        </init-param>
        <!--    启动级别1    -->
        <load-on-startup>1</load-on-startup>
    </servlet>

    <servlet-mapping>
        <servlet-name>springmvc</servlet-name>
        <url-pattern>/</url-pattern>
    </servlet-mapping>

</web-app>
springmvc-servlet.xml
这个文件里的代码也基本固定。做了四件事:
- 打开
component-scan - 设置让Spring MVC不处理静态资源
- 打开注解
- 配置视图解析器
注意这里我们开启了component-scan,这样就无需把每一个bean都注册到Spring的XML配置文件中,因为每个类的@Component注解会被扫描到并将该类自动标记在Spring中注册成bean。
<?xml version="1.0" encoding="UTF-8"?>
<beans xmlns="http://www.springframework.org/schema/beans"
       xmlns:xsi="http://www.w3.org/2001/XMLSchema-instance"
       xmlns:context="http://www.springframework.org/schema/context"
       xmlns:mvc="http://www.springframework.org/schema/mvc"
       xsi:schemaLocation="http://www.springframework.org/schema/beans
       http://www.springframework.org/schema/beans/spring-beans.xsd
       http://www.springframework.org/schema/context
       https://www.springframework.org/schema/context/spring-context.xsd
       http://www.springframework.org/schema/mvc
       https://www.springframework.org/schema/mvc/spring-mvc.xsd">

<!--  以下为配置代码(固定)  -->
    <!--  自动扫描包,让指定包下面类的注解生效,由IOC容器统一管理  -->
    <context:component-scan base-package="com.zzw.controller" />
    <!--  让Spring MVC不处理静态资源 .css .js .html .mp3 .mp4  -->
    <mvc:default-servlet-handler />
    <!--  打开注解,代替处理器映射器和处理器适配器  -->
    <mvc:annotation-driven />
    <!--视图解析器:DispatcherServlet给他的ModelAndView,给视图路径加上前缀和后缀-->
    <bean class="org.springframework.web.servlet.view.InternalResourceViewResolver" id="InternalResourceViewResolver">
        <!--前缀-->
        <property name="prefix" value="/WEB-INF/jsp/"/>
        <!--后缀-->
        <property name="suffix" value=".jsp"/>
    </bean>

</beans>
HelloController.java
这里hello()方法的return的值会被视图解析器处理,并被加上前缀和后缀指向具体的jsp页面。
被@Controller注解的类中的所有方法,如果返回值是String,并且由具体页面可以跳转,那么就会被视图解析器解析。
import org.springframework.stereotype.Controller;
import org.springframework.ui.Model;
import org.springframework.web.bind.annotation.RequestMapping;

// 这里是使用注解,就会被自动'<context:component-scan base-package="com.zzw.controller" />'扫描到,
// 并被自动注册成bean,相当于手动去Spring的XML配置文件里手动注册bean
// @Controller = @Component
@Controller
@RequestMapping("/hello")
public class HelloController {

    // localhost:8080/hello/test
    @RequestMapping("/test")
    public String hello(Model model){
        model.addAttribute("msg", "Hello, SpringMVC annotation!");
        // 这里的这个return,会被视图解析器处理
        // 比如在这个项目里就会被自动加上前缀和后缀,变成:/WEB-INF/jsp/hello.jsp
        return "hello";
    }
}
hello.jsp
<%--
  Created by IntelliJ IDEA.
  User: ryan
  Date: 02/06/2021
  Time: 13:56
  To change this template use File | Settings | File Templates.
--%>
<%@ page contentType="text/html;charset=UTF-8" language="java" %>
<html>
<head>
    <title>Title</title>
</head>
<body>

${msg}

</body>
</html>
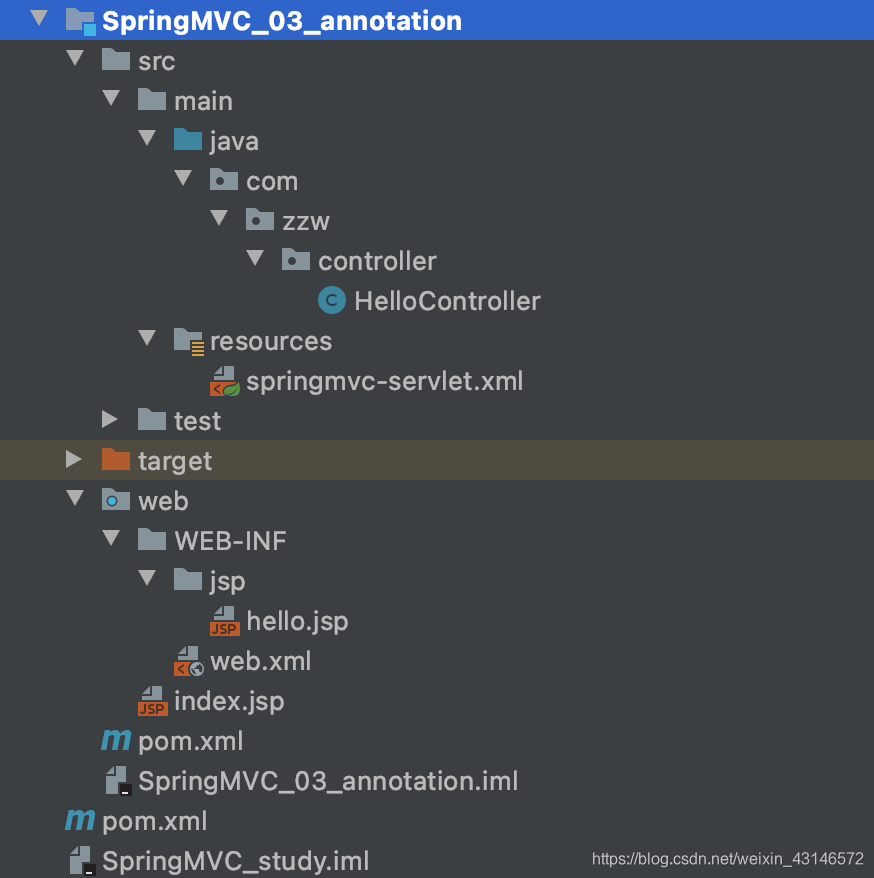
项目结构
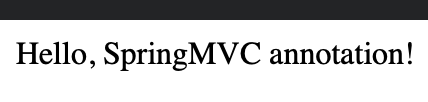
运行结果

2. 前端到后端传参
1. GET
GET方法主要是将前端的参数放在url中传递给后端,后端从请求的URL中解析出需要的参数。无论是使用表单提交GET请求,还是通过Ajax发送GET请求,或者是直接在浏览器中输入一个URL并回车访问,其原理都是一样。
原本做法:
上面在HelloController里通过注解实现了简单的URL映射:
import org.springframework.stereotype.Controller;
import org.springframework.ui.Model;
import org.springframework.web.bind.annotation.RequestMapping;

// 这里是使用注解,就会被自动'<context:component-scan base-package="com.zzw.controller" />'扫描到,
// 并被自动注册成bean,相当于手动去Spring的XML配置文件里手动注册bean
// @Controller = @Component
@Controller
@RequestMapping("/hello")
public class HelloController {

    // localhost:8080/hello/test
    @RequestMapping("/test")
    public String hello(Model model){
        model.addAttribute("msg", "Hello, SpringMVC annotation!");
        // 这里的这个return,会被视图解析器处理
        // 比如在这个项目里就会被自动加上前缀和后缀,变成:/WEB-INF/jsp/hello.jsp
        return "hello";
    }
}
原本我们要设定请求的方法并通过url传递参数,最简单的做法是前端使用表单提交,通过GET方法请求,我们这么写hello方法:
@Controller
public class HelloController {
    // 前端请求的url:localhost:8080/hello?a=1&b=2
    @RequestMapping("/hello")
    public String hello(int a, int b, Model model) {
        model.addAttribute("msg", "Hello World! a + b = " + (a + b));
        return "hello";
    }
}
请求的URL:
相应结果:
这么写的弊端就是:不安全,不隐蔽,后端方法的参数名和数据都暴露在url中。
改进的做法:
@Controller
public class HelloController {
    // localhost:8080/hello/1/2
    @RequestMapping("/hello/{a}/{b}")
    public String hello(@PathVariable("a") int a, @PathVariable("b") int b, Model model) {
        model.addAttribute("msg", "Hello World! Result is = " + (a + b));
        return "hello";
    }
}
这种做法还是用GET方法,但是省去了参数名,相对安全。服务端需要使用@RequestMapping("/hello/{a}/{b}")这样的形式来规定请求的参数,并且需要使用注解@PathVariable来取得对应的参数值。这样虽然数据还是会暴露在url中,但是暴露的规则、参数名将隐藏,相对方法一安全。
2. POST
POST方法将请求参数封装在HTTP请求数据中,以名称/值的形式出现,可以传输大量数据。简单情况下,不管是表单提交还是Ajax提交,后端接收POST请求获取参数的方法是一样的,都可以通过@RequestParam来获取,如需要获取前端name="userName"的参数可以这样使用:
@RequestMapping("/updateUser")
public String updateUser(@RequestParam("userName") String userName) { ... }
但是在实际项目中,我们通常需要前端在传递参数时对数据进行封装,如业务中有“新增评论”的功能,那么我们希望后端在接收参数时直接就能接收到一个Comment类型的参数:
@RequestMapping("/newComment")
public String comment(Comment comment) { ... }
注意这里使用form表单提交和使用AJAX传输JSON来提交有区别:
- form表单:可以自动将form下的input封装成一个Object,后端可以直接在形参中获取并使用,但要注意,前端form中的name必须与类中字段名一致,否则将为null或基本类型的默认值。
- JSON:传输将以键值对的形式传递给后端(无法封装,因为键值都是字符串类型)
我的博客项目中就使用了多种方式,包括form表单、Ajax提交JSON数据
关于传递参数更多内容可参考这里:
3. 后端返回数据
- Model
- ModelMap
- ModelAndView
示例
import org.springframework.stereotype.Controller;
import org.springframework.ui.Model;
import org.springframework.ui.ModelMap;
import org.springframework.web.bind.annotation.RequestMapping;
import org.springframework.web.servlet.ModelAndView;

@Controller
public class Model1 {
    @RequestMapping("/m1")
    public String method1(Model model) {
        model.addAttribute("msg", "This is method1");
        return "hello";
    }

    @RequestMapping("/m2")
    public String method2(ModelMap model) {
        model.addAttribute("msg", "This is method2");
        return "hello";
    }

    @RequestMapping("/m3")
    public ModelAndView method3() {
        ModelAndView modelAndView = new ModelAndView();
        modelAndView.addObject("msg", "This is method3");
        modelAndView.setViewName("hello");
        return modelAndView;
    }
}
ModelMap继承了LinkedHashMapModel是ModelMap的精简版,大部分情况下都直接使用Model
三者区别:
Model只有寥寥几个方法只适合用于储存数据,简化了新手对于Model对象的操作和理解;ModelMap继承了 LinkedMap ,除了实现了自身的一些方法,同样的继承 LinkedMap 的方法和特性;ModelAndView可以在储存数据的同时,可以进行设置返回的逻辑视图,进行控制展示层的跳转。
注意:如果使用了重定向,model里的数据都无法成功传过去,应当使用RedirectAttributes,如:
public String remove(@PathVariable("id") int id, RedirectAttributes attributes) {
        Type type = typeService.queryTypeById(id);
        if (type != null) {
            int res = typeService.removeTypeById(id);
            if (res > 0) {
                attributes.addFlashAttribute("message", "删除成功");
            } else {
                attributes.addFlashAttribute("message", "删除失败");
            }
        } else {
            throw new NotFoundException();
        }
        attributes.addFlashAttribute("typeName", type.getType_name());
        return "redirect:/admin/type";
    }