本文学习以实习僧网站为例
参考文章:
先来观察网站的构造:
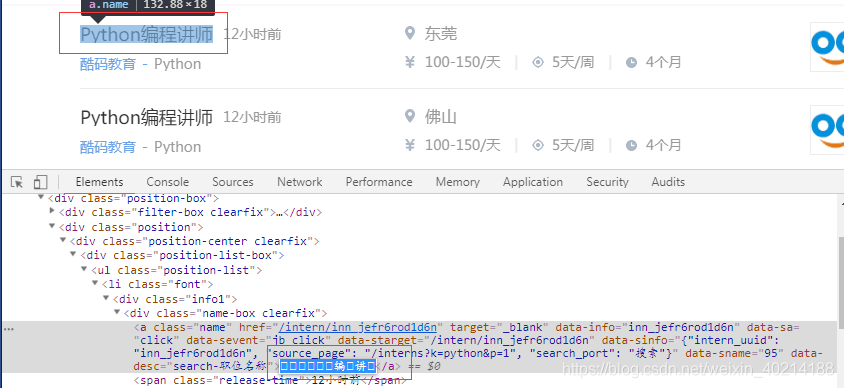
由图中可以看出部分字体隐藏,源码无法直接获取。这就是@font-face搞的鬼。Ctrl + F 搜索 @font-face。定位到下图所示:
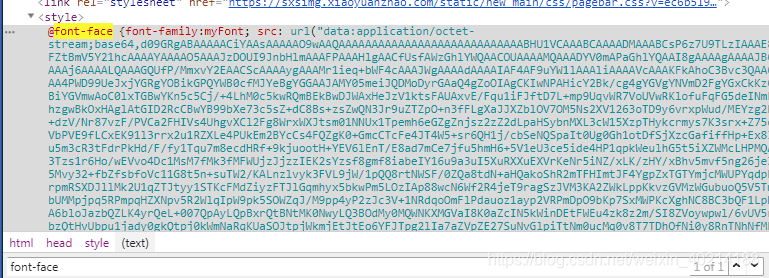
将图中url里面的内容复制,在浏览器新标签页面打开,会直接下载一个文件。使用FontCreator字体查看工具,可以看到隐藏字符都有一个对应的编码
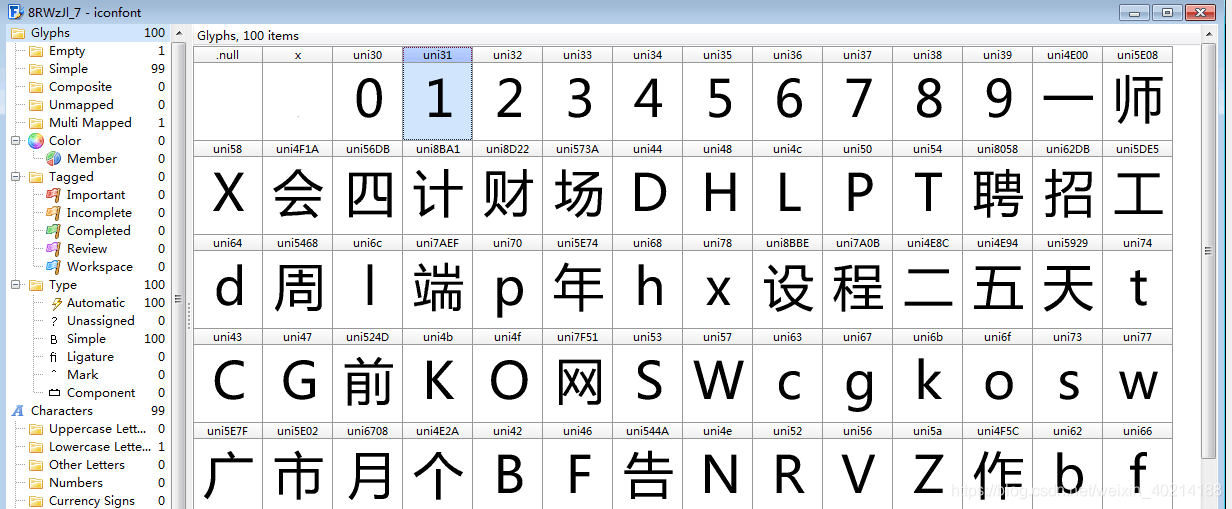
找到隐藏字体的藏身之处,接下来就开始写代码了
首先安装,引入所需要的模块
import requests
from fake_useragent import UserAgent
from lxml import etree
import re
from urllib.request import urlretrieve
from fontTools.ttLib import TTFont
请求数据,使用正则匹配字体url,并下载到本地
def get_response():
    url = 'https://www.shixiseng.com/interns?k=python&p=1'
    headers = {
        'User-Agent': UserAgent().random
    }
    response = requests.get(url, headers=headers)
    return response

# 获取实习僧的字体文件
def get_font_url():
    response = get_response()
    font_url = re.findall(r'myFont; src: url\("(.*?)"\)}',response.text,re.S)[0]
    urlretrieve(font_url,'shixiseng_font.woff')
得到字体文件 ,就可以进行footTools解析了, 具体分析可以参考 文章 https://www.jianshu.com/p/5400bbc8b634
# 解析字体文件 ,获取相应的字体映射关系
def parse_font():
    font1 = TTFont('shixiseng_font.woff')
    keys,values = [],[]
    for k, v in font1.getBestCmap().items():
        if v.startswith('uni'):
            keys.append(eval("u'\\u{:x}" .format(k) + "'"))
            values.append(chr(int(v[3:], 16)))
        else:
            keys.append("&#x{:x}".format(k))
            values.append(v)

    return keys,values
获取网页数据,并将特殊字符进行转换
# 获取数据并对特殊字体转码
def get_data():
response = get_response()
data = etree.HTML(response.text)
ul_data = data.xpath('//ul[@class="position-list"]/li')
for info in ul_data:
title = info.xpath('.//div[@class="info1"]/div[@class="name-box clearfix"]/a/text()')[0]
salary = ' | '.join(info.xpath('.//div[@class="info2"]/div[@class="more"]/span/text()'))
print(title,salary)
print('----------分界线----------')
keys,values = parse_font()
for k,v in zip(keys,values):
title = title.replace(k, v)
salary = salary.replace(k,v)
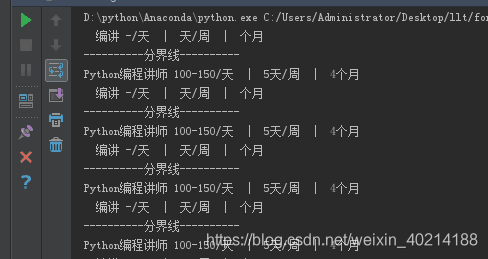
print(title, salary)运行以下方法
get_font_url()
get_data()
运行效果图,可以看到数据全部转换过来了
完整代码放到Github了------>传送门
版权声明:本文为weixin_40214188原创文章,遵循CC 4.0 BY-SA版权协议,转载请附上原文出处链接和本声明。