openGauss社区的博客板块对外完全开放,以方便参与者分享个人见解和技术经验。你可以将个人博客以Pull Request的方式提交到openGauss社区blog仓库, 在Pull Request合入blog仓库之后会自动同步到社区官网:https://opengauss.org/zh/blogs/blogs.html
以下内容将详细描述如何向openGauss社区提交你的第一篇博客:
01
注册Gitee账号
openGauss社区源代码以及官方网站和博客都托管在码云Gitee上面,组织仓库地址https://gitee.com/opengauss。首先请参考http://git.mydoc.io/?t=179267,完成Gitee账号的注册,然后需要前往http://gitee.com/profile/emails绑定你的主邮箱。
02
签署贡献者协议CLA
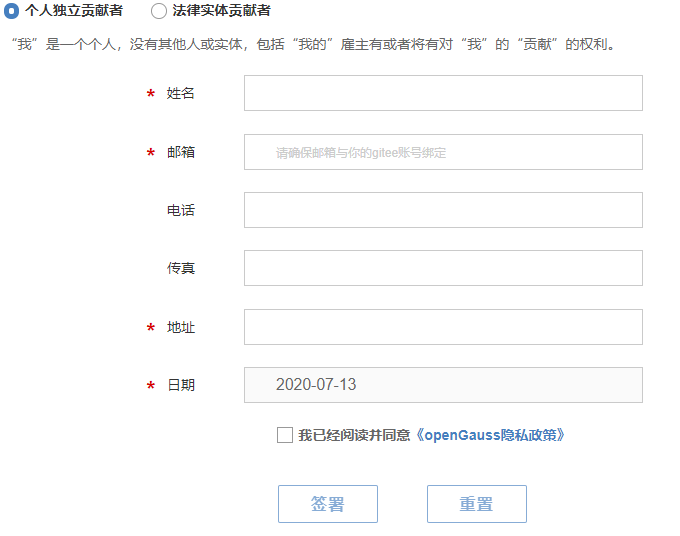
在正式提交博客前,你还需要签署openGauss社区贡献者许可协议(CLA)。CLA签署网址:https://opengauss.org/zh/cla.html
在该过程中,你需要填写一个表单,其中邮箱需要填写你之前在码云上设置的主邮箱地址。
03
提交你的博客
3.1
Fork主干仓库到个人仓库
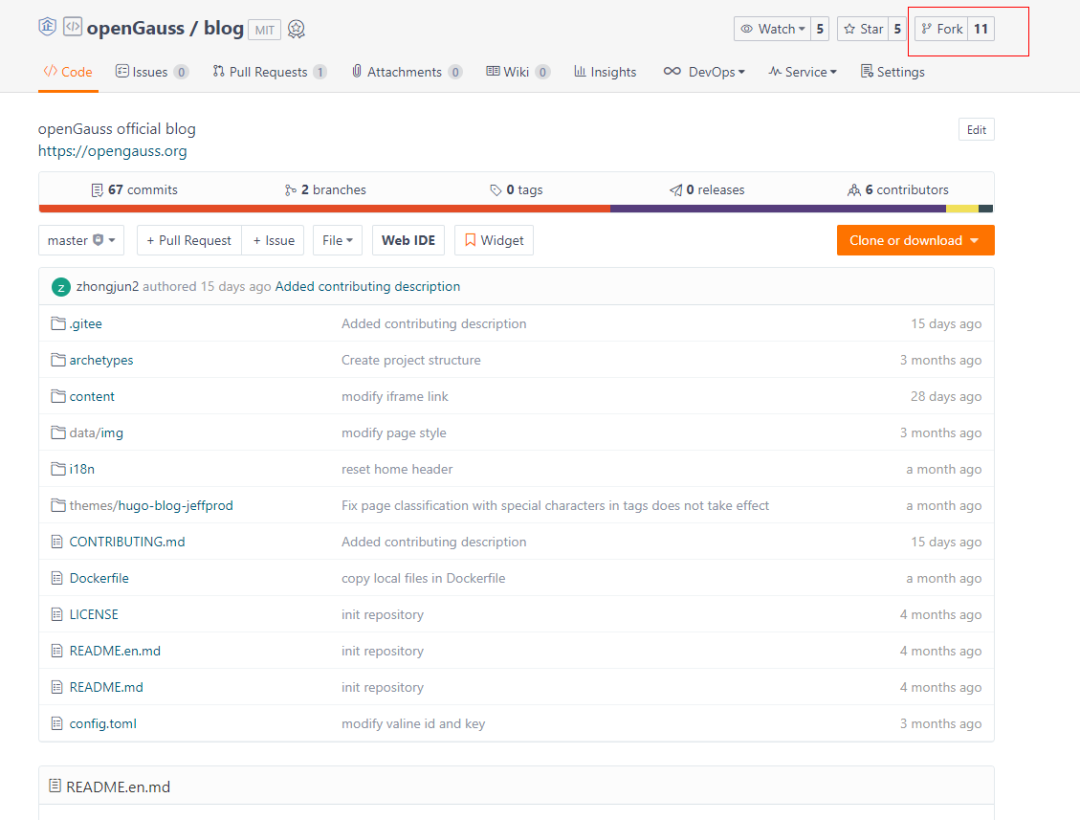
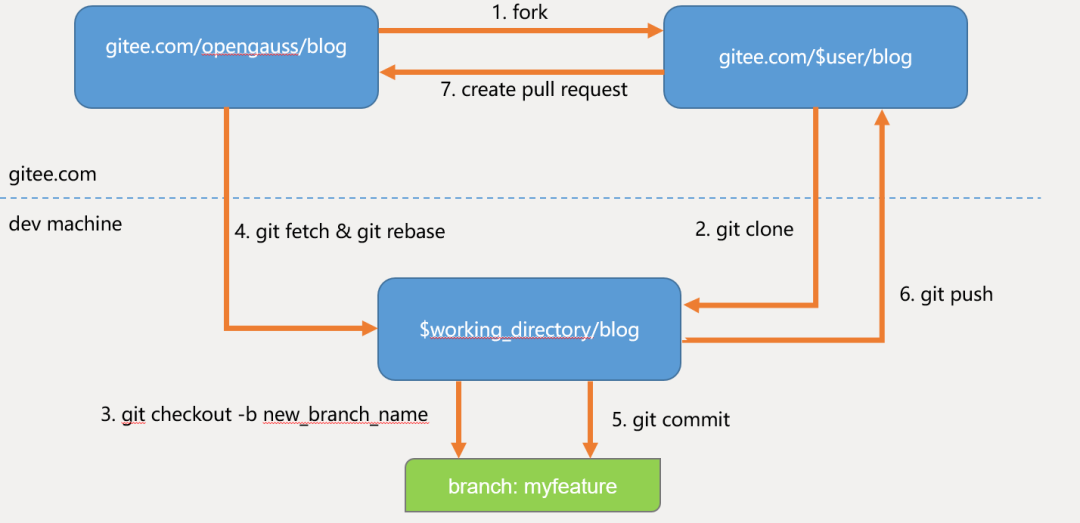
找到https://gitee.com/opengauss/blog仓库,点击右上角的Fork。
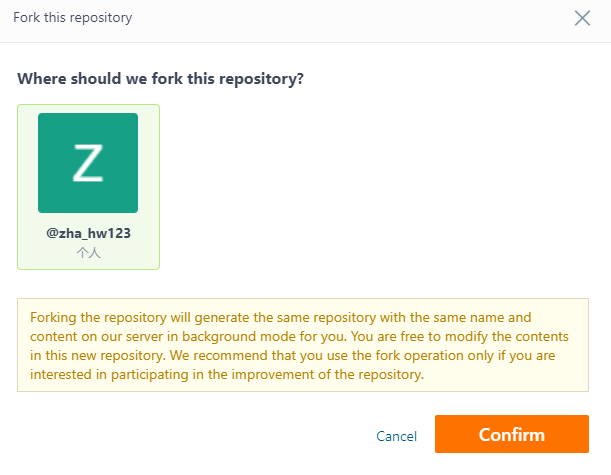
在弹窗中选择你的个人仓库,并点击 “确定(Confirm)”。
3.2
将个人仓库Clone到本地
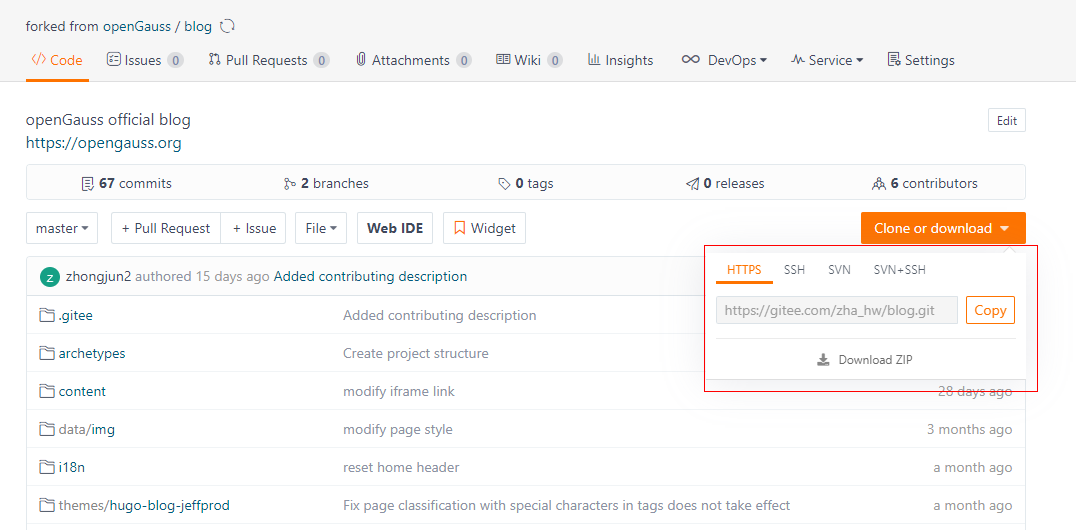
访问你个人账号的blog仓库:https://gitee.com/(user)/blog,点击“克隆或下载”按钮,复制HTTPS地址。
在你本地机器上进入你想要存放blog的路径,输入
git clone https://gitee.com/(user)/blog.git (地址即刚才复制的HTTPS地址)
完成后即可在本地机器看到该仓库下的所有文件。
3.3
完成你的博客
进入到存放blog的路径下,输入以下命令创建你自己的文件夹
cd blog/content/zh/post
mkdir (Your author name)
进入到新建的文件夹Your author name中,新建你的博客。
cd (Your author name)
vi (title of your blog).md
其中(title of your blog).md文件开头请参考如下模板。
+++
title = "openGauss社区入门(git使用基础)"
date = "2020-05-30"
tags = ["openGauss社区开发入门"]
archives = "2020-05"
author = "xingchen"
summary = "openGauss社区开发入门"
img = "/zh/post/xingchen/title/title.jpg"
times = "17:30"
+++
(你的博客正文内容)
参数说明
title:博客标题。
date:博客完成写作并提交的日期,如2020-06-01。
tags:想给博客赋予的标签,这些标签会在官网博客界面中呈现,选择一个标签还可查看该标签下的所有博客。
archives:同一类博客的集合,目前我们按照年月来整理博客,例如输入2020-06即可。
author:对应你之前创建的文件夹Your author name;
summary:这篇博客的简要概述。
img:博客的缩略图片,如/zh/post/xingchen/title/title.jpg。
times:完成时间,如“17:30”
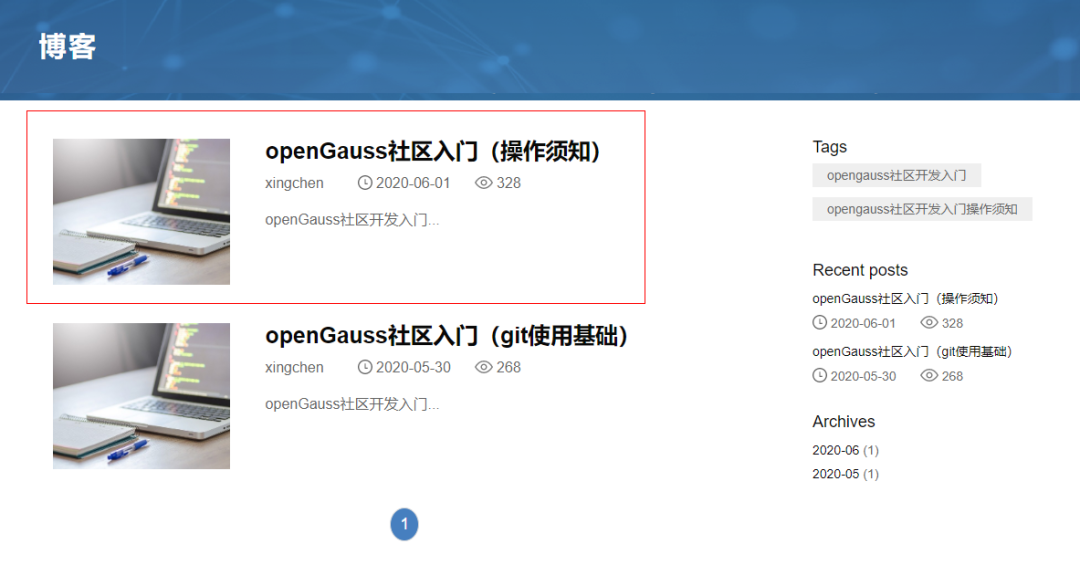
官方网站效果如下:
3.4
提交修改
为了避免多个分支之间的不一致,我们建议签出到新分支:
git checkout -b new_branch_name
在添加完成博客文件后输入:
git add .
git commit –m “add my blog”
git push –f origin new_branch_name
3.5
提交Pull Request

回到码云的(user)/blog仓库中,在页签中找到Pull Request,点击新建一个Pull Request。
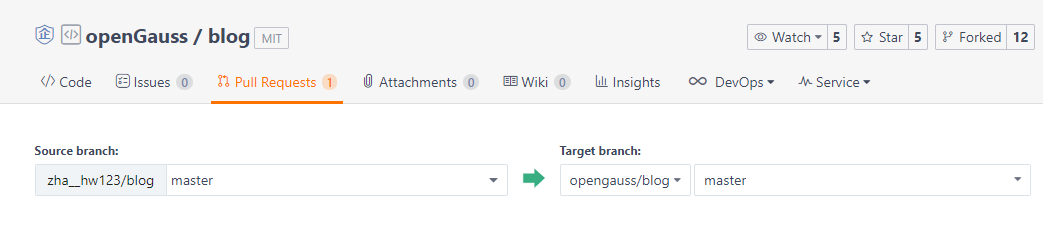
在创建界面将你的提交Commit的分支和openGauss blog master分支进行比较,完成创建Pull Request。
以上全部流程可参照下图。
3.6
完成合入
Pull Request创建完成后,blog仓库的Maintainer会对提交的Pull Request进行检视,检视通过后会合入到blog的主干分支,后续会同步到openGauss的官方网站。https://opengauss.org/zh/blogs/blogs.html
以上就是在openGauss社区提交个人博客的全部过程。欢迎你加入openGauss社区中来,发表你的个人观点和见解。

openGauss开源社区官方网站:https://opengauss.org
openGauss组织仓库:
https://gitee.com/opengauss
openGauss镜像仓库:
https://github.com/opengauss-mirror