禁止转载
文章目录
- 禁止转载
- 第一部分:首先配置conda
- 第二部分:conda已经配置成功,开始配置object detection API
- 5. 创建一个环境,方便管理
- 有一个问题:如果用conda activate cctf15时,里面的python版本仍是3.7的,但是使用source activate cctf15时,python版本就是3.6的,不知道是为什么????tensorflow版本也有这样的问题
- 6. 安装指定版本的tensorflow
- 7. 安装编译工具protobuf
- 8. 下载object detection api源码,[github地址](https://github.com/tensorflow/models)
- 9. 开始编译.proto文件
- 10. 安装一些其他要用到的包
- 11. 将object detection 添加到环境变量中,如果不添加,后面会提示找不到object_detection的
- 12. object detection api已经配置完成了,可以测试一下
- 第三部分:配置转tflite模型的编译环境(可选)
- 第四部分:进行checkpoint模型转tflite模型
- 方法一:非量化训练的模型进行转tflite
- 方法二:量化训练转tflite,即在.config文件中,末尾加上
第一部分:首先配置conda
1. 下载miniconda3(有博客提到过,不要下载最新版本的,可能不太支持安装某些包)
wget -c https://mirrors.tuna.tsinghua.edu.cn/anaconda/miniconda/Miniconda3-4.6.14-Linux-x86_64.sh
2. 添加权限,并运行
chmod 777 Miniconda3-4.6.14-Linux-x86_64.sh
bash Miniconda3-4.6.14-Linux-x86_64.sh
按指示输入ENTER,yse,注意记录下安装路径
是否初始化时(是否添加环境变量):可以选择yes,但是不太建议
初始化时选择no的:手动添加环境变量
export PATH="/home/genius01/miniconda3/bin:"$PATH
# 进入.bashrc文件 (~/表示进入当前用户的主目录)
vim ~/.bashrc

# 按'A'键,进入INSERT模式,在最后面添加下面代码
# 注意:这儿的路径时之前安装miniconda3时的路径
export  PATH="/home/genius01/miniconda3/bin:"$PATH

# 按'Esc'退出INSERT模式
# 输入 :wq 保存更改并退出,(:q是不保存退出)

# 执行刚修改的初始化文件,使之立即生效
source ~/.bashrc

3. 验证conda是否可以使用
输入命令conda,如果有提示信息则成功
4. 添加清华镜像源
添加清华镜像
conda config --add channels http://mirrors.tuna.tsinghua.edu.cn/anaconda/pkgs/main
conda config --add channels http://mirrors.tuna.tsinghua.edu.cn/anaconda/pkgs/r
conda config --add channels http://mirrors.tuna.tsinghua.edu.cn/anaconda/pkgs/msys2

#显示检索路径
conda config --set show_channel_urls yes

#显示镜像通道
conda config --show channels
第二部分:conda已经配置成功,开始配置object detection API
项目地址:github地址
本次安装的是tenforflow1,根据上面的要求安装指定版本的tensorflow,python,protobuf


5. 创建一个环境,方便管理
创建python=3.6的conda环境
conda create -n cctf15 python=3.6
检查python版本,命令行输入python -V或者python -version
进入该环境source activate cctf15 ,后面的步骤都是在该环境下进行
离开环境source deactivate
有一个问题:如果用conda activate cctf15时,里面的python版本仍是3.7的,但是使用source activate cctf15时,python版本就是3.6的,不知道是为什么????tensorflow版本也有这样的问题
6. 安装指定版本的tensorflow
pip install tensorflow-gpu==1.15
检查tensorflow版本,进入python模式
import tensorflow as tf
tf.__verion__
检查tensorflow GPU是否正常使用
import tensorflow as tf
print('GPU:',tf.test.is_gpu_available()
如果最后在屏幕上可以看到 GPU: True ,则表示GPU可以使用
如果GPU:Fasle,显示以下信息,表示GPU不可用:
2021-08-27 08:21:01.810046: W tensorflow/stream_executor/platform/default/dso_loader.cc:55] Could not load dynamic library 'libcudart.so.10.0'; dlerror: libcudart.so.10.0: cannot open shared object file: No such file or directory
2021-08-27 08:21:01.810128: W tensorflow/stream_executor/platform/default/dso_loader.cc:55] Could not load dynamic library 'libcublas.so.10.0'; dlerror: libcublas.so.10.0: cannot open shared object file: No such file or directory
2021-08-27 08:21:01.810200: W tensorflow/stream_executor/platform/default/dso_loader.cc:55] Could not load dynamic library 'libcufft.so.10.0'; dlerror: libcufft.so.10.0: cannot open shared object file: No such file or directory
2021-08-27 08:21:01.810268: W tensorflow/stream_executor/platform/default/dso_loader.cc:55] Could not load dynamic library 'libcurand.so.10.0'; dlerror: libcurand.so.10.0: cannot open shared object file: No such file or directory
2021-08-27 08:21:01.810337: W tensorflow/stream_executor/platform/default/dso_loader.cc:55] Could not load dynamic library 'libcusolver.so.10.0'; dlerror: libcusolver.so.10.0: cannot open shared object file: No such file or directory
2021-08-27 08:21:01.810403: W tensorflow/stream_executor/platform/default/dso_loader.cc:55] Could not load dynamic library 'libcusparse.so.10.0'; dlerror: libcusparse.so.10.0: cannot open shared object file: No such file or directory
2021-08-27 08:21:01.815666: I tensorflow/stream_executor/platform/default/dso_loader.cc:44] Successfully opened dynamic library libcudnn.so.7
2021-08-27 08:21:01.815698: W tensorflow/core/common_runtime/gpu/gpu_device.cc:1641] Cannot dlopen some GPU libraries. Please make sure the missing libraries mentioned above are installed properly if you would like to use GPU. Follow the guide at https://www.tensorflow.org/install/gpu for how to download and setup the required libraries for your platform.
Skipping registering GPU devices...
2021-08-27 08:21:01.816853: I tensorflow/core/common_runtime/gpu/gpu_device.cc:1159] Device interconnect StreamExecutor with strength 1 edge matrix:
2021-08-27 08:21:01.816872: I tensorflow/core/common_runtime/gpu/gpu_device.cc:1165]      0 1 2 3
2021-08-27 08:21:01.816885: I tensorflow/core/common_runtime/gpu/gpu_device.cc:1178] 0:   N Y Y Y
2021-08-27 08:21:01.816894: I tensorflow/core/common_runtime/gpu/gpu_device.cc:1178] 1:   Y N Y Y
2021-08-27 08:21:01.816903: I tensorflow/core/common_runtime/gpu/gpu_device.cc:1178] 2:   Y Y N Y
2021-08-27 08:21:01.816912: I tensorflow/core/common_runtime/gpu/gpu_device.cc:1178] 3:   Y Y Y N
GPU: False

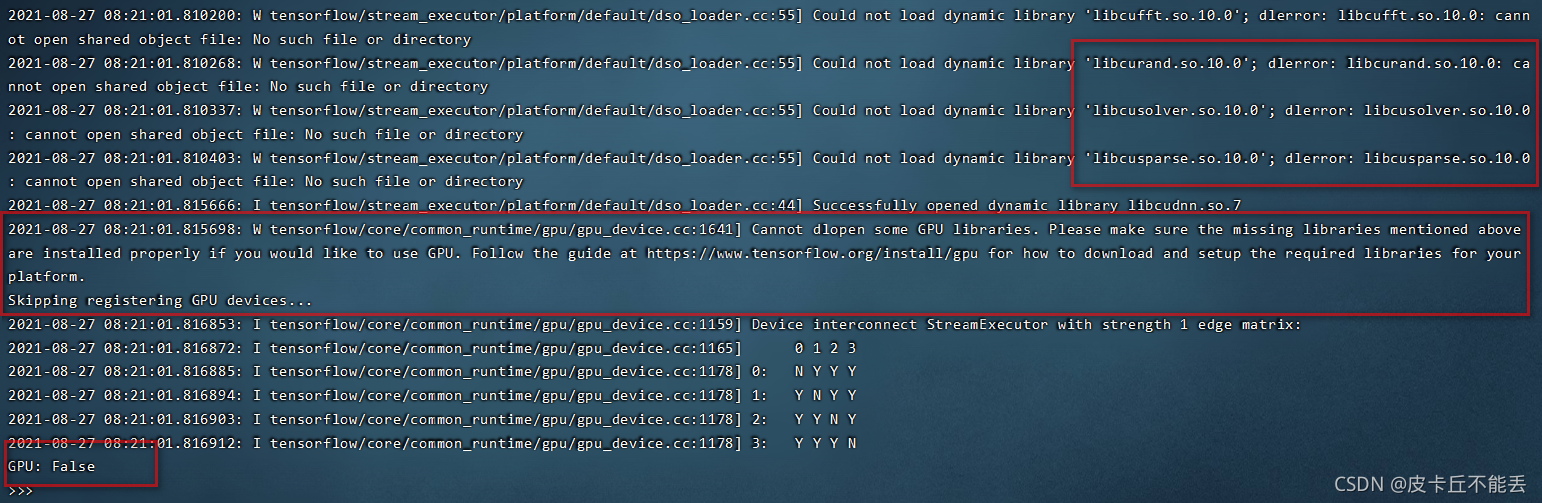
参考解决办法
服务器安装的版本是10.1,但是tensorflow-gpu==1.15版本支持10.0,还不支持10.1,在该环境中安装10.0版本即可
conda install cudatoolkit=10.0
7. 安装编译工具protobuf
该工具能够将object detection api中的.proto文件编译为.py文件
protobuf(Google Protocol
Buffers)是Google提供一个具有高效的协议数据交换格式工具库(类似Json),提供了对C++、java、python语言的支持,能将windows(proto.exe)和linux平台动态编译生成proto文件对应的源文件
conda install -c anaconda protobuf
# 检查版本是否符合要求,命令行输入
protoc --version
8. 下载object detection api源码,github地址
可以直接手动下载,也可以用git
git clone https://github.com/tensorflow/models.git
下载的文件解压保存在一个目录下,不能删除的,记一下保存路径(后面会用这个路径配置环境变量的,所以不要随便放,路径中最好不要带中文),解压后的新式如下图:

9. 开始编译.proto文件
# 进入到下载源码中的research文件夹中,后面的基本都是在这个目录下面进行的,或者直接使用绝对路径
cd models_master/research

# 将object_detection/protos文件夹下的全部.proto文件编译为.py文件
protoc object_detection/protos/*.proto --python_out=.
10. 安装一些其他要用到的包
research/object_detection/packages/tf1/文件夹下的setup.py文件中,有说明需要安装哪些必需的包,可以直接执行这个文件,开始安装,也可以在后面直接运行测试文件时,看缺少哪些包就自己安装哪些包(不建议,因为后面会提示很多包没装,自己装的,还出问题)
# 复制object_detection/packages/tf1/文件夹下的setup.py文件到research文件夹下
cp object_detection/packages/tf1/setup.py .

# 执行这个文件,自动安装必需的包
python -m pip install --use-feature=2020-resolver .
11. 将object detection 添加到环境变量中,如果不添加,后面会提示找不到object_detection的
有两种方法:
注意,这里的路径是解压model_master源码时的路径,所以这个源码路径千万不要随便放
(1) 方法一:每次进入该环境时,命令行输入
export PYTHONPATH=$PYTHONPATH:/home/genius01/chenmq/models-master:/home/genius01/chenmq/models-master/research:/home/genius01/chenmq/models-master/research/slim
(2)方法二:在.bashrc文件中,添加这个路径,就不用每次都输入了
12. object detection api已经配置完成了,可以测试一下
执行object_detection/builders文件夹下的model_builder_tf1_test.py文件
python object_detection/builders/model_builder_tf1_test.py
出现下面信息就表示配置成功

第三部分:配置转tflite模型的编译环境(可选)
要使用tensorflow源码中的工具,必选先用bazel进行编译,编译后,就可以直接使用,需要的工具有freeze_graph(将模型进行固化,生成frozen的graphdef文件)、summarize_graph(查看图结构)、toco(转为tflite)
其实在anaconda的环境中就有转tflite的工具tflite_convert,toco,可以命令行输入tflite_convert,toco查看,但是没有freeze_graph工具,如果是只使用object detection API中的SSD模型,可以跳过此部分,github上有提到过,目前还只支持SSD模型进行转tflite,也只看到了生成SSD冻结图的.py文件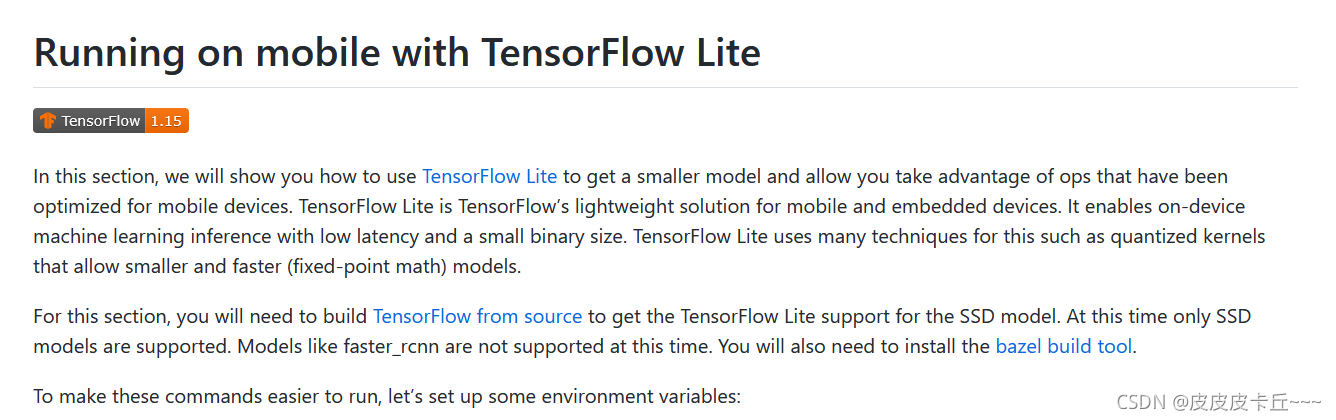
13. 下载tensorflow源码
下载对应版本的tensorflow源码,下载地址 ,将下载的包进行解压缩
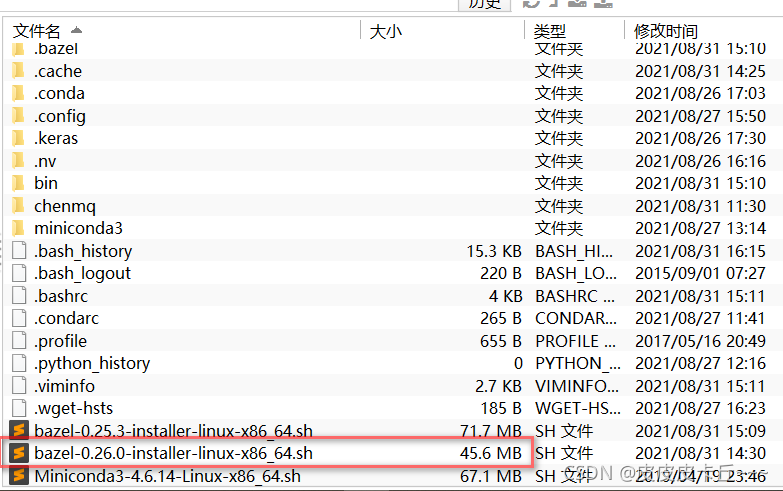
14. 安装bazel,下载二进制源码进行安装
bazel官网 上面有详细的安装步骤
查看该tensorflow对应的bazel版本要求,打开tensorflow源码解压文件,找到configure.py文件,里面有些bazel版本要求
_TF_BAZELRC_FILENAME = '.tf_configure.bazelrc'
_TF_WORKSPACE_ROOT = ''
_TF_BAZELRC = ''
_TF_CURRENT_BAZEL_VERSION = None
_TF_MIN_BAZEL_VERSION = '0.24.1'
_TF_MAX_BAZEL_VERSION = '0.26.1'

- 下载对应版本的二进制安装程序,下载地址
下载了0.26.0版本的,编译时出了点问题,以为是版本的原因,所以又重新装了0.25.3版本的,最后编译成功的也是0.25.3,但是0.26.0也符合版本要求,应该也行的(没试过)
安装bazel前需要安装必要的包,可以先看下这些包是否已经存在
 命令行输入:
which g++,检查是否已安装g++ 命令行输入:
unzip或者zip,验证unzip、zip是否已经安装
执行安装文件
先进入到安装文件所在的目录下,再执行下面两行命令
chmod +x bazel-0.26.0-installer-linux-x86_64.sh
./bazel-0.26.0-installer-linux-x86_64.sh --user
配置环境变量
方法一:执行完上面的命令后,在屏幕上会提示,怎么配置环境变量的,但是和官网上建议的方式不同,推荐使用这种方式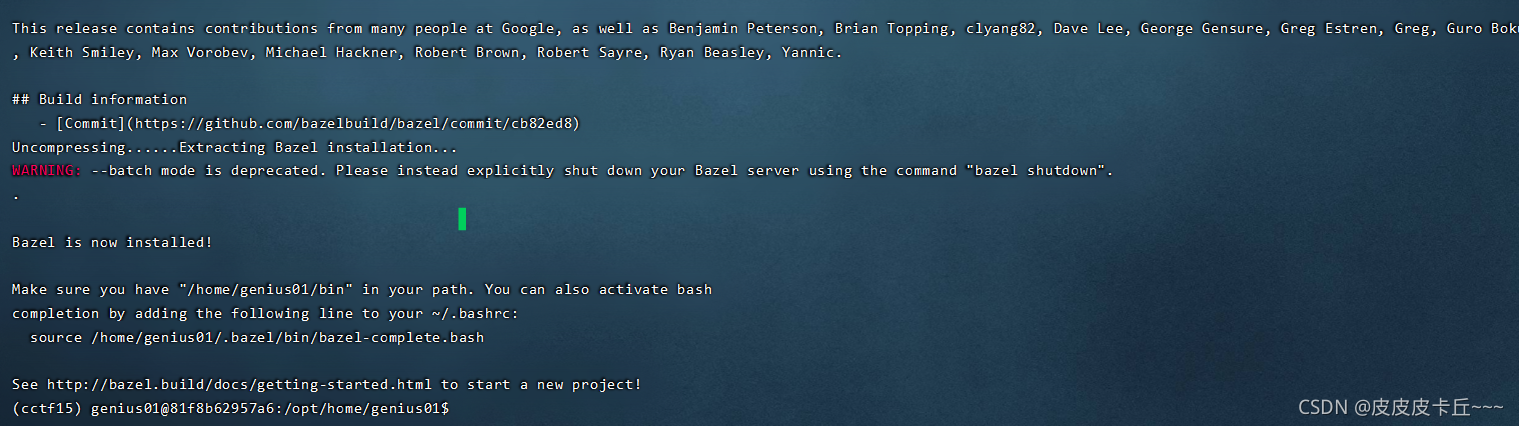
打开.bashrc文件,在末尾添加
source /home/genius01/.bazel/bin/bazel-complete.bash
如图所示:
方法二:官网上建议的配置环境变量方式
如果在执行安装文件时,后边添加了--user的,就可以直接在.bashrc文件中,添加export PATH="$PATH:$HOME/bin"即可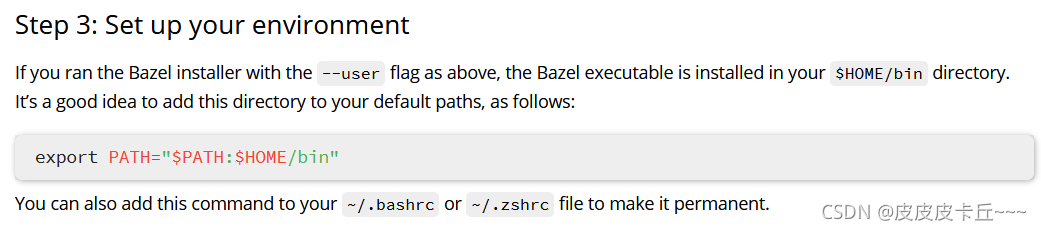
安装结束,检查bazel版本
命令行输入:bazel verion
(后来又装了0.25.3这个版本的)
15. 使用bazel进行编译
将模型转为tflite形式需要三步:
- 在训练模型时保存图模型文件(GraphDef)和变量文件(CheckPoint)
- 将模型固定化,使用freeze_graph工具生成frozen的graphdef文件,也可以使用,onject detection api中的代码将SSD模型进行转换(好像只能转SSD模型)
models-master/research/object_detection/export_tflite_ssd_graph.py- 利用toco工具,生成最终的tflite文件
该部分都需要在tensorflow源码目录下进行cd /home/genius01/chenmq/tensorflow-1.15.0
编译freeze_graph工具
命令行输入:bazel build tensorflow/python/tools:freeze_graph
编译未完全成功,显示以下信息:
INFO: An error occurred during the fetch of repository 'jsoncpp_git'
INFO: Call stack for the definition of repository 'jsoncpp_git':
 - /opt/home/genius01/chenmq/tensorflow-1.15.0/tensorflow/workspace.bzl:570:5
 - /opt/home/genius01/chenmq/tensorflow-1.15.0/WORKSPACE:19:1
ERROR: /opt/home/genius01/chenmq/tensorflow-1.15.0/tensorflow/core/kernels/BUILD:761:1: no such package '@mkl_dnn//': java.io.IOException: Error downloading [https://storage.googleapis.com/mirror.tensorflow.org/github.com/intel/mkl-dnn/archive/v0.20.6.tar.gz, https://github.com/intel/mkl-dnn/archive/v0.20.6.tar.gz] to /opt/home/genius01/.cache/bazel/_bazel_genius01/a173d4060bc60e833406d954ffbd0b34/external/mkl_dnn/v0.20.6.tar.gz: Checksum was f1de676fddeb94132c5ae480fb03a64f03deda10b09b3141373f2b2fe5cd031d but wanted 74675e93eef339ff3d9a9be95c15d0c7ad8736a5356c23428ab2e33dcdb8e3e1 and referenced by '//tensorflow/core/kernels:eigen_contraction_kernel_with_mkl'
ERROR: Analysis of target '//tensorflow/python/tools:freeze_graph' failed; build aborted: no such package '@mkl_dnn//': java.io.IOException: Error downloading [https://storage.googleapis.com/mirror.tensorflow.org/github.com/intel/mkl-dnn/archive/v0.20.6.tar.gz, https://github.com/intel/mkl-dnn/archive/v0.20.6.tar.gz] to /opt/home/genius01/.cache/bazel/_bazel_genius01/a173d4060bc60e833406d954ffbd0b34/external/mkl_dnn/v0.20.6.tar.gz: Checksum was f1de676fddeb94132c5ae480fb03a64f03deda10b09b3141373f2b2fe5cd031d but wanted 74675e93eef339ff3d9a9be95c15d0c7ad8736a5356c23428ab2e33dcdb8e3e1
INFO: Elapsed time: 95.256s
INFO: 0 processes.
FAILED: Build did NOT complete successfully (245 packages loaded, 10080 targets configured)
解决方法:在提示中可以看到,有两个包未成功下载,可以根据上面的下载链接,手动下载这两个包后,放在提示中指定的文件夹下即可

再重新执行编译命令,显示编译成功啦
编译toco工具
命令行输入:bazel build tensorflow/lite/toco:toco
编译成功,显示以下信息
第四部分:进行checkpoint模型转tflite模型
已经有训练好的模型,训练分量化训练和非量化训练的,之间的差别还需要继续学习,注意下这个坑,参考
方法一:非量化训练的模型进行转tflite
16. 将模型进行固化
参考
在训练模型的时候,需要保存模型的图结构文件.pb和参数文件.ckpt,但是现在只保存了.ckpt文件,没有.pb文件,所以没有使用freeze_graph工具来进行固化模型,仍使用的是object detection API中的export_tflite_ssd_graph.py将模型转为tflite兼容的冻结图,见方法二中的16,这部分还是很清楚
17. 转tflite模型
使用tensorflow源码编译的toco工具进行转换

cd tensorflow-1.15.0  # 源码目录中
cd tensorflow/lite/toco # toco目录中

# 执行命令
toco \
--output_file=/opt/home/genius01/chenmq/model/0830_pbmodel/yyrescue_toco_2.tflite \ # 输出tflite模型
--graph_def_file=/opt/home/genius01/chenmq/model/0830_pbmodel/tflite_graph.pb \ # 冻结图.pb文件
--output_format=TFLITE \
--inference_type=QUANTIZED_UINT8 \
--input_arrays=normalized_input_image_tensor \
--input_shapes=1,300,300,3 \
--output_arrays="TFLite_Detection_PostProcess","TFLite_Detection_PostProcess:1","TFLite_Detection_PostProcess:2","TFLite_Detection_PostProcess:3" \
--mean_value=128 \
--std_dev_values=128 \
--change_concat_input_ranges=false \
--allow_custom_ops \
--post_training_quantize # 非量训练一定要加上这个
使用anaconda中自带的toco工具进行转换
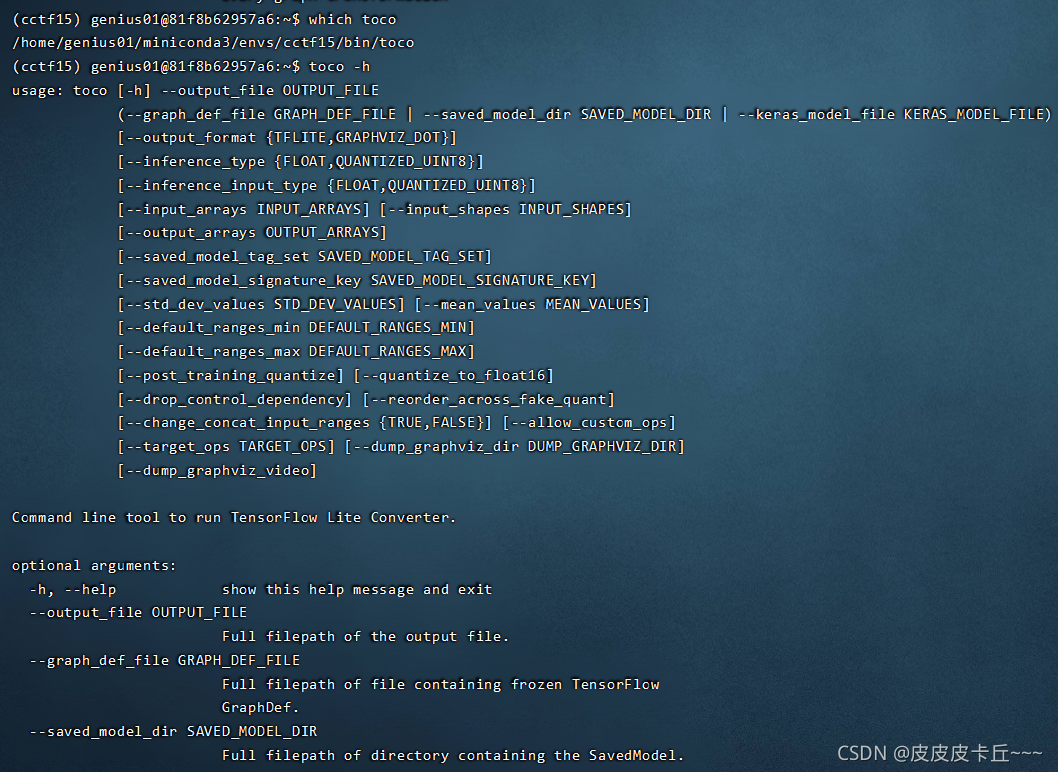
# 不需要进入任何目录下
which toco # 查看toco所在位置
toco -h #查看帮助信息

# 命令行输入
toco \
--output_file=/opt/home/genius01/chenmq/model/0830_pbmodel/yyrescue_toco_2.tflite \
--graph_def_file=/opt/home/genius01/chenmq/model/0830_pbmodel/tflite_graph.pb \
--output_format=TFLITE \
--inference_type=QUANTIZED_UINT8 \
--input_arrays=normalized_input_image_tensor \
--input_shapes=1,300,300,3 \
--output_arrays="TFLite_Detection_PostProcess","TFLite_Detection_PostProcess:1","TFLite_Detection_PostProcess:2","TFLite_Detection_PostProcess:3" \
--mean_value=128 \
--std_dev_values=128 \
--change_concat_input_ranges=false \
--allow_custom_ops \
--post_training_quantize
使用anaconda 中自带的tflite_convert工具

# 退出tensorflow源码目录
which tflite_convert  # 查看该工具所在的位置
tflite_convert -h # 查看帮助

# 命令行输入
tflite_convert \
--graph_def_file=/opt/home/genius01/chenmq/model/0830_pbmodel/tflite_graph.pb \
--output_file=/opt/home/genius01/chenmq/model/0830_pbmodel/yyrescue_anaconda.tflite \
--input_shapes=1,300,300,3 \
--input_arrays=normalized_input_image_tensor \
--output_arrays="TFLite_Detection_PostProcess","TFLite_Detection_PostProcess:1","TFLite_Detection_PostProcess:2","TFLite_Detection_PostProcess:3" \
--output_format=TFLITE \
--mean_values=128 \
--std_dev_values=128 \
--change_concat_input_ranges=false \
--allow_custom_ops \
--post_training_quantize
方法二:量化训练转tflite,即在.config文件中,末尾加上
# This is where model quantization comes in. Quantization compresses the weights and activations in our model to an 8-bit fixed point representation. The following lines in our config file will generate a quantized model:
graph_rewriter {
  quantization {
    delay: 1800
    activation_bits: 8
    weight_bits: 8
  }
}
16. 将模型进行固化
使用object detection api中的代码models-master/research/object_detection/export_tflite_ssd_graph.py 将ckpt模型进行固化
执行代码注意路径,推荐使用绝对路径
python /models-master/research/object_detection/export_tflite_ssd_graph.py \
--pipeline_config_path= ../conf/ssd_mobilenet_v2_coco_0903.config \
--trained_checkpoint_prefix ../model/0903/model.ckpt-30000 \
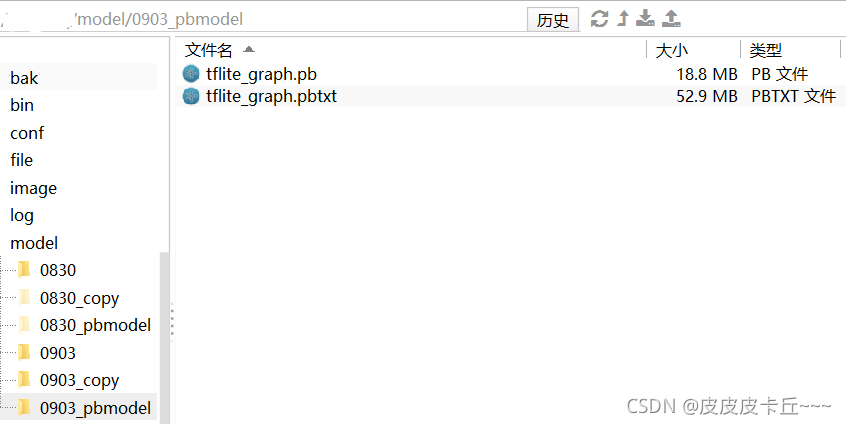
--output_directory ../model/0903_pbmodel/ \
--add_postprocessing_op=true &> ../log/convert2pb_0903.log
17. 转tflite模型
使用tensorflow源码编译的toco工具
cd tensorflow-1.15.0 # 进入tensorflow源码目录下
cd /tensorflow/lite/toco # 进入toco工具目录下

toco \
--output_file=/opt/home/genius01/chenmq/model/0903_pbmodel/yyrescue_toco_1.tflite \
--graph_def_file=/opt/home/genius01/chenmq/model/0903_pbmodel/tflite_graph.pb \
--inference_type=QUANTIZED_UINT8 \
--input_arrays=normalized_input_image_tensor \
--output_arrays="TFLite_Detection_PostProcess","TFLite_Detection_PostProcess:1","TFLite_Detection_PostProcess:2","TFLite_Detection_PostProcess:3" \
--input_shapes=1,300,300,3 \
--mean_value=128 \
--std_dev_values=128 \
--change_concat_input_ranges=false \
--allow_nudging_weights_to_use_fast_gemm_kernel=true \
--allow_custom_ops
使用anaconda中自带的tflite_convert工具
# 命令行输入
tflite_convert \
--output_file=/opt/home/genius01/chenmq/model/0903_pbmodel/yyrescue.tflite \
--graph_def_file=/opt/home/genius01/chenmq/model/0903_pbmodel/tflite_graph.pb \
--inference_type=QUANTIZED_UINT8 \
--input_arrays=normalized_input_image_tensor \
--output_arrays="TFLite_Detection_PostProcess","TFLite_Detection_PostProcess:1","TFLite_Detection_PostProcess:2","TFLite_Detection_PostProcess:3" \
--input_shapes=1,300,300,3 \
--mean_value=128 \
--std_dev_values=128 \
--change_concat_input_ranges=false \
--allow_nudging_weights_to_use_fast_gemm_kernel=true \
--allow_custom_ops
18. 测试tflite模型
运行测试代码时报错,导入import tflite_runtime.interpreter as tflite 包时报错,提示系统缺一个文件,但是由于权限不够,没法解决
(cctf15) genius01@81f8b62957a6:~$ python /opt/home/genius01/chenmq/bin/check_tflite_from_dir_with_visual.py --model_date=0830  --test_image_dir="/opt/home/genius01/chenmq/image/test/"
Traceback (most recent call last):
  File "/home/genius01/miniconda3/envs/cctf15/lib/python3.6/site-packages/tflite_runtime/interpreter_wrapper.py", line 14, in swig_import_helper
    return importlib.import_module(mname)
  File "/home/genius01/miniconda3/envs/cctf15/lib/python3.6/importlib/__init__.py", line 126, in import_module
    return _bootstrap._gcd_import(name[level:], package, level)
  File "<frozen importlib._bootstrap>", line 994, in _gcd_import
  File "<frozen importlib._bootstrap>", line 971, in _find_and_load
  File "<frozen importlib._bootstrap>", line 955, in _find_and_load_unlocked
  File "<frozen importlib._bootstrap>", line 658, in _load_unlocked
  File "<frozen importlib._bootstrap>", line 571, in module_from_spec
  File "<frozen importlib._bootstrap_external>", line 922, in create_module
  File "<frozen importlib._bootstrap>", line 219, in _call_with_frames_removed
ImportError: /lib/x86_64-linux-gnu/libm.so.6: version `GLIBC_2.27' not found (required by /home/genius01/miniconda3/envs/cctf15/lib/python3.6/site-packages/tflite_runtime/_interpreter_wrapper.so)

During handling of the above exception, another exception occurred:

Traceback (most recent call last):
  File "/opt/home/genius01/chenmq/bin/check_tflite_from_dir_with_visual.py", line 20, in <module>
    import tflite_runtime.interpreter as tflite
  File "/home/genius01/miniconda3/envs/cctf15/lib/python3.6/site-packages/tflite_runtime/interpreter.py", line 46, in <module>
    from tflite_runtime import interpreter_wrapper as _interpreter_wrapper
  File "/home/genius01/miniconda3/envs/cctf15/lib/python3.6/site-packages/tflite_runtime/interpreter_wrapper.py", line 17, in <module>
    _interpreter_wrapper = swig_import_helper()
  File "/home/genius01/miniconda3/envs/cctf15/lib/python3.6/site-packages/tflite_runtime/interpreter_wrapper.py", line 16, in swig_import_helper
    return importlib.import_module('_interpreter_wrapper')
  File "/home/genius01/miniconda3/envs/cctf15/lib/python3.6/importlib/__init__.py", line 126, in import_module
    return _bootstrap._gcd_import(name[level:], package, level)
ModuleNotFoundError: No module named '_interpreter_wrapper'
最后使用/usr/bin/python 系统中自带的python执行时,才运行成功