效果

步骤
- 下载

// Vue
// # Vue 2 项目,安装 Vant 2:
npm i vant -S

// # Vue 3 项目,安装 Vant 3:
npm i vant@next -S
- 自动按需引入组件

// # npm
npm i babel-plugin-import -D

// # yarn
yarn add babel-plugin-import -D
- 配置及引入


// main.js
import Vue from 'vue'
import App from './App.vue'
import '@/mobile/flexible'  // 适配
import '@/styles/reset.css' // 初始化样式
import router from '@/router' // 路由对象

import { Tabbar, TabbarItem, NavBar } from 'vant'
Vue.use(Tabbar)
Vue.use(TabbarItem)
Vue.use(NavBar)

Vue.config.productionTip = false

new Vue({
  router,
  render: h => h(App),
}).$mount('#app')
- 使用
- 配置路由 mate 属性
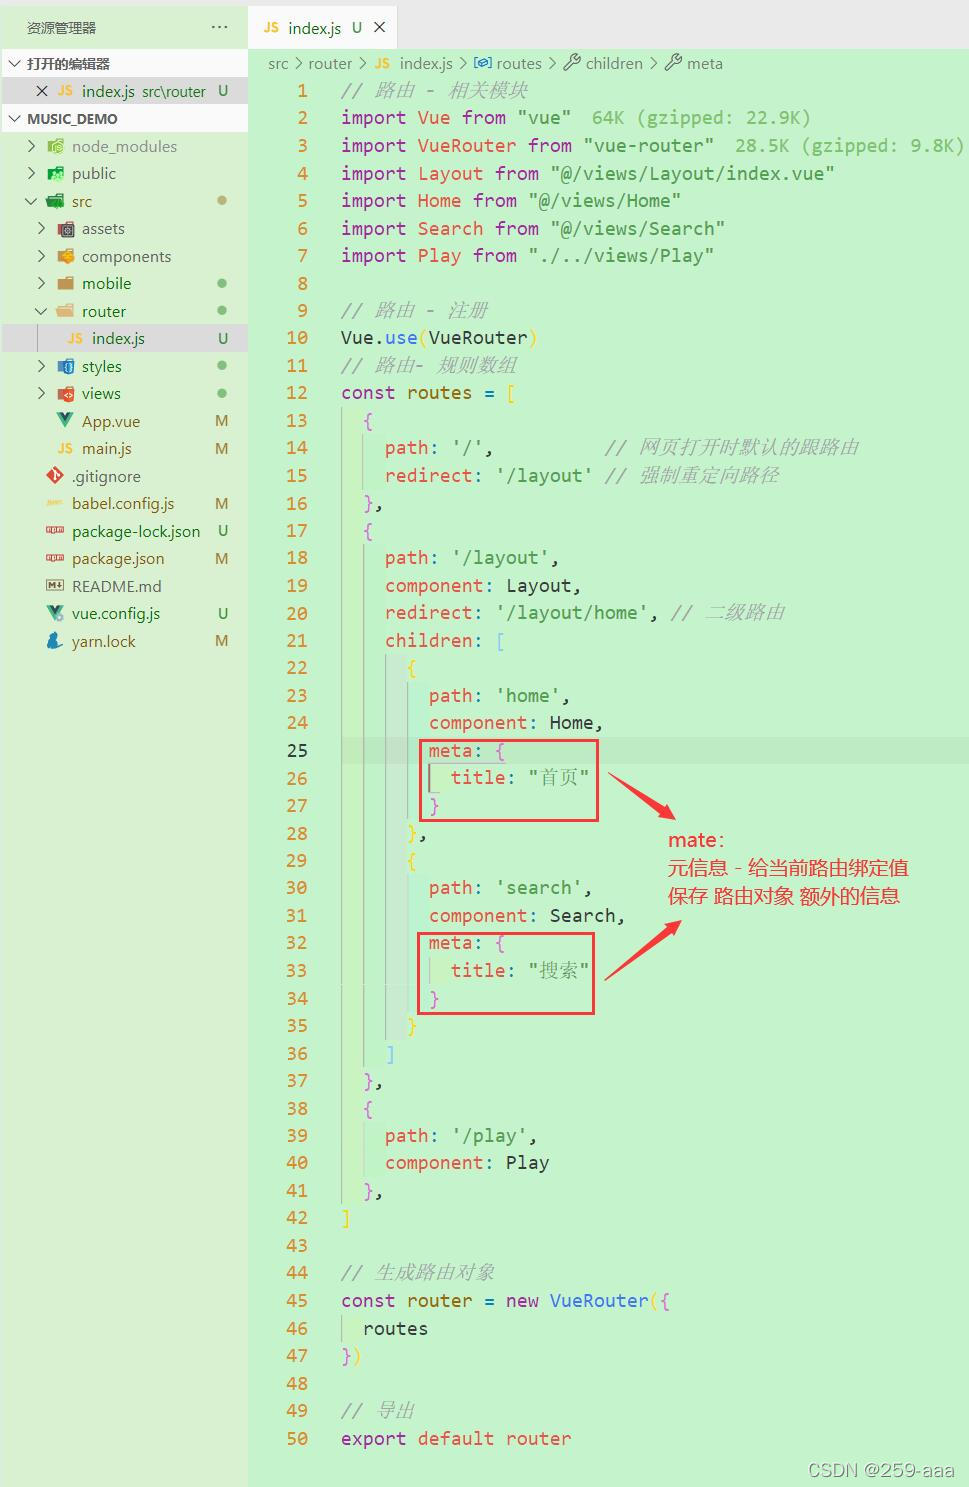
// 配置路由 mate 属性
// 路由 - 相关模块
import Vue from "vue"
import VueRouter from "vue-router"
import Layout from "@/views/Layout/index.vue"
import Home from "@/views/Home"
import Search from "@/views/Search"
import Play from "./../views/Play"

// 路由 - 注册
Vue.use(VueRouter)
// 路由- 规则数组
const routes = [
  {
    path: '/',          // 网页打开时默认的跟路由
    redirect: '/layout' // 强制重定向路径
  },
  {
    path: '/layout',
    component: Layout,
    redirect: '/layout/home', // 二级路由
    children: [
      {
        path: 'home',
        component: Home,
        meta: {
          title: "首页"
        }
      },
      {
        path: 'search',
        component: Search,
        meta: {
          title: "搜索"
        }
      }
    ]
  },
  {
    path: '/play',
    component: Play
  },
]

// 生成路由对象
const router = new VueRouter({
  routes
})

// 导出
export default router
- 页面编辑
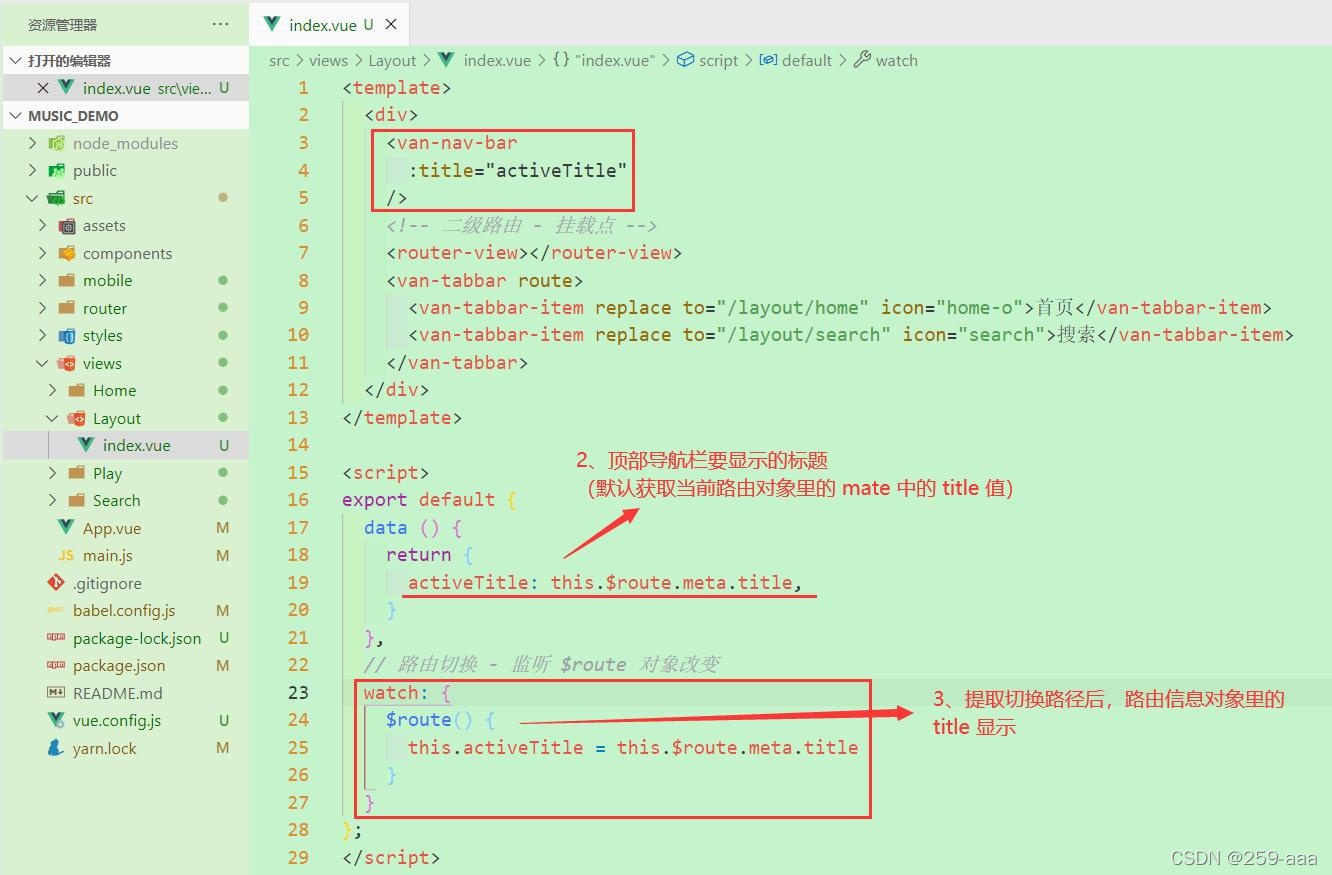
// src/views/Layout/index.vue
<template>
  <div>
    <van-nav-bar
      :title="activeTitle"
    />
    <!-- 二级路由 - 挂载点 -->
    <router-view></router-view>
    <van-tabbar route>
      <van-tabbar-item replace to="/layout/home" icon="home-o">首页</van-tabbar-item>
      <van-tabbar-item replace to="/layout/search" icon="search">搜索</van-tabbar-item>
    </van-tabbar>
  </div>
</template>

<script>
export default {
  data () {
    return {
      activeTitle: this.$route.meta.title,
    }
  },
  // 路由切换 - 监听 $route 对象改变
  watch: {
    $route() {
      this.activeTitle = this.$route.meta.title
    }
  }
};
</script>

<style scoped>
/* 中间内容区域 - 容器样式(留好上下导航所占位置) */
.main {
  padding-top: 46px;
  padding-bottom: 50px;
}
</styles>
版权声明:本文为qq_44680550原创文章,遵循CC 4.0 BY-SA版权协议,转载请附上原文出处链接和本声明。