参考的网络资料
https://github.com/bperez77/xilinx_axidma/tree/master
https://gitlab.gnome.org/HosseinBeheshti/UlteraZed7EV/-/tree/master/petalinux/xilinx_axidma
https://www.icode9.com/content-3-925319.html
https://blog.csdn.net/weixin_38218267/article/details/102833570
https://blog.csdn.net/jin787730090/article/details/114286315?spm=1035.2023.3001.6557&utm_medium=distribute.pc_relevant_bbs_down.none-task-blog-2~default~OPENSEARCH~default-1.nonecase&depth_1-utm_source=distribute.pc_relevant_bbs_down.none-task-blog-2~default~OPENSEARCH~default-1.nonecase
https://blog.csdn.net/sements/article/details/90230188
1、petalinux工程路径下创建一个新的工程,命名为"axidma"
petalinux-create --type project --template zynqMP --name axidma
cd axidma
2、设计好block design 文件并加载硬件描述文件
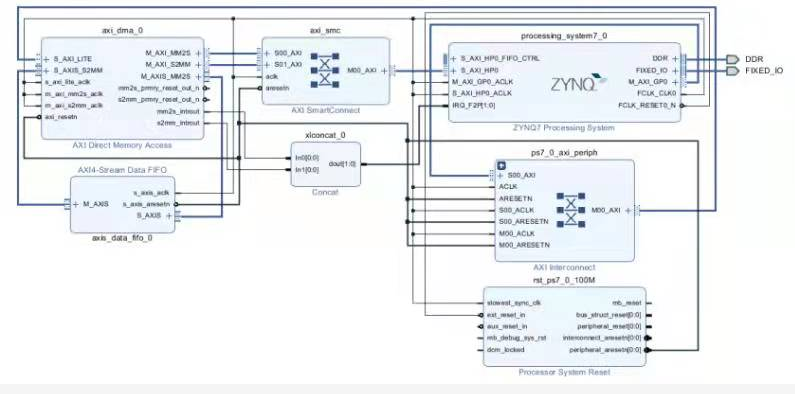
petalinux-config --get-hw-description /home/zergzz/axi20211219/XSA/config_mpsoc_wrapper.xsa
3、建立后等待一会出现配置界面
进行以下配置
DTG-Setting->MACHINENAME ->change to zcu106-reva
Image packaging configuration->root filesystem type->sd/emmc/sata/usb
Image Packaging Configuration --->Root filesystem type(SD card) --->SD card
离线编译设置方法
(1)到官网下载aarch64 sstate-cache和downloads文件并解压。路径在/home/Downloads
(2)使用petalinux-config命令进入配置界面,yocto settings-> Local sstate feeds settings->local sstate feeds url目录是/home/jone/Downloads/sstate_aarch64_2020.2/aarch64
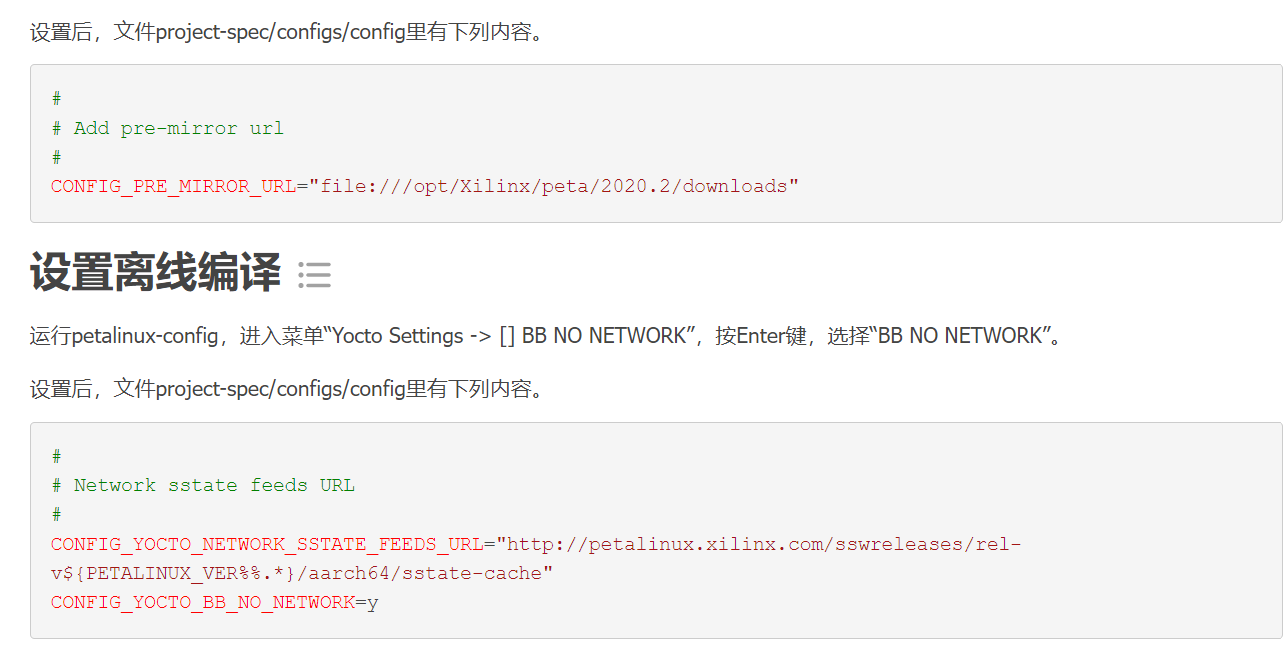
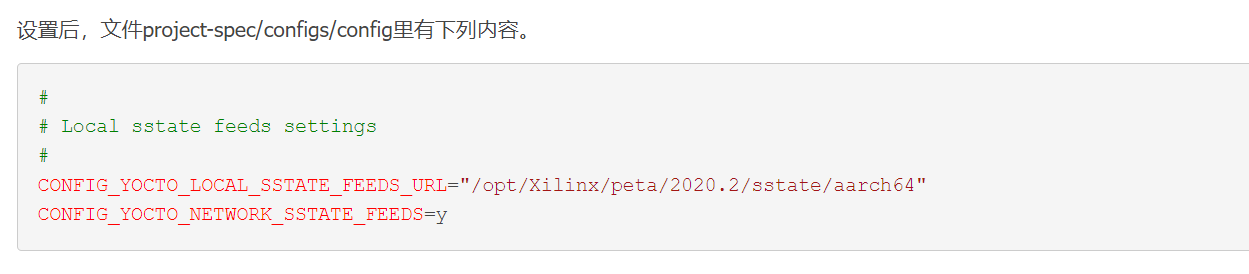 (3)设置downloads路径Yocto Settings-> Add pre-mirror url
file:///home/jone/Downloads/downloads_2020.2/downloads
4、配置linux内核
petalinux-config -c kernel(配置Linux内核一定要把xilinx DMA engine都选中,可以参考GitHub上的Linux Kernel配置)
Memory management options->maximum count of the cma areas ->25
Device Drivers->DMA Engine support->xilinx axi dmas engine
Kernel Features---->Maximum count of the CMA areas
5、petalinux-config -c rootfs
选择进入Petalinux Package Groups
packagegroup-petalinux-qt->packagegroup-petalinux-qt
packagegroup-petalinux-qt-extended->packagegroup-petalinux-qt-extended
packagegroup-petalinux-x11->packagegroup-petalinux-x11
6、petalinux-build
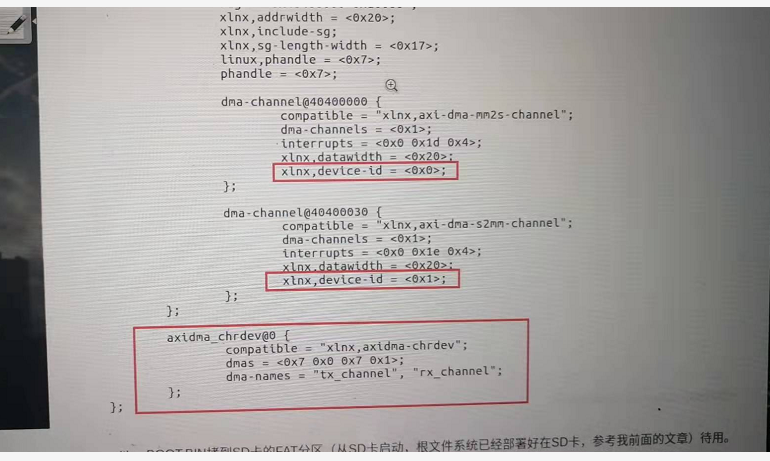
在/home/zergzz/axi20211219/axidma/components/plnx_workspace文件夹中可以找到设备树文件,打开pl.dtsi,可以看到DMA两个通道的信息,修改第二个dma-id为0x01,保存,
/home/zergzz/axi20211219/axidma/project-spec/meta-user/recipes-bsp/device-tree/files/system-user.dtsi中加入:
/include/ "system-conf.dtsi"/{};
 &amba_pl{
    axidma_chrdev: axidma_chrdev@0 {
            compatible = "xlnx,axidma-chrdev";
            dmas = <&axi_dma_0 0 &axi_dma_0 1>;
            dma-names = "tx_channel", "rx_channel";
    };};
 &axi_dma_0{
    dma-channel@40400000 {
        xlnx,device-id = <0x0>;
    };
    dma-channel@40400030 {
        xlnx,device-id = <0x1>;
    };};
7、重新petalinux-build
在工程/image里面找到system.dtb文件,使用dtc -I dtb -O dts -o system.dts system.dtb反编译设备树,查看是否修改好。
在工程/image里面找到system.dtb文件,使用dtc -I dtb -O dts -o system.dts system.dtb反编译设备树,查看是否修改好。
8、添加axi_dma模块
petalinux-create -t modules -n xilinx-axidma --enable
/project-spec/meta-user/recipes-modules/xilinx-axidma/files,进入这个路径,删除其中的xilinx-axidma.c文件。
打开下载的模块文件包,将driver文件下的全部.c文件和.h头文件拷贝进files文件夹下,再将include文件夹下的axidma_ioctl.h文件也拷贝进来。
接下来,打开这个路径中的Makefile文件,将它的第一行替换为如下代码:
DRIVER_NAME = xilinx-axidma
$(DRIVER_NAME)-objs = axi_dma.o axidma_chrdev.o axidma_dma.o axidma_of.o
obj-m := $(DRIVER_NAME).o
保存退出。
修改xilinx-axidma.bb文件中,SRC_URI右侧的赋值为:
SRC_URI = "file://Makefile \
file://axi_dma.c \
file://axidma_chrdev.c \
file://axidma_dma.c \
file://axidma_of.c \
file://axidma.h \
file://axidma_ioctl.h \
file://COPYING \
"
执行petalinux-build -c xilinx-axidma,
生成的驱动.ko文件在/build/tmp/sysroots/plnx_arm/lib/modules//extra/xilinx-axidma.ko
9、创建应用
petalinux-create -t apps --name axidma-benchmark --enable
petalinux-create -t apps --name axidma-transfer --enable
修改axidma-transfer.bb文件
SRC_URI = "file://axidma_transfer.c \
file://axidma_ioctl.h \
file://conversion.h \
file://libaxidma.h \
file://libaxidma.c \
file://util.c \
file://util.h \
file://Makefile \
"
修改Makefile文件
增加
APP_OBJS += libaxidma.o
APP_OBJS += util.o
编译app
petalinux-build -c axidma-transfer
petalinux-build -c axidma-transfer -x do_clean
petalinux-build -c axidma-transfer -x do_install得到可执行文件,位于/build/tmp/work/cortexa9hf-neon-xilinx-linux-gnueabi/1.0-r0$文件夹
最后执行petalinux-build
10、petalinux-package --boot --fsbl ./images/linux/zynqmp_fsbl.elf
--fpga ./images/linux/system.bit --u-boot --force
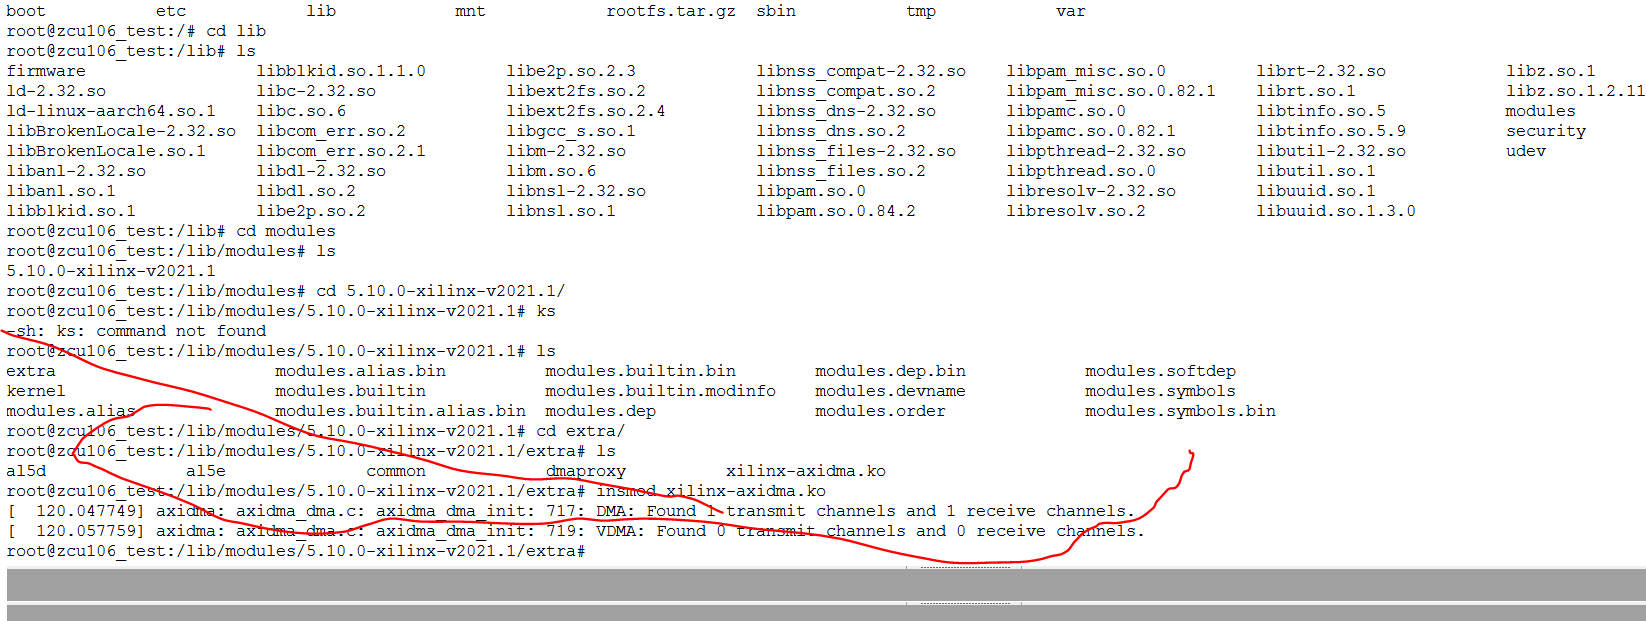
boot.bin、image.ub、boot.src .ko 以及app执行文件拷贝至SD卡的FAT32区(4.3G)将rootfs.tar.gz拷贝至ext4区,通过sudo tar -zxvf rootfs.tar.gz命令解压,在ZCU106板上插上SD卡,上电运行,cd /进入系统文件,cd lib中寻找module->xinlix axi-dma.ko,insmod加载驱动,cd /mnt,运行./axi-transfer测试如下:
编译好了驱动并成功insmod如下:
运行benchmark应用程序如下:

运行axidma-transfer应用程序如下:
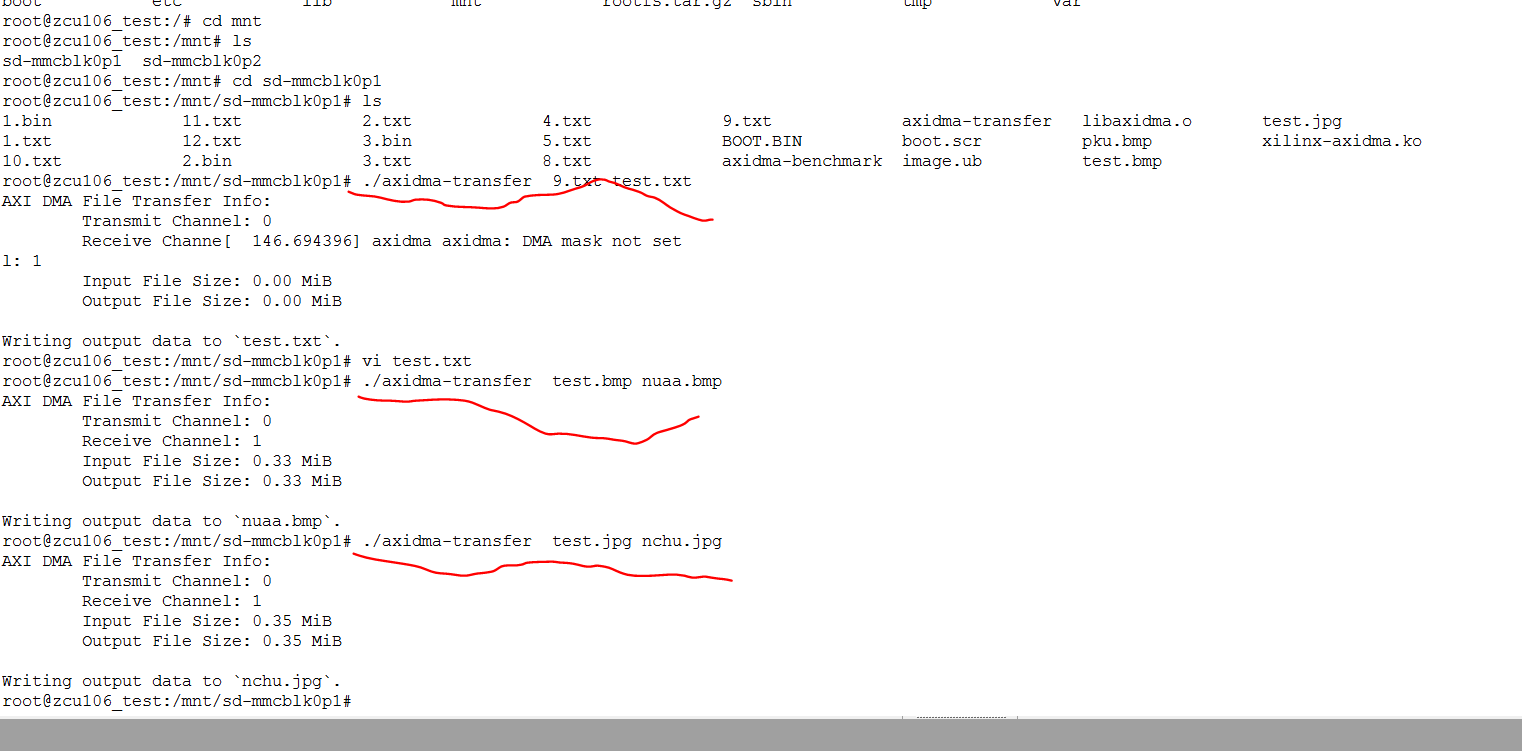
至此ZCU106在Linux系统层上PL-PS通过AXI-DMA传输数据测试完成。
本篇同时主要介绍了在petalinux中linux驱动到应用层的完整流程。