往期文章:
Spring 学习总结笔记【一、快速入门】
Spring 学习总结笔记【二、IoC-控制反转】
Spring 学习总结笔记【三、注解开发】
Spring 学习总结笔记【四、整合Junit】
Spring 学习总结笔记【五、配置数据源】
Spring 学习总结笔记【六、整合Mybatis】
一、AOP简介
- AOP 为(Aspect Oriented Programming)
面向切面编程,是通过预编译方式和运行期动态代理实现程序功能的统一维护的一种技术。 - AOP 是 OOP(Object Oriented Programming)
面向对象编程的延续,是软件开发中的一个热点,也是Spring框架中的一个重要内容,是函数式编程的一种衍生范型。利用AOP可以对业务逻辑的各个部分进行隔离,从而使得业务逻辑各部分之间的耦合度降低,提高程序的可重用性,同时提高了开发的效率。
- Spring理念:无侵入式/无入侵式
1. AOP作用及优势
- 作用:在
不惊动原始设计的基础上为其进行功能增强。- 优势:减少重复代码,提高开发效率,并且便于维护。
2. AOP底层实现
AOP的底层是通过Spring提供的
动态代理技术实现。在运行期间,Spring通过动态代理技术动态的生成代理对象,代理对象方法执行时进行增强功能的介入,再去调用目标对象的方法,从而完成功能的增强。
3. AOP的动态代理技术
常用的动态代理技术
JDK 代理: 基于接口的动态代理技术cglib 代理:基于父类的动态代理技术 (Spring集成的第三方技术)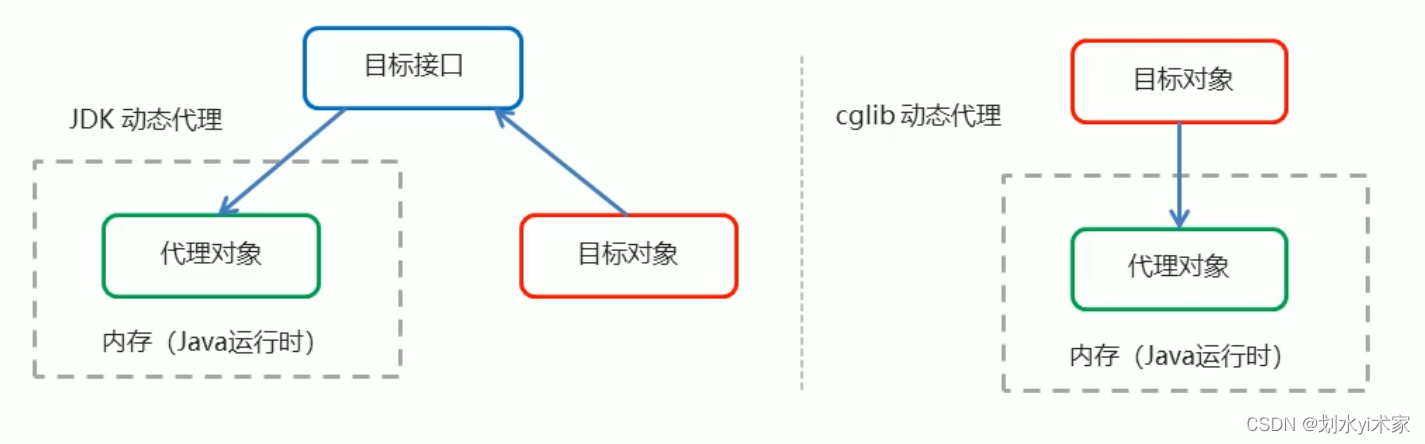
1. JDK动态代理
JDK 动态代理是基于拦截器和反射实现的,不需要第三方库支持,只需要 JDK 环境即可
- 必须实现 InvocationHandler 接口;
- 使用 Proxy.newProxyInstance 产生代理对象;
- 被代理的对象必须要实现接口;
- 内部采用asm技术动态生成字节码;
步骤如下:
① 定义目标接口,TargetInterface
public interface TargetInterface {
    public void method();
}
② 定义目标类,实现TargetInterface
public class Target implements TargetInterface{
	@Override
	public void  method(){
		System.out.println("执行method......");
	}
}
③ 定义增强类
public class Advice {
	public void before(){
		System.out.println("before......");
	}
	public void after(){
		System.out.println("after......");
	}
}
④ 动态代理代码
public static void main(String[] args) {
	// 目标对象
	Target target = new Target();
	// 目标对象类加载器
	ClassLoader classLoader = target.getClass().getClassLoader();
	// 增强对象
	Advice advice = new Advice();

	// 创建代理对象 三个参数
	TargetInterface proxy = (TargetInterface) Proxy.newProxyInstance(
			classLoader,
			// 目标对相关相同的接口字节码对象数组
			new Class[]{TargetInterface.class},
			// 返回值就是动态生成的代理对象
			new InvocationHandler() {
				// 调用代理对象的任何方法,实质执行的都是invoke方法
				@Override
				public Object invoke(Object proxy, Method method, Object[] args) throws Throwable {
					// 前置增强
					advice.before();
					Object result = method.invoke(target, args);// 执行目标方法
					// 后置增强
					advice.after();
					return result ;
				}
			}
	);
	// 调用代理对象的方法
	proxy.method();
}
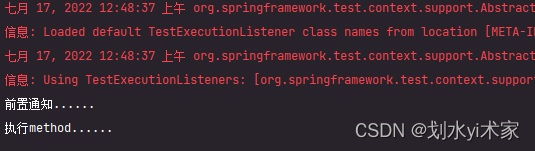
执行效果:
public static Object newProxyInstance(ClassLoader loader,
                                          Class<?>[] interfaces,
                                          InvocationHandler h)
        throws IllegalArgumentException
代码本身很简单,最重要的就是Proxy.newProxyInstance 这个方法,理解这里面的几个参数至关重要,分别说明下几个参数的含义:
classLoader,类加载器;interfaces,目标对象接口;InvocationHandler,真正完成相关方法反射代理的处理器;JDK动态代理,其关键的步骤就是在InvocationHandler 中执行目标实现类的方法反射调用
2. cglib动态代理
JDK实现动态代理需要实现类通过接口定义业务方法,对于没有接口的类,如何实现动态代理呢,这就需要cglib了;
cglib采用了非常底层的字节码技术,其原理是通过字节码技术为一个类创建子类,并在子类中采用方法拦截的技术拦截所有父类方法的调用,顺势织入横切逻辑。
步骤如下:
① 导入cglib坐标(由于cglib是第三方的工具,所以我们在使用过之前需要导入cglib的坐标,在Spring早期的版本中需要我们手动导入,但是Spring高版本已经将cglib集成到了Spring框架里,所以我们可以直接使用)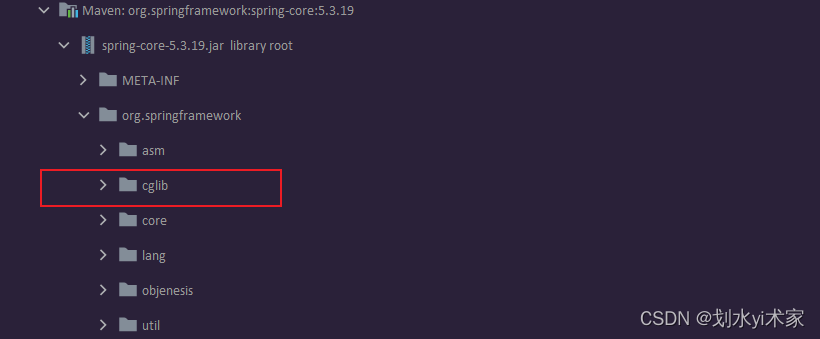
② 定义目标类
public class Target  {
	public void  method(){
		System.out.println("执行method......");
	}
}
③ 定义增强类
public class Advice {
	public void before(){
		System.out.println("before......");
	}
	public void after(){
		System.out.println("after......");
	}
}
④ 动态代理代码
public static void main(String[] args) {
	// 目标对象
	final Target target = new Target();
	// 获得增强对象
	Advice advice = new Advice();
	// 创建代理对象  基于cglib
	// 1、创建增强器
	Enhancer enhancer = new Enhancer();
	// 2、设置父类
	enhancer.setSuperclass(Target.class);
	// 3、设置回调
	enhancer.setCallback(new MethodInterceptor() {
		@Override
		public Object intercept(Object o, Method method, Object[] objects, MethodProxy methodProxy) throws Throwable {
			// 执行前置增强
			advice.before();
			// 执行目标方法
			Object invoke = method.invoke(target, args);
			// 执行后置增强
			advice.after();
			return invoke;
		}
	});
	// 4、创建代理对象
	Target proxy = (Target) enhancer.create();
	// 执行代理对象的方法 最终执行的是目标方法
	proxy.method();
}
执行效果:
4. AOP核心概念
Spring 的 AOP 实现底层就是对上述动态代理的代码进行了封装,封装后我们只需要对需要关注的部分进行代码编写,并通过配置的方式完成指定目标的方法增强。
在正式讲解 AOP 的操作之前,我们必须理解 AOP 的相关术语,常用的术语如下:
- Target(目标对象):代理的目标对象
- Proxy (代理):一个类被 AOP 织入增强后,就产生一个结果代理类
Joinpoint(连接点):所谓连接点是指那些被拦截到的点。在Spring中,这些点指的是方法,因为Spring只支持方法类型的连接点。Pointcut(切入点):所谓切入点是指我们要对哪些 Joinpoint 进行拦截的定义。Advice(通知/ 增强):在切入点处执行的操作,也就是指拦截到 Joinpoint 之后所要做的共性功能,在Spring中,功能最终以方法的形式呈现。Aspect(切面):是切入点和通知(引介)的结合,描述通知与切入点的对应关系。Weaving(织入):是指把增强应用到目标对象来创建新的代理对象的过程。Spring采用动态代理织入,而AspectJ采用编译期织入和类装载期织入。
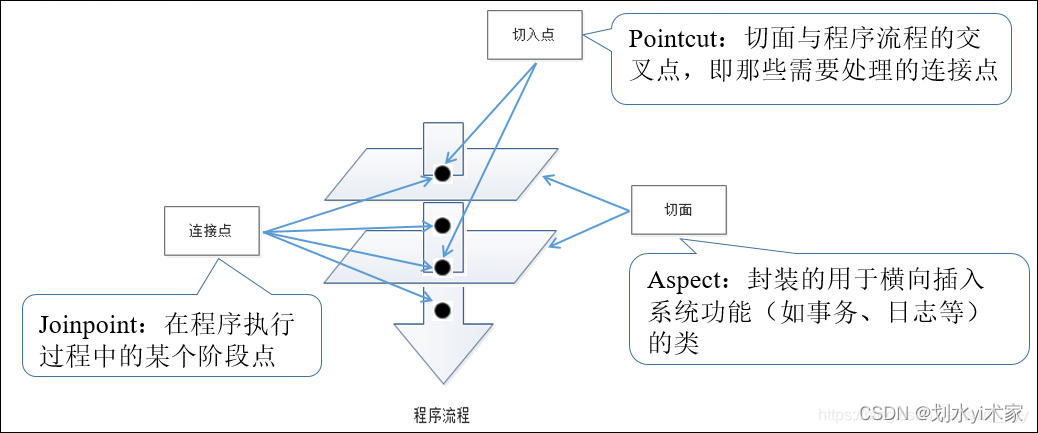
网络上有张图,我觉得非常传神,贴在这里供大家观详: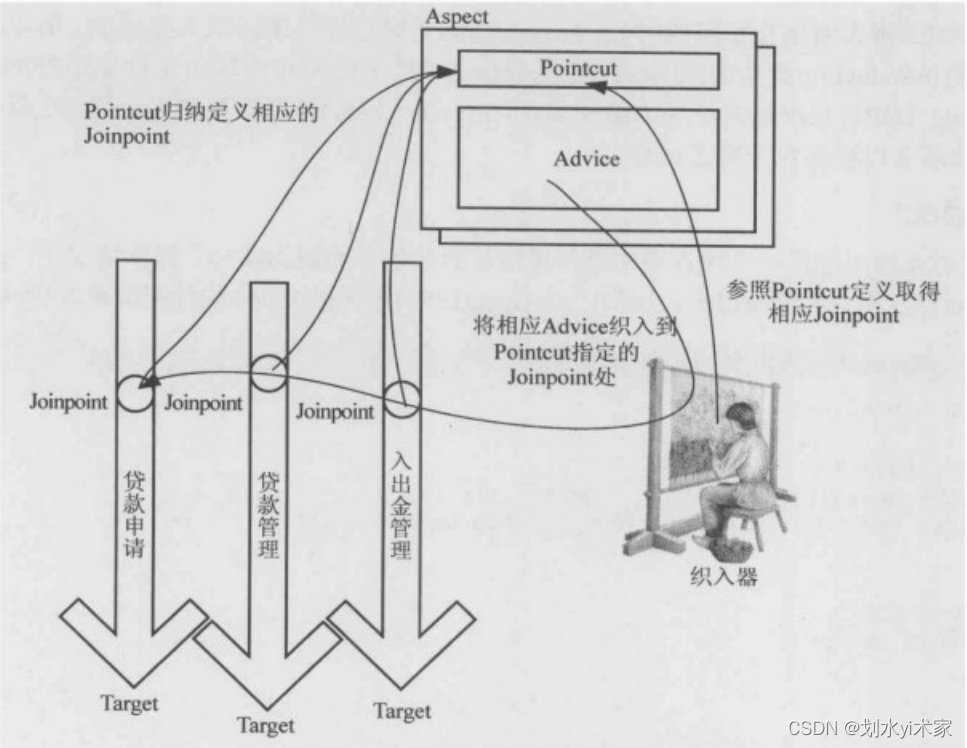
二、AOP开发明确事项
1. 编写内容
- 编写核心业务代码(目标类的目标方法)
- 编写切面类,切面类中有通知(增强功能方法)
- 在配置文件中,配置织入关系,即将哪些通知与哪些连接点进行结合
2. AOP 技术实现的内容
Spring 框架监控切入点方法的执行。一旦监控到切入点方法被运行,使用代理机制,动态创建目标对象的代理对象,根据通知类别,在代理对象的对应位置,将通知对应的功能织入,完成完整的代码逻辑运行。
3. AOP 底层使用哪种代理方式
在 spring 中,框架会根据目标类是否实现了接口来决定采用哪种动态代理的方式。
- 默认使用 jdk动态代理,这样可以代理所有的接口类型;
- 如果目标对象没有实现任何接口,则默认采用cglib代理;
- 可强制使用cglib,指定
proxy-target-class = "true"或者基于注解@EnableAspectJAutoProxy(proxyTargetClass = true)
三、基于XML的AOP开发
1. 入门案例
① 导入坐标
<!--导入spring的context坐标,context依赖aop-->
<dependency>
	<groupId>org.springframework</groupId>
	<artifactId>spring-context</artifactId>
	<version>5.0.5.RELEASE</version>
</dependency>
<!-- aspectj的织入 -->
<dependency>
	<groupId>org.aspectj</groupId>
	<artifactId>aspectjweaver</artifactId>
	<version>1.8.13</version>
</dependency>
② 创建目标接口和目标类(内部有切点)
public interface TargetInterface {
	public void method();
}
public class Target  implements TargetInterface{
	public void  method(){
		System.out.println("执行method......");
	}
}
③ 创建切面类
public class MyAspect {

	public void before(){
		System.out.println("前置通知......");
	}
}
④ 将目标类和切面类的对象创建权交给 Spring
<!--    目标对象-->
<bean id="target" class="com.tyt.xml.Target"/>
<!--    切面对象-->
<bean id="myAspect" class="com.tyt.xml.aspect.MyAspect"/>
⑤ 配置织入关系
<!--    配置织入,告诉Spring框架,哪些方法(切点)需要进行增强配置(前置、后置)-->
<aop:config>
	<!--    声明切面-->
	<aop:aspect ref="myAspect">
		<!--切面:切点 + 通知-->
		<aop:before method="before" pointcut="execution(public void com.tyt.xml.Target.method())"/>
	</aop:aspect>
</aop:config>
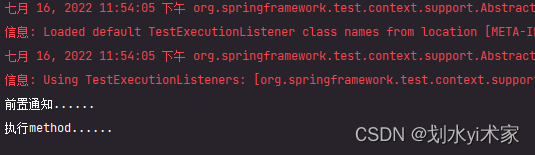
测试:
@RunWith(SpringJUnit4ClassRunner.class)
@ContextConfiguration("classpath:applicationContext.xml")
public class TestXmlDemo {

	@Autowired
	private TargetInterface target;

	@Test
	public void test1(){
		target.method();
	}
}
2. XML配置AOP详解
1. 切点表达式详解
表达式语法:
execution([修饰符] 返回值类型 包名.类名.方法名(参数))
- 访问修饰符可以省略
- 返回值类型、包名、类名、方法名可以使用星号
*代表任意 - 包名与类名之间一个点
.代表当前包下的类,两个点..表示当前包及其子包下的类 - 参数列表可以使用两个点
..表示任意个数,任意类型的参数列表
e.g:
 <!--指定完全-->
execution(public void com.tyt.aop.Target.method())
<!--省略修饰符,任意方法、参数:Target 类下的任意方法任意参数-->
execution(void com.tyt.aop.Target.*(..))
<!--省略修饰符,任意类、方法、参数:aop包下的任意类的任意方法任意参数-->
execution(* com.tyt.aop.*.*(..))
 <!--省略修饰符,任意类、方法、参数:aop包及其子包的任意类的任意方法任意参数-->
execution(* com.tyt.aop..*.*(..))
 <!--均任意-->
execution(* *..*.*(..))
2. 通知类型
通知配置语法格式:
<aop:通知类型 method=“切面类中方法名” pointcut="切点表达式"></aop:通知类型>
通知类型: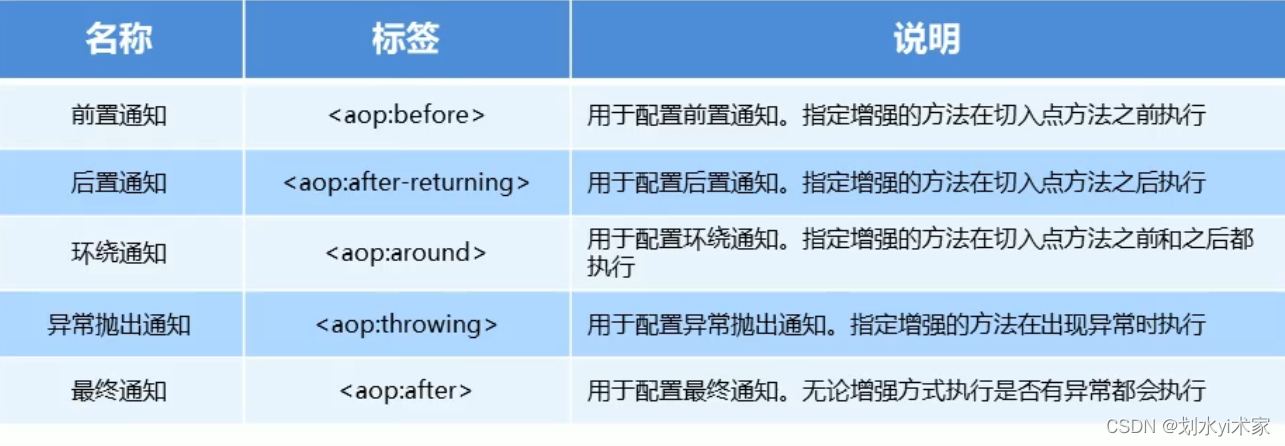
1. 前置通知(before)
在上述入门案例演示的即为前置通知,它指定增强的方法在切入点方法之前执行。
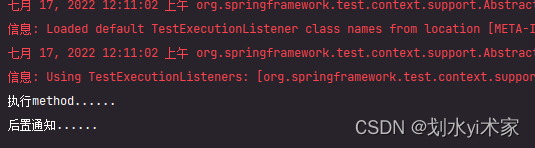
2. 后置通知(after-returning)
指定增强的方法在切入点方法之后执行。
① 在切面类中配置后置增强方法
public class MyAspect {
	public void afterReturning(){
		System.out.println("后置通知......");
	}
}
② 配置织入关系
<aop:config>
	<!--    声明切面-->
	<aop:aspect ref="myAspect">
		<!--切面:切点 + 通知-->
		<aop:after-returning method="afterReturning" pointcut="execution(public void com.tyt.xml.Target.method())"/>
	</aop:aspect>
</aop:config>
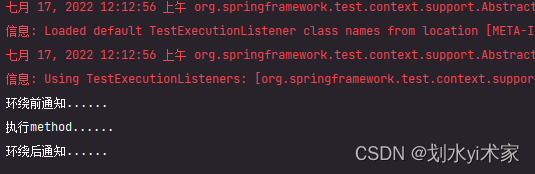
3. 环绕通知(around)
指定增强的方法在切入点方法之前与之后都执行。
① 在切面类中配置环绕增强方法
public class MyAspect {
	/**
	*
	*  @Params ProceedingJoinPoint: 正在执行的连接点==切点
	*  @Return
	*/
	public Object around(ProceedingJoinPoint proceedingJoinPoint) throws Throwable {
		System.out.println("环绕前通知......");
		// 切点方法
		Object result = proceedingJoinPoint.proceed();
		System.out.println("环绕后通知......");
		return result;
	}
}
② 配置织入关系
<aop:config>
	<!--    声明切面-->
	<aop:aspect ref="myAspect">
		<!--切面:切点 + 通知-->
		<aop:around method="around" pointcut="execution(public void com.tyt.xml.Target.method())"/>
	</aop:aspect>
</aop:config>
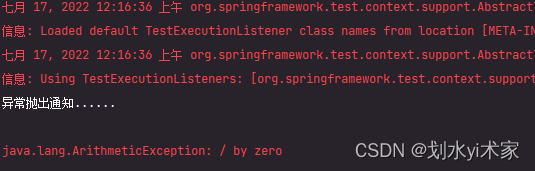
4. 抛出异常通知(after-throwing)
指定增强的方法在出现异常时执行。
① 在切面类中配置异常抛出方法
public class MyAspect {
	public void afterThrowing(){
	 	System.out.println("异常抛出通知......");
	}
}
② 配置织入关系
<aop:config>
	<!--    声明切面-->
	<aop:aspect ref="myAspect">
		<!--切面:切点 + 通知-->
		<aop:after-throwing method="afterThrowing" pointcut="execution(public void com.tyt.xml.Target.method())"/>
	</aop:aspect>
</aop:config>
③ 在执行方法中加入1 / 0,制造bug
public class Target  implements TargetInterface{
	public void  method(){
		int i = 1 / 0;
		System.out.println("执行method......");
	}
}
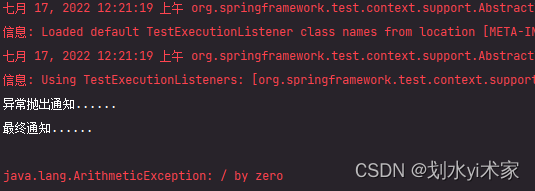
5. 最终通知(after)
指定增强的方法无论是否有异常都执行。
① 在切面类中配置最终通知方法
public class MyAspect {
	public void after(){
		System.out.println("最终通知......");
	}
}
② 配置织入关系
<aop:config>
	<!--    声明切面-->
	<aop:aspect ref="myAspect">
		<!--切面:切点 + 通知-->
		<aop:after-throwing method="afterThrowing" pointcut="execution(public void com.tyt.xml.Target.method())"/>
		<aop:after method="after" pointcut="execution(public void com.tyt.xml.Target.method())"/>
	</aop:aspect>
</aop:config>
③ 在执行方法中加入1 / 0,制造bug
public class Target  implements TargetInterface{
	public void  method(){
		int i = 1 / 0;
		System.out.println("执行method......");
	}
}
3. 切点表达式的抽取
当多个增强的切点表达式相同时,可以将切点表达式进行抽取,在增强中使用 pointcut-ref 属性代替 pointcut 属性来引用抽取后的切点表达式。
<!--配置织入,告诉Spring框架,哪些方法(切点)需要进行增强配置(前置、后置)-->
<aop:config>
	<!--    声明切面-->
	<aop:aspect ref="myAspect">
		<!--抽取切点表达式-->
		<aop:pointcut id="myPointcut" expression="execution(public void com.tyt.xml.Target.method())"/>

		<!--切面:切点 + 通知-->
		<!--<aop:before method="before" pointcut="execution(public void com.tyt.xml.Target.method())"/>-->
		<!--<aop:after-returning method="afterReturning" pointcut="execution(public void com.tyt.xml.Target.method())"/>-->
		<!--<aop:around method="around" pointcut="execution(public void com.tyt.xml.Target.method())"/>-->
		<!--<aop:after-throwing method="afterThrowing" pointcut="execution(public void com.tyt.xml.Target.method())"/>-->
		<!--<aop:after method="after" pointcut="execution(public void com.tyt.xml.Target.method())"/>-->

		<!--使用 pointcut-ref 属性代替 pointcut 属性来引用抽取后的切点表达式-->
		<aop:before method="before" pointcut-ref="myPointcut"/>
		<aop:after-returning method="afterReturning" pointcut-ref="myPointcut"/>
		<aop:around method="around" pointcut-ref="myPointcut"/>
		<aop:after-throwing method="afterThrowing" pointcut-ref="myPointcut"/>
		<aop:after method="after" pointcut-ref="myPointcut"/>
	</aop:aspect>
</aop:config>
四、 基于注解的AOP开发
1. 入门案例
① 创建目标接口和目标类(内部有切点)
public interface TargetInterface {
	public void method();
}
public class Target  implements TargetInterface{
	public void  method(){
		System.out.println("执行method......");
	}
}
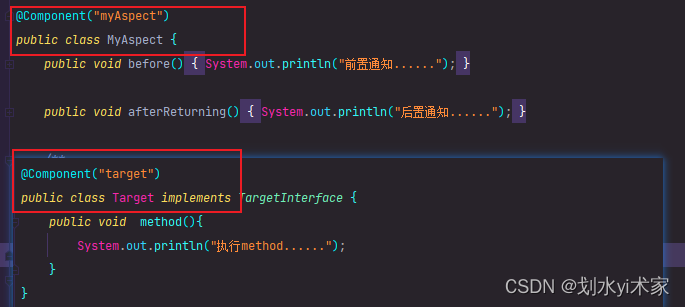
② 创建切面类
public class MyAspect {

	public void before(){
		System.out.println("前置通知......");
	}

	public void afterReturning(){
		System.out.println("后置通知......");
	}

	/**
	*
	*  @Params ProceedingJoinPoint: 正在执行的连接点==切点
	*  @Return
	*/
	public Object around(ProceedingJoinPoint proceedingJoinPoint) throws Throwable {
		System.out.println("环绕前通知......");
		// 切点方法
		Object result = proceedingJoinPoint.proceed();
		System.out.println("环绕后通知......");
		return result;
	}

	public void afterThrowing(){
		System.out.println("异常抛出通知......");
	}

	public void after(){
		System.out.println("最终通知......");
	}
}
③ 将目标类和切面类的对象创建权交给 Spring
④ 在切面类中使用注解配置织入关系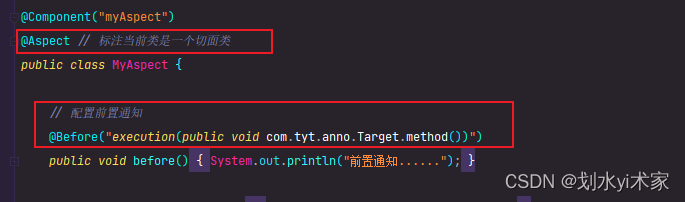
⑤ 定义Spring配置类
@Configuration
@ComponentScan("com.tyt.anno")
@EnableAspectJAutoProxy
public class SpringConfig {

}
测试:
@RunWith(SpringJUnit4ClassRunner.class)
@ContextConfiguration(classes = {SpringConfig.class})
public class TestAnnoDemo {
	@Autowired
	private TargetInterface target;

	@Test
	public void test1(){
		target.method();
	}
}
2. 注解配置AOP详解
1. 注解通知类型
配置语法:
@通知注解("切点表达式")
通知类型: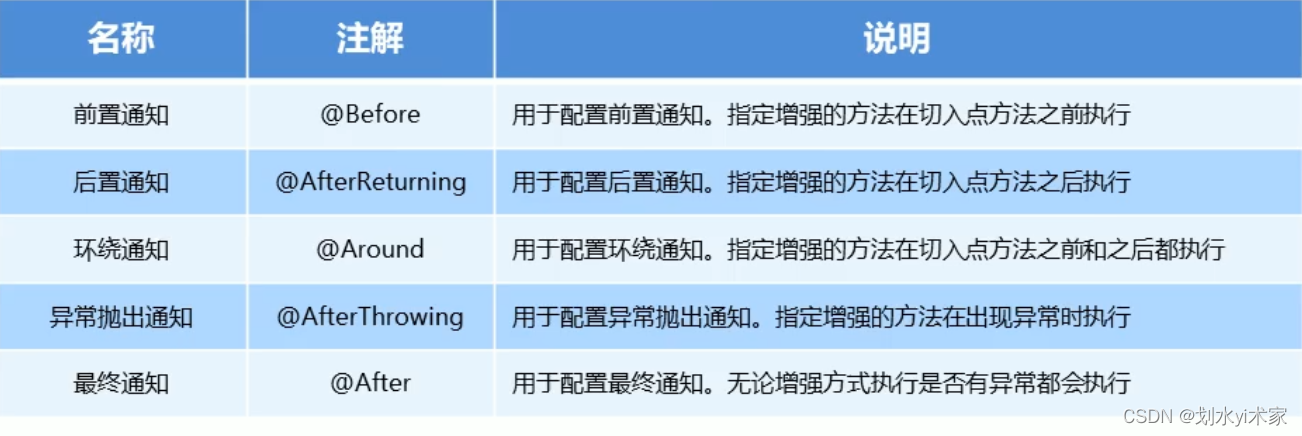
2. 切点表达式的抽取
同 xml配置AOP一样,我们可以将切点表达式抽取。抽取方式是在切面内定义方法,在该方法上使用@Pointcut注解定义切点表达式,然后在在增强注解中进行引用。具体如下:
① 定义切点表达式
@Component("myAspect")
@Aspect // 标注当前类是一个切面类
public class MyAspect {

	// 定义切点表达式
	@Pointcut("execution(public void com.tyt.anno.Target.method())")
	public void myPointcut(){}

	// 配置前置通知
	// @Before("execution(public void com.tyt.anno.Target.method())")
	@Before("myPointcut()")
	public void before(){
		System.out.println("前置通知......");
	}
}
五、AOP通知获取数据
- 获取切入点方法的参数:
①JoinPoint:社用于前置(before)、后置(after-returning)、最终(after)、抛出异常(after-throwing)通知
②PreceedJointPoint:适用于环绕(around)通知
- 获取切入点方法返回值:
① 后置通知(after-returning)
② 环绕通知(around)
- 获取切入点方法运行异常信息
① 抛出异常通知(after-throwing)
② 环绕通知(around)
1. 获取切入点方法的参数
// JoinPoint对象
Onject[] args = joinPoint.getArgs();
// ProceedingJoinPoint对象
Onject[] args = proceedingJoinPoint.getArgs();
@Component("myAspect")
@Aspect
public class MyAspect {
@Pointcut("execution(public void com.tyt.anno.Target.method())")
public void myPointcut(){}
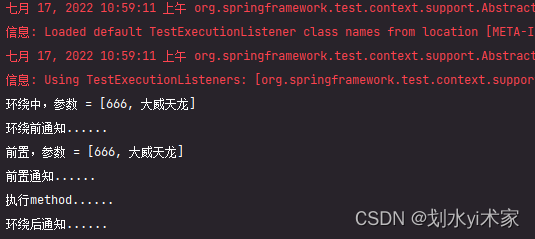
@Before("myPointcut()")
public void before(JoinPoint joinPoint){
Object[] args = joinPoint.getArgs();
System.out.println("前置,参数 = " + Arrays.toString(args));
System.out.println("前置通知......");
}
public Object around(ProceedingJoinPoint proceedingJoinPoint) throws Throwable {
Object[] args = proceedingJoinPoint.getArgs();
System.out.println("环绕中,参数 = " + Arrays.toString(args));
System.out.println("环绕前通知......");
// 切点方法
Object result = proceedingJoinPoint.proceed();
System.out.println("环绕后通知......");
return result;
}
}
@Test
public void test1(){
	target.method(666, "大威天龙");
}
2. 获取切入点方法返回值
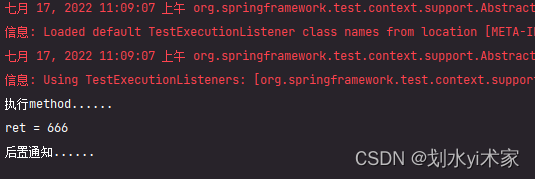
后置通知(after-returning):
// 设置后置通知获取原始方法的返回值,要求returning属性与方法形参相同
@AfterReturning(value = "myPointcut()", returning = "ret")
public void afterReturning(JoinPoint joinPoint, Object ret){
	System.out.println("ret = " + ret);
	System.out.println("后置通知......");
}
环绕通知(around):
环绕通知中可以手工书写对原始方法的调用,得到的结果即为原始方法的返回值
@Around("myPointcut()")
public Object around(ProceedingJoinPoint proceedingJoinPoint) {
	Object ret = proceedingJoinPoint.proceed();
	return ret;
}
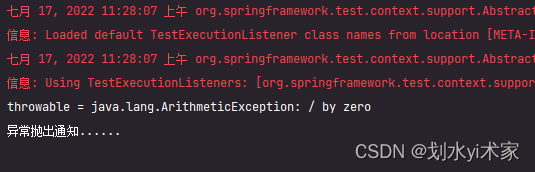
3. 获取切入点方法运行异常信息
抛出异常通知(after-throwing):
// 设置抛出异常后通知获取原始方法运行时抛出的异常对象,要求throwing属性值必须与方法形参名相同
@AfterThrowing(value = "myPointcut()", throwing = "throwable")
public void afterThrowing(JoinPoint joinPoint, Throwable throwable){
	System.out.println("throwable = " + throwable);
	System.out.println("异常抛出通知......");
}
环绕通知(around):
抛出异常后通知可以获取切入点方法运行的异常信息,使用形参可以接收运行时抛出的异常对象
@Around("myPointcut()")
public Object around(ProceedingJoinPoint proceedingJoinPoint) throws Throwable {
	Object result = null;
	try {
		result = proceedingJoinPoint.proceed();
	} catch (Throwable t) {
		t.printStackTrace();
	}
	return result;
}
下期文章: