1、使用spring framework 5.2.1 REALSE

2、创建maven 工程
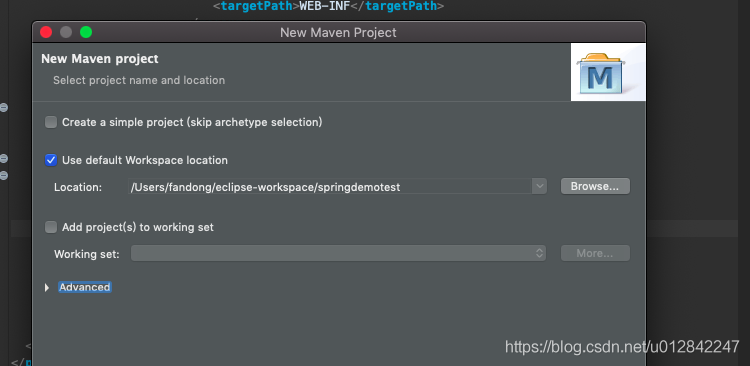


点击完成,这个maven工程就是搭建OK了。
---- 本地安装tomcat,我使用的版本是tomcat8.5

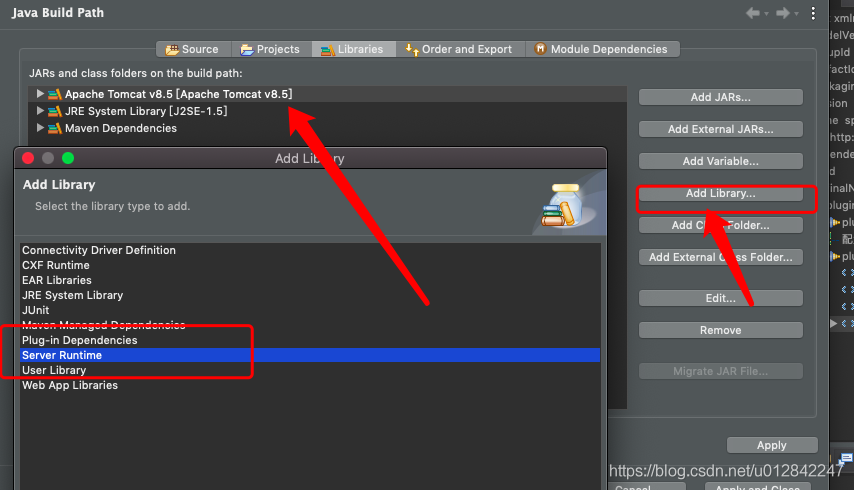
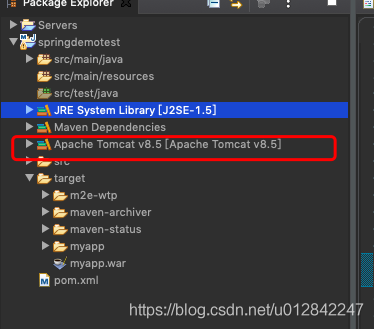
添加后,会出现这个。
引入springMVC,pom.xml
org.springframework
spring-webmvc
5.2.1.RELEASE
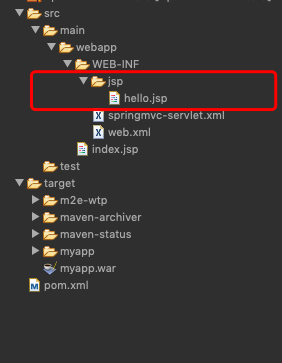
---需要配置的目录如下:

web.xml 是默认的文件在里面配置如下:
/p>
"-//Sun Microsystems, Inc.//DTD Web Application 2.3//EN"
"http://java.sun.com/dtd/web-app_2_3.dtd" >
Archetype Created Web Application
springmvc
org.springframework.web.servlet.DispatcherServlet
1
springmvc
/
servlet 的 name 是 springmvc 要和上面截图的springmvc-servlet.xml 前缀一样,不然在启动时会遇到读取不到的问题。
xmlns:xsi="http://www.w3.org/2001/XMLSchema-instance"
xmlns:context="http://www.springframework.org/schema/context"
xmlns:mvc="http://www.springframework.org/schema/mvc"
xsi:schemaLocation="http://www.springframework.org/schema/beans
http://www.springframework.org/schema/beans/spring-beans-3.2.xsd
http://www.springframework.org/schema/context
http://www.springframework.org/schema/context/spring-context-3.2.xsd
http://www.springframework.org/schema/mvc
http://www.springframework.org/schema/mvc/spring-mvc.xsd">
/WEB-INF/jsp/
.jsp
设定component-scan 扫描包的,
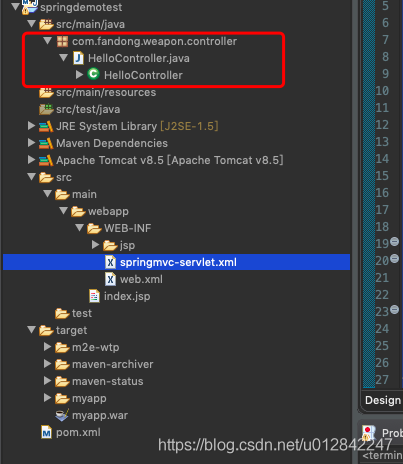
---HelloController
package com.fandong.weapon.controller;
import org.springframework.stereotype.Controller;
import org.springframework.ui.ModelMap;
import org.springframework.web.bind.annotation.RequestMapping;
import org.springframework.web.bind.annotation.RequestMethod;
@Controller
public class HelloController {
@RequestMapping(value="/hello",method=RequestMethod.GET)
public String printHello(ModelMap model) {
model.addAttribute("message","你好的,小子");
System.out.println("-------------------------************** hmemee");
return "hello";
}
}
设定jsp页面:
这个表,
pageEncoding="UTF-8"%>
Insert title here${message}
注意 isELIgnored="false" 否则到时message 会无法序列化。
----本地启动。
---搭建tomcat 服务器。
下载tomcat8.5 解压:
启动:
cd /tomcat/bin
./startup.sh
---修改tomcat文件:
[root@hadoop01 conf]# ls
Catalina catalina.policy catalina.properties context.xml jaspic-providers.xml jaspic-providers.xsd logging.properties server.xml tomcat-users.xml tomcat-users.xsd web.xml
[root@hadoop01 conf]# cat tomcat-users.xml
xmlns:xsi="http://www.w3.org/2001/XMLSchema-instance"
xsi:schemaLocation="http://tomcat.apache.org/xml tomcat-users.xsd"
version="1.0">
[root@hadoop01 conf]#
设定用户、账户和密码。
--在修改可以远程访问:
[root@hadoop01 manager]# pwd
/opt/tomcat/tomcat-8.5.50/webapps/manager
[root@hadoop01 manager]# cd META-INF/
[root@hadoop01 META-INF]# ls
context.xml
[root@hadoop01 META-INF]# cat context.xml
[root@hadoop01 META-INF]#
注释掉:
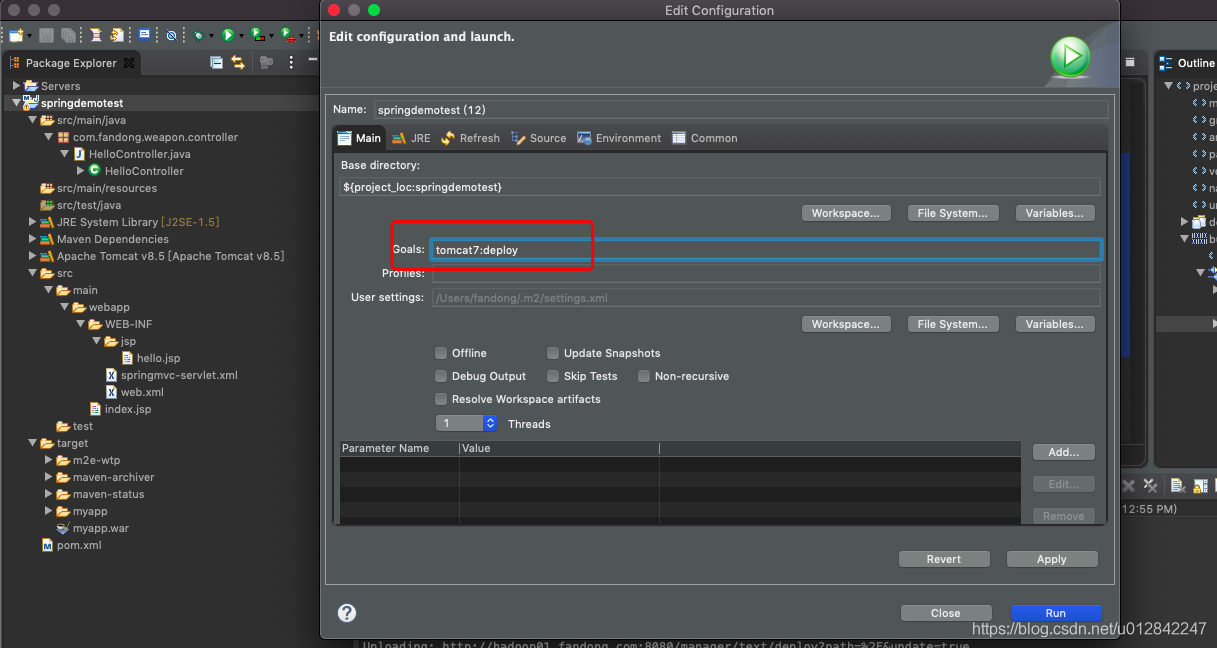
----在pom.xml 配置tomcat-maven 插件
org.apache.tomcat.maven
tomcat7-maven-plugin
2.2
/
http://hadoop01.fandong.com:8080/manager/text
tomcat
tomcat
true
这里一定是true 不然更新会出错的。
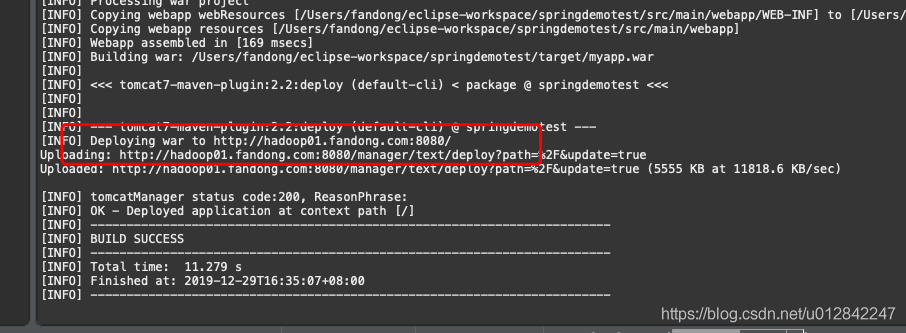
--结果:
---浏览器访问:
