二、基于内存的用户、URL权限配置
1、配置内存用户角色
(1)、我们可以通过继承 WebSecurityConfigurerAdapter类,重写其 configure(AuthenticationManagerBuilder auth)方法设置内存用户,如下所示:
@Configuration
public class WebSecurityConfig extends WebSecurityConfigurerAdapter {

    //配置内存用户
    @Override
    protected void configure(AuthenticationManagerBuilder auth) throws Exception {
        auth.inMemoryAuthentication()// 设置两个内存账户
                .withUser("user").password("123").roles("USER")
                .and()
                .withUser("admin").password("admin").roles("ADMIN")
                .and()
                .passwordEncoder(NoOpPasswordEncoder.getInstance()); //设置密码加密方式
    }

}
注意:基于内存的用户配置在配置角色时不需要添加“ROLE_”前缀,而下文介绍的基于数据库的认证配置角色时需要添加“ROLE_”前缀。
(2)、配置完成后,重启项目,就可以分别使用 user 和 admin 登录了。
2、配置URL访问权限
(1)上面配置完毕后受保护的资源都是默认的,两个用户登录没有任何区别,而真正项目中我们需要根据实际情况进行角色管理。要实现这个功能只需重写 WebSecurityConfigurerAdapter 中的另一个方法即可。完整的代码如下所示:
@Configuration
public class WebSecurityConfig extends WebSecurityConfigurerAdapter {

    //配置内存用户
    @Override
    protected void configure(AuthenticationManagerBuilder auth) throws Exception {
        auth.inMemoryAuthentication()// 设置两个内存账户
                .withUser("user").password("123").roles("USER")
                .and()
                .withUser("admin").password("admin").roles("ADMIN")
                .and()
                .passwordEncoder(NoOpPasswordEncoder.getInstance());
    }

    // URL访问权限配置
    @Override
    protected void configure(HttpSecurity http) throws Exception {
        http.authorizeRequests().antMatchers("/test").hasRole("USER") // “/test” 只能拥有USER角色的用户才可以访问
                .antMatchers("/add").hasRole("ADMIN") // “/add” 接口只能拥有ADMIN角色的用户才可以访问。
                .anyRequest().authenticated()
                .and().formLogin().loginProcessingUrl("/login").permitAll()
                .and().csrf().disable();
    }
}
说明:其中 formLogin().loginProcessingUrl("/login").permitAll() 支持表单提交登录,并且 /login 登录接口不需要进程认证。
(2)、在Controller中添加几个方法,如下所示:
@RestController
public class TestController {
@GetMapping("/test")
public String test(){
return "SpringSecurity 基本配置成功!";
}
@GetMapping("/add")
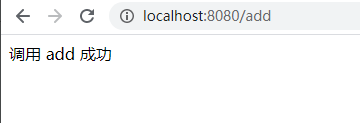
public String add(){
return "调用 add 成功";
}
@GetMapping("/other")
public String other(){
return "other method";
}
}(4)、使用 admin 用户登录,访问 “/add”可以正常访问,访问“/test” 将会出现异常

版权声明:本文为small_love原创文章,遵循CC 4.0 BY-SA版权协议,转载请附上原文出处链接和本声明。