一、安装一些必备的软件
Centos7.2下载地址:https://archive.kernel.org/centos-vault/7.2.1511/isos/x86_64/CentOS-7-x86_64-DVD-1511.iso
Centos7.2安装教程:http://1130739.blog.51cto.com/1120739/1738791
CentOS官网历史发行版本下载地址:http://archive.kernel.org/centos-vault/
注:当CentOS的一个新版本发布时,官方会将上一个版本移入到这里面,当需要安装或使用旧发行版本时,可以从这里下载。
使用yum安装一些依赖:
yum -y install net-tools
yum -y install ntpdate
yum -y install wget
yum -y install perl
yum -y install yum-utils
yum -y install autoconf
yum -y install automake
yum -y install cyrus-sasl-devel
yum -y install flex
yum -y install gcc
yum -y install gcc-c++
yum -y install gdb
yum -y install krb5-server
yum -y install libtool
yum -y install make
yum -y install openssl-devel
yum -y install patch
yum -y install redhat-lsb-core
yum -y install rsync
yum -y install unzip
yum -y install vim-common
yum install -y bind-utils
yum install -y psmisc
yum install -y libxslt
yum install -y sqlite
yum install -y fuse
yum install -y fuse-libs
yum install -y redhat-lsb
yum install -y mod_ssl
yum install -y libtirpc-devel
yum install -y python-devel.x86_64

# yum -y install net-tools ntpdate wget perl yum-utils autoconf automake cyrus-sasl-devel flex gcc gcc-c++ gdb krb5-server libtool make openssl-devel patch redhat-lsb-core rsync unzip vim-common bind-utils psmisc libxslt sqlite fuse fuse-libs redhat-lsb mod_ssl libtirpc-devel python-devel.x86_64
二、基础环境配置
参考文章大数据各组件安装(数据中台搭建)中的第一节 基础环境配置(三台机器都操作) 内容即可。
注:其中的创建 hadoop 用户暂时先可以不做,本文章安装 ambari 都是在 root 用户下。
安装 mysql 也可以参考大数据各组件安装(数据中台搭建)中的 安装MySQL 步骤。
注:为了平衡各个节点只见的资源,我这里把 mysql 安装在了 node03 节点上。
mysql> show databases;
ERROR 1820 (HY000): You must reset your password using ALTER USER statement before executing this statement.

mysql> ALTER USER 'root'@'localhost' IDENTIFIED BY 'root%123';
Query OK, 0 rows affected (0.00 sec)

mysql> grant all privileges on *.* to 'root'@'%' identified by 'root%123';
Query OK, 0 rows affected, 1 warning (0.00 sec)
[root@node01 mnt]# mkdir -p /usr/share/java/
[root@node01 mnt]# cd /usr/share/java/
[root@node01 java]# cp /mnt/mysql-connector-java-5.1.31-bin.jar /usr/share/java/mysqlconnector-java.jar
三、安装 Ambari
1. 安装配置 httpd 服务(主服务器即node01):
systemctl status httpd
systemctl start httpd
# 设置开机自启动
systemctl enable httpd

mkdir -p /var/www/html/hdp315-centos7
tar -zxvf /mnt/ambari-2.7.5.0-centos7.tar.gz -C /var/www/html/hdp315-centos7
tar -zxvf /mnt/HDP-3.1.5.0-centos7-rpm.tar.gz -C /var/www/html/hdp315-centos7
tar -zxvf /mnt/HDP-GPL-3.1.5.0-centos7-gpl.tar.gz -C /var/www/html/hdp315-centos7
tar -zxvf /mnt/HDP-UTILS-1.1.0.22-centos7.tar.gz -C /var/www/html/hdp315-centos7

# 路径分别为:
/var/www/html/hdp315-centos7/HDP/centos7/3.1.5.0-152
/var/www/html/hdp315-centos7/HDP-GPL/centos7/3.1.5.0-152
/var/www/html/hdp315-centos7/HDP-UTILS/centos7/1.1.0.22
/var/www/html/hdp315-centos7/ambari/centos7/2.7.5.0-72
2. 配置本地 Ambari 本地 YUM 源:
[root@node01 ~]# cd /etc/yum.repos.d/
[root@node01 yum.repos.d]# vim ambari.repo
[CentOS7-HDP]
name=CentOS7-HDP
baseurl=http://node01/hdp315-centos7/HDP/centos7/3.1.5.0-152
gpgcheck=0
enabled=1
[CentOS7-HDP-GPL]
name=CentOS7-HDP-GPL
baseurl=http://node01/hdp315-centos7/HDP-GPL/centos7/3.1.5.0-152
gpgcheck=0
enabled=1
[CentOS7-HDP-UTILS]
name=CentOS7-HDP-UTILS
baseurl=http://node01/hdp315-centos7/HDP-UTILS/centos7/1.1.0.22
gpgcheck=0
enabled=1
[CentOS7-ambari]
name=CentOS7-ambari
baseurl=http://node01/hdp315-centos7/ambari/centos7/2.7.5.0-72
gpgcheck=0
enabled=1
将配置文件传到其他两个节点上:
[root@node01 yum.repos.d]# scp /etc/yum.repos.d/ambari.repo root@node02:/etc/yum.repos.d/
[root@node01 yum.repos.d]# scp /etc/yum.repos.d/ambari.repo root@node03:/etc/yum.repos.d/
三台机器生效:
[root@node01 yum.repos.d]# mkdir yumbak
[root@node01 yum.repos.d]# mv CentOS-* yumbak

# 清除缓存:
yum clean all
# 生成缓存:
yum makecache
# 重新检测:
yum repolist
3. 安装 Ambari(可以不连接网络):
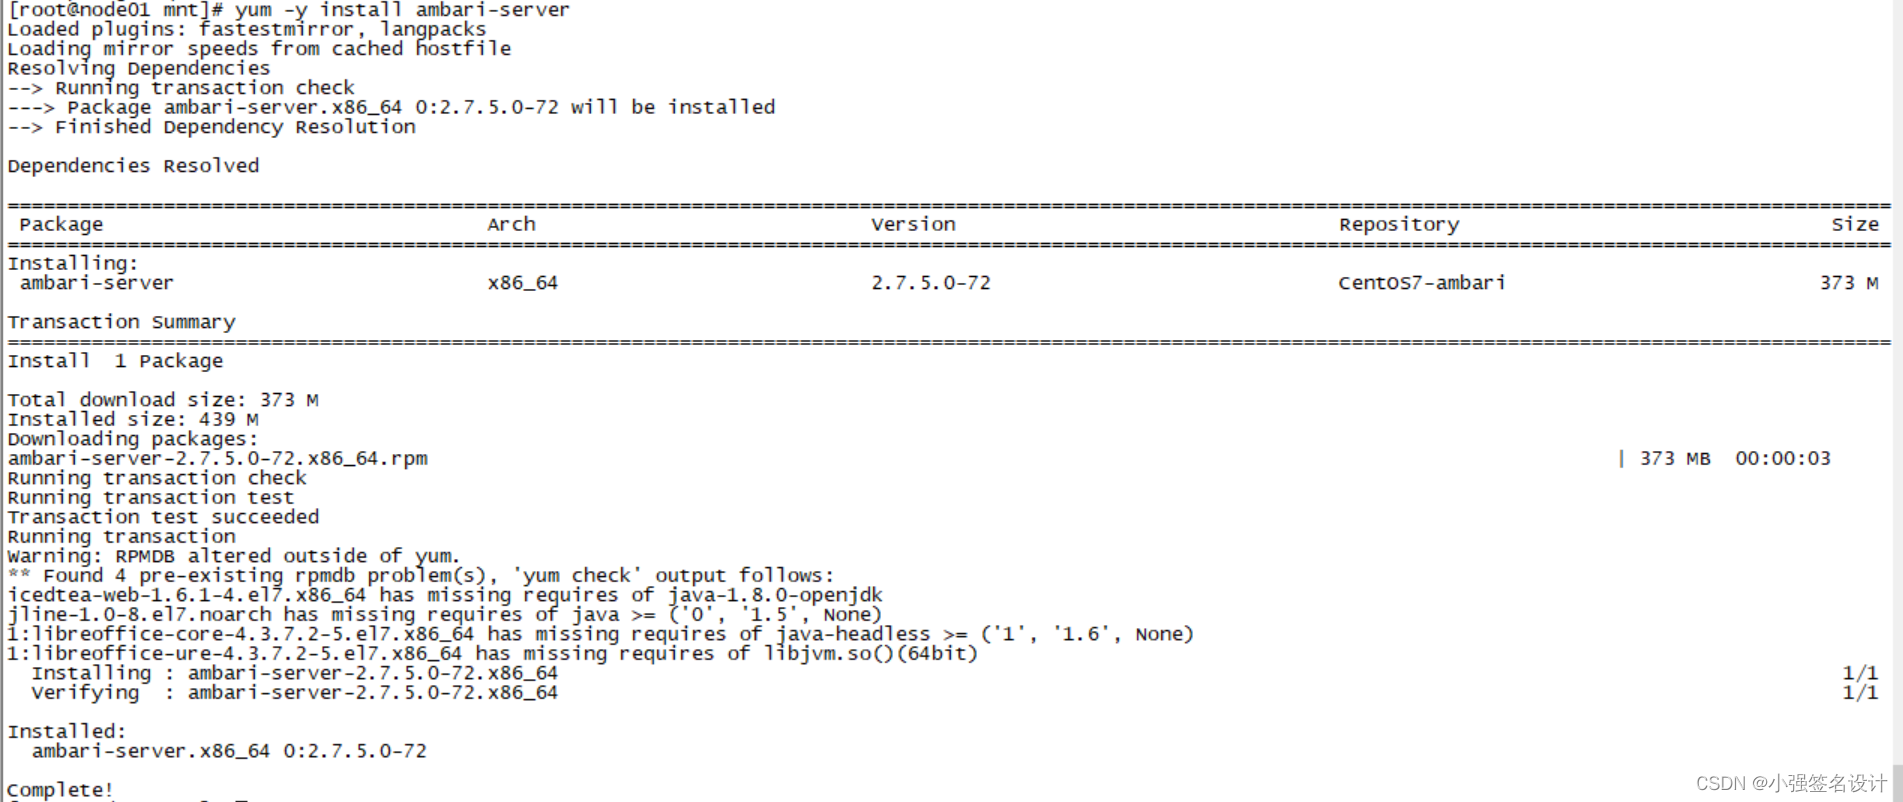
3.1 yum离线安装 Ambari-Server
[root@node01 yum.repos.d]# yum -y install ambari-server
遇到的问题:如图所示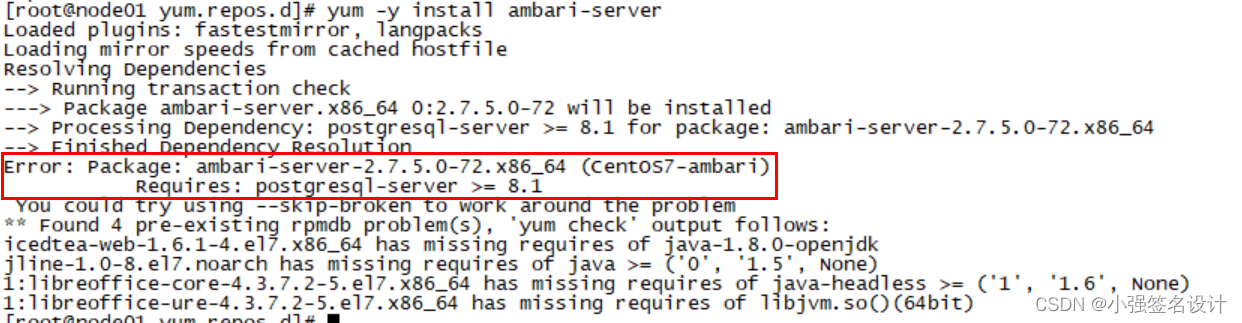
解决:参考 Linux环境下的PostgreSQL离线安装,去官网 https://www.postgresql.org/ 下载下面三个包后离线安装:
rpm -ivh postgresql11-libs-11.2-1PGDG.rhel7.x86_64.rpm
rpm -ivh postgresql11-11.2-1PGDG.rhel7.x86_64.rpm
rpm -ivh postgresql11-server-11.2-1PGDG.rhel7.x86_64.rpm
3.2 初始化元数据库
[root@node01 mnt]# scp /var/lib/ambari-server/resources/Ambari-DDL-MySQL-CREATE.sql node03:/mnt

# 进入 MySQL 数据库命令行:
[root@node03 mnt]# mysql -uroot -proot%123

# 执行以下命令:
create database ambari DEFAULT CHARSET utf8 COLLATE utf8_general_ci;
CREATE USER 'ambari'@'%' IDENTIFIED BY 'ambari';
GRANT ALL ON ambari.* TO 'ambari'@'%';
FLUSH PRIVILEGES;
use ambari;
source /mnt/Ambari-DDL-MySQL-CREATE.sql;
3.3 设置 Ambari-Server
[root@node01 ~]# ambari-server setup
Using python  /usr/bin/python
Setup ambari-server
Checking SELinux...
SELinux status is 'disabled'
Customize user account for ambari-server daemon [y/n] (n)? n
Adjusting ambari-server permissions and ownership...
Checking firewall status...
Checking JDK...
[1] Oracle JDK 1.8 + Java Cryptography Extension (JCE) Policy Files 8
[2] Custom JDK
==============================================================================
Enter choice (1): 2
WARNING: JDK must be installed on all hosts and JAVA_HOME must be valid on all hosts.
WARNING: JCE Policy files are required for configuring Kerberos security. If you plan to use Kerberos,please make sure JCE Unlimited Strength Jurisdiction Policy Files are valid on all hosts.
Path to JAVA_HOME: /opt/java/jdk1.8.0_91
Validating JDK on Ambari Server...done.
Check JDK version for Ambari Server...
JDK version found: 8
Minimum JDK version is 8 for Ambari. Skipping to setup different JDK for Ambari Server.
Checking GPL software agreement...
GPL License for LZO: https://www.gnu.org/licenses/old-licenses/gpl-2.0.en.html
Enable Ambari Server to download and install GPL Licensed LZO packages [y/n] (n)? y
Completing setup...
Configuring database...
Enter advanced database configuration [y/n] (n)? y
Configuring database...
==============================================================================
Choose one of the following options:
[1] - PostgreSQL (Embedded)
[2] - Oracle
[3] - MySQL / MariaDB
[4] - PostgreSQL
[5] - Microsoft SQL Server (Tech Preview)
[6] - SQL Anywhere
[7] - BDB
==============================================================================
Enter choice (1): 3
Hostname (localhost): node03
Port (3306):
Database name (ambari):
Username (ambari):
Enter Database Password (bigdata): ambari
Re-enter password: ambari
Configuring ambari database...
Enter full path to custom jdbc driver: /usr/share/java/mysqlconnector-java.jar
Configuring remote database connection properties...
WARNING: Before starting Ambari Server, you must run the following DDL directly from the database shell to create the schema: /var/lib/ambari-server/resources/Ambari-DDL-MySQL-CREATE.sql
Proceed with configuring remote database connection properties [y/n] (y)? y
Extracting system views...
ambari-admin-2.7.5.0.72.jar
....
Ambari repo file doesn't contain latest json url, skipping repoinfos modification
Adjusting ambari-server permissions and ownership...
Ambari Server 'setup' completed successfully.
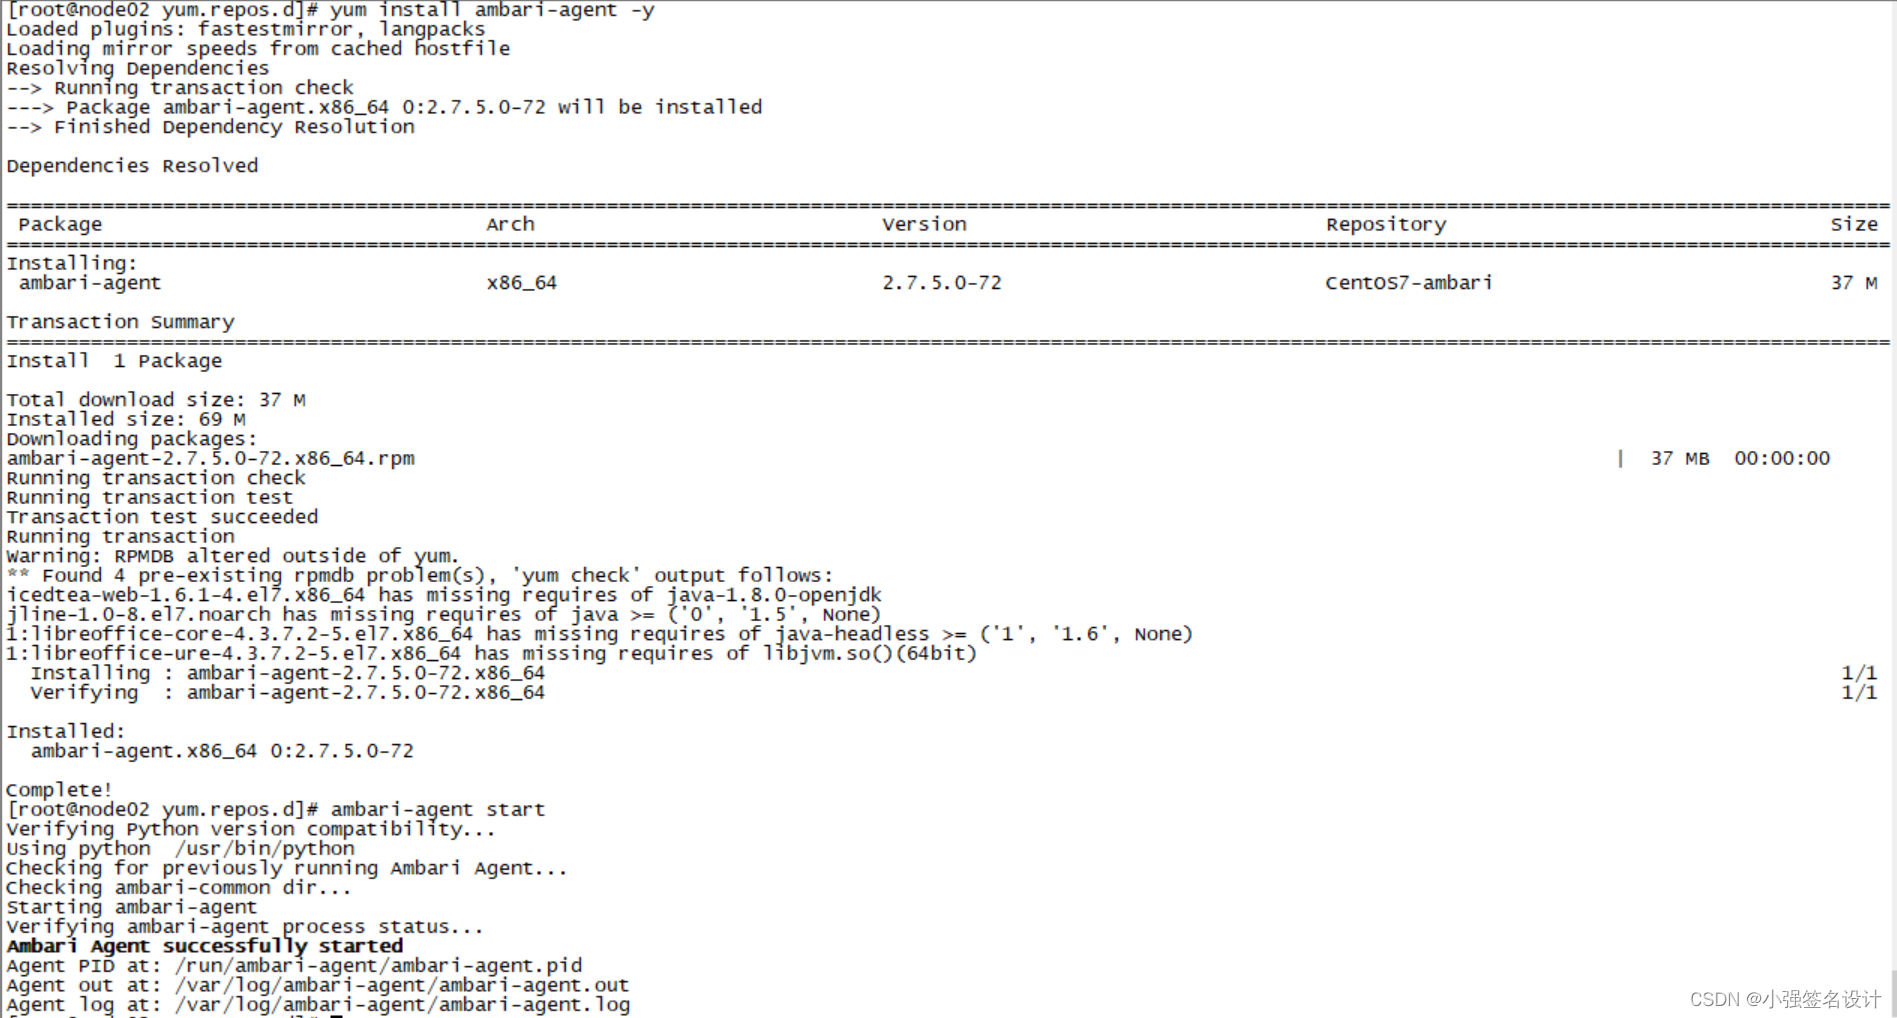
3.4 安装 Ambari-Agent (所有节点都要安装)
yum install ambari-agent -y
ambari-agent start
3.5 安在 node01上启动 amabri-server
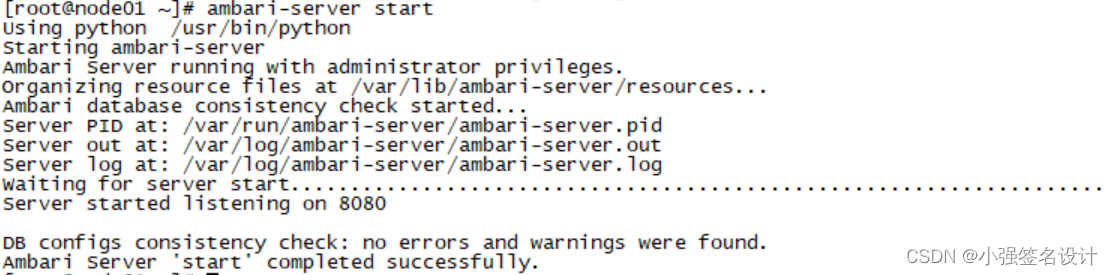
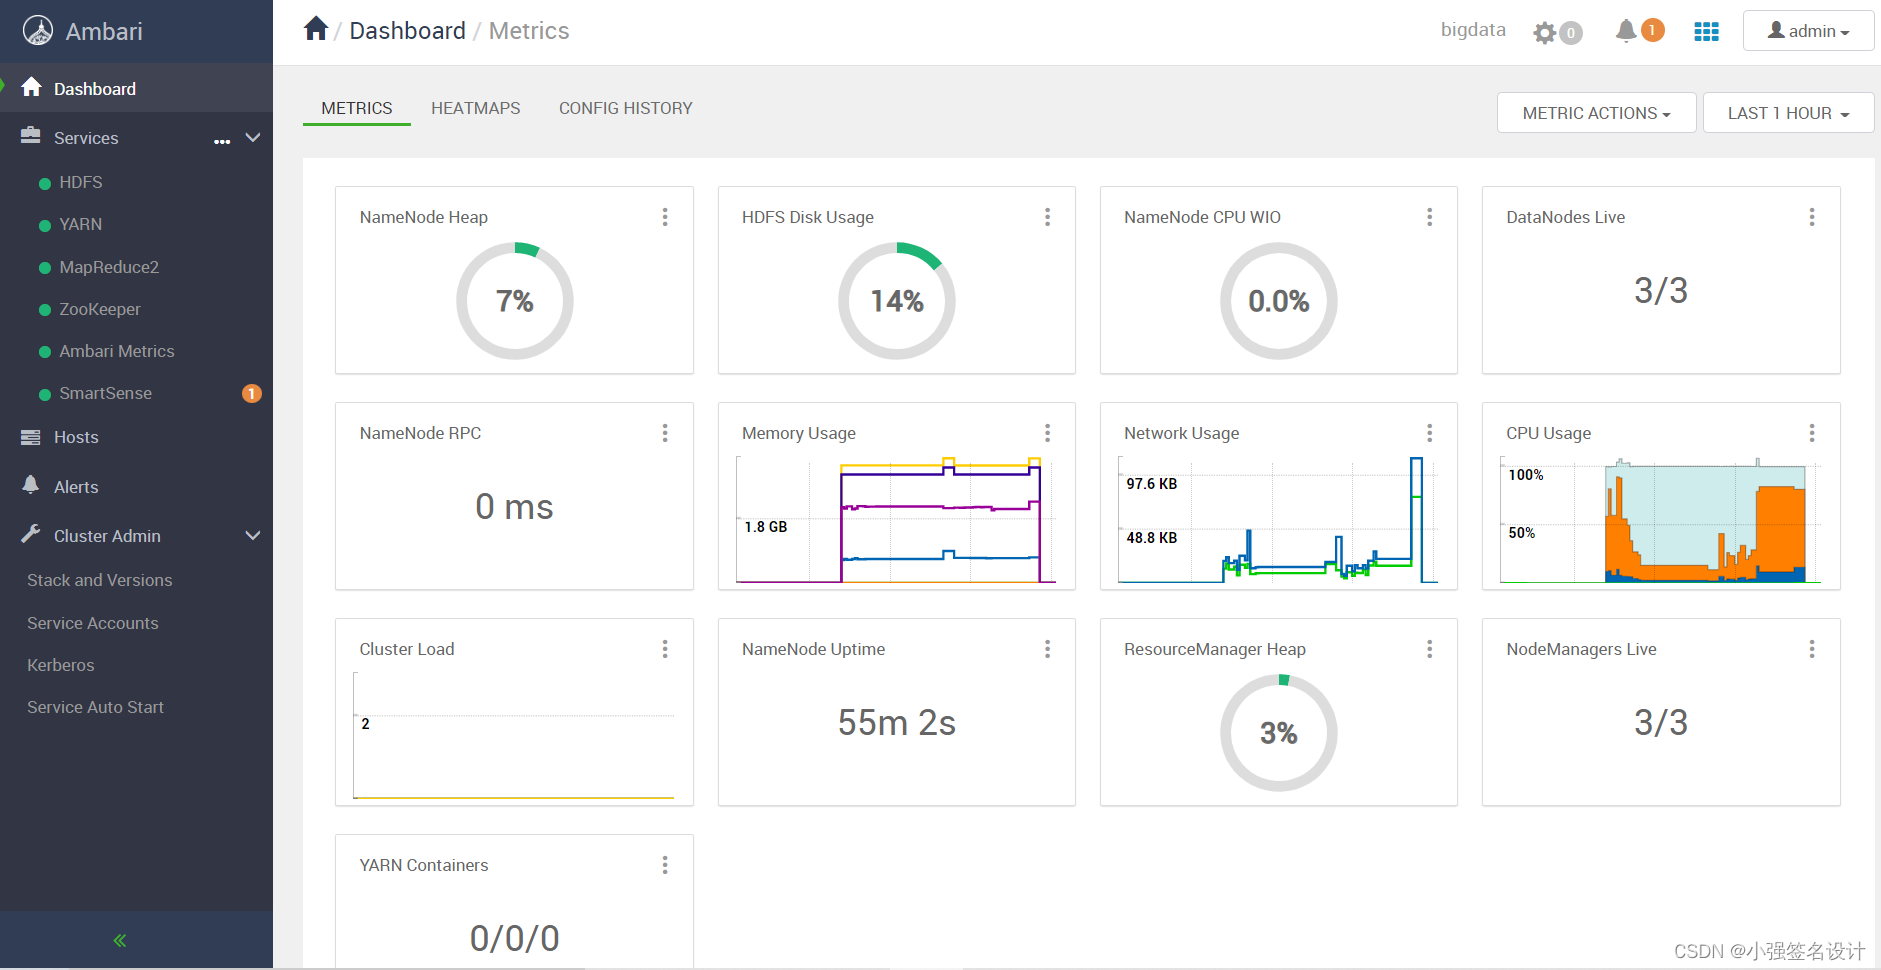
访问 web UI: http://node01:8080/ ,默认端口 8080,Username:admin;Password:admin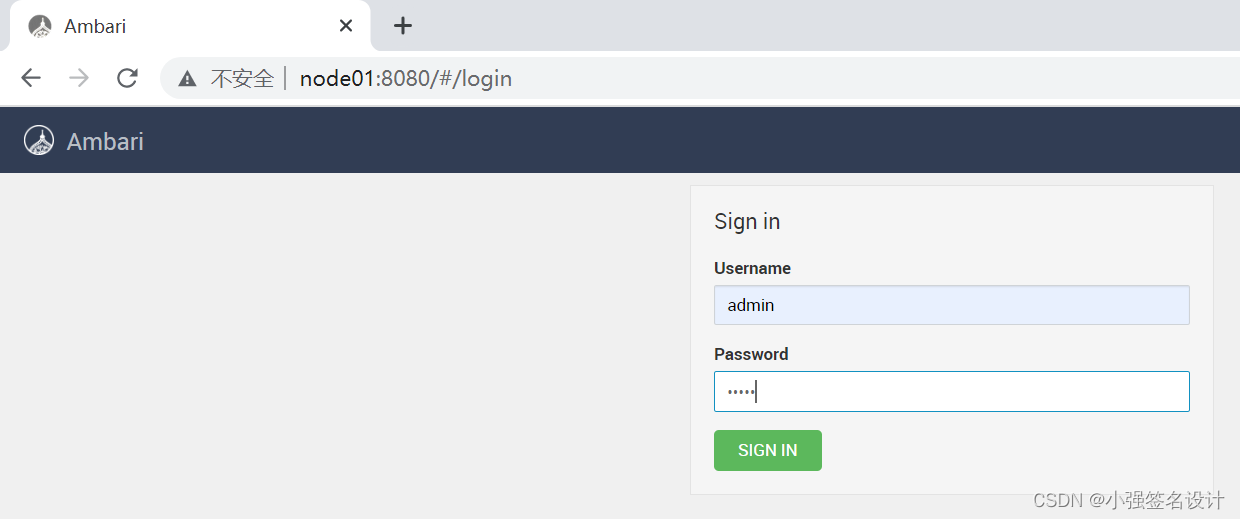
3.6 设置 Cluster information
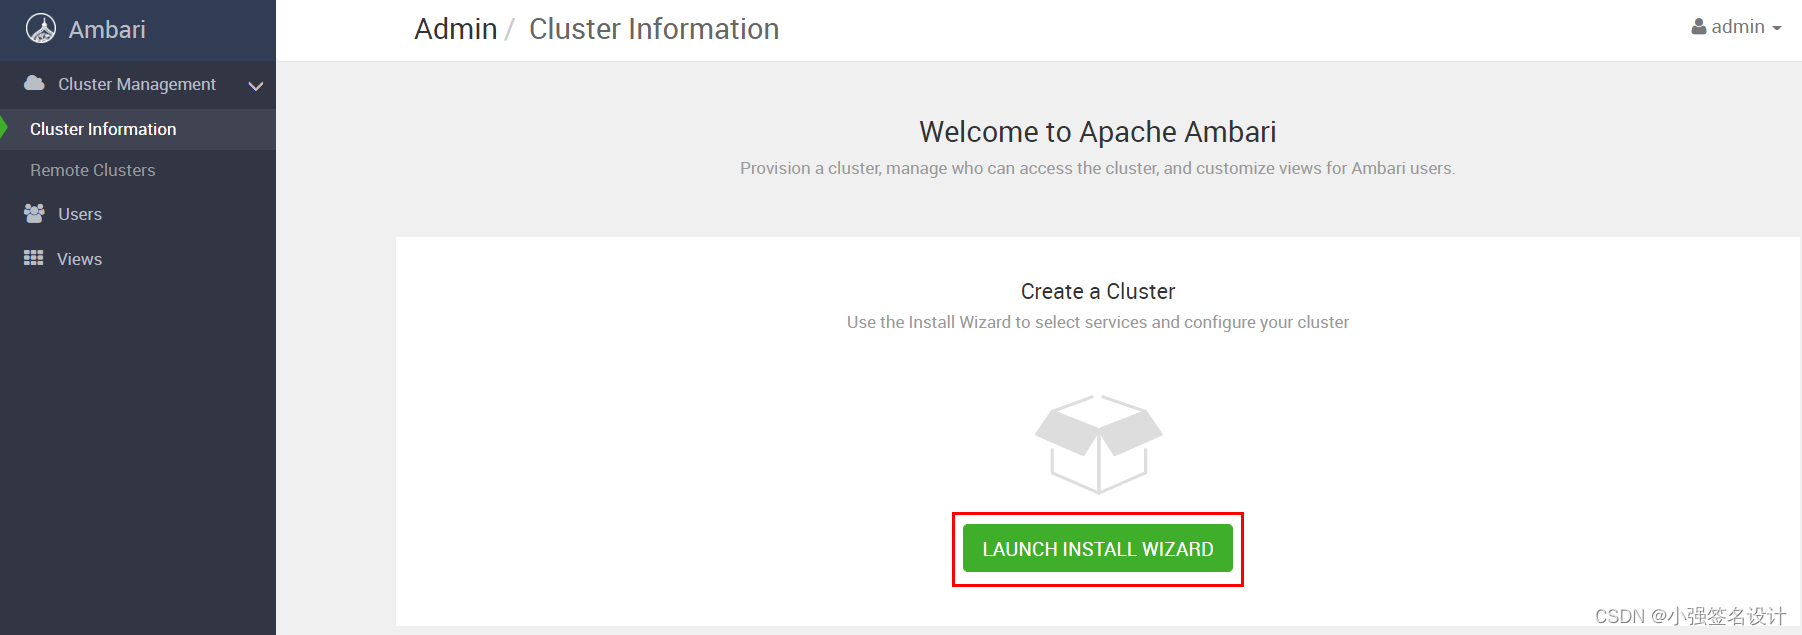
设置集群名称: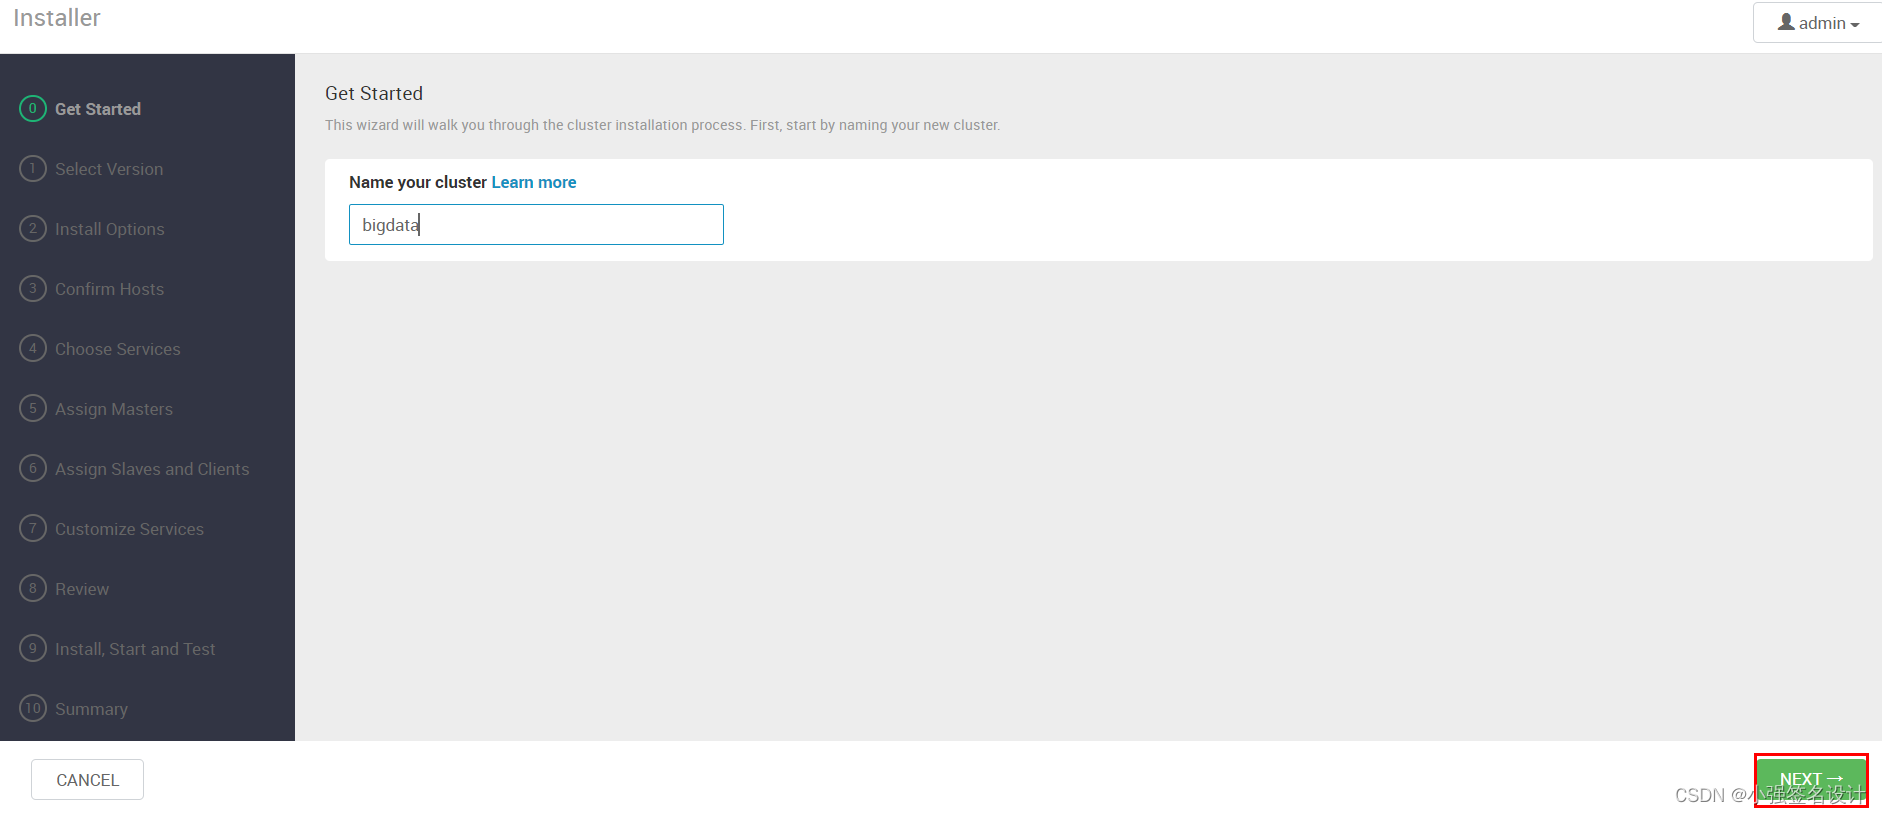
点击 Next,选择 HDP 版本:
设置本地 repository,只保留 redhat7,并填写配置好的 HDP本地源:
3.7 注册主机
我们按照下图所示注册主机到Ambari:
[root@node01 ~]# vim ~/.ssh/id_rsa
# 注意:这个文件中的内容要全部复制,包括BEGIN到END和相应的虚线

点击下一步,开始注册: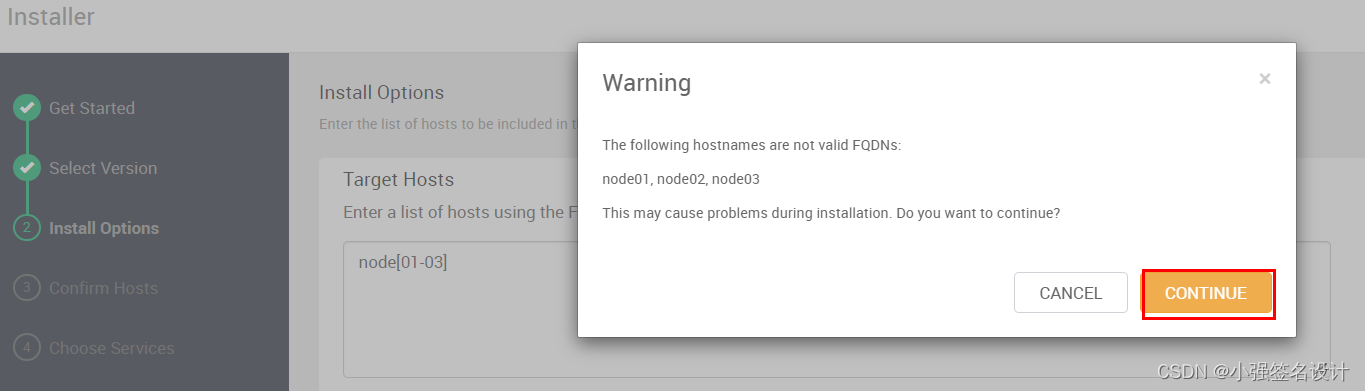

检查完毕:
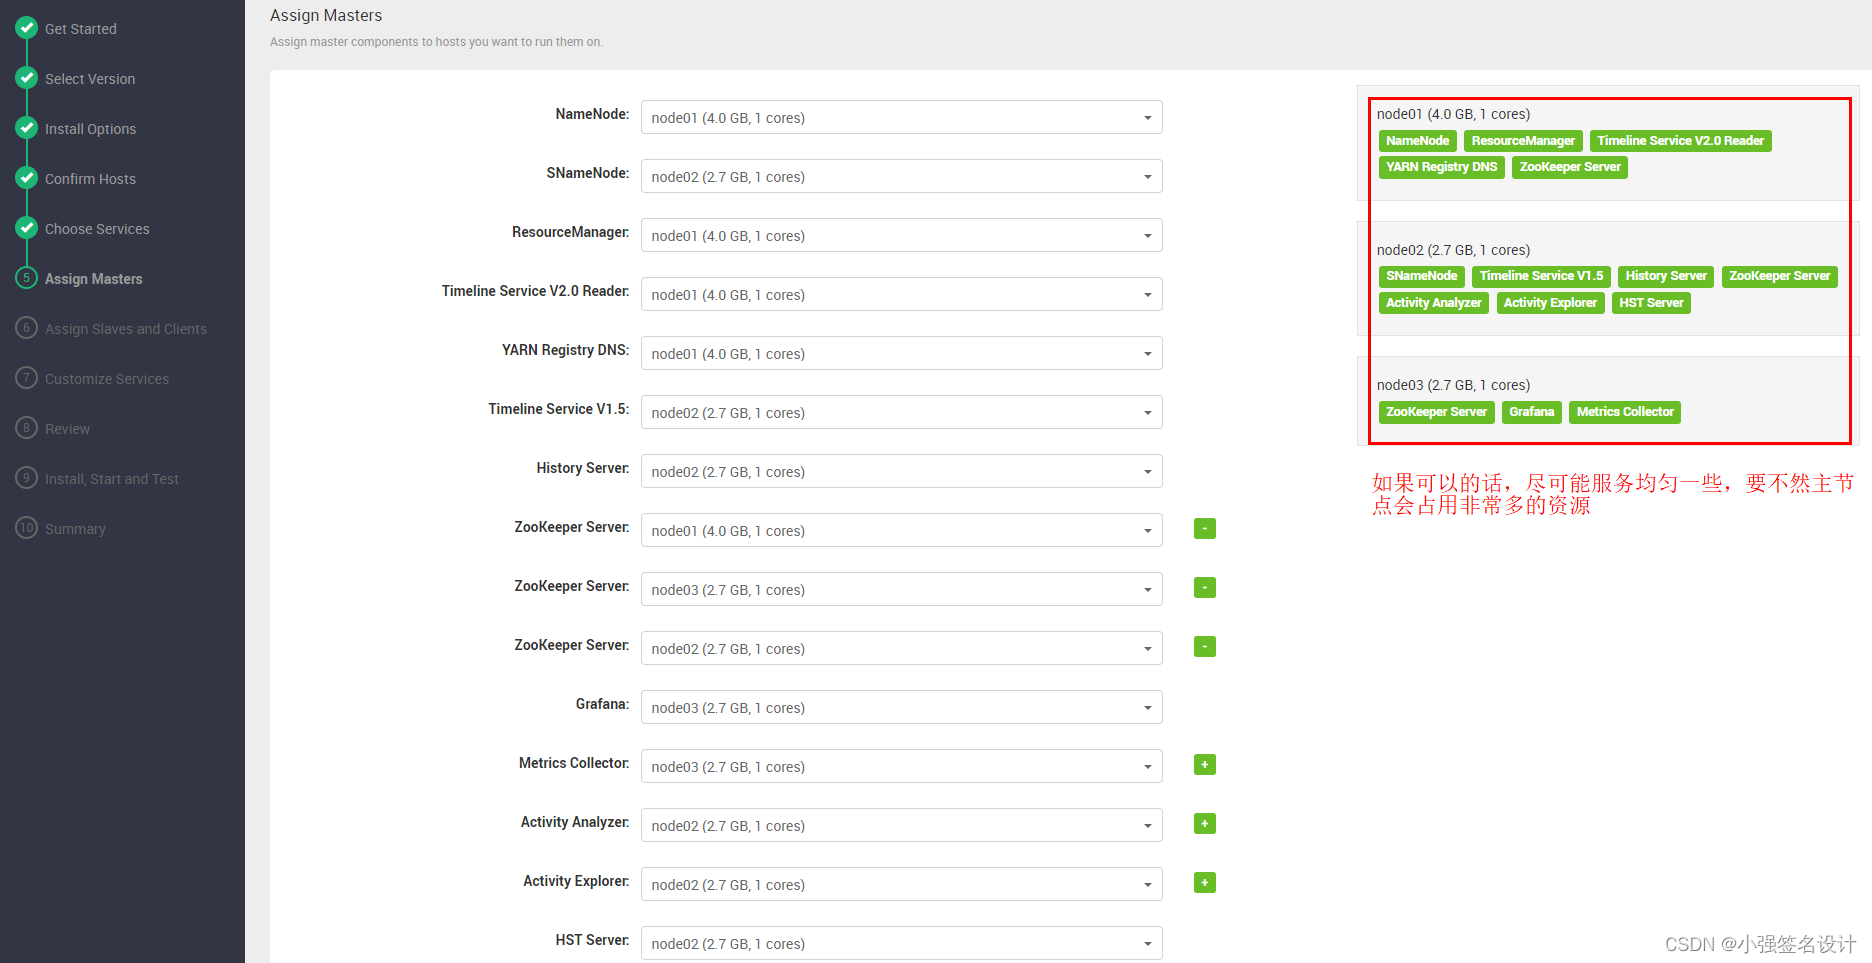
点击下一步,进入安装组件界面。
四、Ambari 安装大数据平台
组件安装不能一次都安装,容易出现问题,所以安装组件是由顺序的,一定要注意。
4.1 安装HDFS、YARN+MapReduce2、Zookeeper、Ambari Metrics:


点击下一步:

点击下一步,设置如下:
点击下一步,设置密码:
点击下一步,不用修改:
点击下一步。保持默认:
将 yarn 配置文件 Advanced yarn-hbase-env 中的 is_hbase_system_service_launch 和 use_external_hbase 勾选,解决后面 Timeline Service V2.0 Reader无法启动的问题。点击下一步:

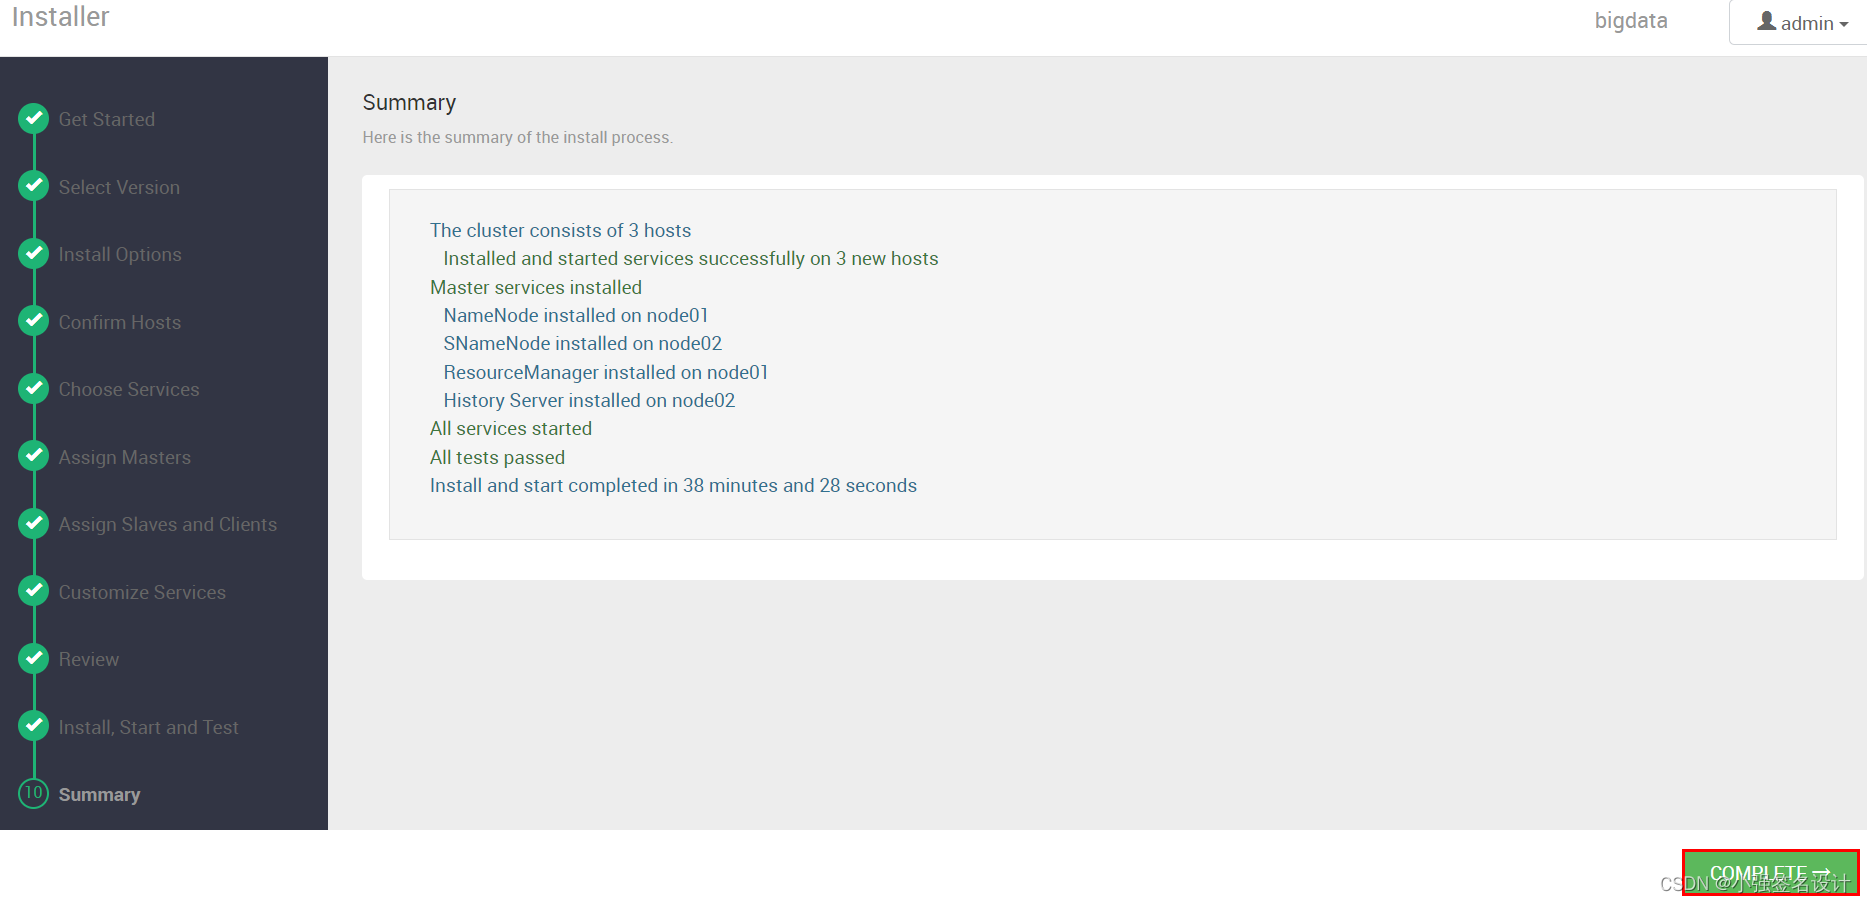
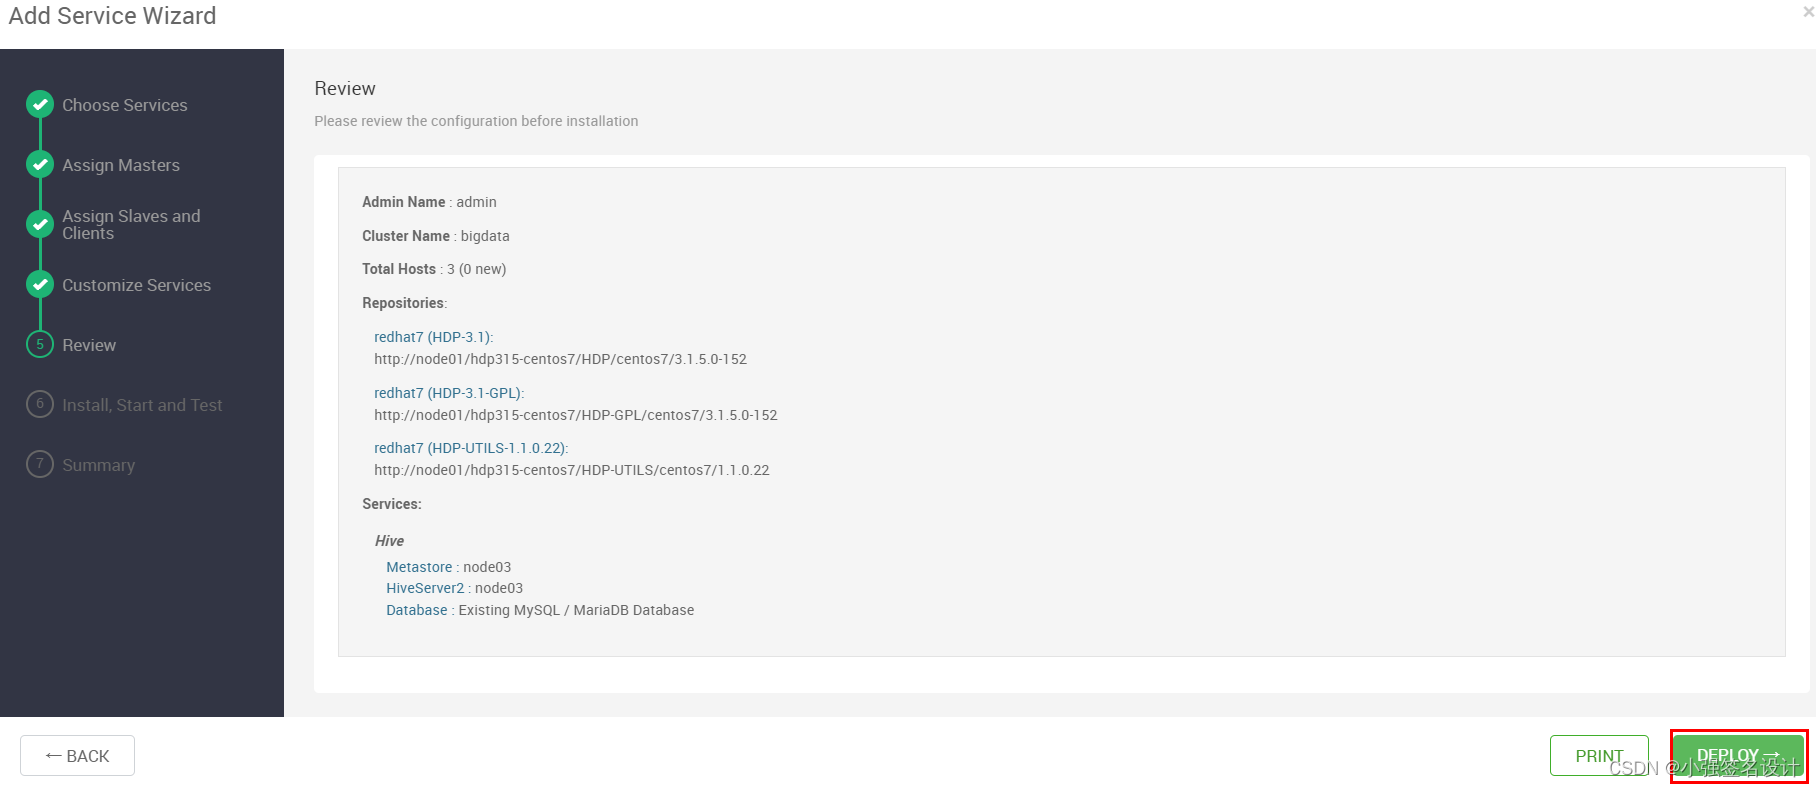
点击DEPLOY进行安装

安装成功:
遇到的问题:YARN Registry DNS 总是 stoped
解决:直接在 Ambari 界面,YARN -> configs -> advanced -> RegistryDNS Bind Port,修改 53 端口为 54 后保存。
4.2 HDFS 启动 HA:
点击启动高可用: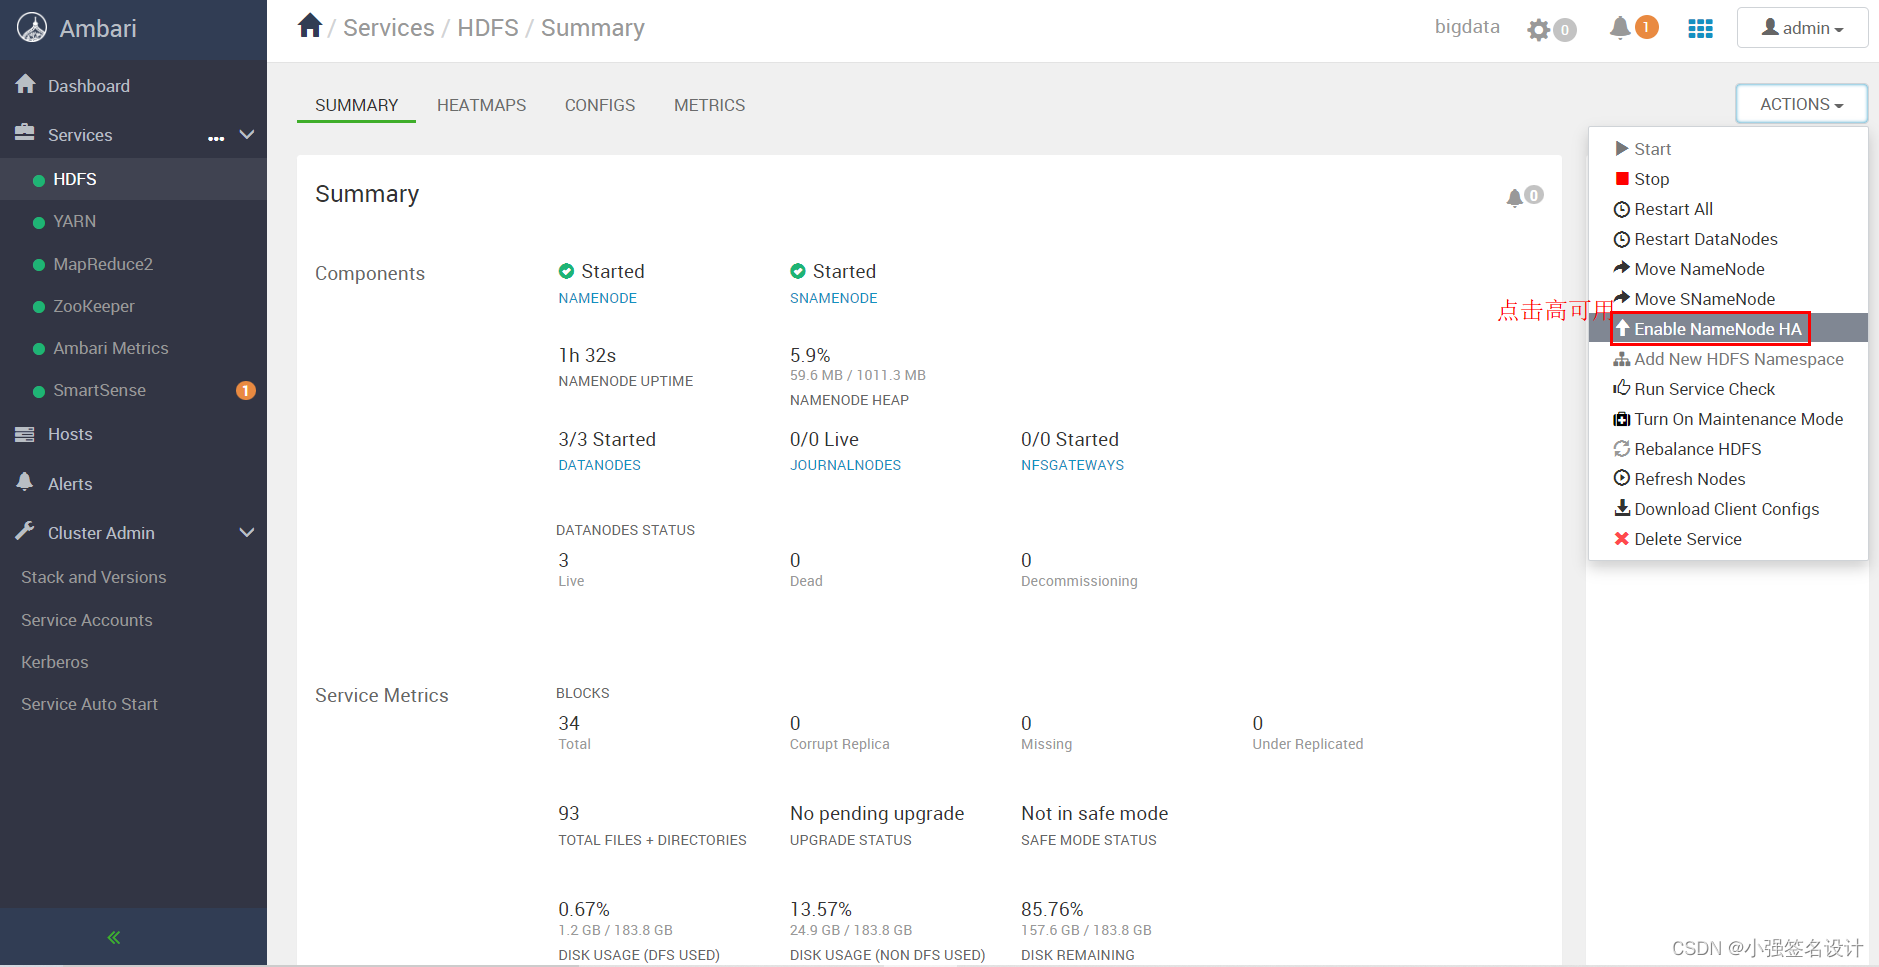
设置空间名称,点击下一步:
这里设置 node01 和 node02 为 HA 节点,点击 next:
点击 Next: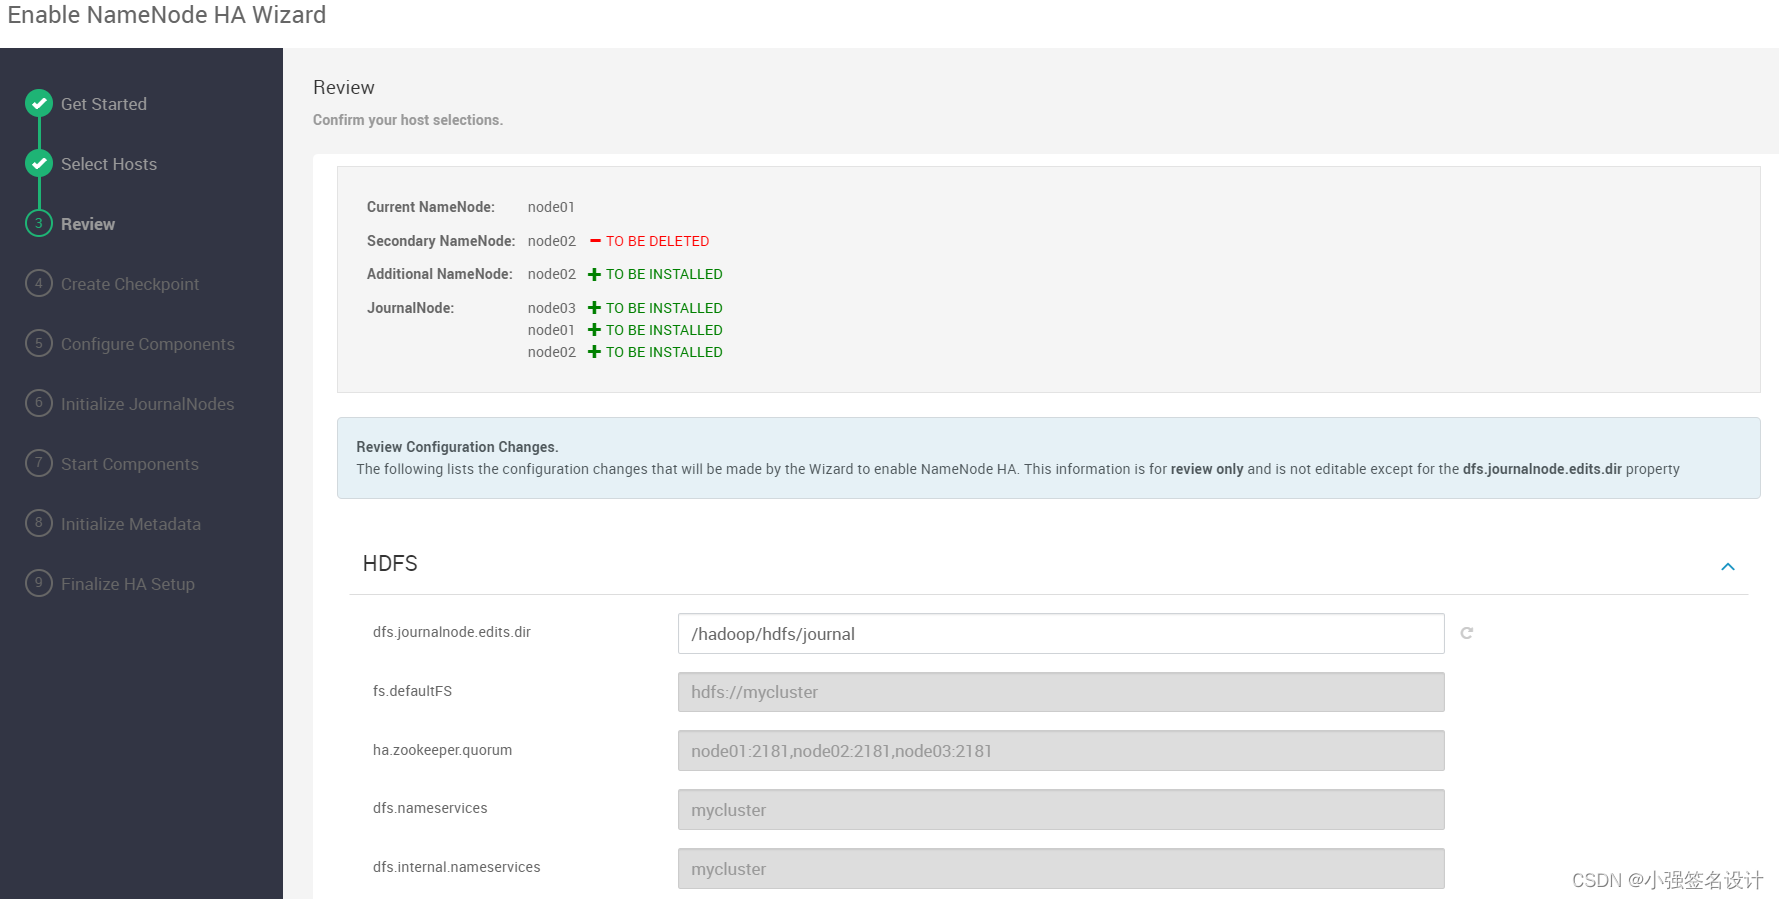
创建 Checkpoint on NameNode:


点击下一步:

初始化完成后进行下一步:
等待启动组件完成,进行下一步:
初始化元数据后,点击 Next:

到此 Namenode HA搭建完成: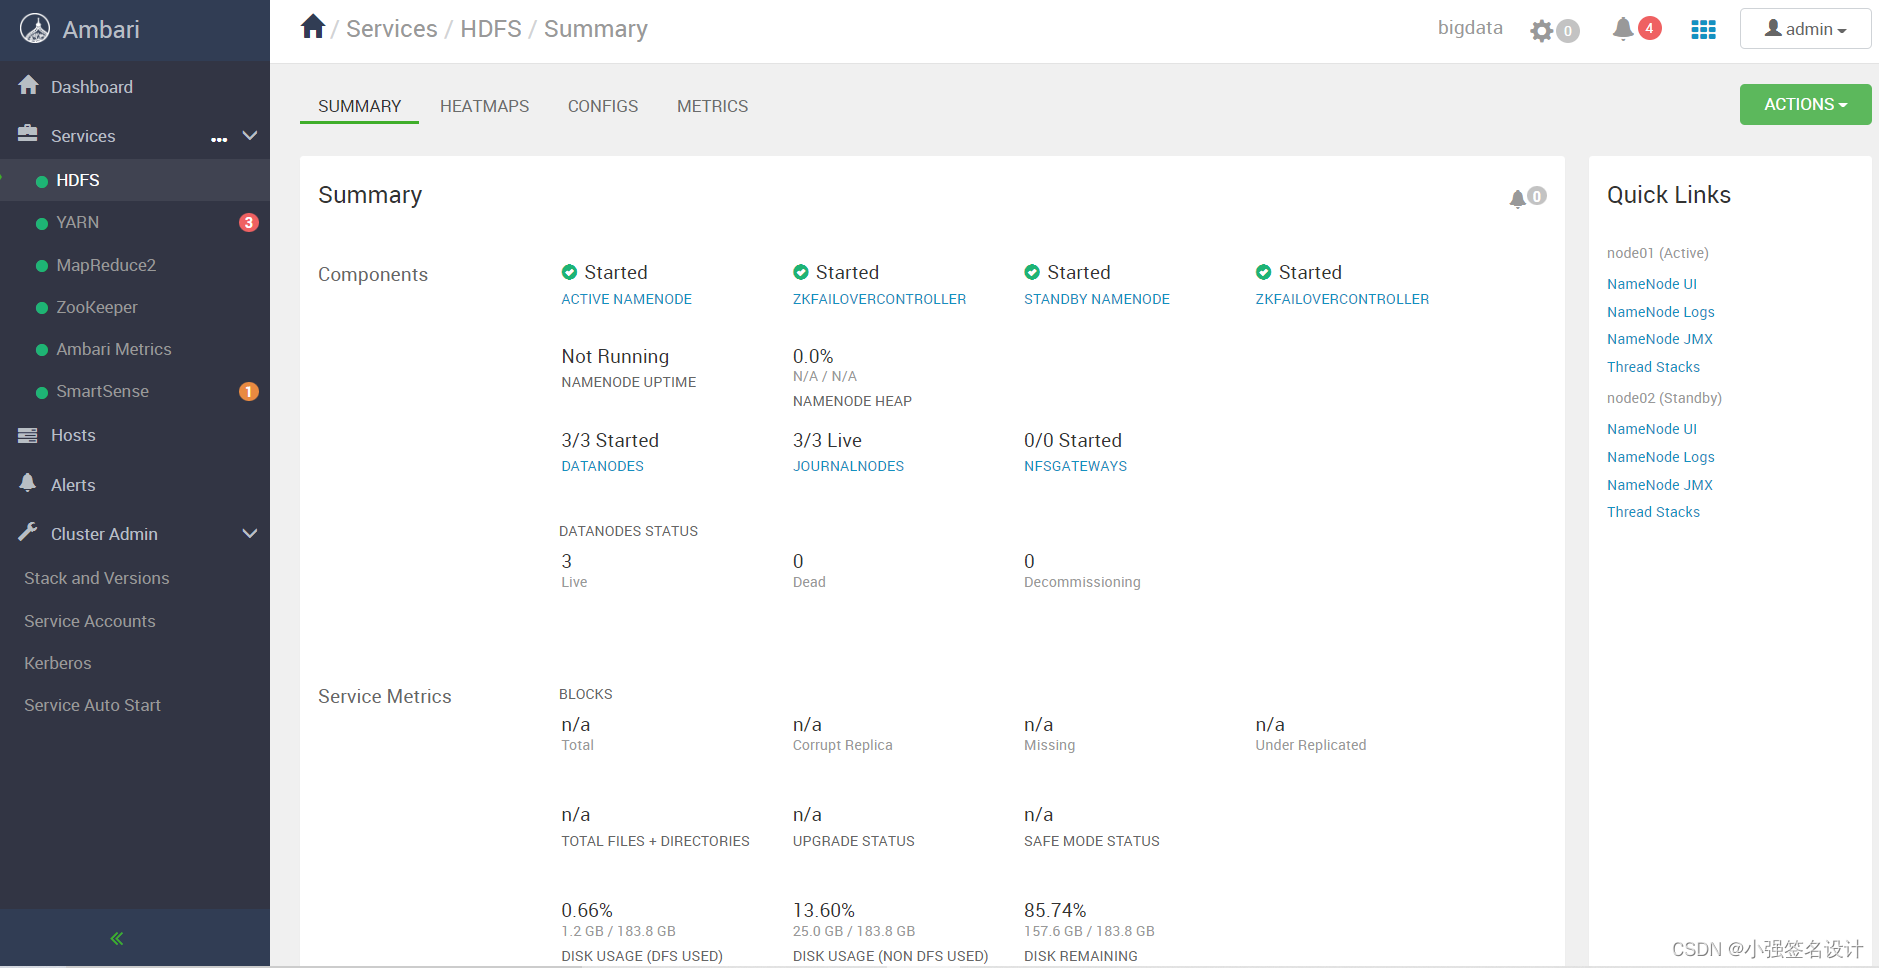
4.3 ResourceManager 启动 HA:
点击 ACTIONS 下拉列表, 选择启动 HA: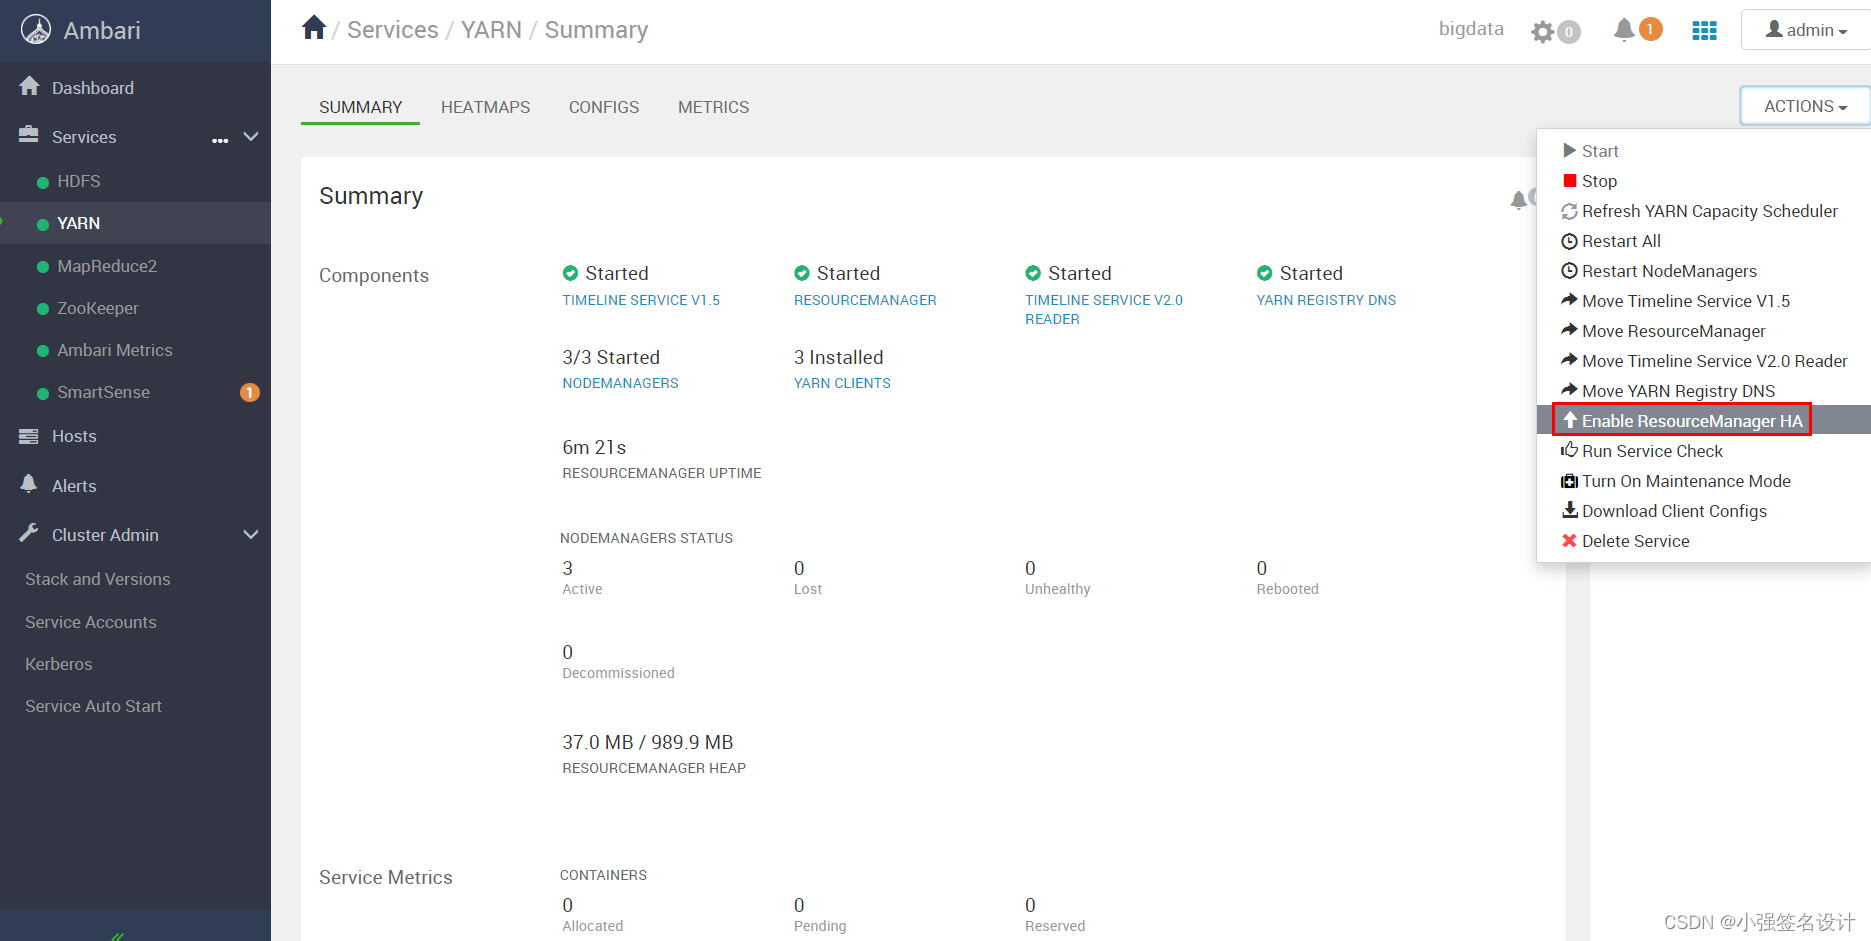

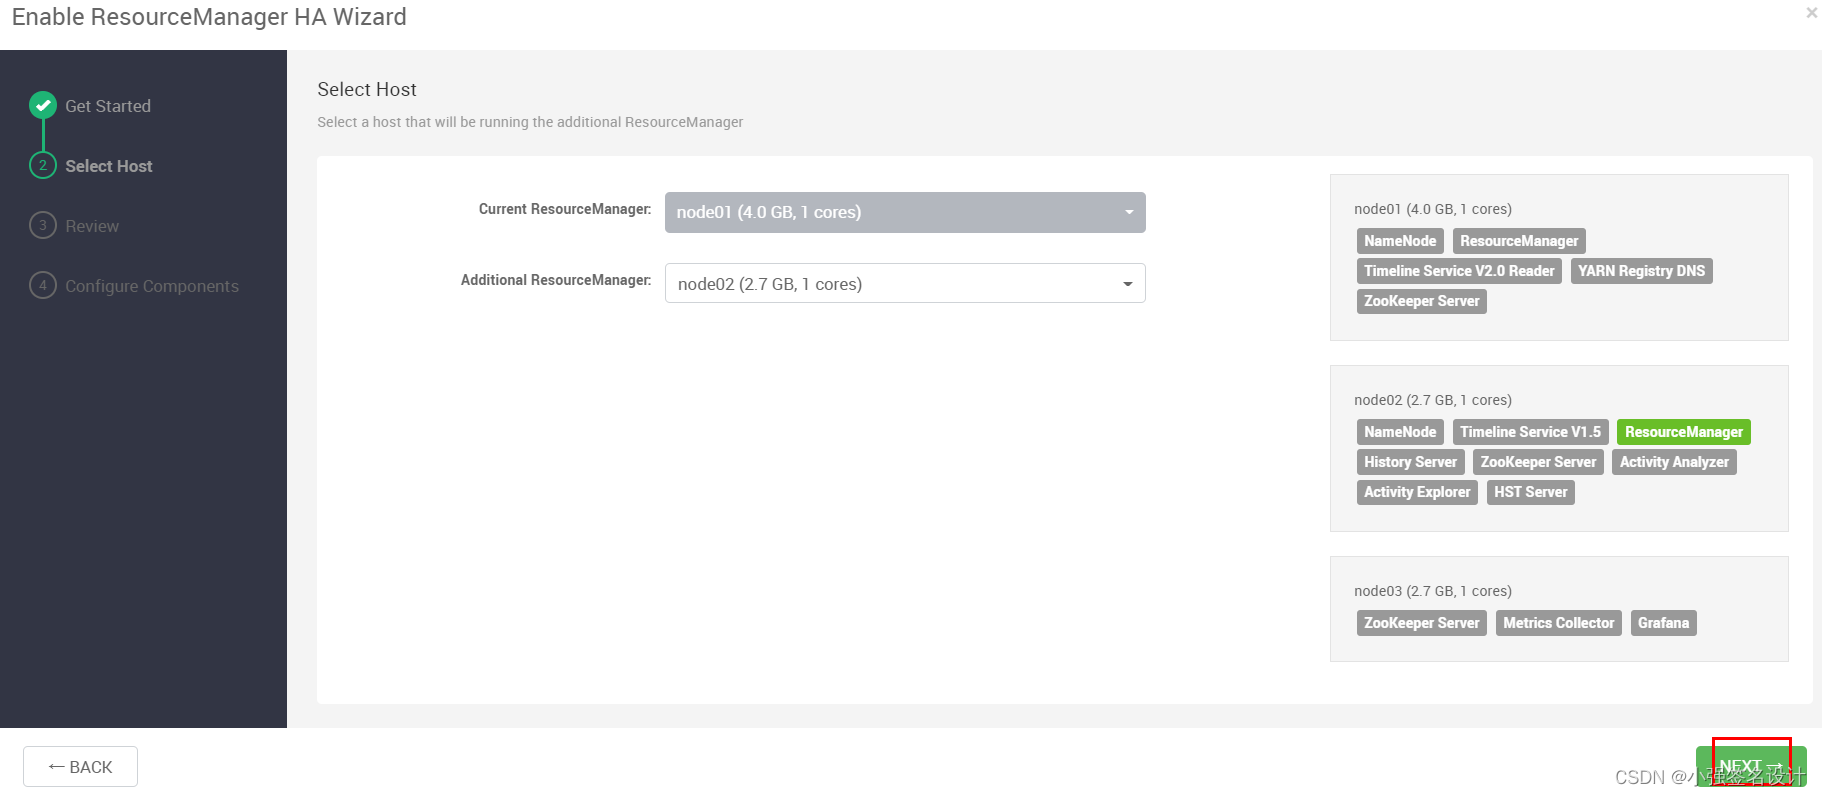


到此 RS HA安装完成:
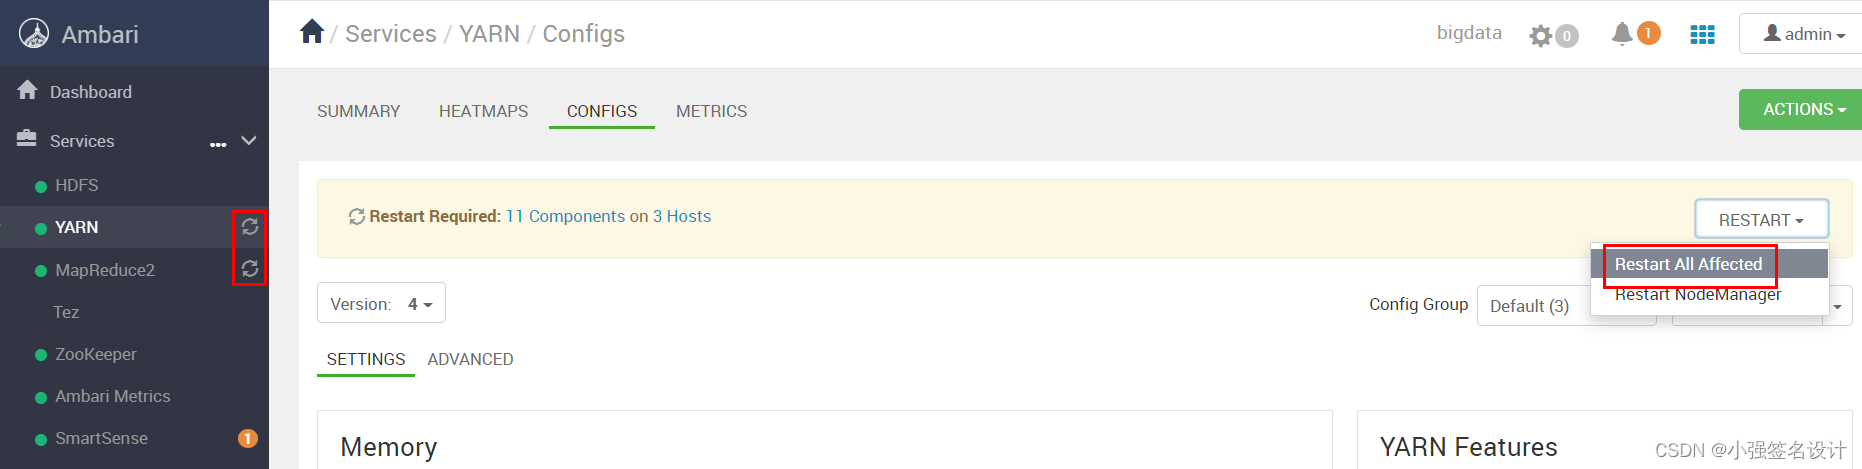
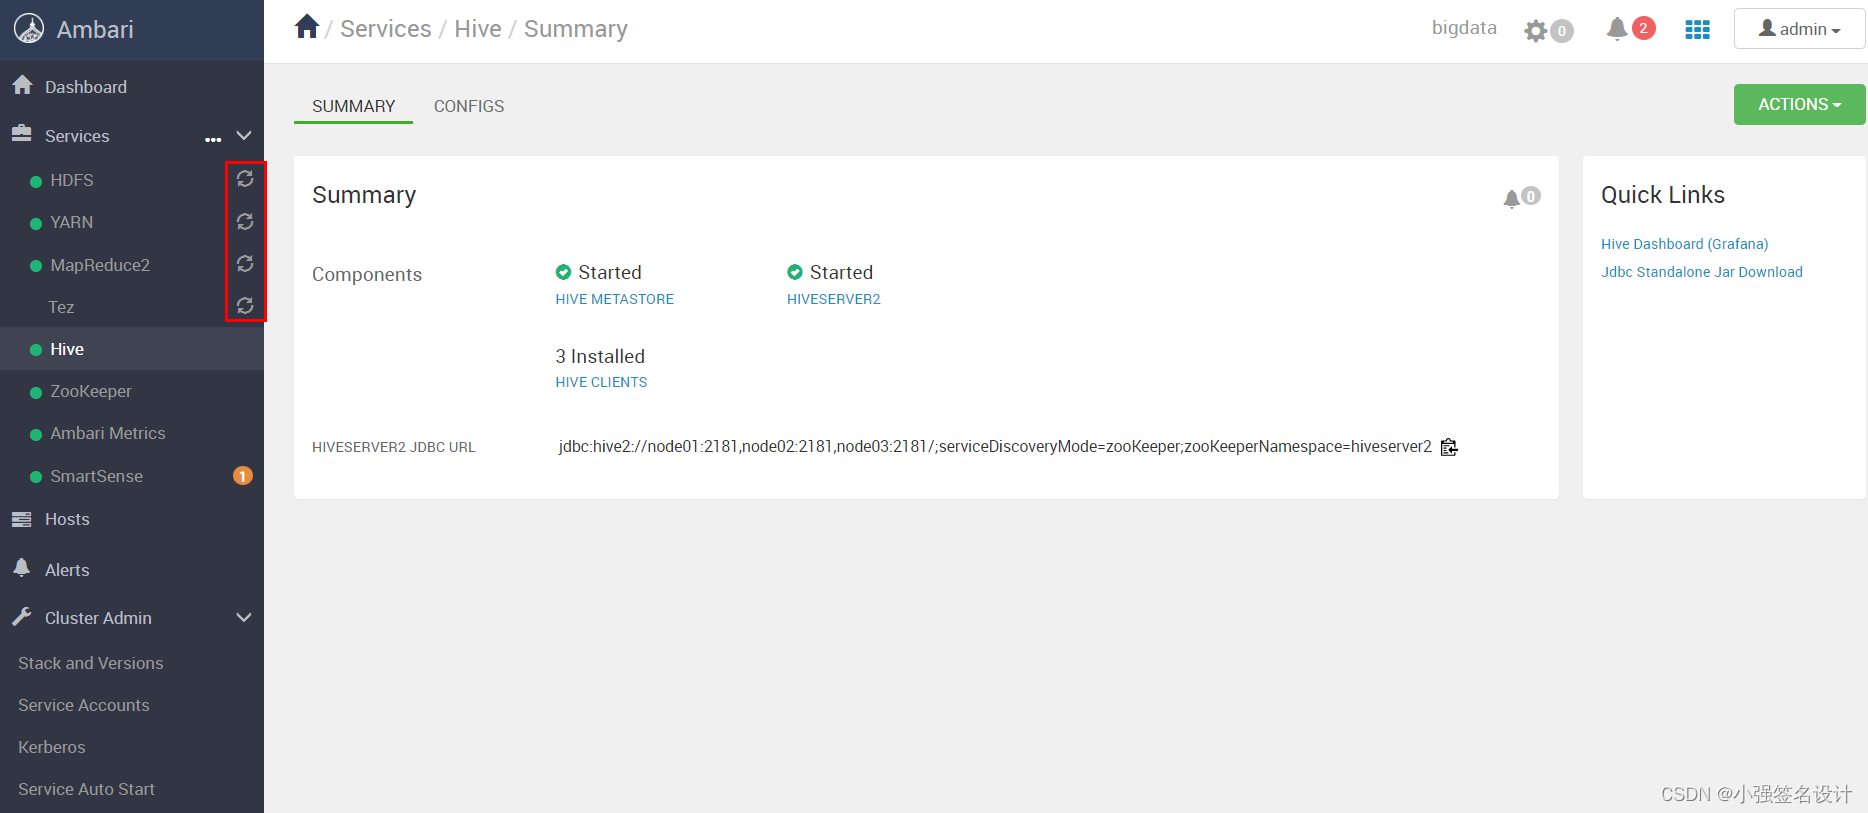
同步 HDFS 配置文件,点击红色框按钮: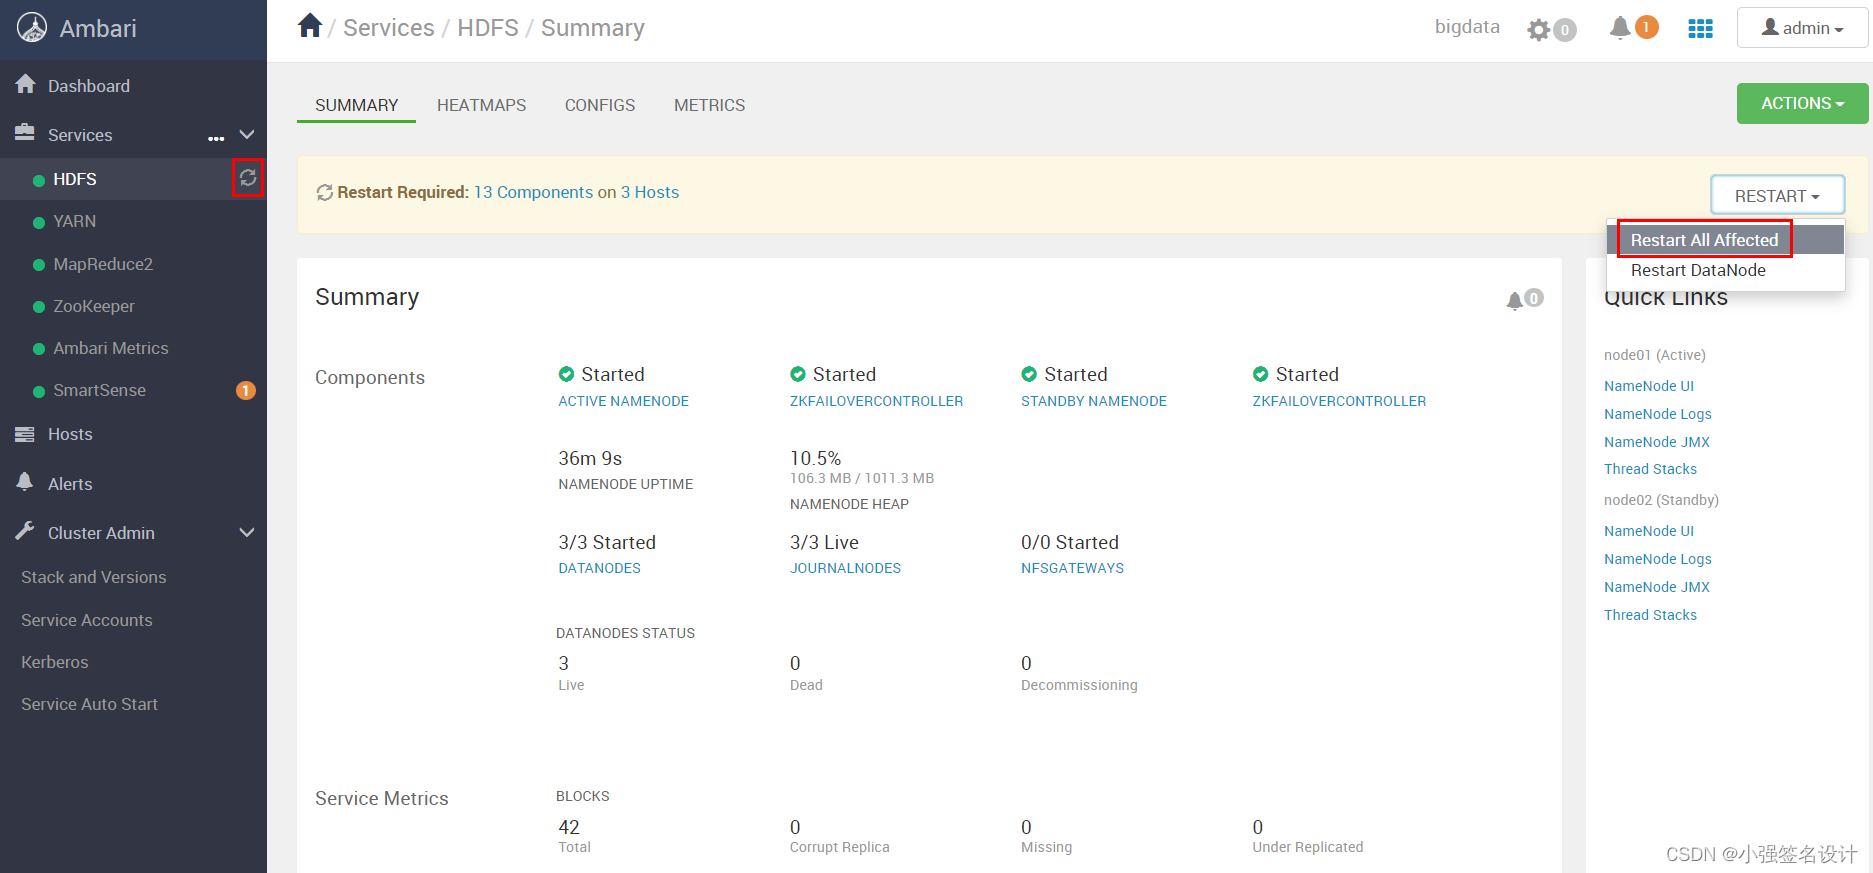
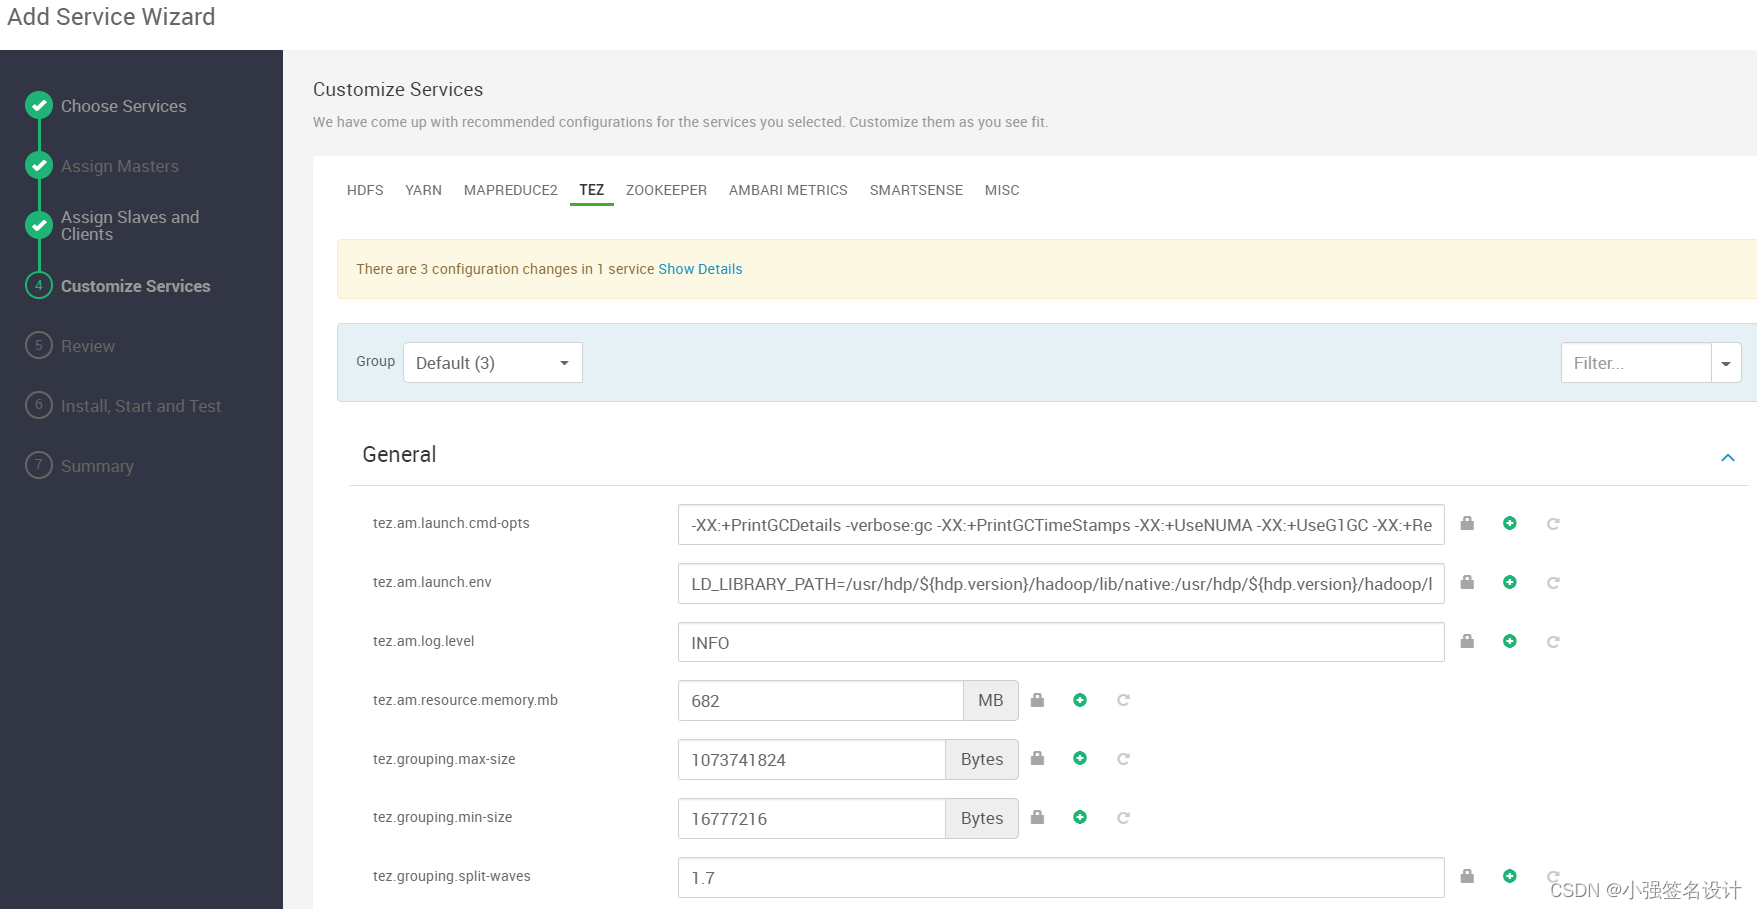
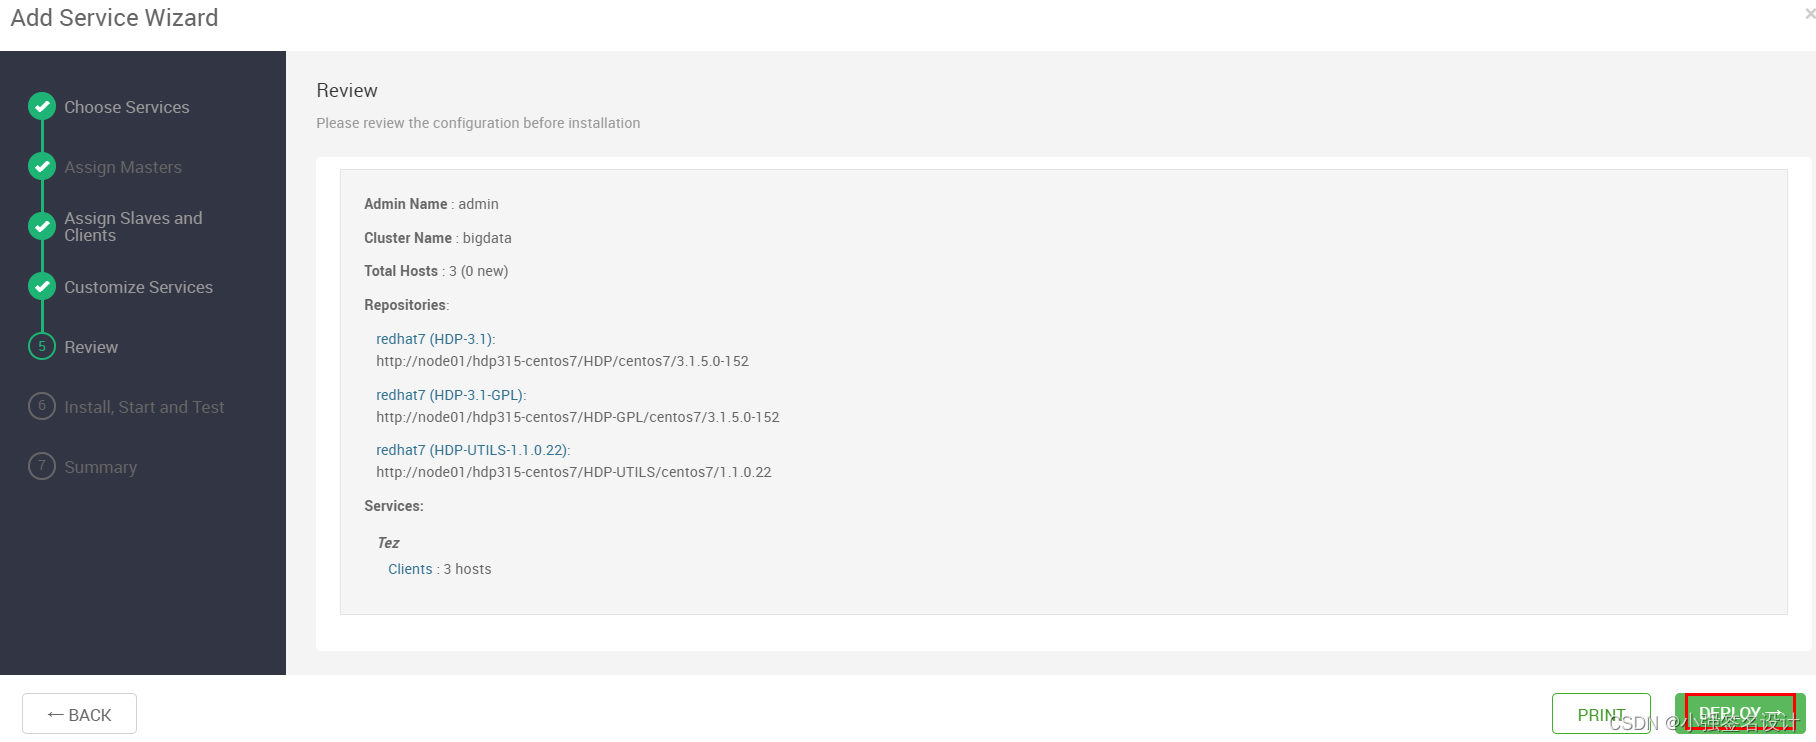
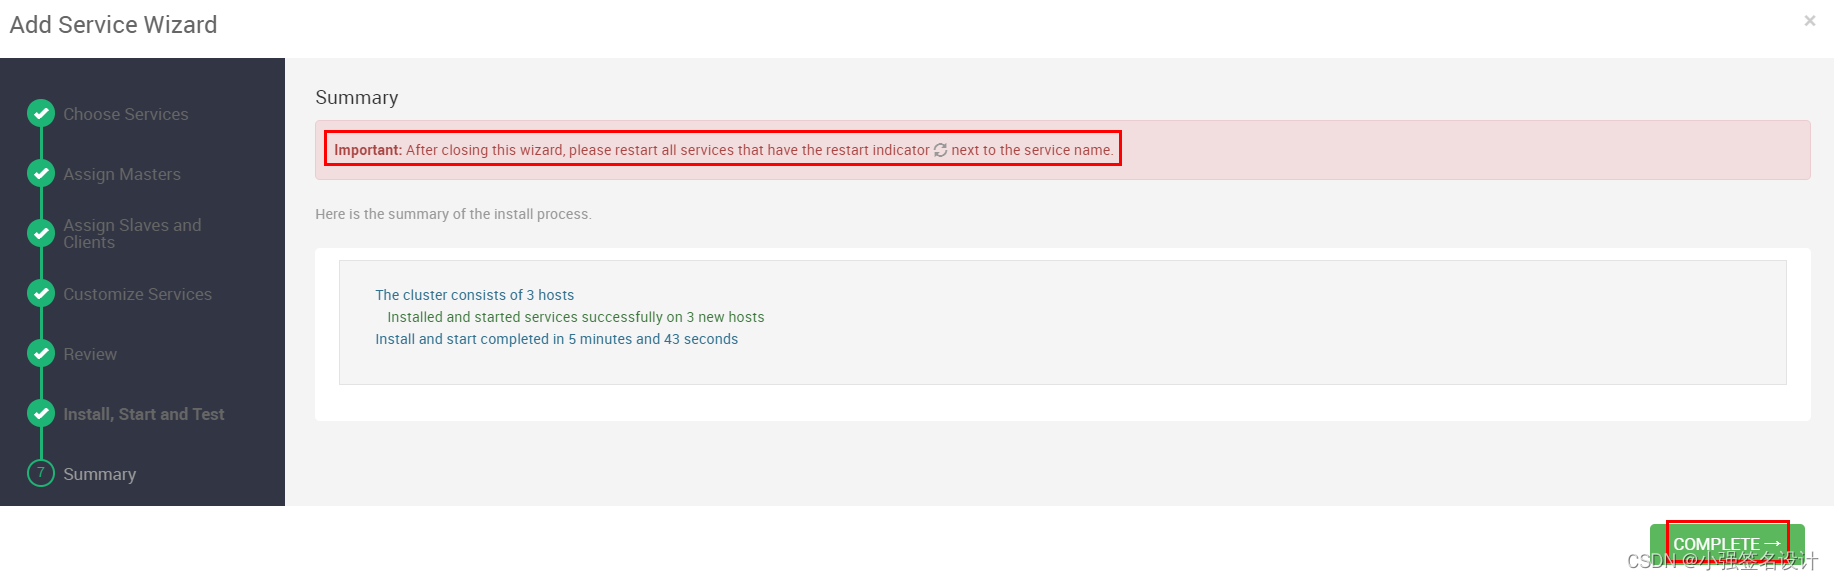
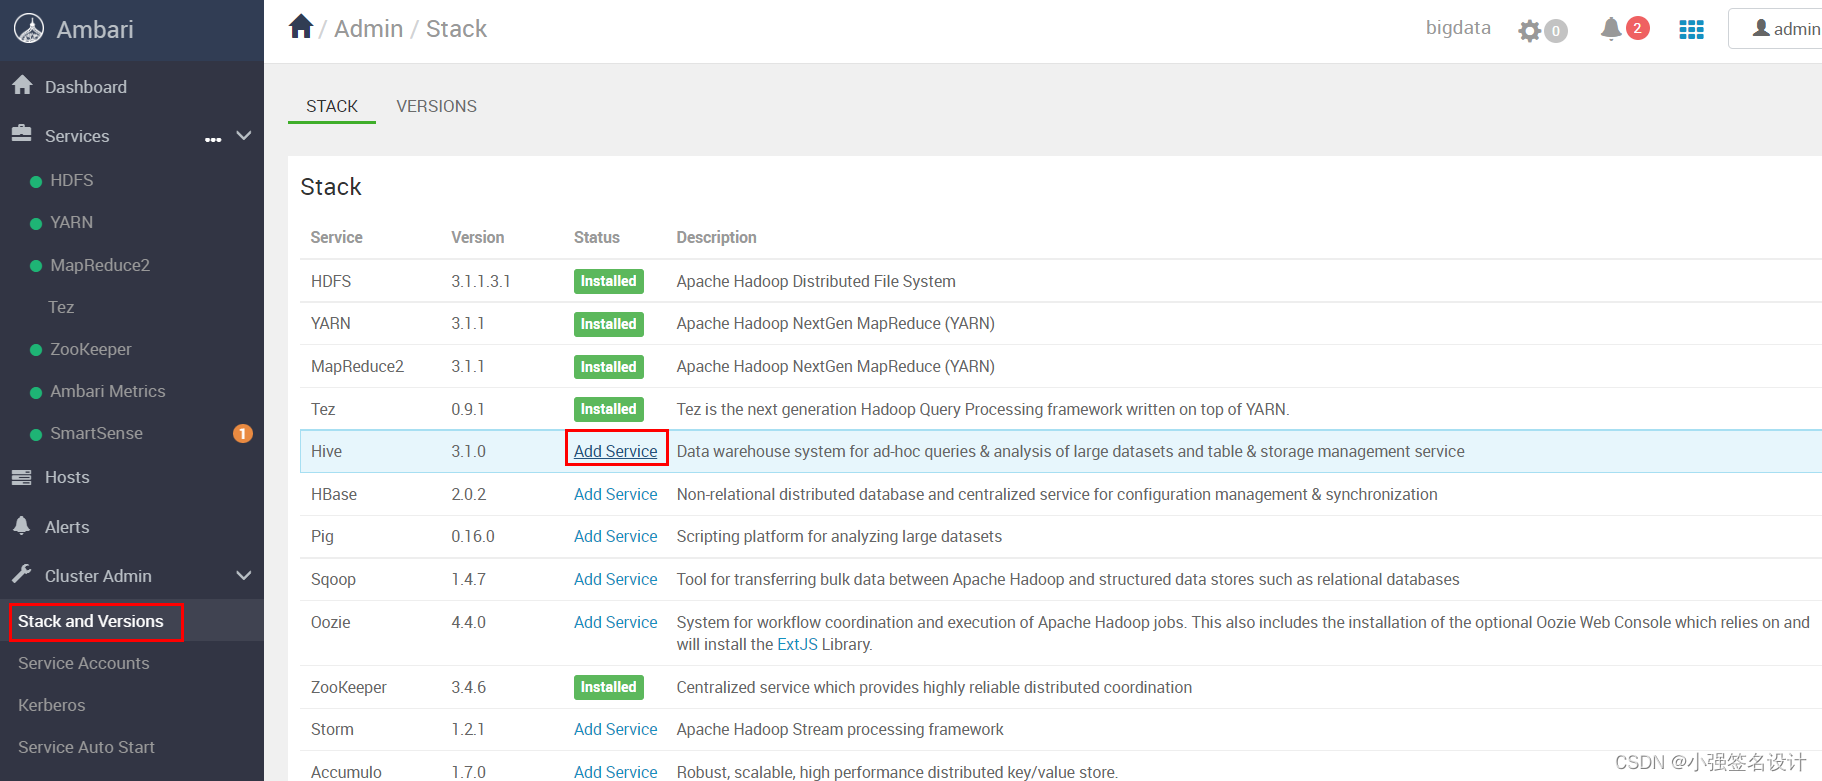
4.4 安装 Tez 组件:
点击 add service: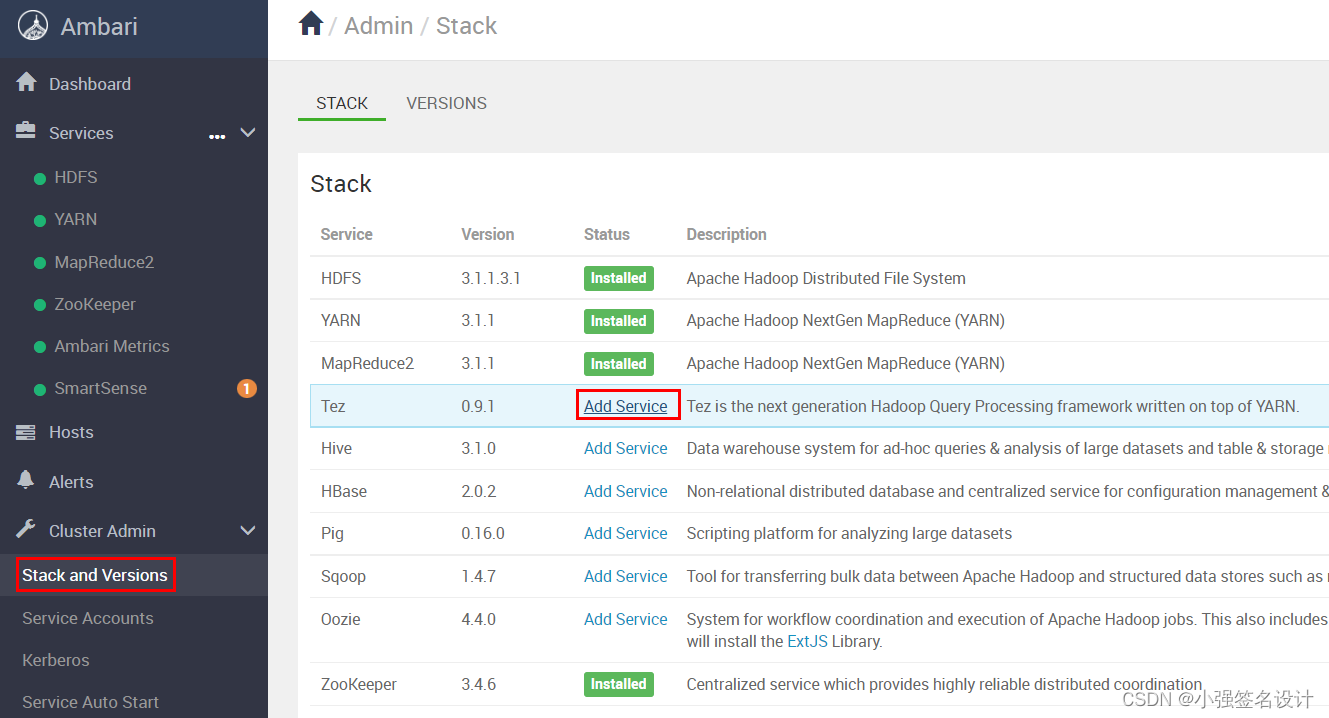


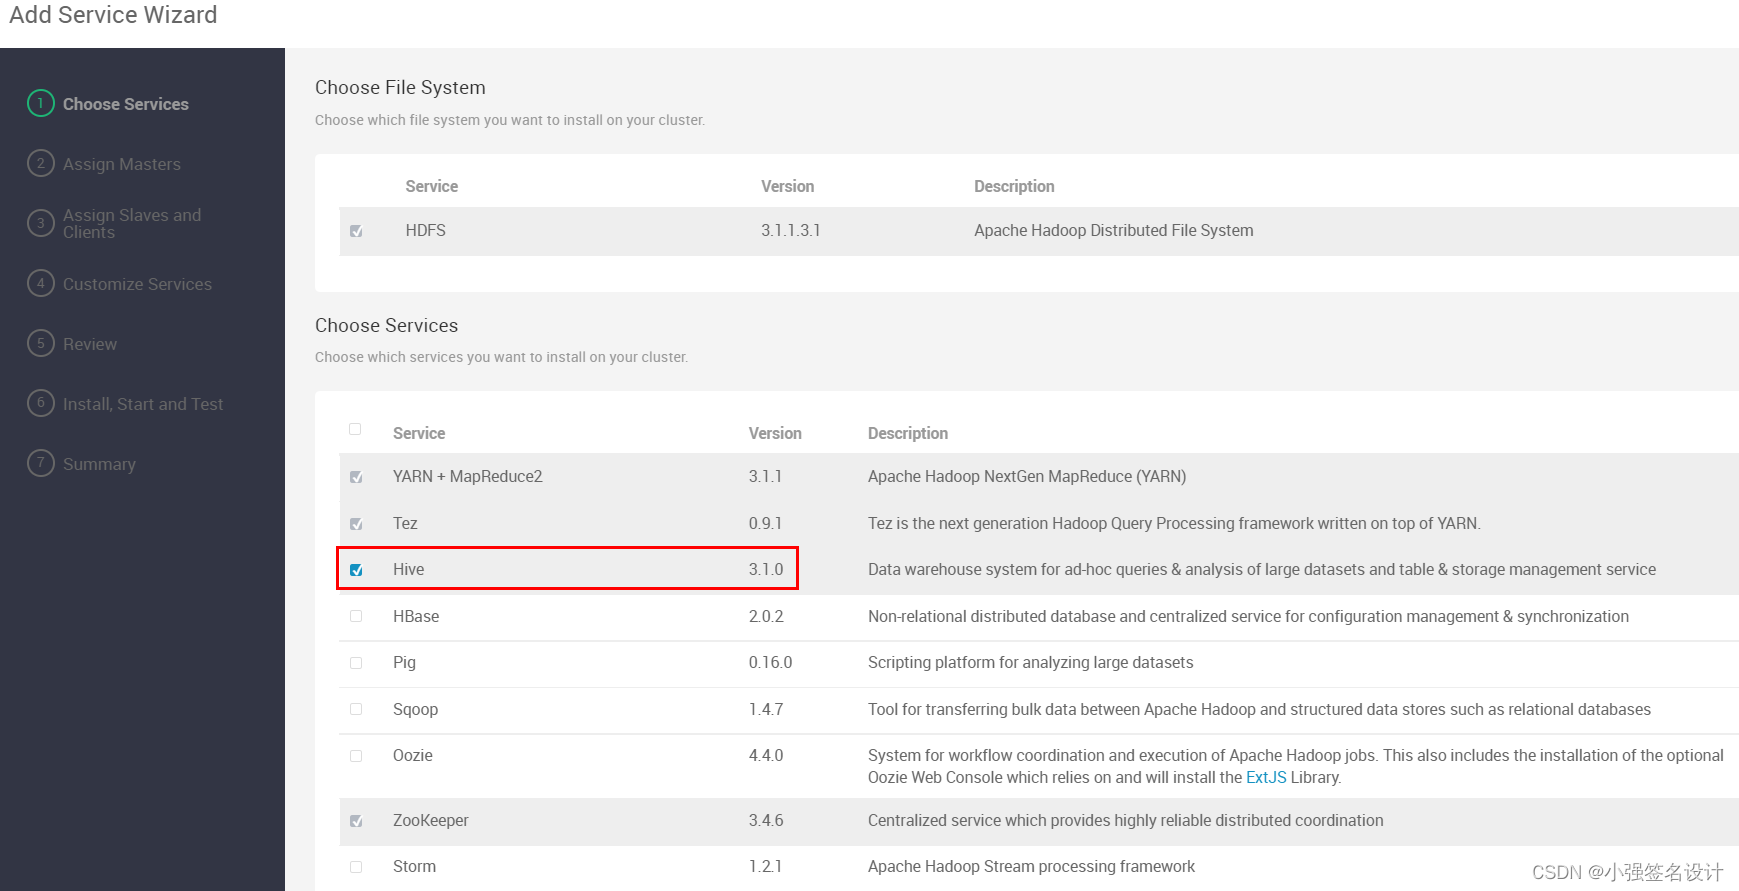
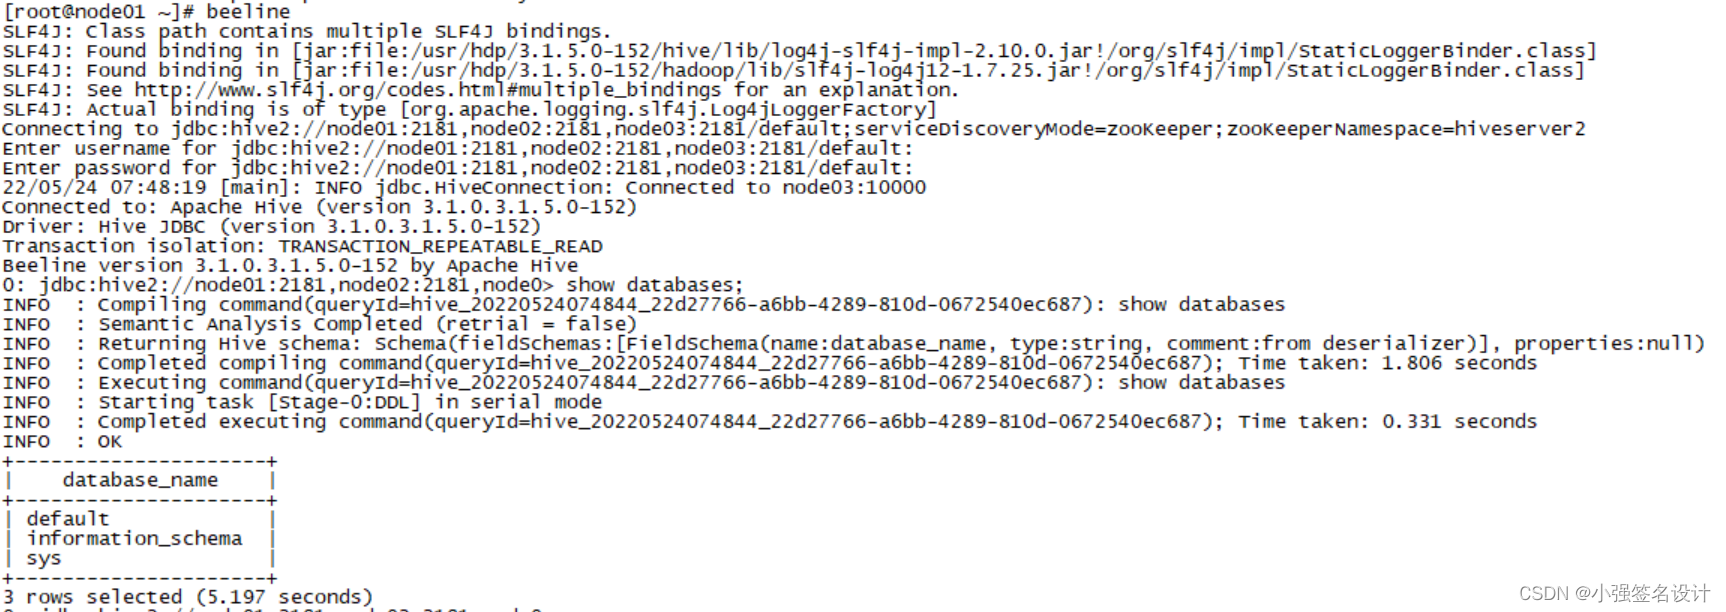
4.5 安装 Hive 组件
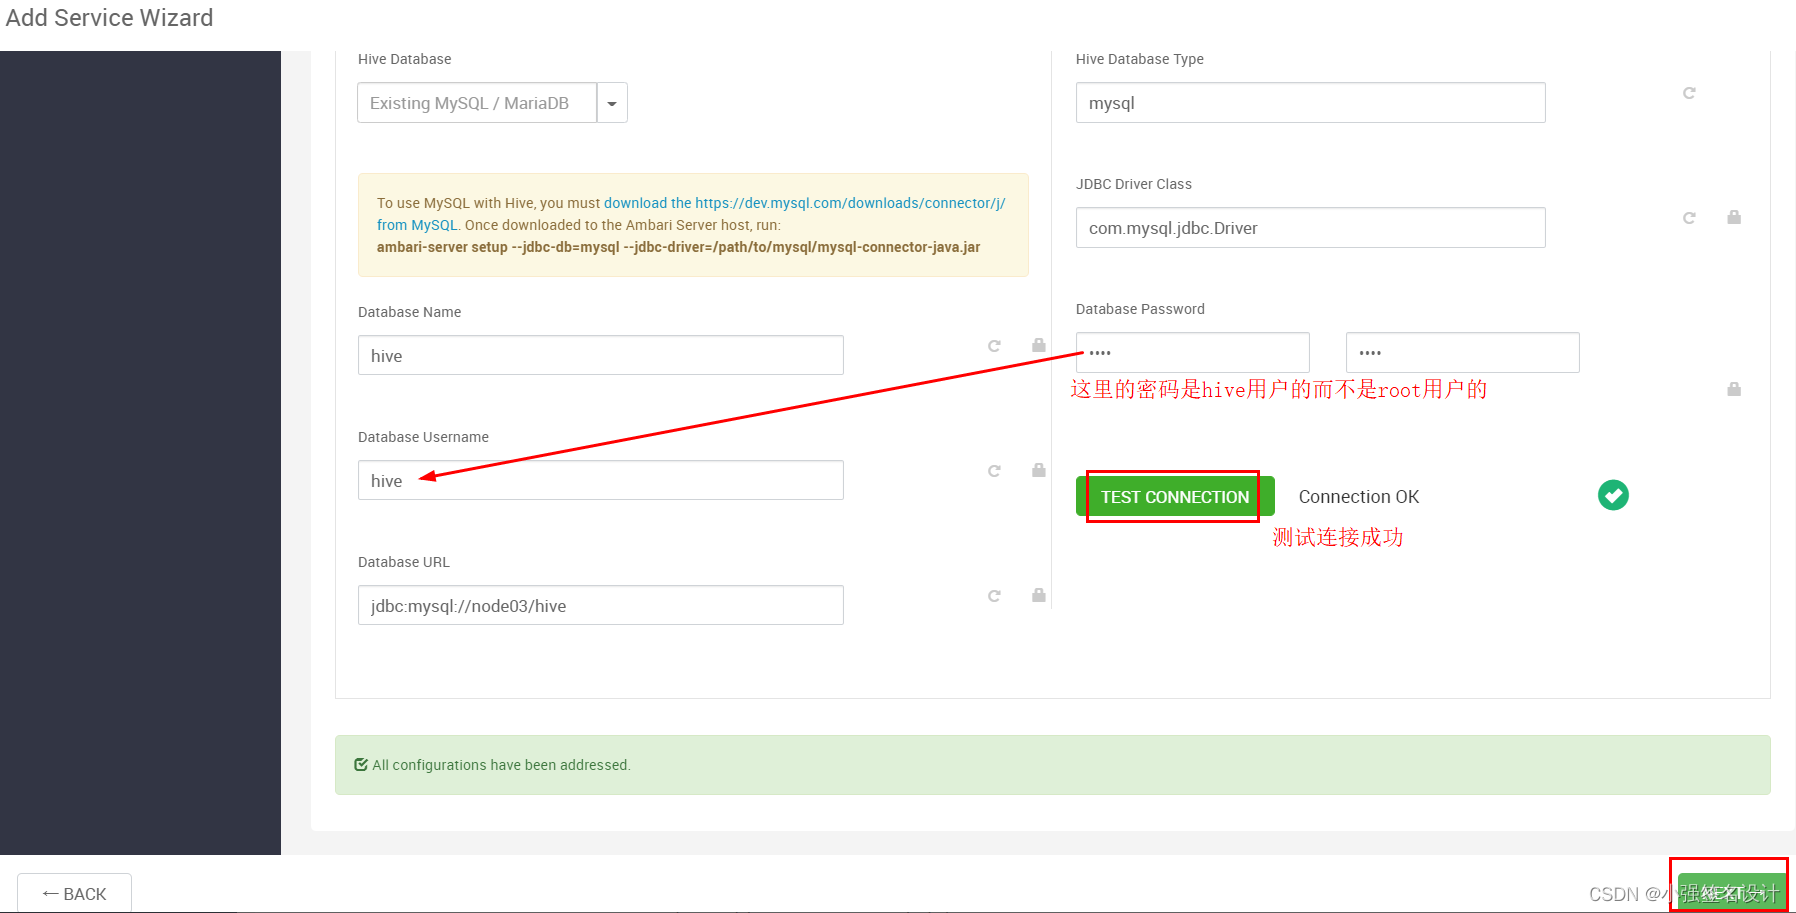
# 先在mysql中执行以下操作
[root@node03 ~]# mysql -uroot -proot%123
mysql> CREATE DATABASE hive;
use hive;
CREATE USER 'hive'@'%' IDENTIFIED BY 'hive';
GRANT ALL PRIVILEGES ON *.* TO 'hive'@'%';
CREATE USER 'hive'@'localhost' IDENTIFIED BY 'hive';
GRANT ALL PRIVILEGES ON *.* TO 'hive'@'localhost';
CREATE USER 'hive'@'master' IDENTIFIED BY 'hive';
GRANT ALL PRIVILEGES ON *.* TO 'hive'@'master';
FLUSH PRIVILEGES;

在节点上注册msyql驱动:
[root@node01 ~]# ambari-server setup --jdbc-db=mysql --jdbc-driver=/usr/share/java/mysqlconnector-java.jar


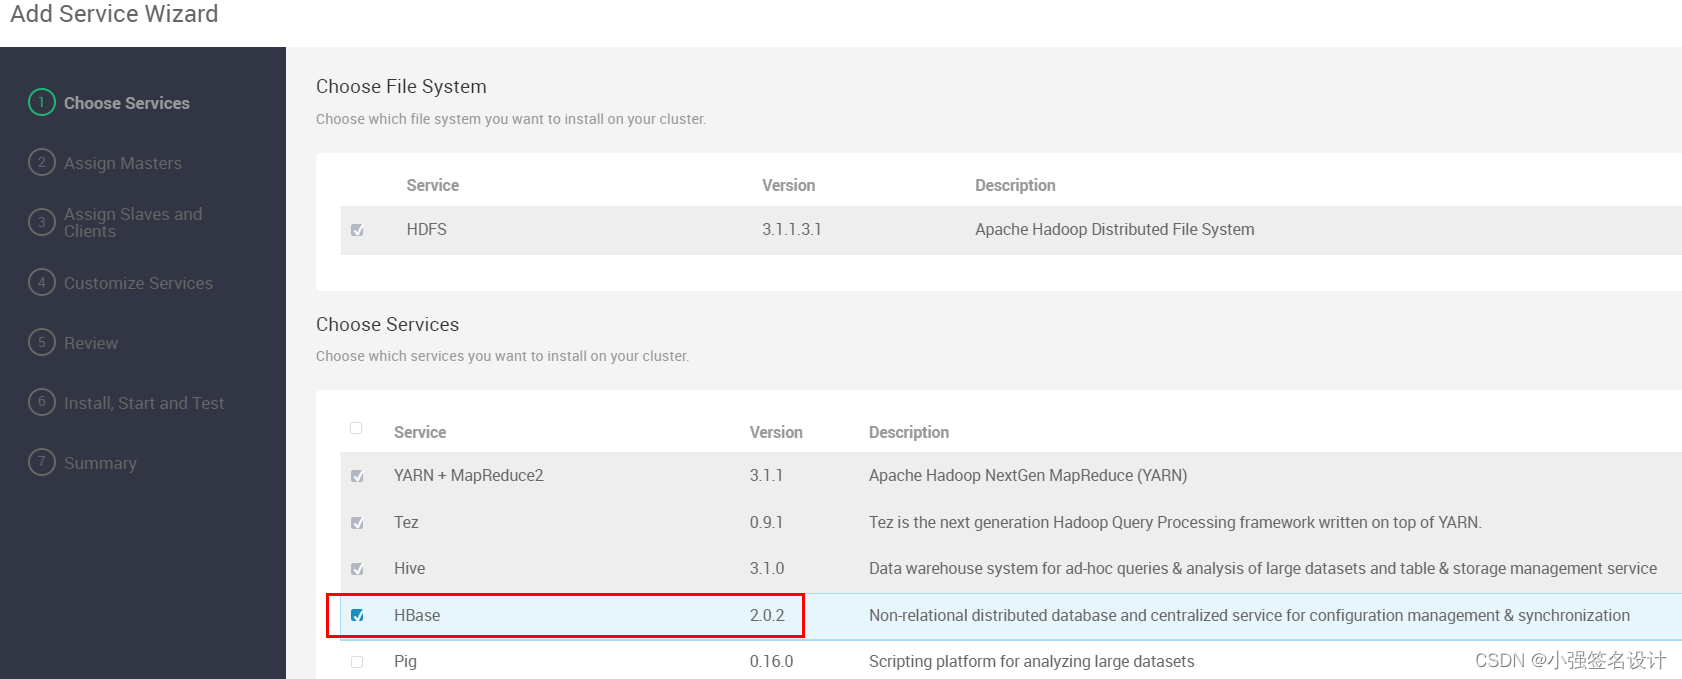
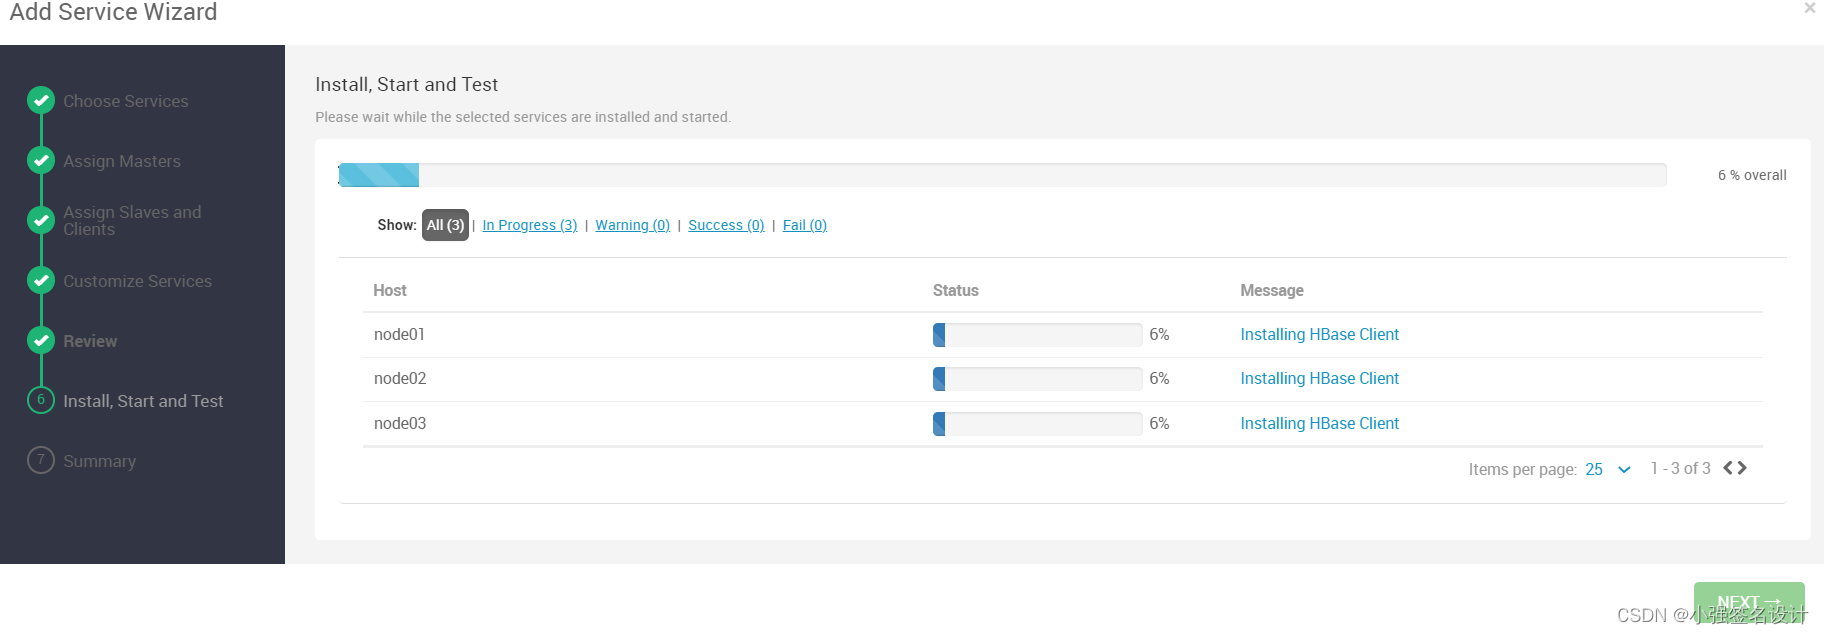
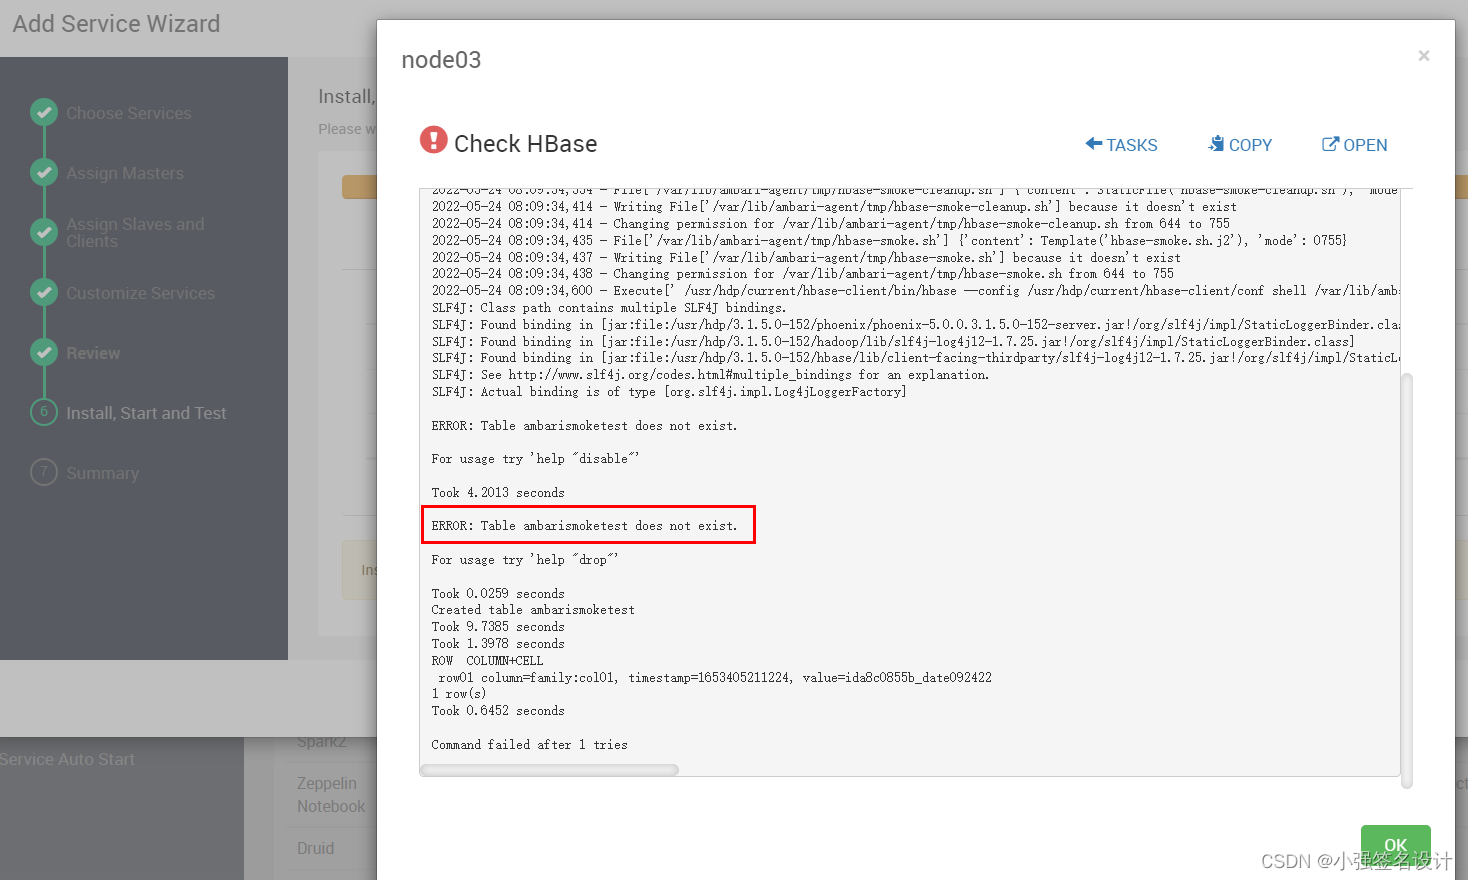
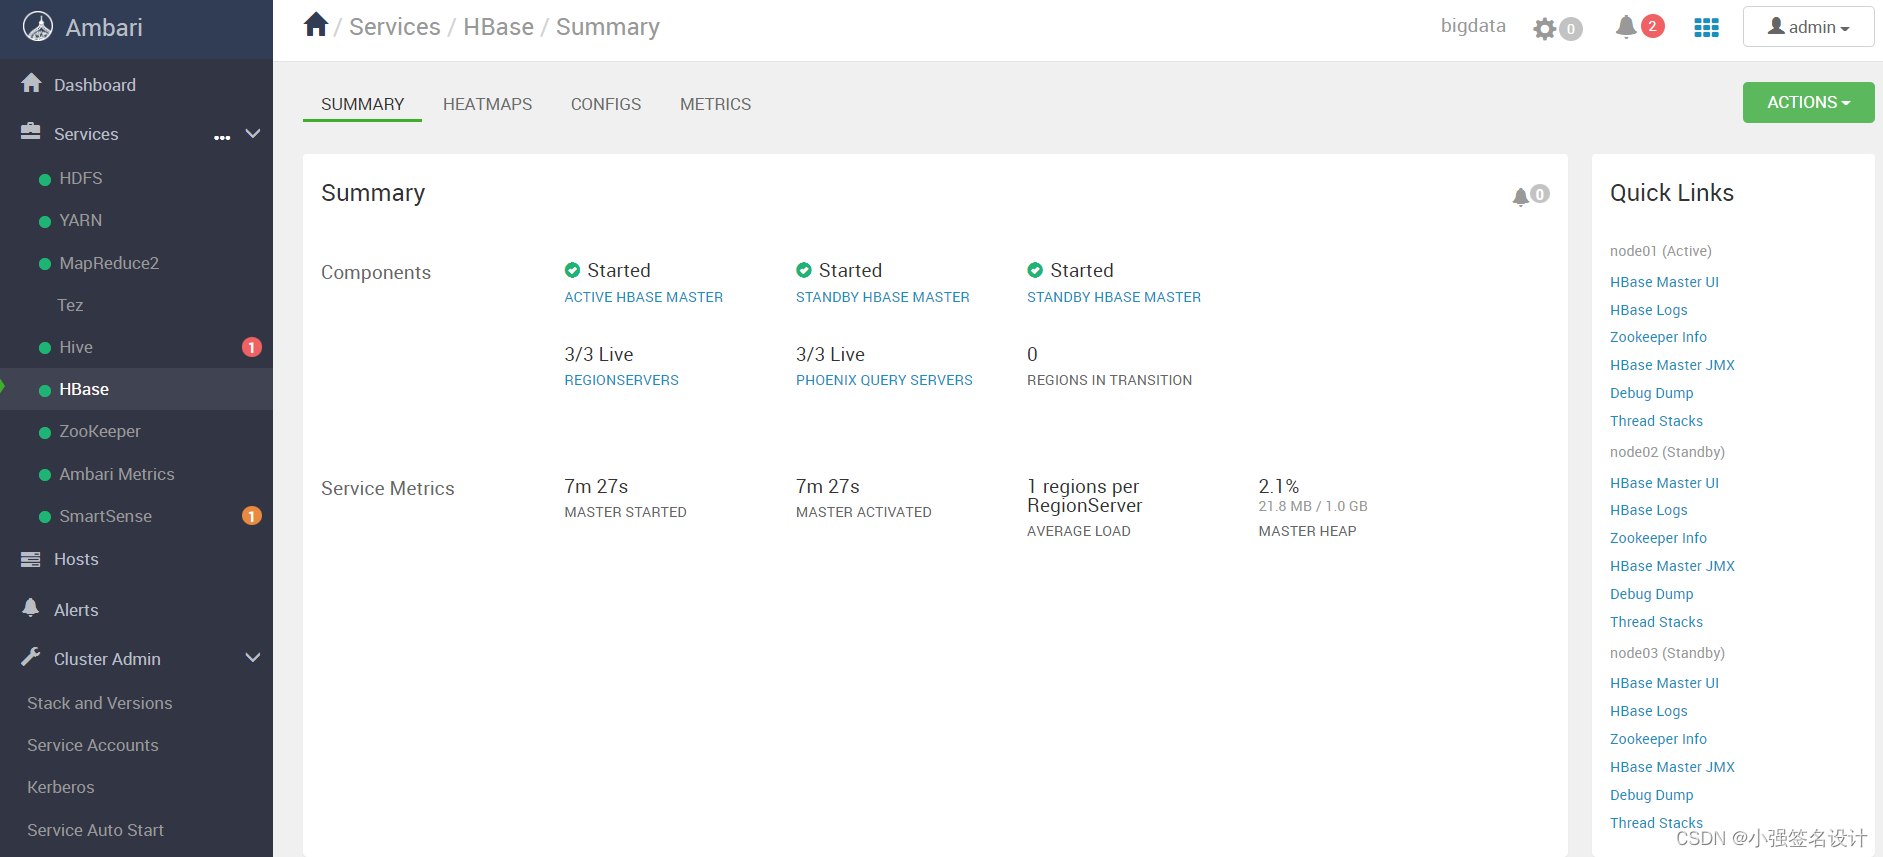
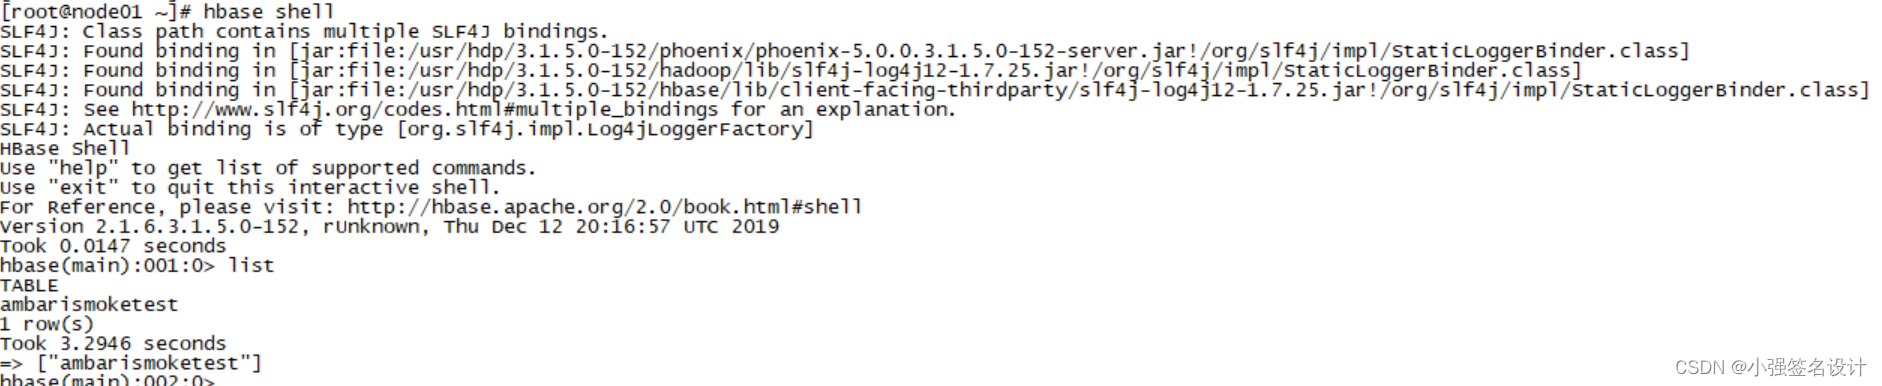
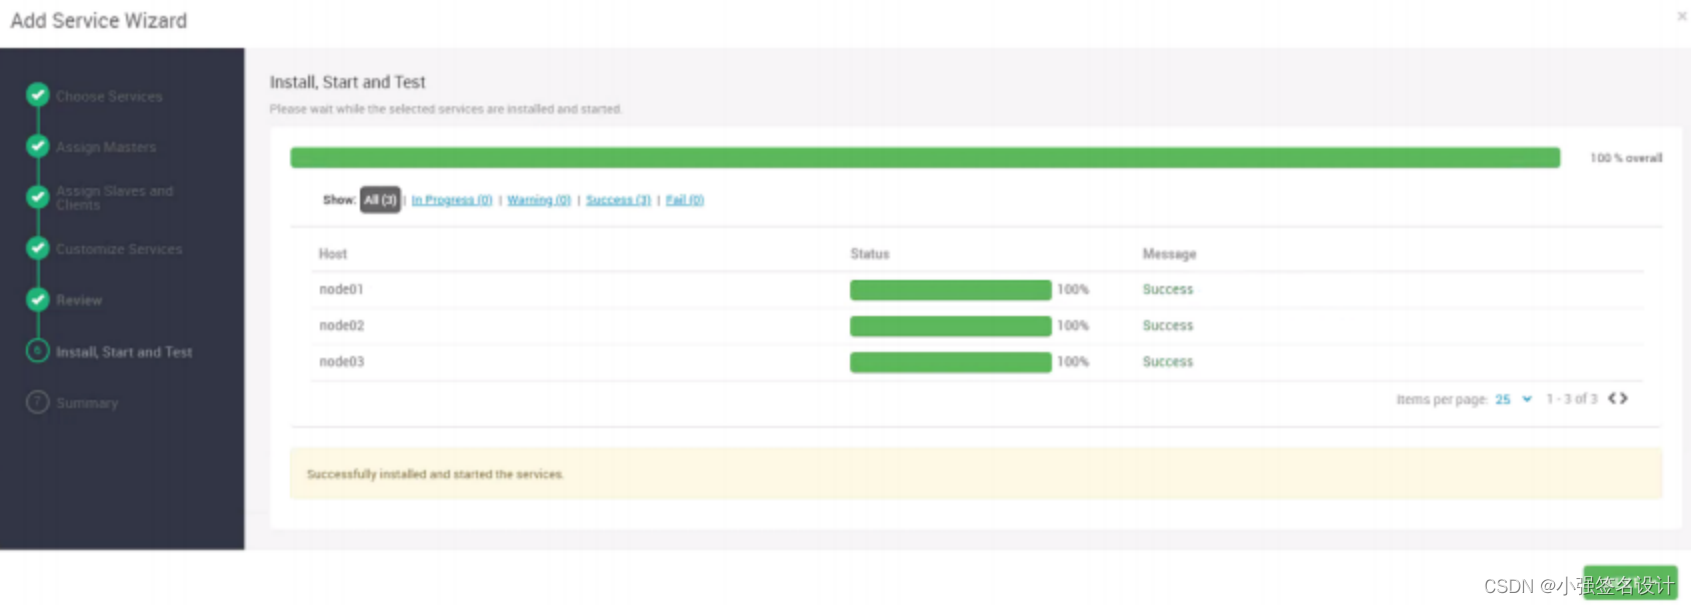
4.6 安装 Hbase 组件
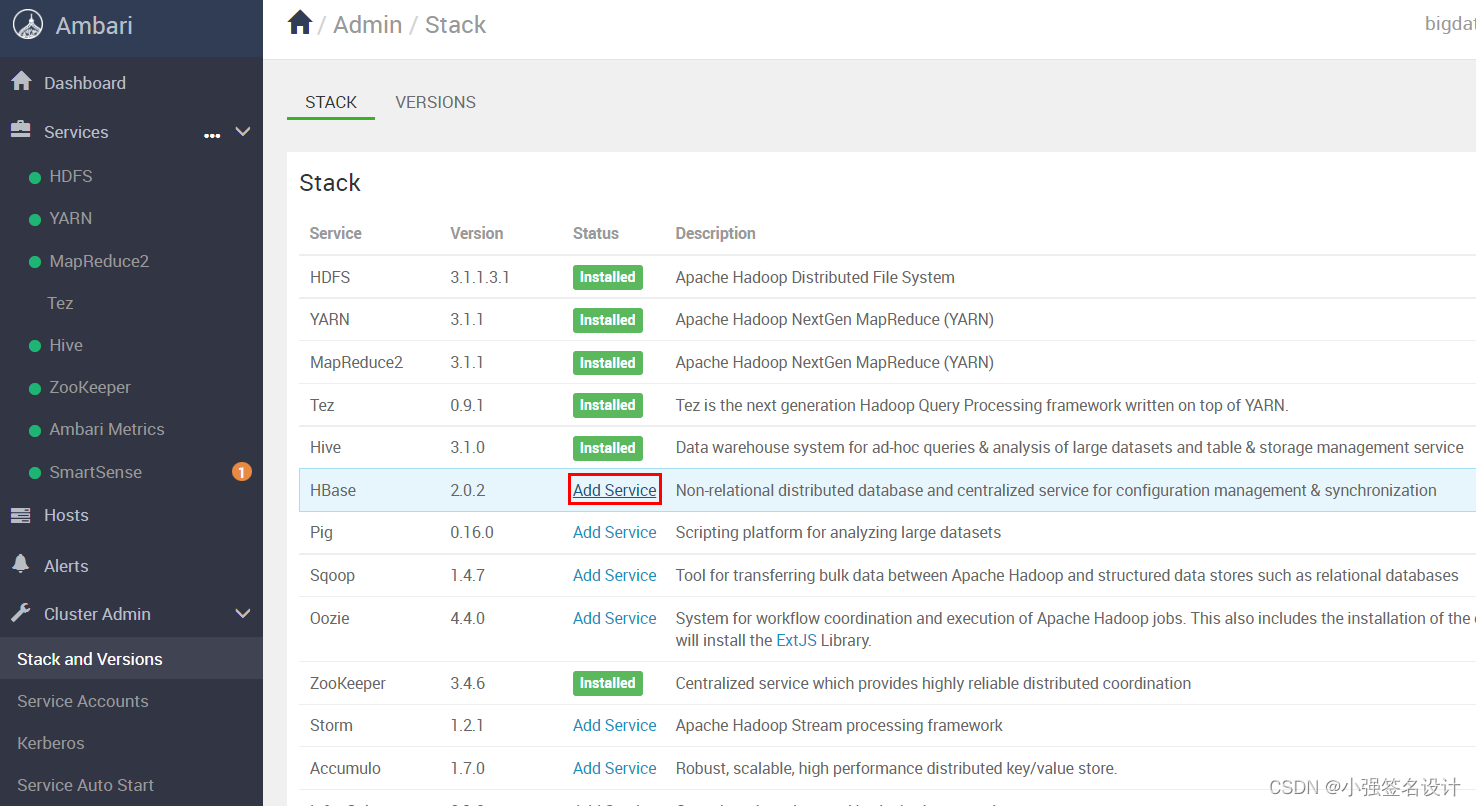
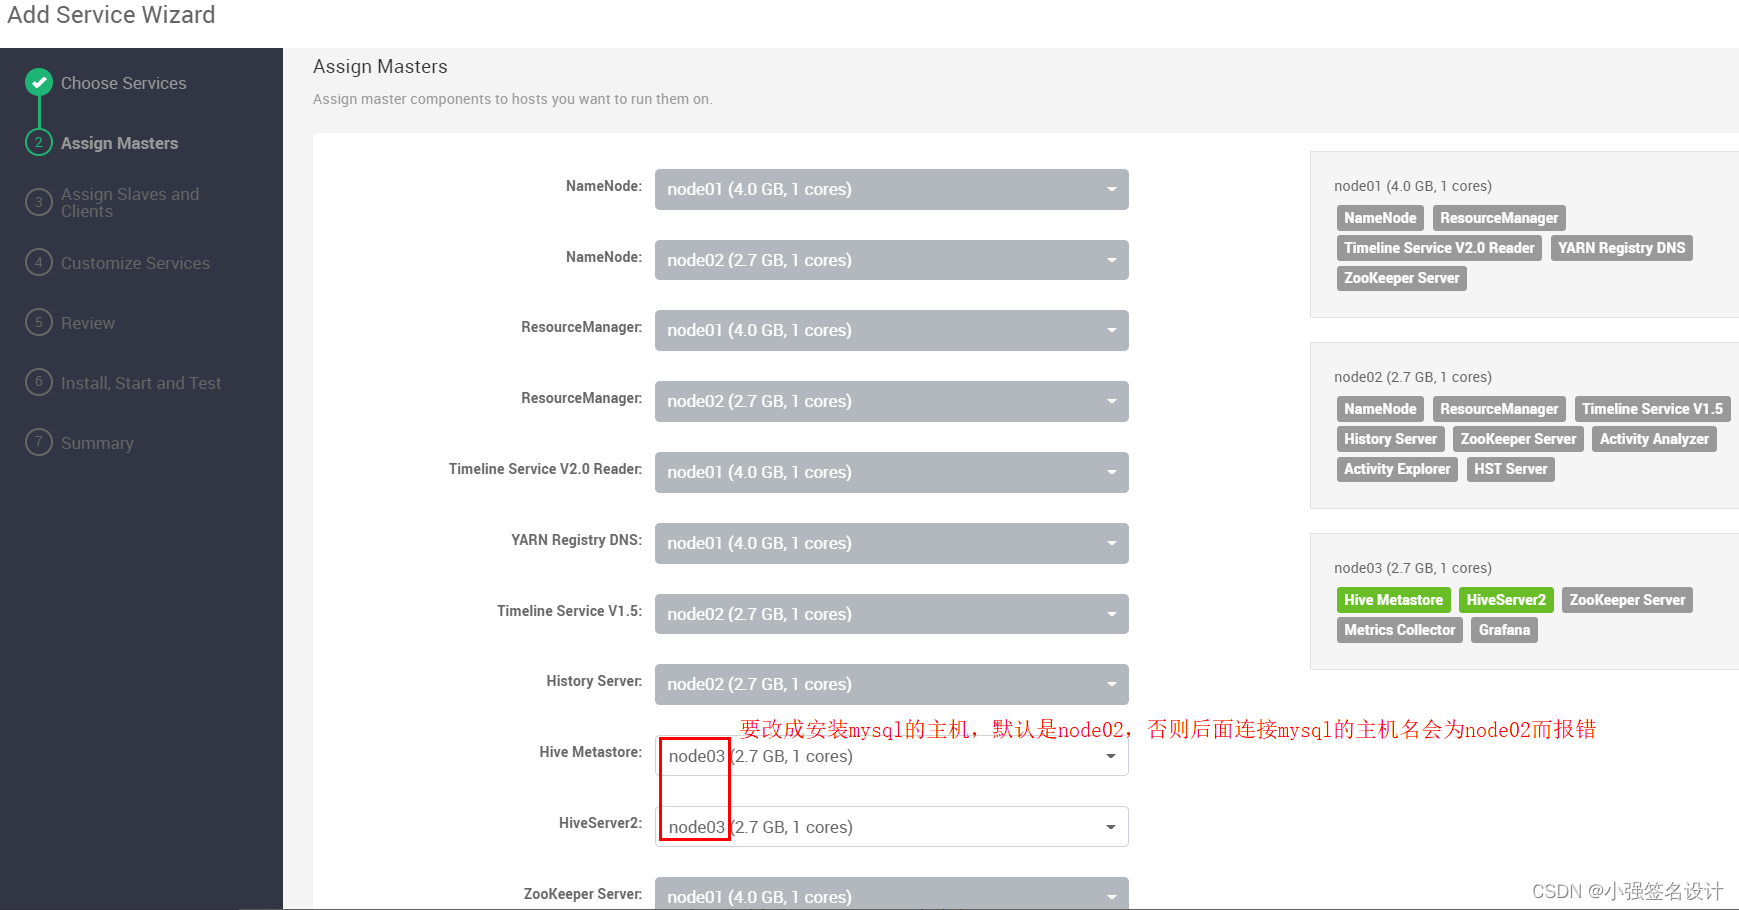
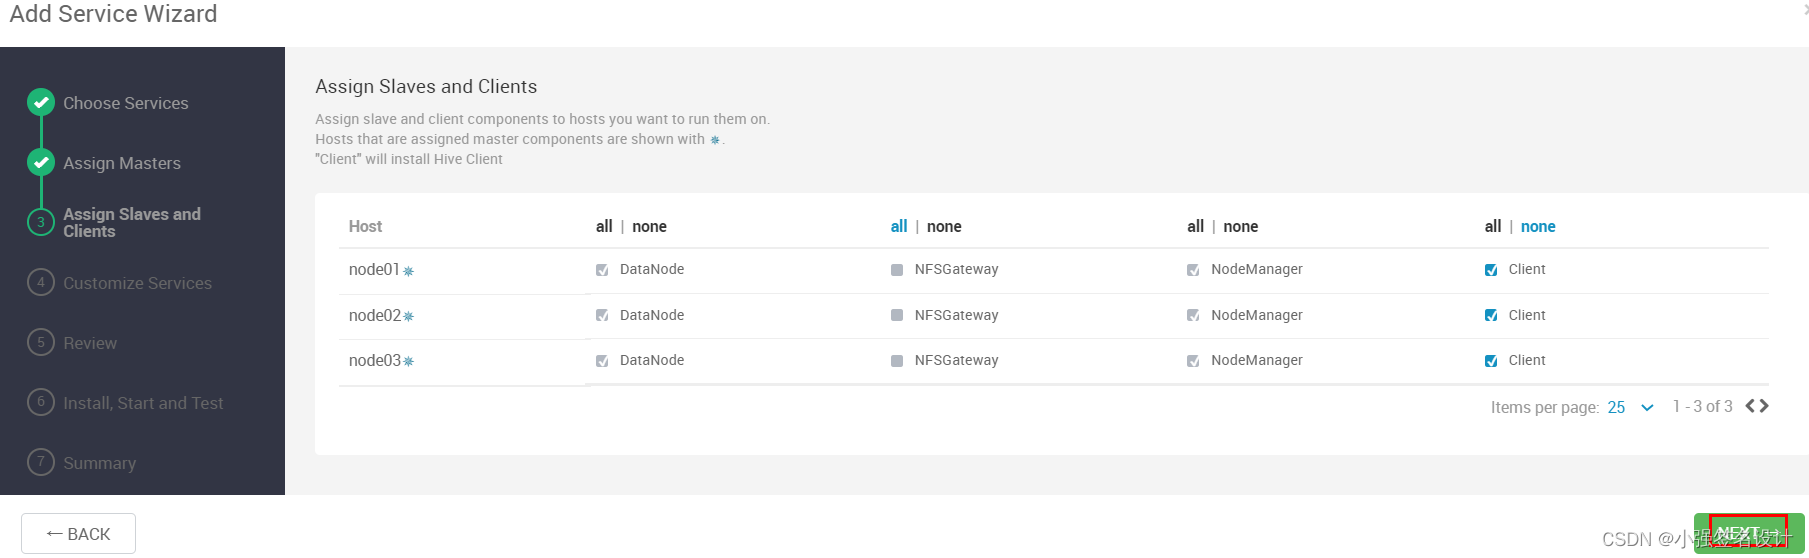
点击下一步,设置三个master节点:
点击下一步,设置 regionserver 和 phonenix 服务: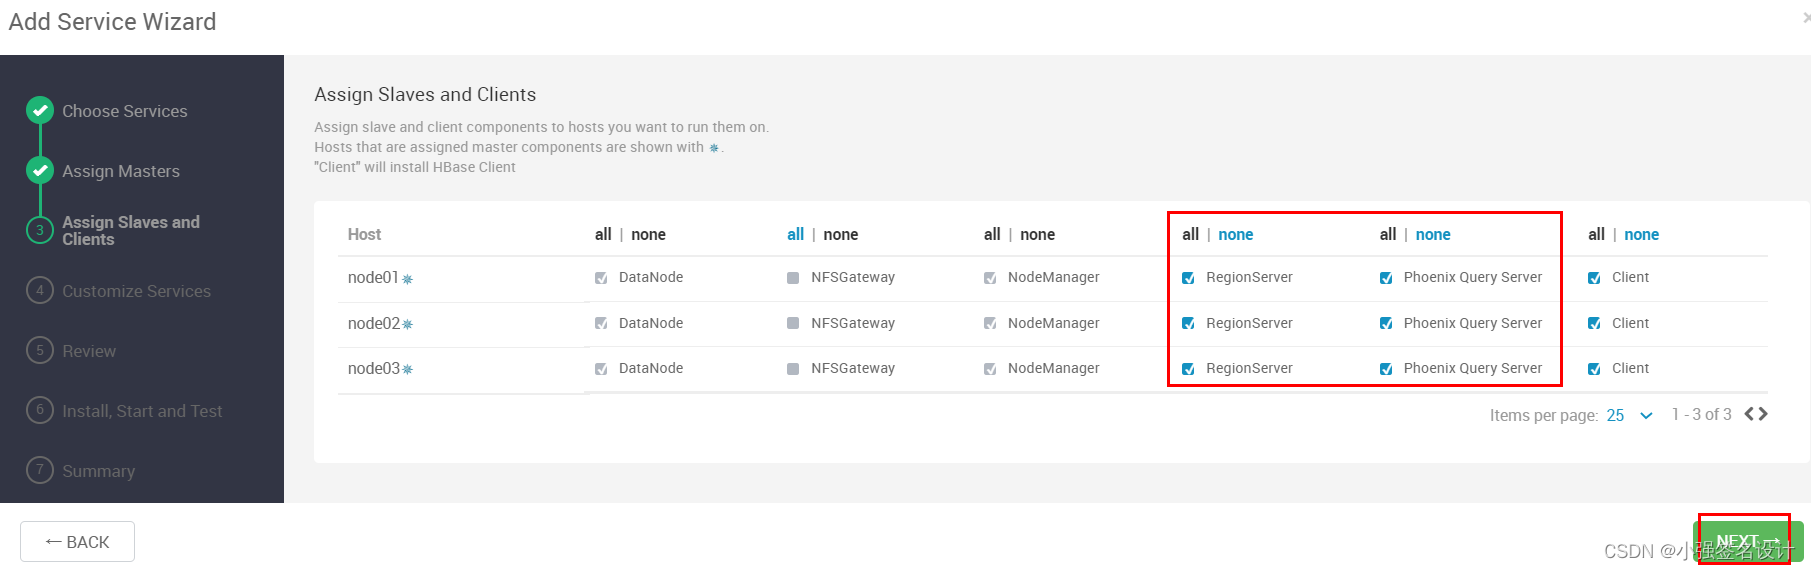
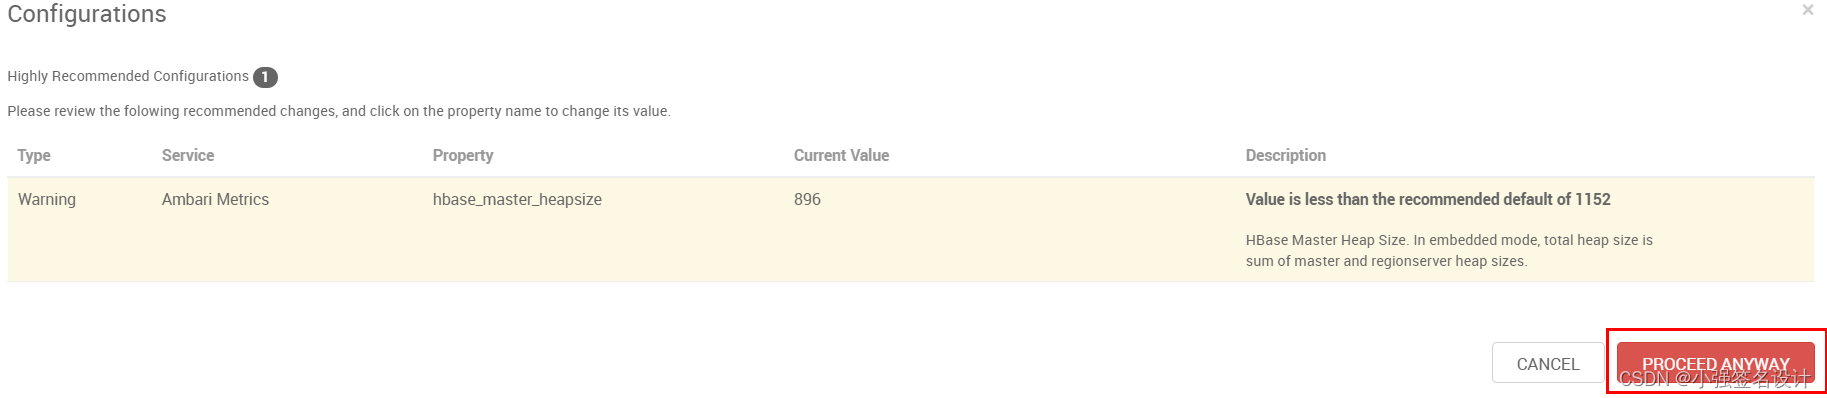
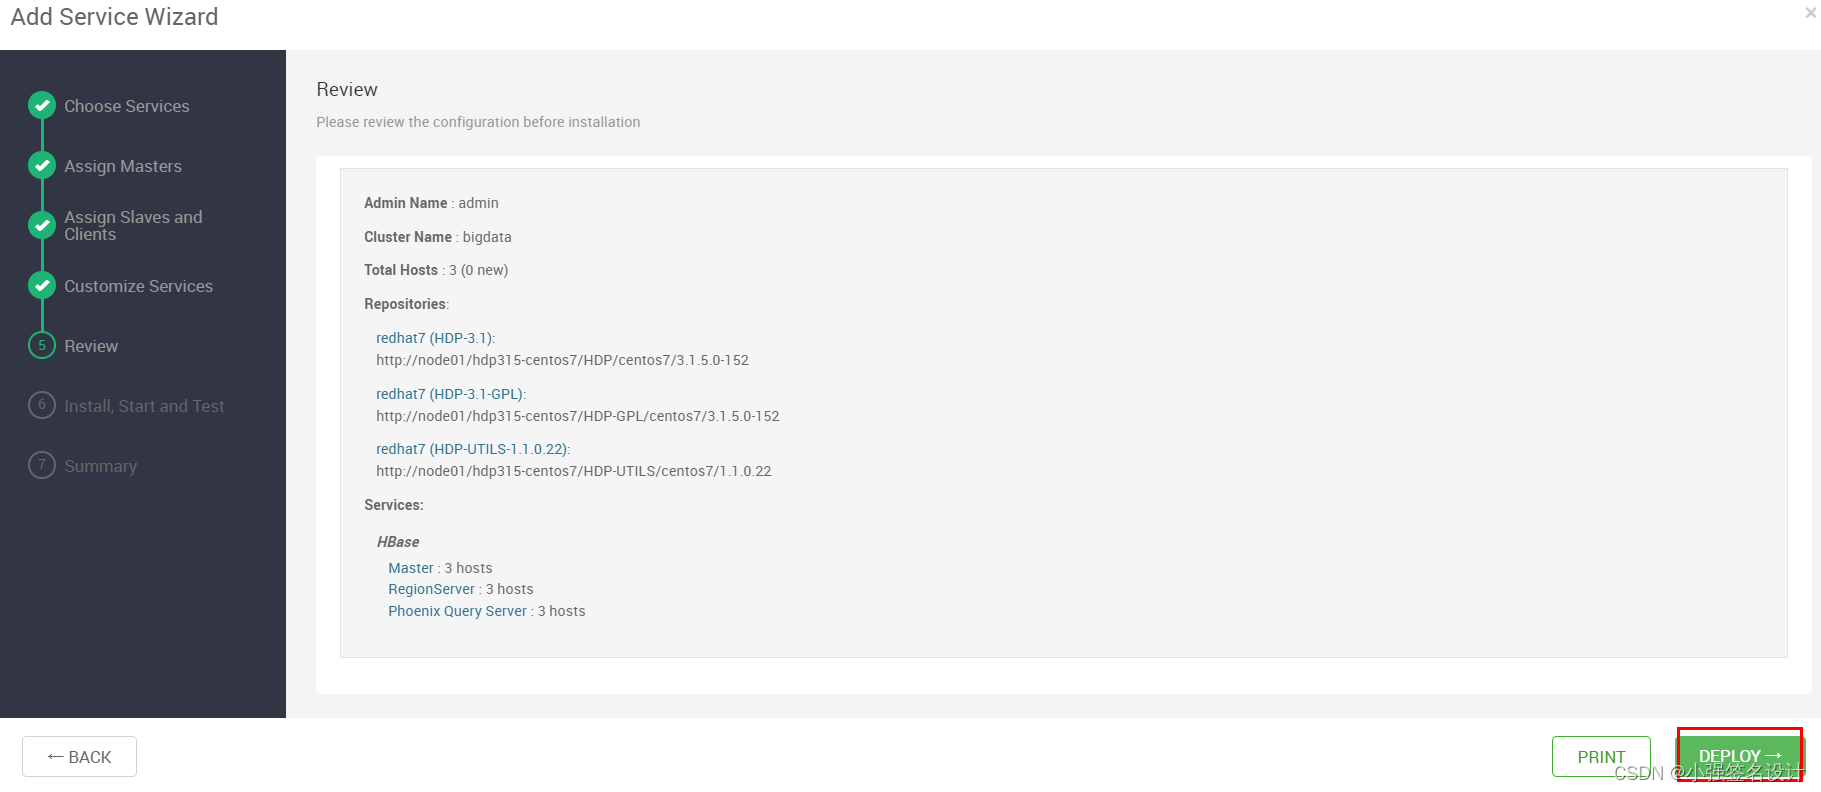
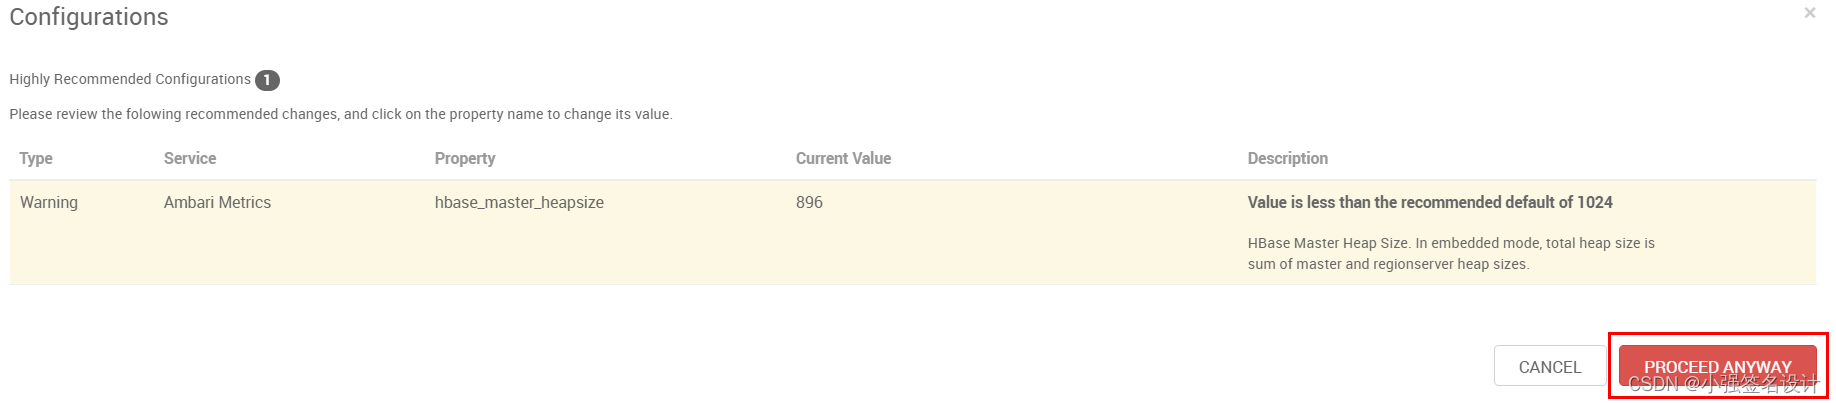
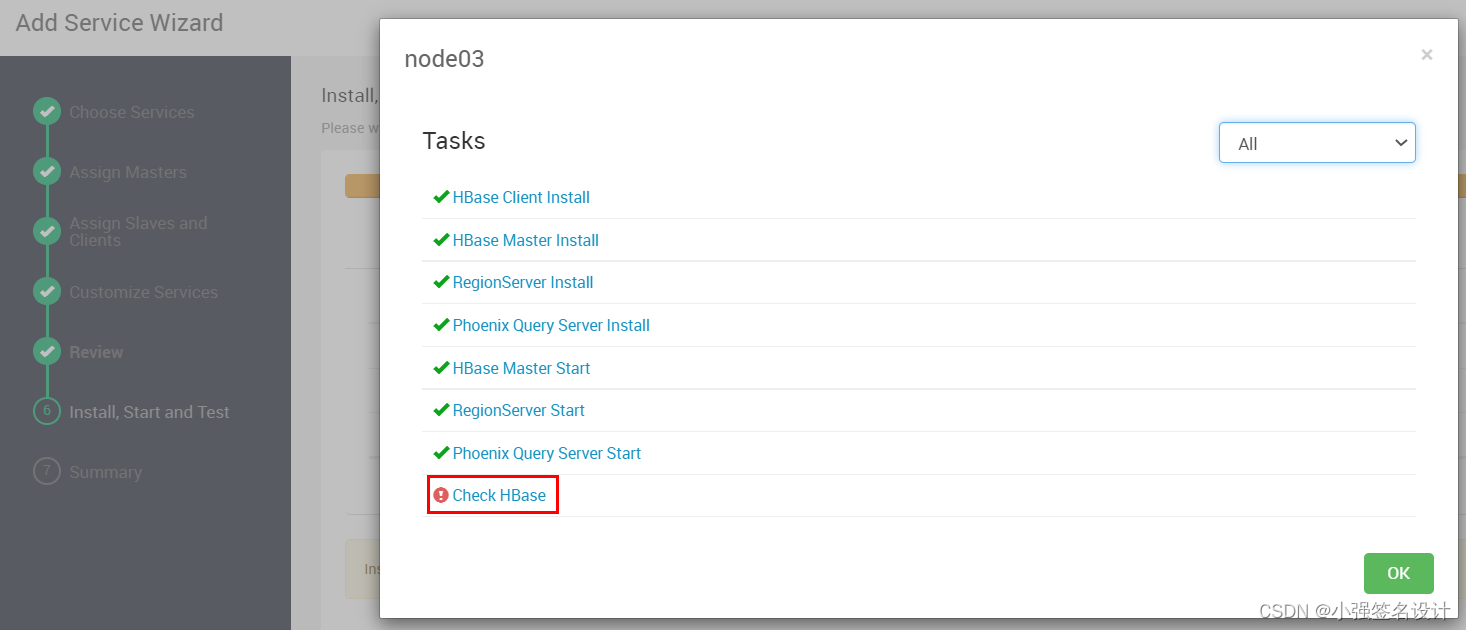
出现了下面这个警告,但是不影响最终使用: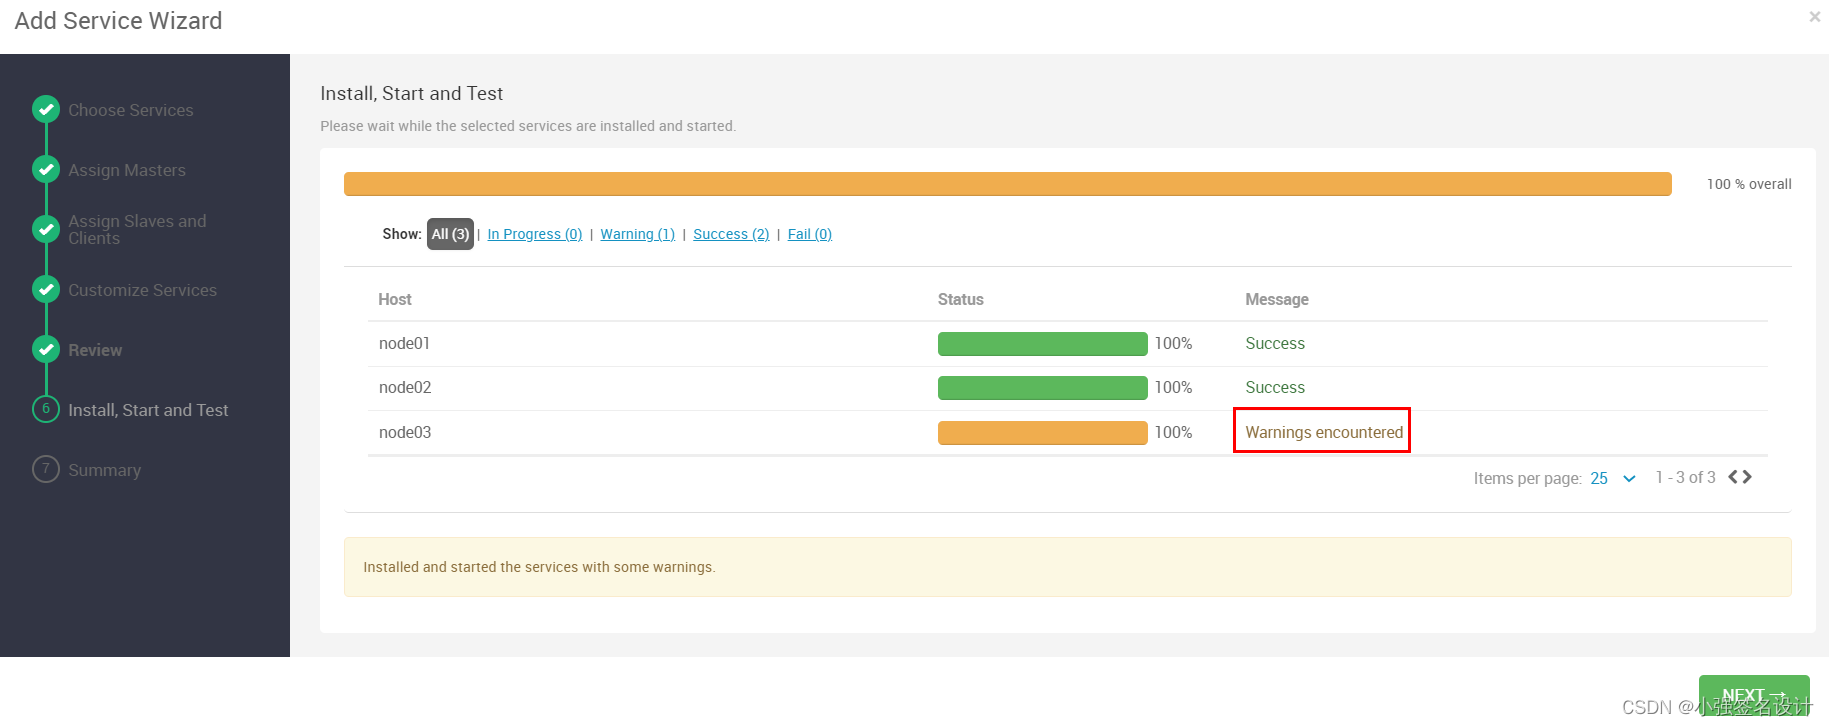
4.7 安装 Oozie 组件
登录mysql,创建oozie库和表:
[root@node03 ~]# mysql -uroot -proot%123
CREATE DATABASE oozie;
use oozie;
CREATE USER 'oozie'@'%' IDENTIFIED BY 'oozie';
GRANT ALL PRIVILEGES ON *.* TO 'oozie'@'%';
CREATE USER 'oozie'@'localhost' IDENTIFIED BY 'oozie';
GRANT ALL PRIVILEGES ON *.* TO 'oozie'@'localhost';
CREATE USER 'oozie'@'master' IDENTIFIED BY 'oozie';
GRANT ALL PRIVILEGES ON *.* TO 'oozie'@'master';
FLUSH PRIVILEGES;


oozie安装完后,oozie web ui不能访问, 缺少文件 ext-2.2.zip, 把缺少文件放入以下目录:
[root@node03 ~]# cp /mnt/ext-2.2.zip /usr/hdp/3.1.5.0-152/oozie/libext/


4.7.1 Oozie 启用 HA:


安装的 node02 节点也要同步 ext-2.2.zip 文件
[root@node03 ~]# scp /usr/hdp/3.1.5.0-152/oozie/libext/ext-2.2.zip node02:/usr/hdp/3.1.5.0-152/oozie/libext/


遇到的问题:

然后我在服务器上执行该命令也是报这个错,然后我对比了下两个节点该文件的大小居然不一致:
# 解决:
[root@node02 ~]# rm /usr/hdp/current/oozie-server/oozie-sharelib.tar.gz
[root@node03 ~]# scp /usr/hdp/current/oozie-server/oozie-sharelib.tar.gz node02:/usr/hdp/current/oozie-server/
再启动node02上的Oozie Server可以成功:
4.8 安装 Kafka 组件
因为我是在自己笔记本电脑上三台虚拟机上安装的,资源实在有些不够用,所以我暂时先将Oozie服务停掉了。


4.9 安装 Solr 组件
怕资源不够用,又将Hive服务停掉。


4.10 安装 Atlas 组件


4.11 安装 Spark2 组件
为了节约资源,将不需要的组件atlas、hbase、kafka、solr服务都停了,注:hive服务得打开。


4.12 删除SmartSense节点


