使用方法:
.vmdk格式 使用 VBoxManage.exe modifyhd
.vdi格式 采用 VBoxManage.exe createhd->clonehd ->modifyhd
查看磁盘uuid
D:\Program Files\Oracle\VirtualBox>VBoxManage.exe list hdds
UUID:           887eb54f-dcee-43d5-a99c-104a5fa71632
Parent UUID:    base
State:          locked write
Type:           normal (base)
Location:       F:\Program Files\VirtualBox VMs\bigdata_HDP2.6.2\Master\hdpMaster.vdi
Storage format: VDI
Capacity:       81920 MBytes
Encryption:     disabled
1、对磁盘 .vdi格式,增加总量,以Windows系统为例
.vmdk格式
(特别注意空格和中文)
1.启动CMD命令行,进入VirtualBox的安装目录。如
运行:cmd
> C:\Users\Administrator\>D:
> D:\> cd  "\Program Files\Oracle\VirtualBox"
> D:\Program Files\Oracle\VirtualBox> .\VBoxManage.exe modifyhd YOUR_HARD_DISK.vdi --resize SIZE_IN_MB
其中参数 YOUR_HARD_DISK.vdi 是您要修改的 VirtualBox 虚拟硬盘镜像文件。而参数 SIZE_IN_MB
是指修改后的硬盘容量,单位是MB。
- 调整磁盘空间为15G:
比如下面这行命令将会把名为" ubuntu.vdi "的 VirtualBox 硬盘容量修改为15*1024MB。
 C:\Program Files\Oracle\VirtualBox>VBoxManage.exe modifyhd "E:\dds\VirtualBox VMs\linux\linux-bak.vdi" --resize 15360

0%....10%....20%....30%....40%....50%....60%....70%....80%....90%....100%.
注意:如果路径中包含空格或中文,整个路径要用英文状态引号"括起来,在WIN7的CMD下可以输入部分路径然后按TAB键补全,CMD监测到路径中有空格会自动为路径名加引号的,如:
格式一:
D:\Program Files\Oracle\VirtualBox>VBoxManage.exe modifyhd "F:\VirtualBox\my ubuntu.vdi" --resize 15360
格式二:
>D:\Program Files\Oracle\VirtualBox>VBoxManage.exe modifyhd "F:\虚拟机\my ubuntu.vdi"--resize 15360
.vdi格式
在命令行先创建一个空的vdi虚拟机介质,创建时设置大小为扩容后的大小,然后使用克隆命令进行虚拟机介质克隆。
创建新虚拟介质命令
 VBoxManage.exe createhd -filename "F:\Program Files\VirtualBox VMs\bigdata_HDP2.6.2\Master\hdpMaster" -size 81920 -format VDI -variant Standard
0%...10%...20%...30%...40%...50%...60%...70%...80%...90%...100%
Medium created. UUID: 23d3d507-14eb-4efb-a98b-707e12965010
克隆命令
D:\VirtualBox>VBoxManage.exe clonehd "F:\Program Files\VirtualBox VMs\bigdata_HDP2.6.2\Master\Master.vdi" "F:\Program Files\VirtualBox VMs\bigdata_HDP2.6.2\Master\hdpMaster.vdi" --existing
0%...10%...20%...30%...40%...50%...60%...70%...80%...90%...100%
Clone medium created in format 'VDI'. UUID: aac9dd3f-ba41-46a8-bb49-c6559fef0360
此时原来的那个Master.vdi 已经克隆到hdpMaster.vdi了,再执行以下VBoxManage modifyhd 命令即可。
D:\VirtualBox>VBoxManage modifyhd "F:\Program Files\VirtualBox VMs\bigdata_HDP2.6.2\Master\1ahdpMaster.vdi" --resize 81920
0%...10%...20%...30%...40%...50%...60%...70%...80%...90%...100%
或者
1、选择虚拟介质管理进行磁盘扩容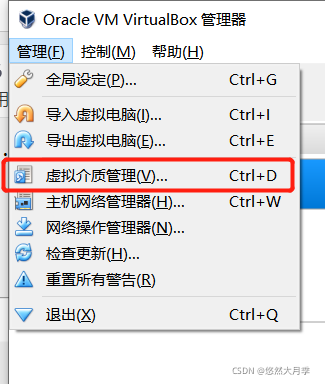
2、选择磁盘大小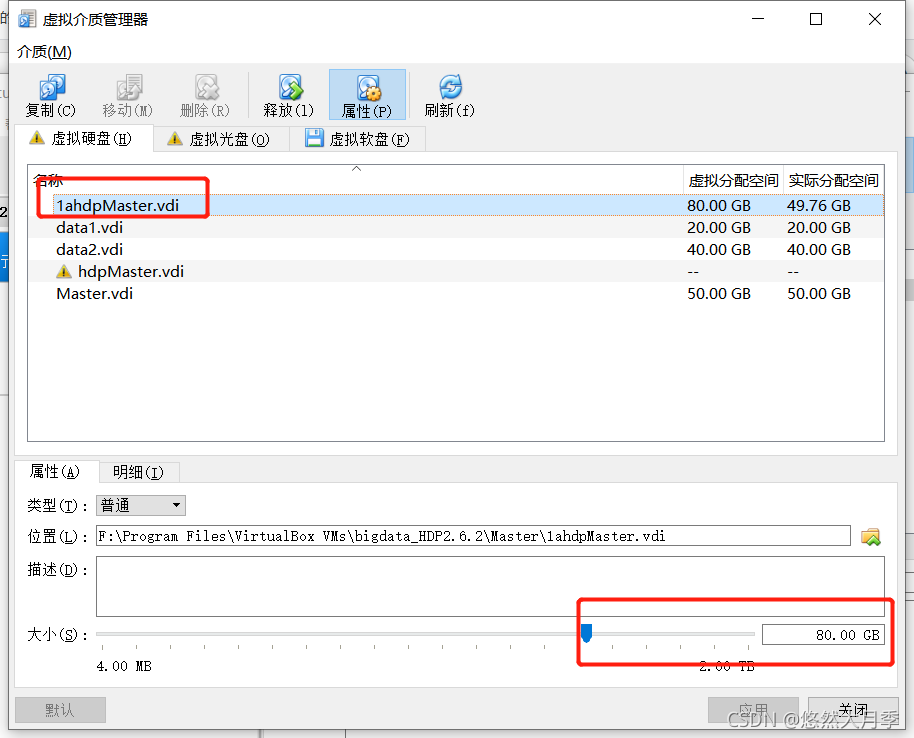
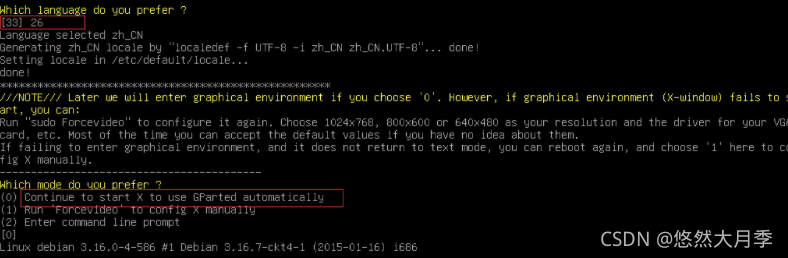
2、环境准备(不需要测试,跳到第二步)
软件地址:
https://sourceforge.net/projects/gparted/files/
- 首先先下载GParted的iso镜像文件【下载地址】
- 虚拟机下可以直接挂载iso文件,修改启动项启动即可
- 物理机则需要U盘或者光驱来做启动盘
# 在需要扩容的挂载盘下创建一个大文件和一些小文件,看扩容结果会不会导致数据丢失
[root@rsq-8-163 data]# dd if=/dev/zero of=/data/test count=10 bs=100M
记录了10+0 的读入
记录了10+0 的写出
1048576000字节(1.0 GB)已复制,6.9634 秒,151 MB/秒
[root@rsq-8-163 data]# touch test{1..10}.txt
[root@rsq-8-163 data]# df -h | grep data
/dev/xvda3            20G  1.1G   19G    6% /data
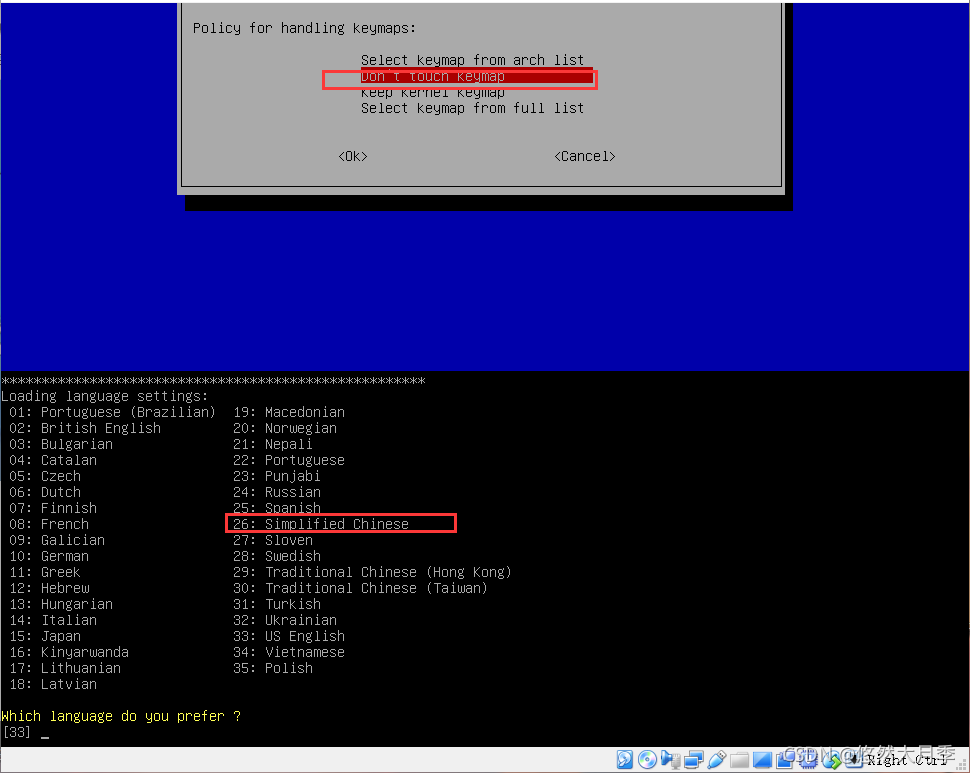
2、根据提示操作即可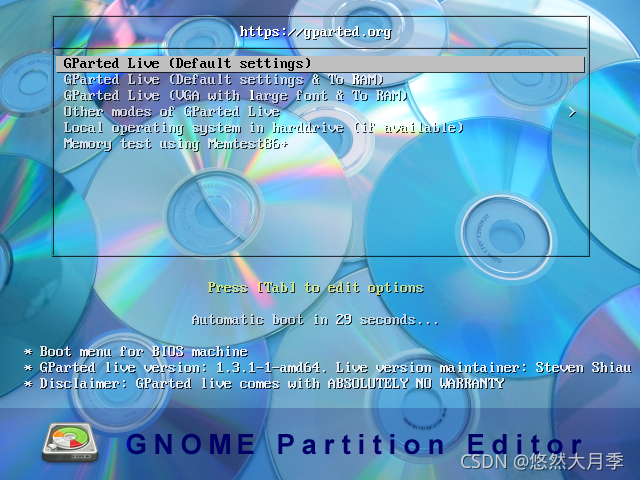
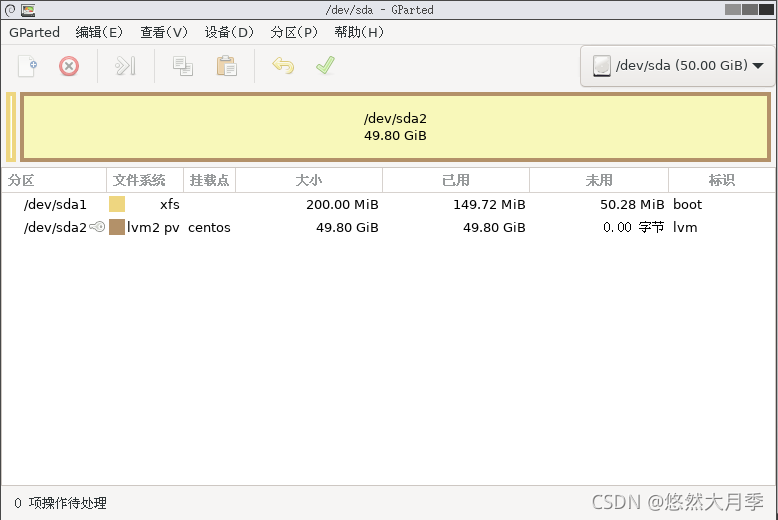
这里需要把未分配的20G空间合并至/dev/sda2分区中,
拖动伸缩条,往后边拉满即可
分区已经合并完毕,调整服务器启动项,重启服务器查看磁盘空间
变化前:
[root@master ~]# df -h /
Filesystem               Size  Used Avail Use% Mounted on
/dev/mapper/centos-root   48G   40G  8.3G  83% /
变化后
[root@master ~]# df -h /
Filesystem               Size  Used Avail Use% Mounted on
/dev/mapper/centos-root   78G   40G   39G  51% /
3.查看数据是否丢失(可选测试)
[root@rsq-8-163 ~]# ll -h /data/
总用量 1000M
-rw-r--r--. 1 root root 1000M 8月  20 11:26 test
-rw-r--r--. 1 root root     0 8月  20 13:44 test10.txt
-rw-r--r--. 1 root root     0 8月  20 13:44 test1.txt
-rw-r--r--. 1 root root     0 8月  20 13:44 test2.txt
-rw-r--r--. 1 root root     0 8月  20 13:44 test3.txt
-rw-r--r--. 1 root root     0 8月  20 13:44 test4.txt
-rw-r--r--. 1 root root     0 8月  20 13:44 test5.txt
-rw-r--r--. 1 root root     0 8月  20 13:44 test6.txt
-rw-r--r--. 1 root root     0 8月  20 13:44 test7.txt
-rw-r--r--. 1 root root     0 8月  20 13:44 test8.txt
-rw-r--r--. 1 root root     0 8月  20 13:44 test9.txt
我这里还需要进行下一步才能将磁盘挂载到根目录(挂载到/dev/mapper/centos-root 下),使用方法二
方法二:
继续进行如下操作
[root@master ~]# df -h /
Filesystem               Size  Used Avail Use% Mounted on
/dev/mapper/centos-root   48G   40G  8.3G  83% /
[root@master ~]# lvdisplay
  --- Logical volume ---
  LV Path                /dev/centos/swap
  LV Name                swap
  VG Name                centos
  LV UUID                hSbznW-LkWa-KQTh-T3TJ-6ojL-1A6a-QVw9Ee
  LV Write Access        read/write
  LV Creation host, time master, 2021-05-18 14:14:10 +0800
  LV Status              available
  # open                 2
  LV Size                2.00 GiB
  Current LE             512
  Segments               1
  Allocation             inherit
  Read ahead sectors     auto
  - currently set to     8192
  Block device           253:1

  --- Logical volume ---
  LV Path                /dev/centos/root
  LV Name                root
  VG Name                centos
  LV UUID                dmISWA-BfrO-8NqQ-X3rc-Utxo-BSkb-KtgvSV
  LV Write Access        read/write
  LV Creation host, time master, 2021-05-18 14:14:11 +0800
  LV Status              available
  # open                 1
  LV Size                47.80 GiB
  Current LE             12237
  Segments               1
  Allocation             inherit
  Read ahead sectors     auto
  - currently set to     8192
  Block device           253:0

#ex:添加 Free  PE / Size       10240 / 40.00 GiB  (40G为自己添加的磁盘大小)
[root@master ~]# vgdisplay
  --- Volume group ---
  VG Name               centos
  System ID
  Format                lvm2
  Metadata Areas        1
  Metadata Sequence No  5
  VG Access             read/write
  VG Status             resizable
  MAX LV                0
  Cur LV                2
  Open LV               2
  Max PV                0
  Cur PV                1
  Act PV                1
  VG Size               79.80 GiB
  PE Size               4.00 MiB
  Total PE              20429
  Alloc PE / Size       20429 / 79.80 GiB
  Free  PE / Size       0 / 0
  VG UUID               TrcTCd-oUgC-d6yR-0lPO-iiE4-1G9x-ADfzA8

#添加 Free  PE / Size 中剩余的磁盘大小。我这里是30GB
[root@master ~]# lvextend -L +30G /dev/mapper/centos-root
  Size of logical volume centos/root changed from 47.80 GiB (12237 extents) to 77.80 GiB (19917 extents).
  Logical volume centos/root successfully resized.
[root@master ~]# df -ht
df: option requires an argument -- 't'
Try 'df --help' for more information.
[root@master ~]# df -hT
Filesystem              Type      Size  Used Avail Use% Mounted on
devtmpfs                devtmpfs  2.9G     0  2.9G   0% /dev
tmpfs                   tmpfs     2.9G     0  2.9G   0% /dev/shm
tmpfs                   tmpfs     2.9G  9.2M  2.9G   1% /run
tmpfs                   tmpfs     2.9G     0  2.9G   0% /sys/fs/cgroup
/dev/mapper/centos-root xfs        48G   40G  8.3G  83% /
/dev/sda1               xfs       197M  157M   41M  80% /boot
tmpfs                   tmpfs     581M   12K  581M   1% /run/user/42
cm_processes            tmpfs     2.9G     0  2.9G   0% /run/cloudera-scm-agent/process
[root@master ~]# xfs_growfs /dev/mapper/centos-root
meta-data=/dev/mapper/centos-root isize=512    agcount=4, agsize=3132672 blks
         =                       sectsz=512   attr=2, projid32bit=1
         =                       crc=1        finobt=0 spinodes=0
data     =                       bsize=4096   blocks=12530688, imaxpct=25
         =                       sunit=0      swidth=0 blks
naming   =version 2              bsize=4096   ascii-ci=0 ftype=1
log      =internal               bsize=4096   blocks=6118, version=2
         =                       sectsz=512   sunit=0 blks, lazy-count=1
realtime =none                   extsz=4096   blocks=0, rtextents=0
data blocks changed from 12530688 to 20395008
[root@master ~]# df -h
Filesystem               Size  Used Avail Use% Mounted on
devtmpfs                 2.9G     0  2.9G   0% /dev
tmpfs                    2.9G     0  2.9G   0% /dev/shm
tmpfs                    2.9G  9.2M  2.9G   1% /run
tmpfs                    2.9G     0  2.9G   0% /sys/fs/cgroup
/dev/mapper/centos-root   78G   40G   39G  51% /
/dev/sda1                197M  157M   41M  80% /boot
tmpfs                    581M   12K  581M   1% /run/user/42
cm_processes             2.9G     0  2.9G   0% /run/cloudera-scm-agent/process
[root@master ~]# vgdisplay
  --- Volume group ---
  VG Name               centos
  System ID
  Format                lvm2
  Metadata Areas        1
  Metadata Sequence No  5
  VG Access             read/write
  VG Status             resizable
  MAX LV                0
  Cur LV                2
  Open LV               2
  Max PV                0
  Cur PV                1
  Act PV                1
  VG Size               79.80 GiB
  PE Size               4.00 MiB
  Total PE              20429
  Alloc PE / Size       20429 / 79.80 GiB
  Free  PE / Size       0 / 0
  VG UUID               TrcTCd-oUgC-d6yR-0lPO-iiE4-1G9x-ADfzA8

[root@master ~]#
成功挂载到根目录
版权声明:本文为weixin_38504735原创文章,遵循CC 4.0 BY-SA版权协议,转载请附上原文出处链接和本声明。