angular快速 入门
角度安装 (Angular Installation)
先决条件 (Prerequisites)
Angular projects are dependent on npm packages. So by installing Node.js, we by default get npm package manager, which is used to install npm packages.
Angular项目依赖于npm软件包。 因此,通过安装Node.js,我们默认获取npm软件包管理器,该软件包管理器用于安装npm软件包。
Download Node.js using this link → https://nodejs.org/en/download/
使用此链接下载Node.js→ https://nodejs.org/en/download/
Once the installation done, we get nodeand npmbinaries added to systems environment path. That means, now you can use node and npm command.
安装完成后,我们将节点和npm二进制文件添加到系统环境路径中。 这意味着,现在您可以使用node和npm命令。
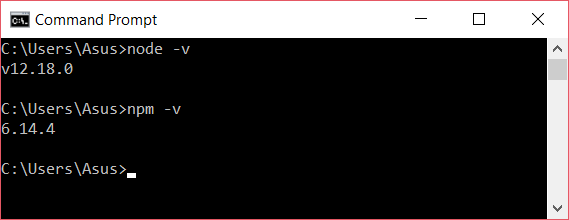
Lets check the version of Node installed by using the following commands in our terminal:
让我们在终端中使用以下命令检查安装的Node版本:
安装Angular CLI (Installing Angular CLI)
Now, Lets Install Angular!!. Enter the following command in the terminal:
现在,让我们安装Angular !!。 在终端中输入以下命令:
npm install -g @angular/cliWe can check the version of Angular installed.
我们可以检查安装的Angular版本。
ng version创建您的Angular项目 (Create Your Angular Project)
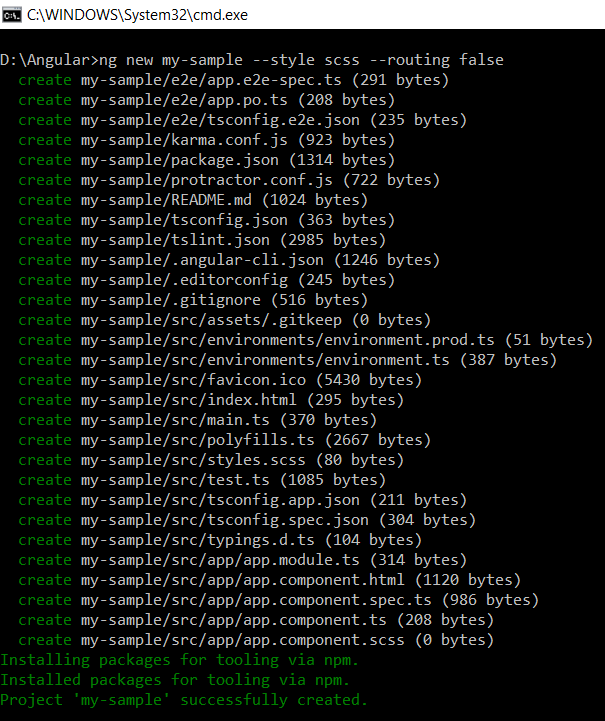
ng new my-sample --style scss --routing falseIn the above command we are passing --style scss, so that we can customize our project using Sass and --routing false , as we will not be implementing routing.
在上面的命令中,我们传递了--style scss ,因此我们可以使用Sass和--routing false定义项目,因为我们不会实现路由。
Make your way into the project that has been created via the following command:
进入通过以下命令创建的项目:
cd my-sampleNow let us start our angular project using ng-serve.
现在让我们使用ng-serve开始我们的角度项目。
ng serve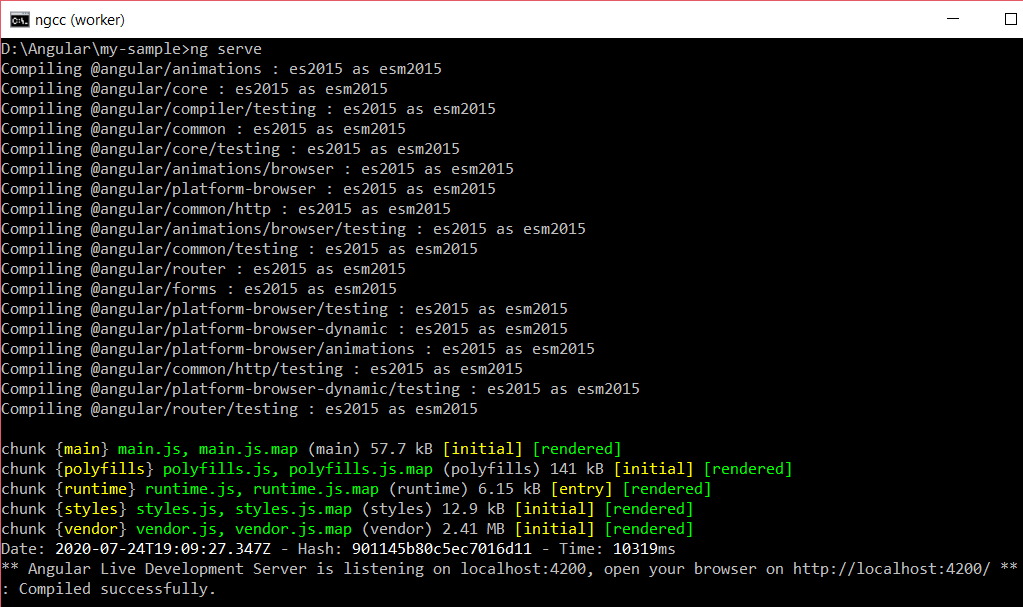
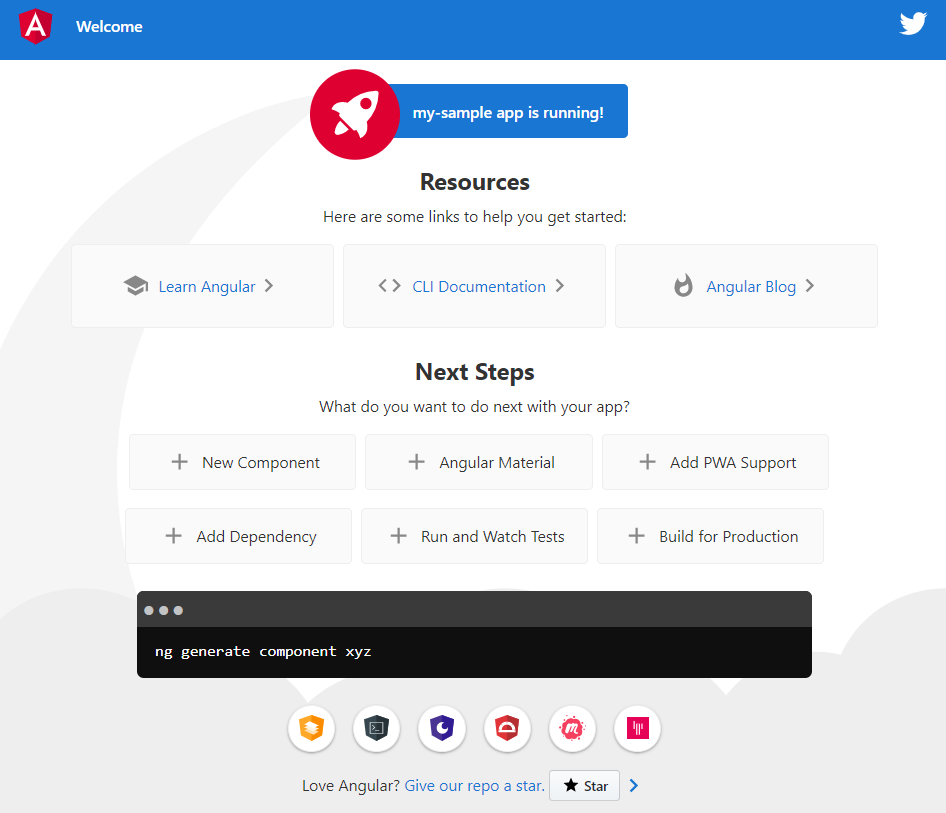
We can view our app from our browser by going to this URL: http://localhost:4200/
我们可以通过以下URL从浏览器中查看我们的应用程序: http:// localhost:4200 /
If everything goes as expected, then Congratulations !!!.. Yeeee..
如果一切都按预期进行,那么恭喜!!! .. Yeeee ..
Lets stop the command prompt by pressing “Ctrl + c” and add the Ag-Grid NPM packages to our project.
让我们通过按“ Ctrl + c”来停止命令提示符,然后将Ag-Grid NPM软件包添加到我们的项目中。
npm install --save ag-grid-community ag-grid-angularnpm installNow that the Ag-Grid packages are added and a great deal of time has passed since. Lets get to the code !!!!.We have to add the Ag-Grid styles to the styles.scss (my-sample\src\styles.scss).
现在,已经添加了Ag-Grid程序包,并且已经过去了很多时间。 让我们来看看代码!!! 我们必须将Ag-Grid样式添加到styles.scss(my-sample \ src \ styles.scss)中。
@import "../node_modules/ag-grid-community/src/styles/ag-grid.scss";
@import "../node_modules/ag-grid-community/src/styles/ag-theme-alpine/sass/ag-theme-alpine-mixin.scss";
.ag-theme-alpine {
    @include ag-theme-alpine();
}
The next step is to add the Ag-Grid Angular module to the root AppModule file by importing it and add AgGridModule to the imports array (my-sample\src\app\app.module.ts):
下一步是通过导入将Ag-Grid Angular模块添加到根AppModule文件,并将AgGridModule添加到imports数组(my-sample \ src \ app \ app.module.ts):
Next, we have to declare the grid (my-sample\src\app\app.component.ts):
接下来,我们必须声明网格(my-sample \ src \ app \ app.component.ts):
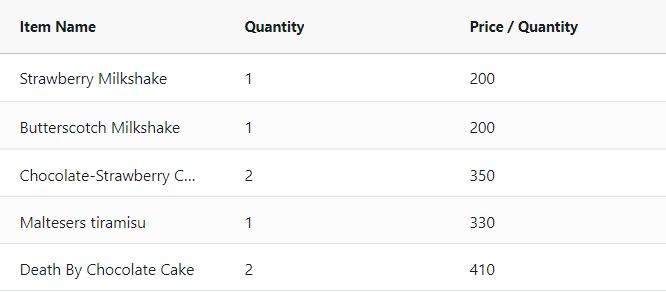
In the code above we have used column definitions (columnDefs) and the Row data (rowData). Here in our example we have three columns where each of them contain two properties ‘headerName’ which contains Header Name and ‘fields’ which contains the data field to be displayed in the body of the table.
在上面的代码中,我们使用了列定义(columnDefs)和行数据(rowData)。 在我们的示例中,我们有三列,其中每列包含两个属性“ headerName”和“ fields”,其中“ headerName”包含标题名称,“ fields”包含要在表主体中显示的数据字段。
Please Note: The value in ‘columndef (key,value)’ must match with the key of ‘rowData (key,value)’.
请注意:“ columndef(键,值)”中的值必须与“ rowData(键,值)”中的键匹配。
Now lets add the HTML component to our code (my-sample\src\app\app.component.html).
现在,将HTML组件添加到我们的代码中(my-sample \ src \ app \ app.component.html)。
If everything goes as expected, then Congratulations Once Again!. Yeeeah!!!...
如果一切都按预期进行,那么再次恭喜您! 是的!!! ...
从服务器获取/获取数据 (Get/Fetch Data from a Server)
Now that we have successfully displayed hard coded data, lets try getting our data from a server or in this case github where i have a JSON file.
现在我们已经成功显示了硬编码数据,让我们尝试从服务器或本例中我有JSON文件的github中获取数据。
Github URL for the json file: https://raw.githubusercontent.com/monishnarendra/Angular-Ag-Grid-Quick-Start-Example/master/Data.json
json文件的Github URL: https : //raw.githubusercontent.com/monishnarendra/Angular-Ag-Grid-Quick-Start-Example/master/Data.json
启用HTTP服务 (Enable HTTP Services)
Let’s add HttpClient to the root AppModule file by importing it and add HttpClientModule to the imports array (my-sample\src\app\app.module.ts) which is used for communicating with a server.
让我们通过导入将HttpClient添加到根AppModule文件中,并将HttpClientModule添加到用于与服务器进行通信的imports数组(my-sample \ src \ app \ app.module.ts)中。
Now we need to remove the hard-coded data and fetch it from a server by making changes to the app.component file (my-sample\src\app\app.component.ts):
现在,我们需要通过更改app.component文件(my-sample \ src \ app \ app.component.ts)来删除硬编码数据并从服务器中获取它们:
Injecting HttpClient into the constructor in a private property called http. Through http we can used the get method to communicate to the server and the subscribe function receives the data (json) from the server and pushes it into to the ‘rowData’ list for display.
在名为http的私有属性中将HttpClient注入构造函数。 通过http,我们可以使用get方法与服务器进行通信,并且subscription函数从服务器接收数据(json)并将其推送到“ rowData”列表中进行显示。
Notice that we also imported the OnInit and implemented it in our export class. This is done so that we can use the ngOnInit function. As the ngOnInit is called by Angular to indicate that the Angular is done creating the component. Hence we want our data to be loaded as soon as Angular is done creating its components.
注意,我们还导入了OnInit并将其实现在我们的导出类中。 这样做是为了可以使用ngOnInit函数。 由于Angular调用ngOnInit来指示Angular已完成创建组件。 因此,我们希望在Angular完成创建其组件后立即加载数据。
复选框,过滤和排序 (Checkbox, Filtering and Sorting)
Since we are done with fetching the data, let me show you how simple it is to implement sorting and filtering in the data using ag-grid.
既然我们已经完成了获取数据的工作,那么让我向您展示使用ag-grid对数据进行排序和过滤是多么简单。
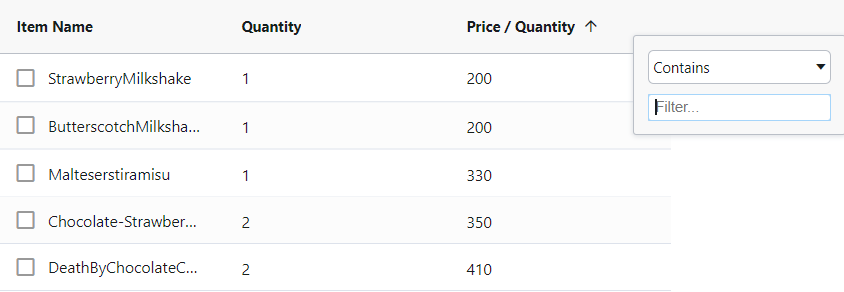
All we need to do is to add the properties ( sortable, filter and checkboxSelection) and set them to true. Yes its that easy, Don’t believe me.. hmm Let me show you.
我们要做的就是添加属性(sortable,filter和checkboxSelection)并将它们设置为true。 是的,那很容易,不要相信我..嗯,让我告诉你。
If everything works out well then you should be seeing this:
如果一切顺利,那么您应该会看到以下信息:
从Ag-grid获取选定的行 (Getting Selected row from Ag-grid)
This task is fairly simple too, lets first create the instance of the component.
这个任务也很简单,让我们首先创建组件的实例。
Now lets try accessing this (‘#myGrid’) instance from our component.
现在,让我们尝试从我们的组件中访问此('#myGrid')实例。
Next we need to add a button that triggers/calls a function which gets the selected data and prints the selected row in the browser console.
接下来,我们需要添加一个按钮来触发/调用一个函数,该函数获取所选数据并在浏览器控制台中打印所选行。
结论 (Conclusion)
I do hope this “Quick Start” guide has shown you how easy it is to integrate and configure Ag-Grid with Angular.
我确实希望这份“快速入门”指南向您展示了使用Angular集成和配置Ag-Grid是多么容易。
Whole solution at this GitHub Repository. Your probably now thinking “I could’ve avoided all that copy/pasting.!!!!” But hey, hope you learned something along the way. I know I did.
整个解决方案位于此GitHub存储库中 。 您现在可能在想:“我本可以避免所有复制/粘贴。!!!” 但是,希望您在此过程中学到了一些东西。 我知道我做到了
Comments and questions welcome below — I hope that you found this useful!
欢迎在下面发表评论和提问-希望您觉得这有用!
Happy Coding!!!
快乐编码!
翻译自: https://medium.com/swlh/angular-with-ag-grid-quick-start-dfda8f02d9a
angular快速 入门