1、创建一个maven项目,在pom文件中添加依赖:
<?xml version="1.0" encoding="UTF-8"?>
<project xmlns="http://maven.apache.org/POM/4.0.0"
         xmlns:xsi="http://www.w3.org/2001/XMLSchema-instance"
         xsi:schemaLocation="http://maven.apache.org/POM/4.0.0 http://maven.apache.org/xsd/maven-4.0.0.xsd">
    <modelVersion>4.0.0</modelVersion>

    <groupId>com.yyq</groupId>
    <artifactId>hello-spring-boot-starter-autoconfigure</artifactId>
    <version>1.0-SNAPSHOT</version>
    <packaging>jar</packaging>

    <properties>
        <java.version>1.8</java.version>
    </properties>

    <dependencies>

		<!-- spring-boot-autoconfigure此jar包中包含大量核心注解,包含条件注解等 -->
        <dependency>
            <groupId>org.springframework.boot</groupId>
            <artifactId>spring-boot-autoconfigure</artifactId>
            <version>2.0.0.RELEASE</version>
        </dependency>

        <dependency>
            <groupId>org.springframework.boot</groupId>
            <artifactId>spring-boot-configuration-processor</artifactId>
            <version>2.2.1.RELEASE</version>
            <optional>true</optional>
        </dependency>

    </dependencies>

    <build>
        <plugins>
            <plugin>
                <groupId>org.apache.maven.plugins</groupId>
                <artifactId>maven-compiler-plugin</artifactId>
                <configuration>
                    <source>1.8</source>
                    <target>1.8</target>
                </configuration>
            </plugin>
        </plugins>
    </build>

</project>
2、创建properties属性类读取属性:
package com.yyq;

import org.springframework.boot.context.properties.ConfigurationProperties;

/**
 * @author YangYuQian
 * @date 2021/8/30 9:23
 * @description: 属性类
 */

/**
 * @ConfigurationProperties
 * 配置此注解可以自动导入application.properties配置文件中的属性,
 * 前提需要指定属性前缀prefix。
 * 如果application.properties文件中未指定相应属性,
 * 便使用默认的,如上name=“wisdom”,hobby=“basketball”.
 */
@ConfigurationProperties(prefix = "com.yyq")
public class HelloServiceProperties {

    private String name="yuzi";
    private String hobby="playgame";

    public String getName() {
        return name;
    }

    public void setName(String name) {
        this.name = name;
    }

    public String getHobby() {
        return hobby;
    }

    public void setHobby(String hobby) {
        this.hobby = hobby;
    }
}
3、创建配置类
package com.yyq;

/**
 * @author YangYuQian
 * @date 2021/8/30 9:32
 * @description: 配置类
 */
public class HelloServiceConfiguration {
    private String name;
    private String hobby;

    public String getName() {
        return name;
    }

    public void setName(String name) {
        this.name = name;
    }

    public String getHobby() {
        return hobby;
    }

    public void setHobby(String hobby) {
        this.hobby = hobby;
    }

}
3、创建自动配置类
package com.yyq;

import org.springframework.beans.factory.annotation.Autowired;
import org.springframework.boot.autoconfigure.condition.ConditionalOnClass;
import org.springframework.boot.autoconfigure.condition.ConditionalOnMissingBean;
import org.springframework.boot.autoconfigure.condition.ConditionalOnProperty;
import org.springframework.boot.context.properties.EnableConfigurationProperties;
import org.springframework.context.annotation.Bean;
import org.springframework.context.annotation.Configuration;

/**
 * @author YangYuQian
 * @date 2021/8/30 9:33
 * @description: 自动配置类
 */

/**
 * @Configuration: 表明此类是一个配置类,将变为一个bean被spring进行管理。
 * @EnableConfigurationProperties: 启用属性配置,将读取HelloServiceProperties里面的属性。
 * @ConditionalOnClass: 当类路径下面有HelloServiceConfiguration此类时,自动配置。
 * @ConditionalOnProperty: 判断指定的属性是否具备指定的值。
 * @ConditionalOnMissingBean: 当容器中没有指定bean是,创建此bean。
 */
@Configuration
@EnableConfigurationProperties(HelloServiceProperties.class)
@ConditionalOnClass(HelloServiceConfiguration.class)
@ConditionalOnProperty(prefix = "com.yyq", value = "enabled", matchIfMissing = true)
public class HelloServiceAutoConfiguration {
    @Autowired
    private HelloServiceProperties helloServiceProperties;

    @Bean
    @ConditionalOnMissingBean(HelloServiceConfiguration.class)
    public HelloServiceConfiguration helloServiceConfiguration() {
        HelloServiceConfiguration helloService = new HelloServiceConfiguration();
        helloService.setName(helloServiceProperties.getName());
        helloService.setHobby(helloServiceProperties.getHobby());
        return helloService;
    }
}
5、在resources文件夹中新建一个META-INF文件,在里面创建spring.factories文件,注册自动配置类
org.springframework.boot.autoconfigure.EnableAutoConfiguration=\
  com.yyq.HelloServiceAutoConfiguration
项目结构如下:

自定义的hello-spring-boot-starter-autoconfigure编写完毕,springboot官方建议对于非官方的starter命名方式为xxx-spring-boot-starter。执行mvn clean install将项目打成一个jar包。
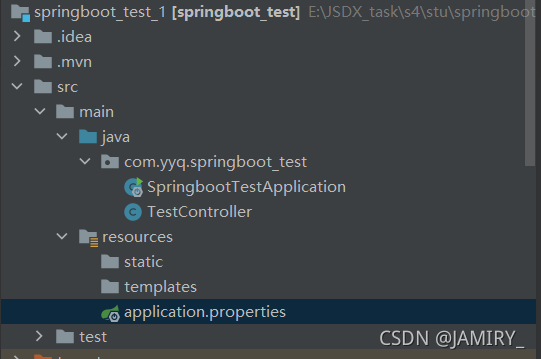
6、新建一个springboot项目,在pom文件中添加刚刚打包的jar:
<dependency>
	  <groupId>com.yyq</groupId>
	  <artifactId>hello-spring-boot-starter-autoconfigure</artifactId>
	  <version>1.0-SNAPSHOT</version>
	  <scope>compile</scope>
</dependency>
7、编写测试类
package com.yyq.springboot_test;

import com.yyq.HelloServiceConfiguration;
import org.springframework.web.bind.annotation.RequestMapping;
import org.springframework.web.bind.annotation.RestController;

import javax.annotation.Resource;

/**
 * @author YangYuQian
 * @date 2021/8/30 14:52
 * @description:
 */
@RestController
@RequestMapping("/my")
public class TestController {
    @Resource
    private HelloServiceConfiguration HelloServiceConfiguration;

    @RequestMapping("/get")
    public void getUser() {
        String hobby = HelloServiceConfiguration.getHobby();
        String name = HelloServiceConfiguration.getName();
        System.out.println(name + "\t" + hobby);
    }
}
8、在application.properties修改属性信息,不修改就是原来默认的属性值
com.yyq.hobby=study
com.yyq.name=yyq
9、启动项目访问接口 http://localhost:8080/my/get( 写自己的地址)

项目结构如下:
编译后的starter:

里面的json文件

版权声明:本文为JAMIRY_原创文章,遵循CC 4.0 BY-SA版权协议,转载请附上原文出处链接和本声明。