介绍
本地系统 windows 10。博客使用 GitHub Pages 网站托管,Hexo 博客框架,Hexo 主题选用 Aurora。
使用博客时,用Markdown编辑器写内容。hexo 会将 md 文件生成静态网页,并发布至 GitHub,通过 GitHub Pages 所给二级域名直接访问。
GitHub Pages
GitHub Pages is a static site hosting service that takes HTML, CSS, and JavaScript files straight from a repository on GitHub, optionally runs the files through a build process, and publishes a website.
Git是一个分布式版本控制系统,而Github是一个集成了git的服务,它可以以网页或者客户端的形式,帮助用户把git本地的数据提交到远程的服务器里。
Hexo 博客框架
Hexo 是一个快速、简洁且高效的博客框架。Hexo 使用 Markdown(或其他渲染引擎)解析文章,在几秒内,即可利用靓丽的主题生成静态网页。
准备
下载 Node.js download;安装;选默认配置;打开命令行输入
node -v看到版本号即安装无误;下载 Git download;默认配置安装;命令行
git --version,确认版本;安装完 Git 会得到 Git Bash 命令行工具;
Git 是一个分布式版本控制系统,而 Github 是一个集成了 Git 的服务。Git 可以帮助用户把本地的数据提交到远程的服务器里;
准备一个github.com账户,例如:用户名: zhangsan, email: zhangsan@abc.com
安装 Hexo
新建文件夹作为博客的根目录,例如:d:\myblog;
打开 d:\myblog目录,在文件夹空白区域右击选择 Git Bash Here;
命令行:
npm install hexo -cli -g; 安装 Hexo,其中参数 -g 是 global,全局安装;命令行:
hexo -v;查看是否安装成功命令行:在d:\myblog下,运行
hexo init初始化;现在可以看到myblog目录下多了很多文件。命令行:
hexo s;启动hexo博客服务。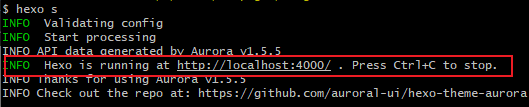
浏览器访问 http://localhost:4000/ 可以看到博客界面了。
本地博客和 Github Pages 同步
新建仓库
登录 github.com, 新建一个仓库。
github 首页 - New - create a new repository
- owner:zhangsan; //输入github账户名,这样才可用https://zhangsan.github.io 来访问;
- repository name:zhangsan;
- Description:随便写;
- 选中 public;
- 选中 “Add a README file”;
- 点击 “Create repository”。
ssh-keygen 生成密钥对
打开 “d:\myblog” 文件夹(博客根目录),空白处右击鼠标,选择
Git bash here;命令行:
ssh-keygen -t rsa -C "你的邮箱地址";新建密钥对;- -t 参数:t for type, 指密钥类型,此处是 rsa;
- -C 参数:C for Comment,指密钥的备注;
- 一路回车选择默认,ssh-keygen 会生成两个文件:
id_rsa(私钥)和id_rsa.pub(公钥),均在"c:\users\用户名\.ssh"目录下; - “Enter file in which to save the key”:若此处输入了新文件名,则后续需要调整路径,否则会报错:" git@github.com 出现 Permission denied ( publickey ) problem. " 一个简易的解决办法,是把文件名更改回默认,即 id_rsa 和 id_rsa.pub,然后将这两个文件移至 " C:\users\用户名\.ssh" 目录下;
- “Enter passphrase”:直接回车,则之后的ssh连接不再需要密码。
公钥放至github
- 登录 github.com;
- “点击自己头像 - setting - ssh and GPG keys”;
- 选择 “New SSH Key”;将本地 id_ras.pub 文件内容 copy 至此,保存;
Git 中配置 GitHub 账户信息
- 在 Git Bash 中配置 github.com 账户信息
git config --global user.name "zhangsan"
git config --global user.email "zhangsan@abc.com"
测试本地和 github.com 之间的连接
Git Bash命令行:
ssh -T git@github.com;若成功,会显示:“Hi username, You’ve successfully authenticated, but GitHub does not provide shell access.”
若报错:" git@github.com: Permission denied ( publickey ) ",应是id_ras.pub文件位置问题。
Hexo 配置修改
- 文本编辑器打开 “d:\myblog_config.yml” 文件
- “#deployment” 和 “#url” 部分,做如下修改:
# Deployment
## Docs: https://hexo.io/docs/one-command-deployment
deploy:
  type: 'git'
  repo: git@github.com:zhangsan/zhangsan.github.io.git
  branch: main
# URL
## Set your site url here. For example, if you use GitHub Page, set url as 'https://username.github.io/project'
url: https://zhangsan.github.io
# 注意是https
安装 hexo-deployer-git
- Git Bash 输入
npm install hexo-deployer-git --save; - 之后使用下列命令将本地博客部署至 github.com,
hexo clean #清除旧页面
hexo g #生成新页面
hexo d #部署至服务器
- 部署结束通过浏览器访问 “zhangsan.github.io” 。
博客使用
写博客
hexo new test
# 生成一个新文件test.md, 位于:\source\_posts\test.md;
# 直接编辑 test.md
重建页面并运行本地server
hexo clean
hexo g
hexo s #本地服务器运行,即预览
部署至 GitHub Pages
hexo clean
hexo g
hexo d
hexo clean 会清除 db.json 和 public 所有内容,
hexo g 会将source中所有的md文件转为html文件放至public 文件夹。
每次部署的时候,都需要重建博客所有数据。
Hexo Aurora Theme设置
安装 Aurora 主题包
- 博客根目录下打开 git bash;
npm install hexo-theme-aurora --save;安装aurora主题;
生成Aurora主题配置
- 打开文件夹:
d:\myblog\node_modules\hexo-theme-aurora,找到_config.yml,更名为_config.aurora.yml; - 将 _config.aurora.yml 移动到根目录(这时根目录有_config.yml和_config.aurora.yml);
_config.yml修改
修改 permalink 参数为 /post/:title.html
# URL
## Set your site url here. For example, if you use GitHub Page, set url as 'https://username.github.io/project'
url: https://tridiamond.tech
permalink: /post/:title.html
permalink_defaults:
pretty_urls:
  trailing_index: true # Set to false to remove trailing 'index.html' from permalinks
  trailing_html: true # Set to false to remove trailing '.html' from permalinks
把 highlight 的启用改为 false
把 prismjs 的启用改为 true
把 prismjs 下的 preprocess 改为 false
highlight:
  enable: false
  line_number: true
  auto_detect: false
  tab_replace: ''
  wrap: true
  hljs: false
prismjs:
  enable: true
  preprocess: true
  line_number: true
  tab_replace: ''
theme 改为 Aurora
# Extensions
## Plugins: https://hexo.io/plugins/
## Themes: https://hexo.io/themes/
theme: aurora
重新生成并启动本地服务器
hexo clean
hexo g
hexo server
通过 https://localhost:4000 访问你的博客,就可以看到新主题了。
Gitalk 评论组件问题
Gitalk 在_config.aurora.yml中设置。其中,clientID 和 clientsecret 需要从github获取,步骤如下:
- 登录github,点击头像,选择 setting;
- 选 developer settings;
- 选 “OAuth Apps - New OAuth App”;
- Application name:随便取,
- homepage url:填 https://zhangsan.github.io
- description 随便写
- authorization callback URL:此处同homepage url, 注意,都是https
- 点 “register application”;
- 记录下 clientID 和 clientsecret,对应地填到 _config.aurora.yml 里。
设置完,重建服务器后,须先登录 github.com 确认绑定,之后就可以正常评论了。
Gitalk 仅支持 GitHub 账户登录后进行评论。
其他 gitalk 参数解释见官方文档:https://aurora.tridiamond.tech/guide/plugins.html#gitalk
快速发布博客
参考
如何快速有效的编写hexo 中 的文章
https://blog.csdn.net/resilient/article/details/86429076
官方文档
Hexo themes portal: https://hexo.io/themes/index.html
Aurora安装配置指南:https://aurora.tridiamond.tech/zh/guide/getting-started.html