window下maven+harbor+docker环境配置
1、启用windows功能
1、适用于Linux的windows子系统
2、虚拟机平台

2、安装wsl2
1、访问下面网址
https://docs.microsoft.com/zh-cn/windows/wsl/install-win10#step-2---update-to-wsl-2

2、下载Linux内核更新包
http://aka.ms/wsl2kernelmsix64
3、设置wsl2为默认版本
wsl --set-default-version 2
3、安装子系统
1、选择ubuntu20.04

2、切换wsl为wsl2
#查看ubuntu当前wsl版本
wsl -l -v
#切换版本
wsl --set-version Ubuntu-20.04 2
4、安装windows版docker
1、访问官网
2、下载安装docker desktop for windows版

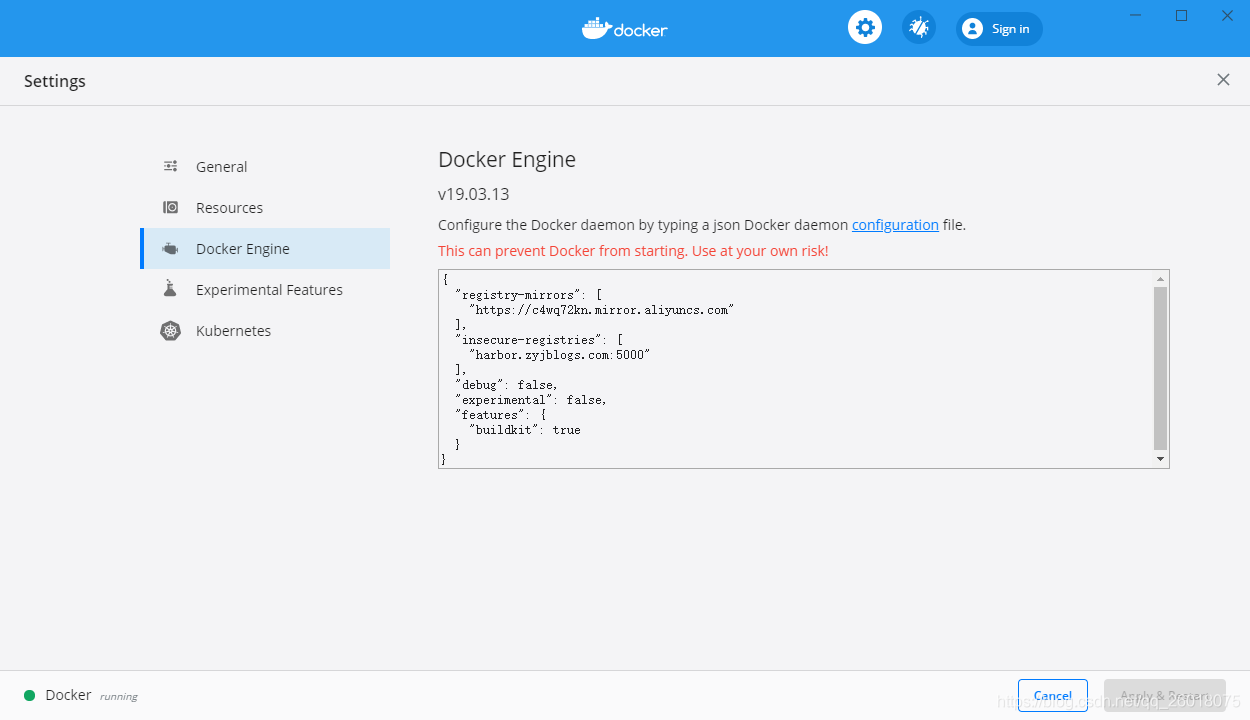
3、win10下设置docker desktop for windows版本,在设置中打开2375端口支持TLS

4、配置地址insecure-registries
配置daemon.json
{
  "insecure-registries": [
    "harbor.zyjblogs.com:5000"
  ]
}
5、配置ubuntu系统
1、ubuntu换源
sudo vim /etc/apt/sources.list
#在第一最前面添加清华镜像源
deb https://mirrors.tuna.tsinghua.edu.cn/ubuntu/ focal main restricted universe multiverse
# deb-src https://mirrors.tuna.tsinghua.edu.cn/ubuntu/ focal main restricted universe multiverse
deb https://mirrors.tuna.tsinghua.edu.cn/ubuntu/ focal-updates main restricted universe multiverse
# deb-src https://mirrors.tuna.tsinghua.edu.cn/ubuntu/ focal-updates main restricted universe multiverse
deb https://mirrors.tuna.tsinghua.edu.cn/ubuntu/ focal-backports main restricted universe multiverse
# deb-src https://mirrors.tuna.tsinghua.edu.cn/ubuntu/ focal-backports main restricted universe multiverse
deb https://mirrors.tuna.tsinghua.edu.cn/ubuntu/ focal-security main restricted universe multiverse
# deb-src https://mirrors.tuna.tsinghua.edu.cn/ubuntu/ focal-security main restricted universe multiverse
# 预发布软件源,不建议启用
# deb https://mirrors.tuna.tsinghua.edu.cn/ubuntu/ focal-proposed main restricted universe multiverse
# deb-src https://mirrors.tuna.tsinghua.edu.cn/ubuntu/ focal-proposed main restricted universe multiverse 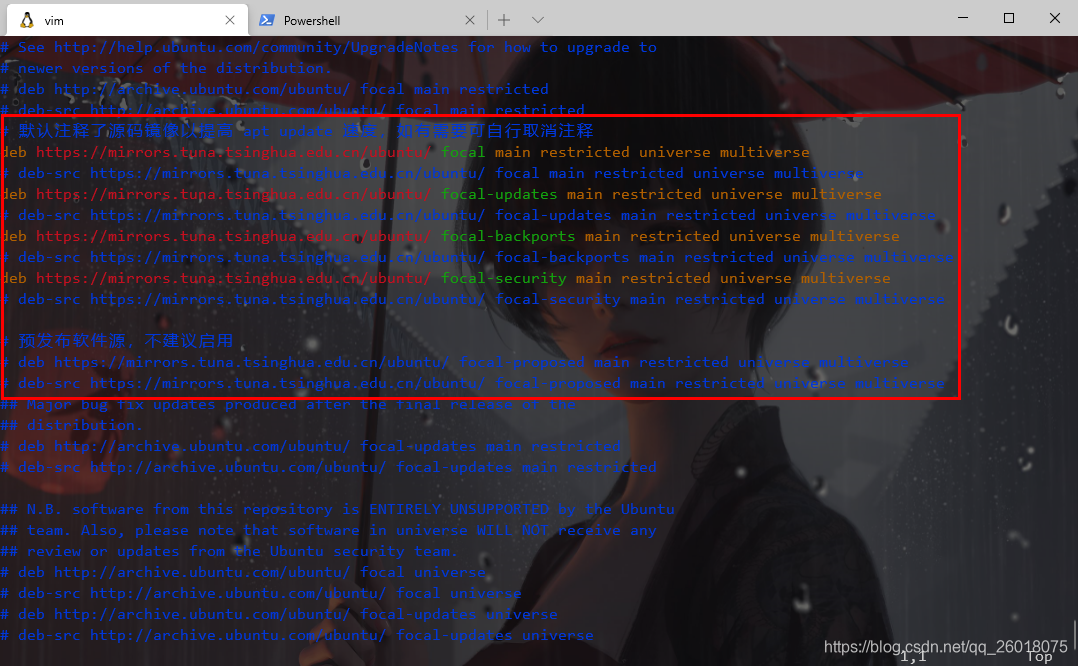
#修改后更新apt包索引
sudo apt-get update
2、安装docker-compose
sudo apt install docker-compose3、安装python和pip
1、安装python
sudo apt install python2、安装pip2
启用 universe 源仓库:
sudo add-apt-repository universe使用
curl命令来下载get-pip.py脚本:
curl https://bootstrap.pypa.io/get-pip.py --output get-pip.py安装pip2
sudo python2 get-pip.py查看pip2版本
pip2 --version3、pip2安装docker-compose
pip2 install docker-compose4、配置hosts
1、查看ip地址
ip a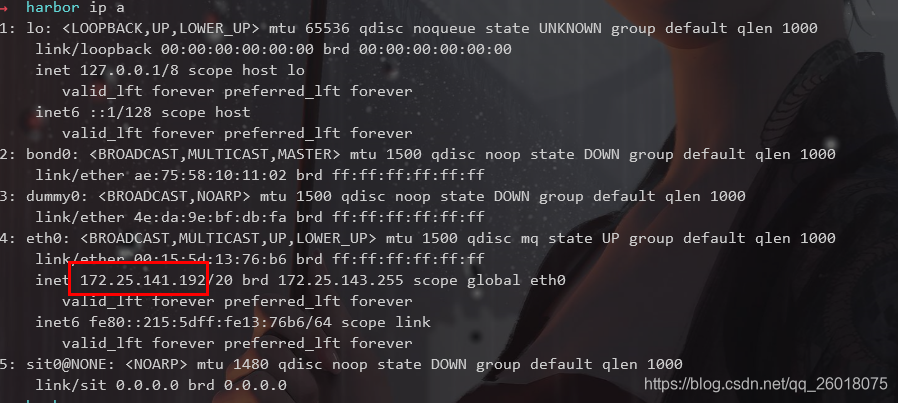
2、修改hosts
sudo vim /etc/hosts
#添加以下内容(后面会用到域名)
172.25.141.192  harbor.zyjblogs.com
6、安装harbor
1、下载harbor
github 地址: https://github.com/goharbor/harbor
下载harbor
wget wget https://download.fastgit.org/goharbor/harbor/releases/download/v1.10.6/harbor-offline-installer-v1.10.6.tgz2、解压harbor
tar -xvf harbor-offline-installer-v1.10.6.tgz3、在~下创建software文件夹并复制harbor到其中
mkdir -p ~/software
cp -r harbor ~/software/
cd ~/software/harbor
4、修改harbor.yml配置文件


到此修改完成,如果配置其他请参考https://github.com/goharbor/harbor
一下是完整配置
# Configuration file of Harbor

# The IP address or hostname to access admin UI and registry service.
# DO NOT use localhost or 127.0.0.1, because Harbor needs to be accessed by external clients.
hostname: harbor.zyjblogs.com

# http related config
http:
  # port for http, default is 80. If https enabled, this port will redirect to https port
  port: 5000

# https related config
#https:
  # https port for harbor, default is 443
  #  port: 443
  # The path of cert and key files for nginx
  #certificate: /your/certificate/path
  #private_key: /your/private/key/path

# Uncomment external_url if you want to enable external proxy
# And when it enabled the hostname will no longer used
# external_url: https://reg.mydomain.com:8433

# The initial password of Harbor admin
# It only works in first time to install harbor
# Remember Change the admin password from UI after launching Harbor.
harbor_admin_password: admin

# Harbor DB configuration
database:
  # The password for the root user of Harbor DB. Change this before any production use.
  password: 123456
  # The maximum number of connections in the idle connection pool. If it <=0, no idle connections are retained.
  max_idle_conns: 50
  # The maximum number of open connections to the database. If it <= 0, then there is no limit on the number of open connections.
  # Note: the default number of connections is 100 for postgres.
  max_open_conns: 100

# The default data volume
data_volume: /home/zhuyijun/data/harbor/data

# Harbor Storage settings by default is using /data dir on local filesystem
# Uncomment storage_service setting If you want to using external storage
# storage_service:
#   # ca_bundle is the path to the custom root ca certificate, which will be injected into the truststore
#   # of registry's and chart repository's containers.  This is usually needed when the user hosts a internal storage with self signed certificate.
#   ca_bundle:

#   # storage backend, default is filesystem, options include filesystem, azure, gcs, s3, swift and oss
#   # for more info about this configuration please refer https://docs.docker.com/registry/configuration/
#   filesystem:
#     maxthreads: 100
#   # set disable to true when you want to disable registry redirect
#   redirect:
#     disabled: false

# Clair configuration
clair:
  # The interval of clair updaters, the unit is hour, set to 0 to disable the updaters.
  updaters_interval: 12

jobservice:
  # Maximum number of job workers in job service
  max_job_workers: 10

notification:
  # Maximum retry count for webhook job
  webhook_job_max_retry: 10

chart:
  # Change the value of absolute_url to enabled can enable absolute url in chart
  absolute_url: disabled

# Log configurations
log:
  # options are debug, info, warning, error, fatal
  level: info
  # configs for logs in local storage
  local:
    # Log files are rotated log_rotate_count times before being removed. If count is 0, old versions are removed rather than rotated.
    rotate_count: 50
    # Log files are rotated only if they grow bigger than log_rotate_size bytes. If size is followed by k, the size is assumed to be in kilobytes.
    # If the M is used, the size is in megabytes, and if G is used, the size is in gigabytes. So size 100, size 100k, size 100M and size 100G
    # are all valid.
    rotate_size: 200M
    # The directory on your host that store log
    location: /home/zhuyijun/data/harbor/data/logs

  # Uncomment following lines to enable external syslog endpoint.
  # external_endpoint:
  #   # protocol used to transmit log to external endpoint, options is tcp or udp
  #   protocol: tcp
  #   # The host of external endpoint
  #   host: localhost
  #   # Port of external endpoint
  #   port: 5140

#This attribute is for migrator to detect the version of the .cfg file, DO NOT MODIFY!
_version: 1.10.0

# Uncomment external_database if using external database.
# external_database:
#   harbor:
#     host: localhost
#     port: 3306
#     db_name: mysql
#     username: root
#     password: 123456
#     ssl_mode: disable
#     max_idle_conns: 2
#     max_open_conns: 0
#   clair:
#     host: clair_db_host
#     port: clair_db_port
#     db_name: clair_db_name
#     username: clair_db_username
#     password: clair_db_password
#     ssl_mode: disable
#   notary_signer:
#     host: notary_signer_db_host
#     port: notary_signer_db_port
#     db_name: notary_signer_db_name
#     username: notary_signer_db_username
#     password: notary_signer_db_password
#     ssl_mode: disable
#   notary_server:
#     host: notary_server_db_host
#     port: notary_server_db_port
#     db_name: notary_server_db_name
#     username: notary_server_db_username
#     password: notary_server_db_password
#     ssl_mode: disable

# Uncomment external_redis if using external Redis server
# external_redis:
#   host: redis
#   port: 6379
#   password:
#   # db_index 0 is for core, it's unchangeable
#   registry_db_index: 1
#   jobservice_db_index: 2
#   chartmuseum_db_index: 3
#   clair_db_index: 4

# Uncomment uaa for trusting the certificate of uaa instance that is hosted via self-signed cert.
# uaa:
#   ca_file: /path/to/ca

# Global proxy
# Config http proxy for components, e.g. http://my.proxy.com:3128
# Components doesn't need to connect to each others via http proxy.
# Remove component from `components` array if want disable proxy
# for it. If you want use proxy for replication, MUST enable proxy
# for core and jobservice, and set `http_proxy` and `https_proxy`.
# Add domain to the `no_proxy` field, when you want disable proxy
# for some special registry.
proxy:
  http_proxy:
  https_proxy:
  # no_proxy endpoints will appended to 127.0.0.1,localhost,.local,.internal,log,db,redis,nginx,core,portal,postgresql,jobservice,registry,registryctl,clair,chartmuseum,notary-server
  no_proxy:
  components:
    - core
    - jobservice
    - clair
5、创建harbor数据和日志目录
mkdir -p ~/data/harbor/data/logs6、运行准备检查
sudo ./prepare7、安装
sudo ./install8、修改windows的hosts文件
C:\Windows\System32\drivers\etc\hosts
#同样添加下面内容
172.25.141.192  harbor.zyjblogs.com
修改后刷新
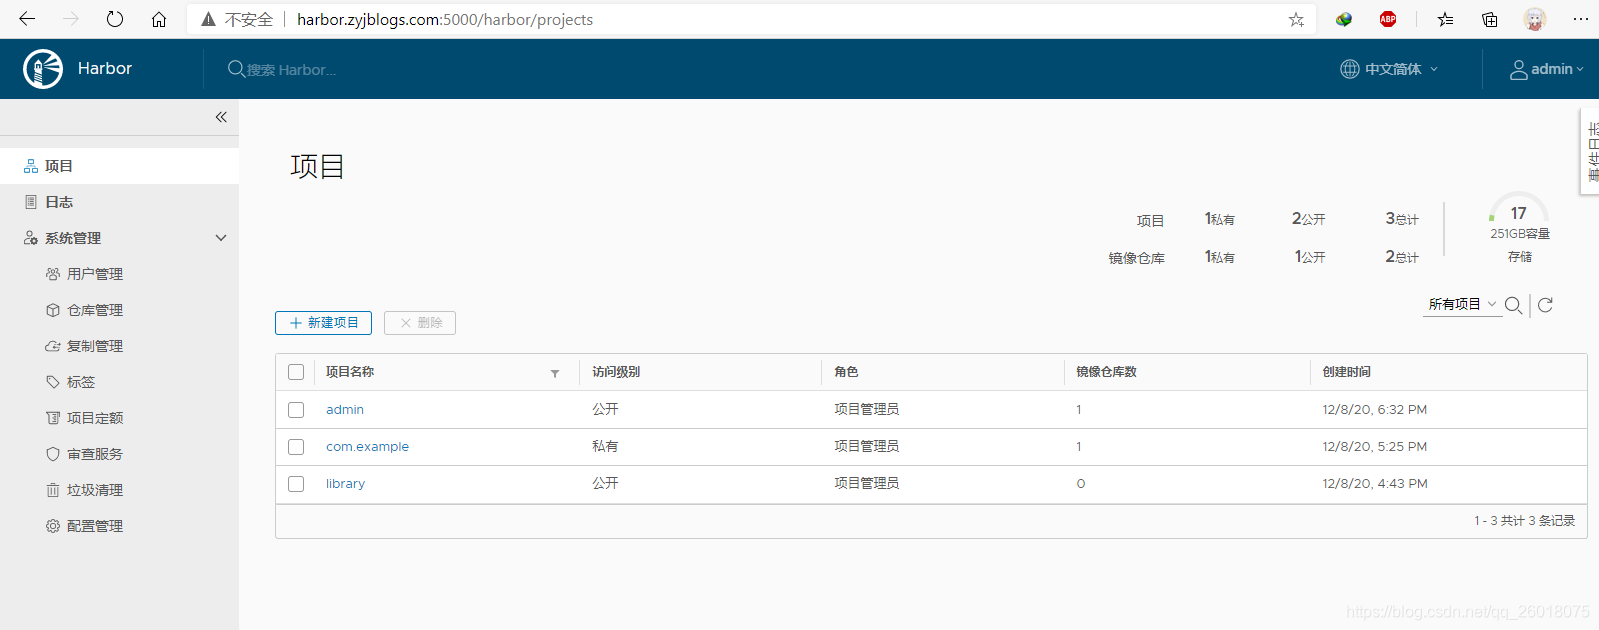
ipconfig /flushdns9、测试访问harbor.zyjblogs.com:5000
10、docker登录harbor
docker login http://harbor.zyjblogs.com:5000

11、harbor创建项目

7、maven打包jar到docker并且推送到harbor
1、添加spring-boot-maven-plugin插件
<properties>
    <java.version>1.8</java.version>
<!--注册名就是上面创建的项目名-->
    <docker.registry.name>admin</docker.registry.name>
    <docker.repostory>harbor.zyjblogs.com:5000</docker.repostory>
</properties>


<build>
    <plugins>
        <plugin>
            <groupId>com.spotify</groupId>
            <artifactId>docker-maven-plugin</artifactId>
            <version>1.0.0</version>
            <configuration>
                <imageName>${docker.repostory}/${docker.registry.name}/${project.artifactId}:${project.version}</imageName>
                <!-- 指定Dockerfile所在的路径 -->
                <dockerDirectory>${project.basedir}/src/main/docker</dockerDirectory>
                <resources>
                    <resource>
                        <targetPath>/</targetPath>
                        <directory>${project.build.directory}</directory>
                        <include>${project.build.finalName}.jar</include>
                    </resource>
                </resources>
                <serverId>docker-harbor</serverId>
                <registryUrl>${docker.repostory}</registryUrl>
                <pushImage>true</pushImage>
            </configuration>
        </plugin>
<!--            mvn clean package -DskipTests=true docker:build -DpushImage-->
    </plugins>
</build>
2、编写dockerfile文件(src/main/docker下)
FROM openjdk:8-jdk-alpine
MAINTAINER zhuyijun
VOLUME /tmp
ADD email-0.0.1.jar email.jar
EXPOSE 9029
ENTRYPOINT ["java","-Djava.security.egd=file:/dev/./urandom","-jar","/email.jar"]
3、idea中的terminal中执行命令
mvn clean package -DskipTests=true docker:build -DpushImage

版权声明:本文为qq_26018075原创文章,遵循CC 4.0 BY-SA版权协议,转载请附上原文出处链接和本声明。