通过 VS Code 创建一个新的 Flutter 工程,创建好后,就会得到一个计数器应用的 Demo。在“计数器”示例的基础上,删掉多余部分,然后写自己需要的部分。
import 'package:flutter/material.dart';

void main() {
  runApp(const MyApp());
}

class MyApp extends StatelessWidget {
  const MyApp({Key? key}) : super(key: key);

  // This widget is the root of your application.
  @override
  Widget build(BuildContext context) {
    return MaterialApp(
      title: 'Flutter Demo',
      theme: ThemeData(
        primarySwatch: Colors.blue,
      ),
      home: const MyHomePage(title: 'Flutter Demo Home Page'),
    );
  }
}
class MyHomePage extends StatefulWidget {
  const MyHomePage({Key? key, required this.title}) : super(key: key);
   final String title;

  @override
  State<MyHomePage> createState() => _MyHomePageState();
}
class _MyHomePageState extends State<MyHomePage> {
  }
  @override
  Widget build(BuildContext context) {
    return Scaffold(
      appBar: AppBar(
        title: Text(widget.title),
      ),
      body: Center(
        child: Column(
          children: <Widget>[

          ],
        ),
      ),

    );
  }
}
利用Navigator.push的路由跳转:
在这个空的demo上创建一个新路由,命名“NewRoute”:
class NewRoute extends StatelessWidget {
  const NewRoute({Key? key}) : super(key: key);

  @override
  Widget build(BuildContext context) {
    return Scaffold(
      appBar: AppBar(
        title: const Text("New route"),
      ),
      body: const Center(
        child: Text("This is new route"),
      ),
    );
  }
}
新路由继承自StatelessWidget,界面很简单,在页面中间显示一句"This is new route"。
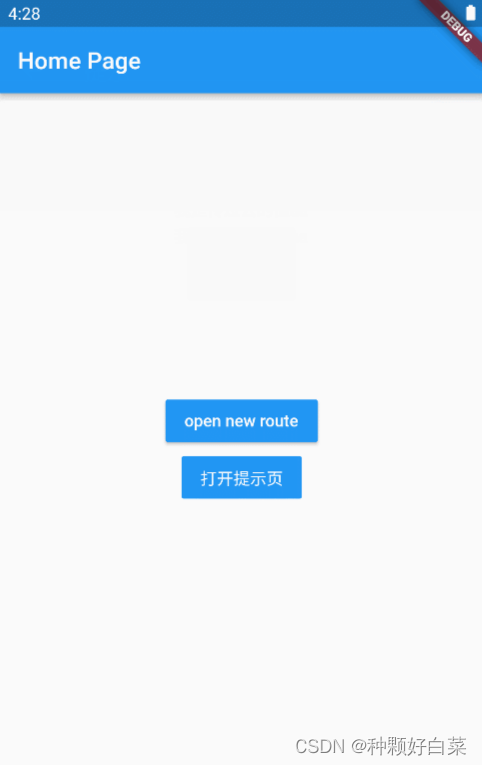
在_MyHomePageState.build方法中的Column的子 widget 中添加一个按钮(RaisedButton)
RaisedButton(
              child: const Text("open new route"),
              color: Colors.blue,
              textColor: Colors.white,
              onPressed: () {
                //导航到新路由
                Navigator.push(context, MaterialPageRoute(builder: (context) {
                  return const NewRoute();
                }));
              },
            ),
Navigator.push(BuildContext context, Route route):将给定的路由入栈(即打开新的页面),返回值是一个Future对象,用以接收新路由出栈(即关闭)时的返回数据。
路由传值:
创建一个TipRoute路由,让它接受一个提示文本参数,负责将传入它的文本显示在页面上。在TipRoute中添加一个“返回”按钮,点击后在返回上一个路由的同时会带上一个返回参数。
class TipRoute extends StatelessWidget {
  // ignore: use_key_in_widget_constructors
  const TipRoute({
    required this.text, // 接收一个text参数
  }) : super();
  final String text;
  @override
  Widget build(BuildContext context) {
    return Scaffold(
      appBar: AppBar(
        title: const Text("提示"),
      ),
      body: Padding(
        padding: const EdgeInsets.all(18),
        child: Center(
          child: Column(
            children: <Widget>[
              Text(text),
              RaisedButton(
                onPressed: () => Navigator.pop(context, "我是返回值"),
                child: const Text("返回"),
              )
            ],
          ),
        ),
      ),
    );
  }
}
Navigator.pop(BuildContext context, [ result ]):将路由出栈,result为页面关闭时返回给上一个页面的数据。
再在_MyHomePageState.build方法中的Column的子 widget 中添加一个按钮(FlatButton)打开路由TipRoute:
FlatButton(
              color: Colors.blue,
              textColor: Colors.white,
              onPressed: () async {
                // 打开`TipRoute`,并等待返回结果
                var result = await Navigator.push(
                  context,
                  MaterialPageRoute(
                    builder: (context) {
                      return const TipRoute(
                        // 路由参数
                        text: "我是传过来的aa",
                      );
                    },
                  ),
                );
                //输出`TipRoute`路由返回结果
                // ignore: avoid_print
                print("路由返回值: $result");
              },
              child: const Text("打开提示页"),
            ),
提示文案“我是传过来的aa”是通过TipRoute的text参数传递给TipRoute路由页的。我们可以通过等待Navigator.push(…)返回的Future来获取新路由的返回数据。
在TipRoute页中有两种方式可以返回到上一页;第一种方式时直接点击导航栏返回箭头,第二种方式是点击页面中的“返回”按钮。这两种返回方式的区别是前者不会返回数据给上一个路由,而“返回”按钮会。下面是分别点击导航栏返回箭头和页面中的返回按钮后,RouterTestRoute页中print方法在控制台输出的内容:

效果展示:
命名路由:
在上面的两个页面的跳转中,我用的是Navigator.push(…)的方法,现在我用给路由起一个名字的方式,通过路由名字直接打开新的路由。这个方法为路由管理带来了一种直观、简单的感觉。
首先注册路由表:
class MyApp extends StatelessWidget {
  const MyApp({Key? key}) : super(key: key);

  // This widget is the root of your application.
  @override
  Widget build(BuildContext context) {
    return MaterialApp(
      title: 'Flutter Demo',
      theme: ThemeData(
        primarySwatch: Colors.blue,
      ),
      //注册路由表
      routes: <String, WidgetBuilder>{
        "new_page": (context) => const NewRoute(),
        "tip-route-page": (context) => const TipRoute(
              text: '我是传过来的aa',
            ),
      },
      home: const MyHomePage(title: 'Home Page'),
    );
  }
}
Navigator.pushNamed(BuildContext context, String routeName,{Object arguments})通过路由名来打开路由页,同时还可以传递参数。现在我将上面的打开路由方式做一下改变,换成Navigator.pushNamed(…)的方式进行页面跳转:
class _MyHomePageState extends State<MyHomePage> {
  @override
  Widget build(BuildContext context) {
    return Scaffold(
      appBar: AppBar(
        title: Text(widget.title),
      ),
      body: Center(
        child: Column(
          mainAxisAlignment: MainAxisAlignment.center,
          children: <Widget>[
            RaisedButton(
              child: const Text("open new route"),
              color: Colors.blue,
              textColor: Colors.white,
              onPressed: () {
                //导航到新路由
                Navigator.pushNamed(context, "new_page");
              },
            ),
            FlatButton(
              color: Colors.blue,
              textColor: Colors.white,
              onPressed: () async {
                // 打开`TipRoute`,并等待返回结果
                var result =
                    await Navigator.pushNamed(context, "tip-route-page");
                //输出`TipRoute`路由返回结果
                // ignore: avoid_print
                print("路由返回值: $result");
              },
              child: const Text("打开提示页"),
            )
          ],
        ),
      ),
    );
  }
}
这样一来,代码比原来更加简洁而且运行效果是一样的。
当需要传递的参数不是单个的值,并且是一个动态的该如何处理?
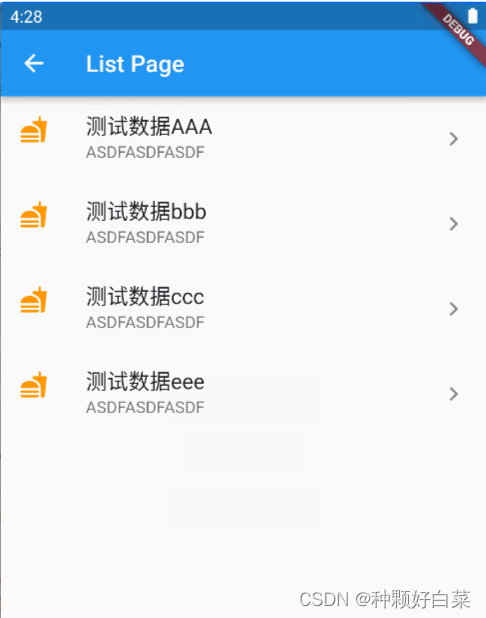
增加list.dart
import 'package:flutter/material.dart';

class ListPage extends StatelessWidget {
  const ListPage({Key? key}) : super(key: key);

  @override
  Widget build(BuildContext context) {
    //定义列表widget的list
    List<Widget> list = <Widget>[];

    //Demo数据定义
    var data = [
      {"id": 1, "title": "测试数据AAA", "subtitle": "ASDFASDFASDF"},
      {"id": 2, "title": "测试数据bbb", "subtitle": "ASDFASDFASDF"},
      {"id": 3, "title": "测试数据ccc", "subtitle": "ASDFASDFASDF"},
      {"id": 4, "title": "测试数据eee", "subtitle": "ASDFASDFASDF"},
    ];

    //根据Demo数据,构造列表ListTile组件list
    for (var item in data) {
      // ignore: avoid_print
      print(item["title"]);

      list.add(ListTile(
        title: Text(item["title"] as String,
            style: const TextStyle(fontSize: 18.0)),
        subtitle: Text(item["subtitle"] as String),
        leading: const Icon(Icons.fastfood, color: Colors.orange),
        trailing: const Icon(Icons.keyboard_arrow_right),
      ));
    }

    //返回整个页面
    return Scaffold(
      appBar: AppBar(
        title: const Text("List Page"),
      ),
      body: Center(
          child: ListView(
        children: list,
      )),
    );
  }
}
Text(item["title"] ) 如果只写成这样会报The argument type 'Object?' can't be assigned to the parameter type 'String'错误,所以要以as String来定义它的类型。
1.在main.dart增加list页面的引入 : import './list.dart';
2.在路由表中注册路由:
routes: <String, WidgetBuilder>{
        "ListPage": (context) => const ListPage(),
        "new_page": (context) => const NewRoute(),
        "tip-route-page": (context) => const TipRoute(
              text: '我是传过去的值aa',
            ),
      },
3.在_MyHomePageState.build方法中的Column的子 widget 中添加一个按钮(OutlineButton)
OutlineButton(
              textColor: Colors.blue,
              //点击按钮,修改msg的文字
              onPressed: () {
                Navigator.pushNamed(context, "ListPage");
              },
              child: const Text(
                "To list page",
                style: TextStyle(fontSize: 20.0),
              ),
            ),
效果:
小tips : 在_MyHomePageState.build方法中的Column的子 widget 中我运用了三种不同的按钮(FlatButton、OutlineButton、RaisedButton)
RaisedButton: 凸起的按钮
FlatButton:扁平化按钮
OutlineButton:带边框按钮
IconButton:带图标按钮
现在我们有了列表页,现在再新建一个详情页,并且列表页跳转到详情页,需要路由传参。
在main.dart里,增加详情页DedailPage的路由配置
routes: <String, WidgetBuilder>{
        "ListPage": (context) => const ListPage(),
        "DetailPage": (context) => const DetailPage(),
        "new_page": (context) => const NewRoute(),
        "tip-route-page": (context) => const TipRoute(
              text: '我是传过去的值aa',
            ),
      },
2. 修改ListPage里ListTile的点击事件,增加路由跳转传参,这里是将整个item数据对象传递
list.add(ListTile(
        title: Text(item["title"] as String,
            style: const TextStyle(fontSize: 18.0)),
        subtitle: Text(item["subtitle"] as String),
        leading: const Icon(Icons.fastfood, color: Colors.orange),
        trailing: const Icon(Icons.keyboard_arrow_right),
        onTap: () {
          //点击的时候,进行路由跳转传参
          Navigator.pushNamed(context, "DetailPage", arguments: item);
        },
      ));
3.新建详情页DetailPage,获取传参并显示
class DetailPage extends StatelessWidget {
  const DetailPage({Key? key}) : super(key: key);

  @override
  Widget build(BuildContext context) {
    //获取路由传参
    final Map args = ModalRoute.of(context)?.settings.arguments as Map;

    return Scaffold(
        appBar: AppBar(
          title: const Text("Detail Page"),
        ),
        body: Column(
          children: <Widget>[
            const Text("我是Detail页面",
                style: TextStyle(
                    fontSize: 20,
                    fontWeight: FontWeight.bold,
                    color: Colors.orange)),
            Text("id:${args['id']}"),
            Text("title:${args['title']}"),
            Text("subtitle:${args['subtitle']}")
          ],
        ));
  }
}
Demo效果: