项目结构如下,需要netty-all的依赖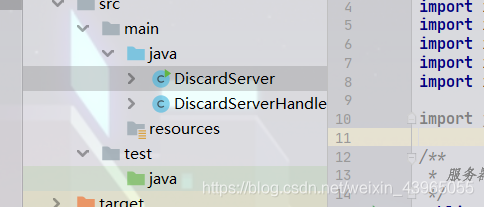
channel适配器
import io.netty.buffer.ByteBuf;
import io.netty.channel.ChannelHandlerAdapter;
import io.netty.channel.ChannelHandlerContext;
import io.netty.util.CharsetUtil;
import io.netty.util.ReferenceCountUtil;
import io.netty.util.internal.StringUtil;

import java.nio.ByteBuffer;

public class DiscardServerHandler extends ChannelHandlerAdapter {
    //服务端处理通道


    @Override
    public void exceptionCaught(ChannelHandlerContext ctx, Throwable cause) throws Exception {

        cause.printStackTrace();
        ctx.close();
    }

    /**
     * 这里我们覆盖了chanelRead()事件处理方法。 每当从客户端收到新的数据时, 这个方法会在收到消息时被调用,
     * 这个例子中,收到的消息的类型是ByteBuf
     *
     * @param ctx
     *            通道处理的上下文信息
     * @param msg
     *            接收的消息
     */
    @Override
    public void channelRead(ChannelHandlerContext ctx, Object msg) throws Exception {

        try {
            ByteBuf in = (ByteBuf) msg;
            // 打印客户端输入,传输过来的的字符
            System.out.print("client:"+in.toString(CharsetUtil.UTF_8));
        } finally {
            /**
             * ByteBuf是一个引用计数对象,这个对象必须显示地调用release()方法来释放。
             * 请记住处理器的职责是释放所有传递到处理器的引用计数对象。
             */
            // 抛弃收到的数据
            ReferenceCountUtil.release(msg);
        }
    }
}
服务端
import io.netty.bootstrap.ServerBootstrap;
import io.netty.channel.ChannelFuture;
import io.netty.channel.ChannelInitializer;
import io.netty.channel.ChannelOption;
import io.netty.channel.EventLoopGroup;
import io.netty.channel.nio.NioEventLoopGroup;
import io.netty.channel.socket.SocketChannel;
import io.netty.channel.socket.nio.NioServerSocketChannel;

import java.nio.channels.Channel;

/**
 * 服务器
 */
public class DiscardServer {
    //端口号
    private int port;

    public DiscardServer(int port) {
        super();
        this.port = port;
    }

    public void publish() {
        //EventLoopGroup的实现用来处理不同传输协议
        //因此会有2个NioEventLoopGroup会被使用,基于NIO
        EventLoopGroup receive = new NioEventLoopGroup();
        EventLoopGroup sender = new NioEventLoopGroup();
        System.out.println("run port==>" + port);
        try {
            /***
             * ServerSocketChannel以NIO的selector为基础进行实现的,用来接收新的连接
             * 这里告诉Channel如何获取新的连接.
             */
            ServerBootstrap bootstrap = new ServerBootstrap();
            bootstrap = bootstrap.group(receive, sender);
            bootstrap = bootstrap.channel(NioServerSocketChannel.class);

            bootstrap = bootstrap.childHandler(new ChannelInitializer<SocketChannel>() {

                protected void initChannel(SocketChannel socketChannel) throws Exception {
                    DiscardServerHandler ServerHandler = new DiscardServerHandler();
                    socketChannel.pipeline().addLast(ServerHandler);
                    // ch.pipeline().addLast(new
                    // ResponseServerHandler());//demo2.echo
                    // ch.pipeline().addLast(new
                    // TimeServerHandler());//demo3.time
                }
            });

            /***
             * 你可以设置这里指定的通道实现的配置参数。 我们正在写一个TCP/IP的服务端,
             * 因此我们被允许设置socket的参数选项比如tcpNoDelay和keepAlive。
             * 请参考ChannelOption和详细的ChannelConfig实现的接口文档以此可以对ChannelOptions的有一个大概的认识。
             */
            bootstrap = bootstrap.option(ChannelOption.SO_BACKLOG, 128);
            bootstrap = bootstrap.option(ChannelOption.SO_KEEPALIVE,true);
            ChannelFuture f = bootstrap.bind(port).sync();
            f.channel().closeFuture().sync();

        } catch (Exception e) {
            e.printStackTrace();
        }finally {
            /***
             * 关闭
             */
            sender.shutdownGracefully();
            receive.shutdownGracefully();
        }


    }


    public static void main(String[] args) {
        int port;
        if (args.length > 0) {
            port = Integer.parseInt(args[0]);
        } else {
            port = 8080;
        }
        new DiscardServer(port).publish();
        System.out.println("server:run()");
    }


}
开了之后打开Telnet或者其他客户端访问talnet 127.0.0.1 8080
然后ctrl]可以看到客户端和服务端的通信
版权声明:本文为weixin_43965055原创文章,遵循CC 4.0 BY-SA版权协议,转载请附上原文出处链接和本声明。