原理
通过在项目根目录下配置.gitlab-ci.yml文件,可以控制CI流程的不同阶段,例如install/检查/编译/部署服务器。GitLab平台会扫描.gitlab-ci.yml文件,并据此处理CI流程
Pipeline & Job
Pipeline是GitLab根据项目的.gitlab-ci.yml文件执行的流程,它由许多个任务节点组成,而这些Pipeline上的每一个任务节点,都是一个独立的Job。
Runner
Runner可以理解为:在特定机器上根据项目的.gitlab-ci.yml文件,对项目执行Pipeline的程序。
GitLab-Runner下载链接:https://docs.gitlab.com/runner/install/
gitlab-ci.yml配置
GitLab提供了很多配置关键字,其中最基础和常用的有这么几个:
stages
stages定义在YML文件的最外层,它的值是一个数组,用于定义一个Pipeline不同的流程节点。
例如我们定义如下:
stages:
- deploy
则在GitLab交互界面中能够看到如下展示: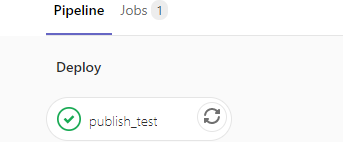
stage/script/tags/only
Job是Pipeline的任务节点,它构成了Pipeline的基本单元。
而stage/script/tags/only这三个关键字,都是作为Job的子属性来使用的,如下所示,install就是我们定义的一个Job。
stages:
  - deploy

publish_test:
  stage: deploy
  tags:
    - test
  only:
    - test
  script:
    - whoami
    - bash /root/script/ybd-shop-deploy.sh
stage 是一个字符串,且是stages数组的一个子项,表示的是当前的Pipeline节点。
script 它是当前Pipeline节点运行的shell脚本(以项目根目录为上下文执行)。
tags 是当前Job的标记,这个tags关键字是很重要,因为GitLab的Runner会通过tags去判断能否执行当前这个Job。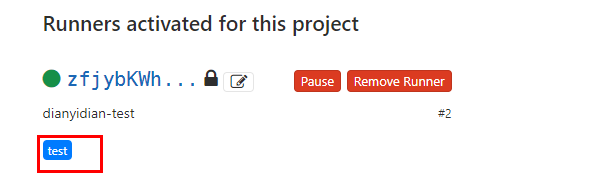
上面的这个test就是当前Runner的tags,这意味着:这个runner只会执行tag为test的Job。如果一个Job没有tag或者tag不是test,那么即使这个Runner是激活且空闲的,也不会去执行!
实践
下载并安装GitLab-Runner命令行
curl -L --output /usr/local/bin/gitlab-runner "https://gitlab-runner-downloads.s3.amazonaws.com/latest/binaries/gitlab-runner-linux-amd64"
chmod +x /usr/local/bin/gitlab-runner
gitlab-runner install -u root
gitlab-runner start
注册Runner
gitlab-runner register
 [root@s102 /]# gitlab-runner register
 # 版本不同可能会有其它内容,可忽略,以下列出了比较重要的内容
# 输入 GitLab 地址
Please enter the gitlab-ci coordinator URL (e.g. https://gitlab.com/):
http://192.168.199.109/

# 输入 GitLab Token
Please enter the gitlab-ci token for this runner:
1Lxq_f1NRfCfeNbE5WRh

# 很重要设置 Tag,可以用于指定在构建规定的 tag 时触发 ci
Please enter the gitlab-ci tags for this runner (comma separated):
test

# 选择 runner 执行器,这里我们选择的是 shell
Please enter the executor: virtualbox, docker+machine, parallels, shell, ssh, docker-ssh+machine, kubernetes, docker, docker-ssh:
shell
runner绑定的token和url
Gitlab项目首页=> setting => CI/CD => Runners => Specific Runners
激活Runner
注册完了可能还需要激活,这时我们可以看下面板,如果有个黑色的感叹号,这说明Runner注册成功了,但是尚未激活(如果是绿色的说明已经激活,本步骤跳过)。
#激活方法
gitlab-runner verify
编写.gitlab-ci.yml
stages:
  - deploy

publish_test:
  stage: deploy
  tags:
    - test
  only:
    - test
  script:
    - whoami
    - bash /root/script/ybd-shop-deploy.sh
编写脚本
DEPLOY_PATH=/var/www/ybd-shop
NOW_BRANCH=test
cd $DEPLOY_PATH
if [ -d "$DEPLOY_PATH/.git" ];then
        echo --- Clean Workspace ---
        git clean -f
        git reset --hard
        git remote update origin -p
        git checkout $NOW_BRANCH
        echo --- 拉取 $NOW_BRANCH 分支 ---
        git pull origin $NOW_BRANCH
        echo --- OK ---
else
        echo --- 先初始化仓库 ---
fi
测试

