原文链接:https://liancode.top/posts/f79db71a.html
ByteBuffer
一、使用
- 向
buffer写入数据,例如调用channel.read(buffer) - 调用
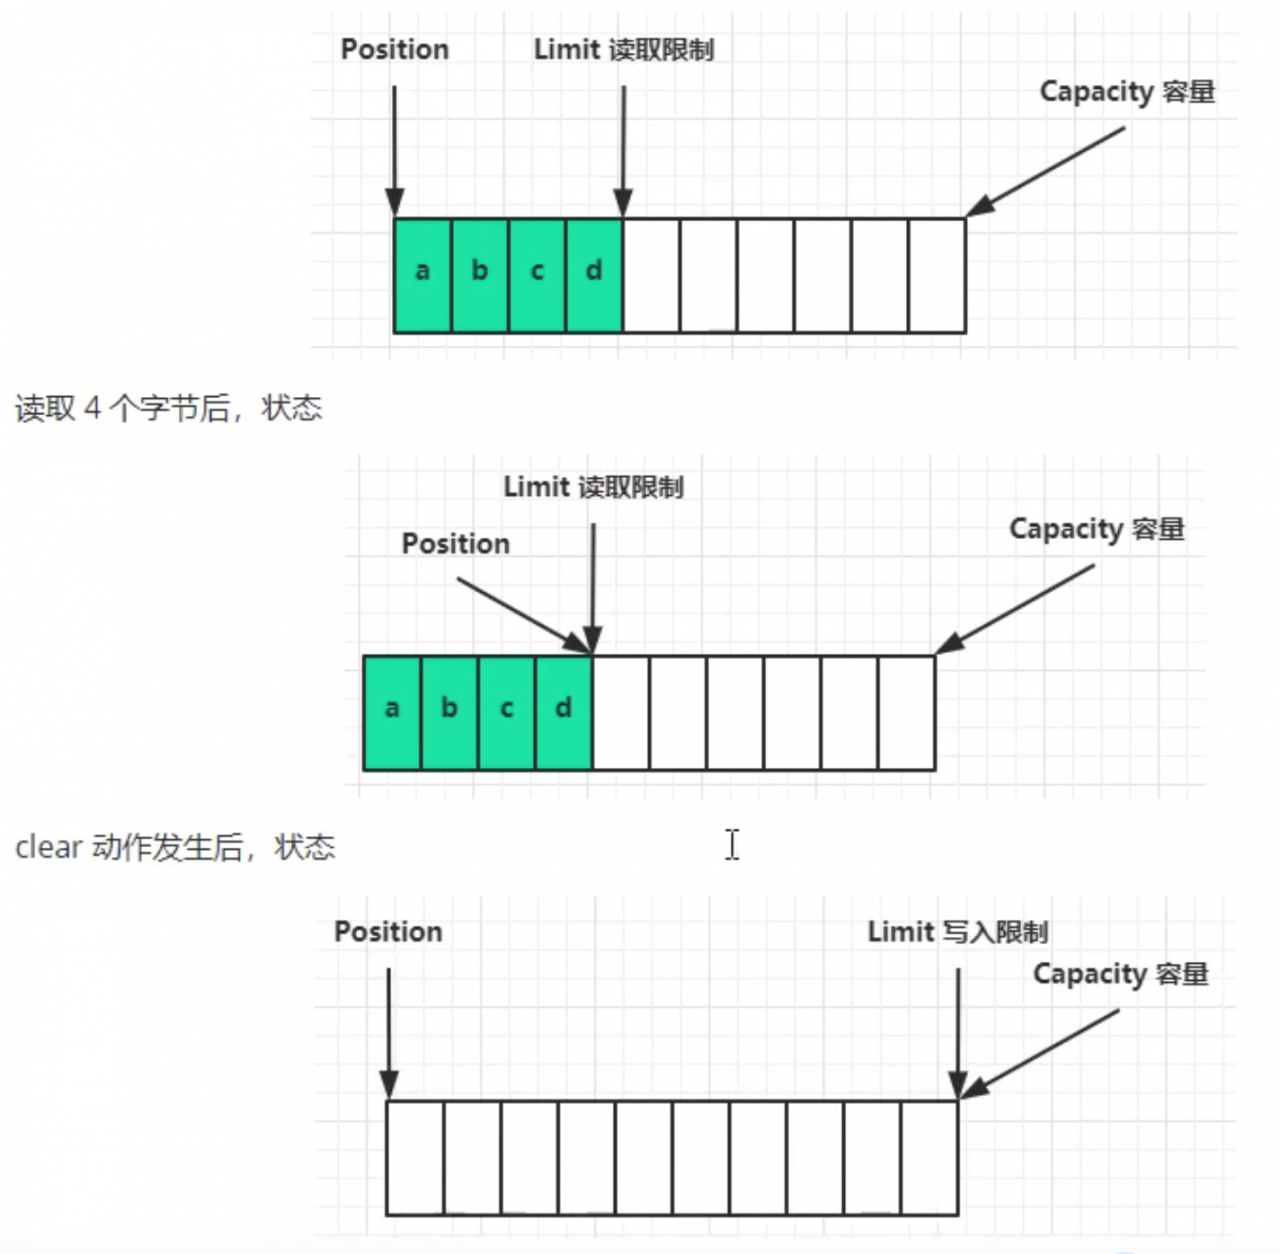
filp()切换至读模式 - 从
buffer读取数据,例如调用buffer.get() - 调用
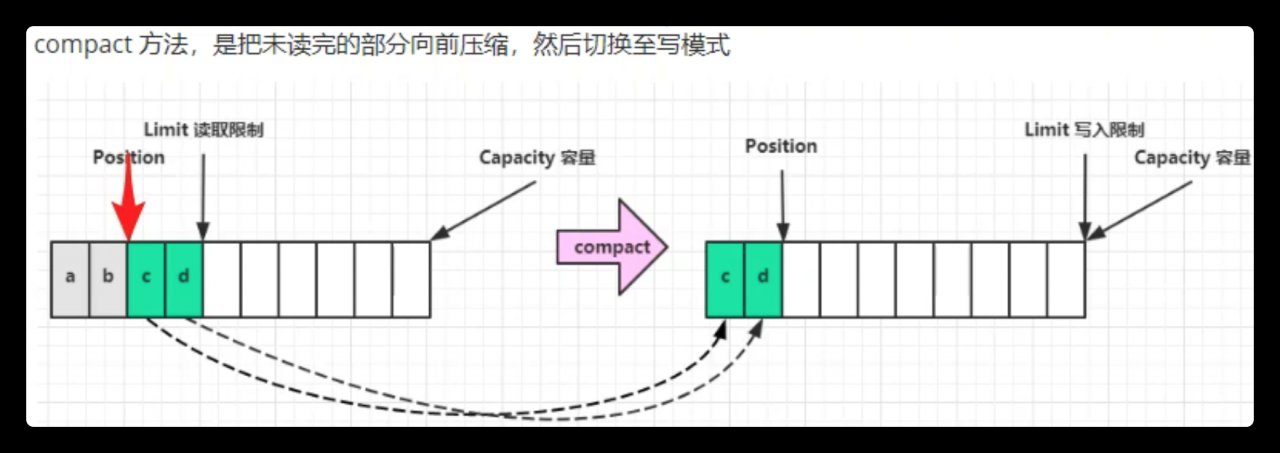
clear()或者compact()切换至写模式 - 重复 1-4 步骤
public class TestByteBuffer {
    public static void main(String[] args) {
        try {
            FileChannel channel = new FileInputStream("src/main/resources/data.txt").getChannel();
            ByteBuffer buffer = ByteBuffer.allocate(10);
            while (channel.read(buffer) != -1){
                buffer.flip();
                while (buffer.hasRemaining()){
                    byte b = buffer.get();
                    System.out.print(" "+ (char) b);
                }
                buffer.clear();
            }
        } catch (IOException e) {
            e.printStackTrace();
        }
    }
}
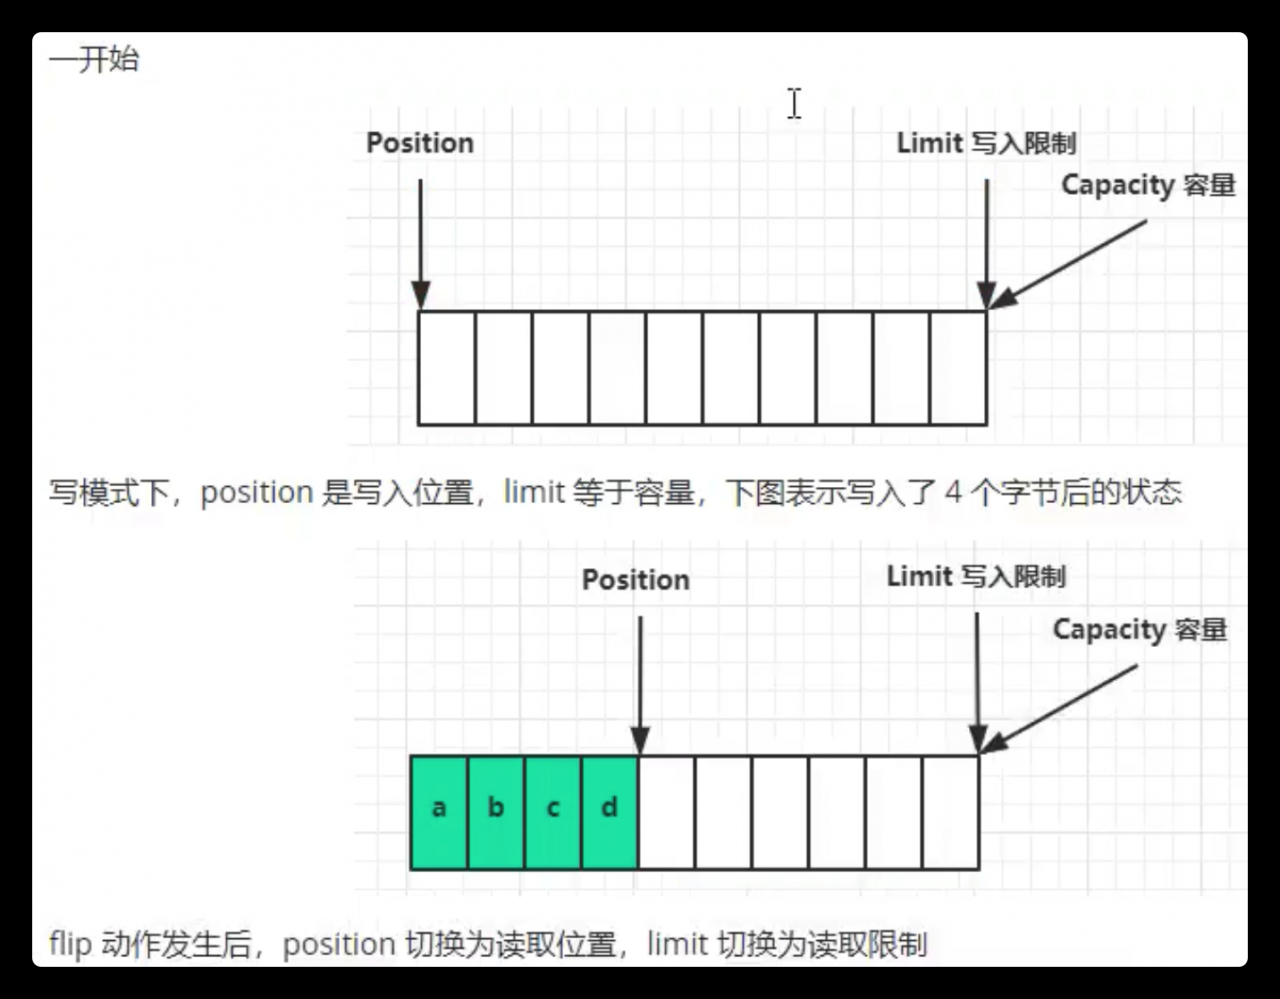
二、ByteBuffer 结构
1. 属性
- capacity
- position
- limit
2. 常见方法
- 分配空间 :
allocate()或allocateDirect()
public class TestByteBufferAllocate {
    public static void main(String[] args) {
        /**
         * class java.nio.HeapByteBuffer
         * java 堆内存,读写效率较低,受到 GC 的影响
         * GC 的标记整理算法,会多一次拷贝
         */
        System.out.println(ByteBuffer.allocate(10).getClass());
        /**
         * class java.nio.DirectByteBuffer
         * 直接内存,读写效率高(少一次拷贝),不受 GC 的影响
         * 系统内存的分配效率低,netty对其进行了优化,使用不当会造成内存泄露
         * 注:直接内存与 ByteBuffer 是虚引用,ByteBuffer 被 GC 回收后,直接内存也会被清理
         */
        System.out.println(ByteBuffer.allocateDirect(10).getClass());
    }
}
写入数据
调用
channel的read方法调用
buffer自己的put方法
int readByte = channel.read(buf);
buf.put((byte) 127);
读取数据
调用
channel的write方法调用
buffer的get方法mark():标记当前 positionreset():回到标记的位置
int writeByte = channel.write(buf);
buf.get();
get()方法会让position的读指针往后移动,如果需要重复读取数据
- 调用
rewind方法将position重置为 0- 调用
get( int i )方法获取索引 i 的内容,指针不会移动
- 字符串与 ByteBuffer 互转
ByteBuffer buf = StandardCharsets.UTF_8.encode("hello");
ByteBuffer buf2 = ByteBuffer.wrap("hello".getBytes());

String str = StandardCharsets.UTF_8.decode(buf).toString();
3. 处理黏包和拆包
- 简单方法
public class TestByteBufferExam {
    public static void main(String[] args) {
        ByteBuffer source = ByteBuffer.allocate(32);
        source.put("hello,world\nI'm,zhangsan\nHo".getBytes());
        split(source);
        source.put("w are you?\n".getBytes());
        split(source);
    }

    public static void split(ByteBuffer source) {
        source.flip();
        for (int i = 0; i < source.limit(); i++) {
            if (source.get(i) == '\n') {
                int len = i + 1 - source.position();
                ByteBuffer buffer = ByteBuffer.allocate(len);
                for (int j = 0; j < len; j++) {
                    buffer.put(source.get());
                }
                buffer.rewind();
                System.out.println(StandardCharsets.UTF_8.decode(buffer));
            }
        }
        source.compact();
    }
}
版权声明:本文为weixin_45636641原创文章,遵循CC 4.0 BY-SA版权协议,转载请附上原文出处链接和本声明。