Google 身份验证器 Google Authenticator 是谷歌推出的基于时间的一次性密码 (Time-based One-time Password,简称 TOTP),只需要在手机上安装该 APP,就可以生成一个随着时间变化的一次性密码,用于帐户验证。
Google 身份验证器是一款基于时间与哈希的一次性密码算法的两步验证软件令牌,此软件用于 Google 的认证服务。此项服务所使用的算法已列于 RFC 6238 和 RFC 4226 中。
1、安装谷歌身份验证器
- 苹果用户
在App Store搜索google authenticator
- 安卓用户
http://s.downpp.com//apk9/googlesfyzq_5.10_2265.com.apk
2、引入 maven 依赖
<!-- 加密工具 -->
<dependency>
    <groupId>top.lrshuai.encryption</groupId>
    <artifactId>encryption-tools</artifactId>
    <version>1.0.0</version>
</dependency>
<!-- 二维码依赖 -->
<dependency>
    <groupId>org.iherus</groupId>
    <artifactId>qrext4j</artifactId>
    <version>1.3.1</version>
</dependency>
- 谷歌身份验证器工具类
import org.apache.commons.codec.binary.Base32;
import org.apache.commons.codec.binary.Hex;
import org.springframework.util.StringUtils;

import javax.crypto.Mac;
import javax.crypto.spec.SecretKeySpec;
import java.io.UnsupportedEncodingException;
import java.net.URLEncoder;
import java.security.InvalidKeyException;
import java.security.NoSuchAlgorithmException;
import java.security.SecureRandom;

/**
 * 谷歌身份验证器工具类
 */
public class GoogleAuthenticator {

    /**
     * 时间前后偏移量
     * 用于防止客户端时间不精确导致生成的TOTP与服务器端的TOTP一直不一致
     * 如果为0,当前时间为 10:10:15
     * 则表明在 10:10:00-10:10:30 之间生成的TOTP 能校验通过
     * 如果为1,则表明在
     * 10:09:30-10:10:00
     * 10:10:00-10:10:30
     * 10:10:30-10:11:00 之间生成的TOTP 能校验通过
     * 以此类推
     */
    private static int WINDOW_SIZE = 0;

    /**
     * 加密方式,HmacSHA1、HmacSHA256、HmacSHA512
     */
    private static String CRYPTO = "HmacSHA1";

    /**
     * 生成密钥,每个用户独享一份密钥
     *
     * @return
     */
    public static String getSecretKey() {
        SecureRandom random = new SecureRandom();
        byte[] bytes = new byte[20];
        random.nextBytes(bytes);
        Base32 base32 = new Base32();
        String secretKey = base32.encodeToString(bytes);
        // make the secret key more human-readable by lower-casing and
        // inserting spaces between each group of 4 characters
        return secretKey.toUpperCase();
    }

    /**
     * 生成二维码内容
     *
     * @param secretKey 密钥
     * @param account   账户名
     * @param issuer    网站地址(可不写)
     * @return
     */
    public static String getQrCodeText(String secretKey, String account, String issuer) {
        String normalizedBase32Key = secretKey.replace(" ", "").toUpperCase();
        try {
            return "otpauth://totp/"
                    + URLEncoder.encode((!StringUtils.isEmpty(issuer) ? (issuer + ":") : "") + account, "UTF-8").replace("+", "%20")
                    + "?secret=" + URLEncoder.encode(normalizedBase32Key, "UTF-8").replace("+", "%20")
                    + (!StringUtils.isEmpty(issuer) ? ("&issuer=" + URLEncoder.encode(issuer, "UTF-8").replace("+", "%20")) : "");
        } catch (UnsupportedEncodingException e) {
            throw new IllegalStateException(e);
        }
    }

    /**
     * 获取验证码
     *
     * @param secretKey
     * @return
     */
    public static String getCode(String secretKey) {
        String normalizedBase32Key = secretKey.replace(" ", "").toUpperCase();
        Base32 base32 = new Base32();
        byte[] bytes = base32.decode(normalizedBase32Key);
        String hexKey = Hex.encodeHexString(bytes);
        long time = (System.currentTimeMillis() / 1000) / 30;
        String hexTime = Long.toHexString(time);
        return TOTP.generateTOTP(hexKey, hexTime, "6", CRYPTO);
    }

    /**
     * 检验 code 是否正确
     *
     * @param secret 密钥
     * @param code   code
     * @param time   时间戳
     * @return
     */
    public static boolean checkCode(String secret, long code, long time) {
        Base32 codec = new Base32();
        byte[] decodedKey = codec.decode(secret);
        // convert unix msec time into a 30 second "window"
        // this is per the TOTP spec (see the RFC for details)
        long t = (time / 1000L) / 30L;
        // Window is used to check codes generated in the near past.
        // You can use this value to tune how far you're willing to go.
        long hash;
        for (int i = -WINDOW_SIZE; i <= WINDOW_SIZE; ++i) {
            try {
                hash = verifyCode(decodedKey, t + i);
            } catch (Exception e) {
                // Yes, this is bad form - but
                // the exceptions thrown would be rare and a static
                // configuration problem
                // e.printStackTrace();
                throw new RuntimeException(e.getMessage());
            }
            if (hash == code) {
                return true;
            }
        }
        return false;
    }

    /**
     * 根据时间偏移量计算
     *
     * @param key
     * @param t
     * @return
     * @throws NoSuchAlgorithmException
     * @throws InvalidKeyException
     */
    private static long verifyCode(byte[] key, long t) throws NoSuchAlgorithmException, InvalidKeyException {
        byte[] data = new byte[8];
        long value = t;
        for (int i = 8; i-- > 0; value >>>= 8) {
            data[i] = (byte) value;
        }
        SecretKeySpec signKey = new SecretKeySpec(key, CRYPTO);
        Mac mac = Mac.getInstance(CRYPTO);
        mac.init(signKey);
        byte[] hash = mac.doFinal(data);
        int offset = hash[20 - 1] & 0xF;
        // We're using a long because Java hasn't got unsigned int.
        long truncatedHash = 0;
        for (int i = 0; i < 4; ++i) {
            truncatedHash <<= 8;
            // We are dealing with signed bytes:
            // we just keep the first byte.
            truncatedHash |= (hash[offset + i] & 0xFF);
        }
        truncatedHash &= 0x7FFFFFFF;
        truncatedHash %= 1000000;
        return truncatedHash;
    }

    public static void main(String[] args) {
        for (int i = 0; i < 100; i++) {
            String secretKey = getSecretKey();
            System.out.println("secretKey:" + secretKey);
            String code = getCode(secretKey);
            System.out.println("code:" + code);
            boolean b = checkCode(secretKey, Long.parseLong(code), System.currentTimeMillis());
            System.out.println("isSuccess:" + b);
        }
    }
}
- 验证码生成工具类
import javax.crypto.Mac;
import javax.crypto.spec.SecretKeySpec;
import java.lang.reflect.UndeclaredThrowableException;
import java.math.BigInteger;
import java.security.GeneralSecurityException;

/**
 * 验证码生成工具类
 */
public class TOTP {

    // 0 1 2 3 4 5 6 7 8
    private static final int[] DIGITS_POWER = {1, 10, 100, 1000, 10000, 100000, 1000000, 10000000, 100000000};

    /**
     * This method uses the JCE to provide the crypto algorithm. HMAC computes a
     * Hashed Message Authentication Code with the crypto hash algorithm as a
     * parameter.
     *
     * @param crypto   : the crypto algorithm (HmacSHA1, HmacSHA256, HmacSHA512)
     * @param keyBytes : the bytes to use for the HMAC key
     * @param text     : the message or text to be authenticated
     */
    private static byte[] hmac_sha(String crypto, byte[] keyBytes, byte[] text) {
        try {
            Mac hmac;
            hmac = Mac.getInstance(crypto);
            SecretKeySpec macKey = new SecretKeySpec(keyBytes, "RAW");
            hmac.init(macKey);
            return hmac.doFinal(text);
        } catch (GeneralSecurityException gse) {
            throw new UndeclaredThrowableException(gse);
        }
    }

    /**
     * This method converts a HEX string to Byte[]
     *
     * @param hex : the HEX string
     * @return: a byte array
     */
    private static byte[] hexStr2Bytes(String hex) {
        // Adding one byte to get the right conversion
        // Values starting with "0" can be converted
        byte[] bArray = new BigInteger("10" + hex, 16).toByteArray();

        // Copy all the REAL bytes, not the "first"
        byte[] ret = new byte[bArray.length - 1];
        System.arraycopy(bArray, 1, ret, 0, ret.length);
        return ret;
    }

    /**
     * This method generates a TOTP value for the given set of parameters.
     *
     * @param key          : the shared secret, HEX encoded
     * @param time         : a value that reflects a time
     * @param returnDigits : number of digits to return
     * @param crypto       : the crypto function to use
     * @return: a numeric String in base 10 that includes
     */
    public static String generateTOTP(String key, String time, String returnDigits, String crypto) {
        int codeDigits = Integer.decode(returnDigits);
        String result = null;

        // Using the counter
        // First 8 bytes are for the movingFactor
        // Compliant with base RFC 4226 (HOTP)
        while (time.length() < 16)
            time = "0" + time;

        // Get the HEX in a Byte[]
        byte[] msg = hexStr2Bytes(time);
        byte[] k = hexStr2Bytes(key);
        byte[] hash = hmac_sha(crypto, k, msg);

        // put selected bytes into result int
        int offset = hash[hash.length - 1] & 0xf;

        int binary = ((hash[offset] & 0x7f) << 24)
                | ((hash[offset + 1] & 0xff) << 16)
                | ((hash[offset + 2] & 0xff) << 8) | (hash[offset + 3] & 0xff);

        int otp = binary % DIGITS_POWER[codeDigits];

        result = Integer.toString(otp);
        while (result.length() < codeDigits) {
            result = "0" + result;
        }
        return result;
    }
}
因为谷歌身份验证器支持两种方式添加,扫码和输入密钥添加,所以两种方式我们都实现了
3、项目启动类
import com.asurplus.common.google.GoogleAuthenticator;
import com.asurplus.common.utils.QRCodeUtil;
import org.springframework.boot.SpringApplication;
import org.springframework.boot.autoconfigure.SpringBootApplication;
import org.springframework.web.bind.annotation.GetMapping;
import org.springframework.web.bind.annotation.RestController;

import javax.servlet.http.HttpServletResponse;

/**
 * 项目启动类
 *
 * @Author Asurplus
 */
@RestController
@SpringBootApplication
public class AsurplusApplication {

    public static void main(String[] args) {
        SpringApplication.run(AsurplusApplication.class, args);
    }

    /**
     * 生成 Google 密钥,两种方式任选一种
     */
    @GetMapping("getSecret")
    public String getSecret() {
        return GoogleAuthenticator.getSecretKey();
    }

    /**
     * 生成二维码,APP直接扫描绑定,两种方式任选一种
     */
    @GetMapping("getQrcode")
    public void getQrcode(String name, HttpServletResponse response) throws Exception {
        // 生成二维码内容
        String qrCodeText = GoogleAuthenticator.getQrCodeText(GoogleAuthenticator.getSecretKey(), name, "");
        // 生成二维码输出
		new SimpleQrcodeGenerator().generate(qrCodeText).toStream(response.getOutputStream());
    }

    /**
     * 获取code
     */
    @GetMapping("getCode")
    public String getCode(String secretKey) {
        return GoogleAuthenticator.getCode(secretKey);
    }

    /**
     * 验证 code 是否正确
     */
    @GetMapping("checkCode")
    public String checkCode(String secret, String code) {
        boolean b = GoogleAuthenticator.checkCode(secret, Long.parseLong(code), System.currentTimeMillis());
        if (b) {
            return "success";
        }
        return "error";
    }
}
4、测试
- 1、获取密钥
http://localhost:8080/getSecret
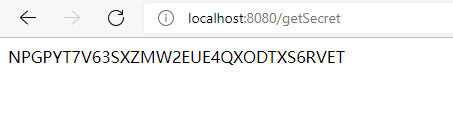
我们就可以打开谷歌身份验证器APP,选择”输入设置密钥“,输入:账户名,密钥即可
- 2、获取二维码
http://localhost:8080/getQrcode?name=test
其中:test为你的账户名
打开谷歌身份验证器APP,选择“扫描二维码”,则会自动添加
- 3、身份验证
http://localhost:8080/checkCode?secret=BSW5QUVXPQ7QIDQ4R2JW7MFZPQJPGQPD&code=699118
secret 为密钥,code 为APP生成的验证码
5、设计优化
我们在实际的开发过程中,每一个用户需要对应唯一的密钥,在 user 表中应该有一个 secret 字段,保存该用户的密钥,用户需要绑定该密钥,从而实现二步验证
6、源码
本文章中源码地址:
https://gitee.com/asurplus/google-auth
如您在阅读中发现不足,欢迎留言!!!
版权声明:本文为qq_40065776原创文章,遵循CC 4.0 BY-SA版权协议,转载请附上原文出处链接和本声明。