文章目录
Git基础命令
1、设置用户签名
签名的作用是区分不同操作者身份。用户的签名信息在每一个版本的提交信息中能够看到,以此确认本次提交是谁做的。首次安装必须设置,否则无法提交代码。这里设置的用户签名和代码托管中心的账号没有任何关系
git config --global user.name PengHuAnZhi
#Git并不会验证此邮箱,也不会去校验邮箱的真实性
git config --global user.email penghuanzhi@pwrd.com
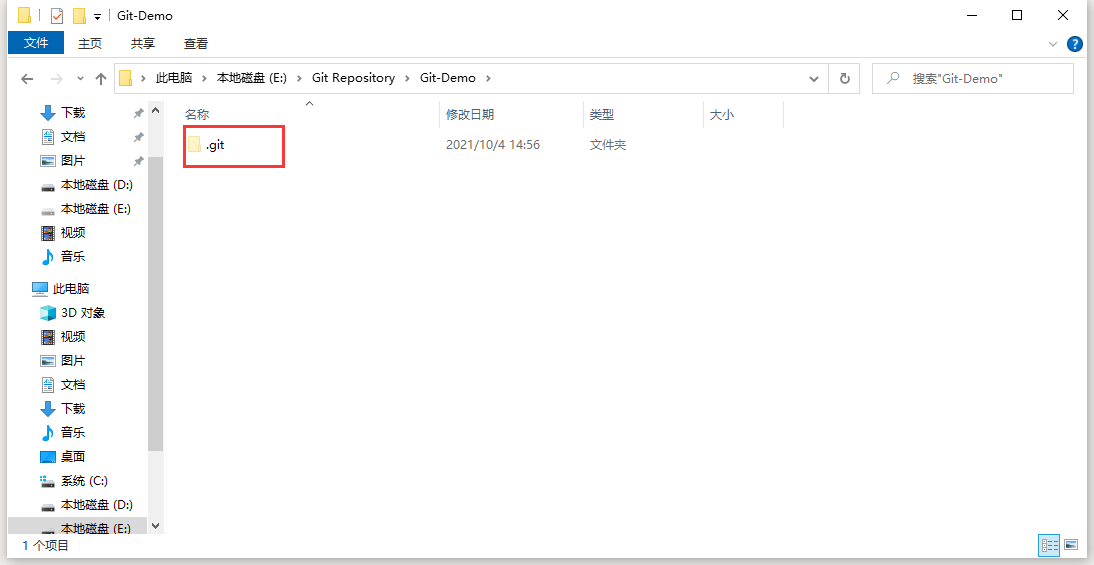
2、初始化本地库
定位到项目根目录
$ git init
Initialized empty Git repository in E:/Git Repository/Git-Demo/.git/
3、查看本地库状态
$ git status
On branch master#当前处于master分支

No commits yet#目前还没有提交

nothing to commit (create/copy files and use "git add" to track)#也没有任何需要提交的东西
当前目录新建一个文件
hello.txt,再次查看状态
$ git status
On branch master

No commits yet

Untracked files:#未被追踪的文件,目前还只是在工作区,还没有提交到暂存区
  (use "git add <file>..." to include in what will be committed)
        hello.txt

nothing added to commit but untracked files present (use "git add" to track)
4、添加暂存区
$ git add hello.txt
warning: LF will be replaced by CRLF in hello.txt#windows换行符为CRLF,提交到暂存区后需要将其转换为Linux下面的换行符LF
The file will have its original line endings in your working directory
再次查看本地库状态
$ git status
On branch master

No commits yet

Changes to be committed:
  (use "git rm --cached <file>..." to unstage)
        new file:   hello.txt
5、移除暂存区
$ git rm --cached hello.txt
rm 'hello.txt'
6、提交本地库
$ git commit -m '第一次提交' hello.txt
[master (root-commit) 3d42b70] 第一次提交
 1 file changed, 11 insertions(+)
 create mode 100644 hello.txt
再次查看本地库状态
$ git status
On branch master
nothing to commit, working tree clean
修改文件再次提交
$ git status
On branch master
Changes not staged for commit:
  (use "git add <file>..." to update what will be committed)
  (use "git restore <file>..." to discard changes in working directory)
        modified:   hello.txt

no changes added to commit (use "git add" and/or "git commit -a")

$ git add hello.txt

$ git commit -m '第二次提交' hello.txt
[master e79f67b] 第二次提交
 1 file changed, 11 insertions(+), 11 deletions(-)

$ git add hello.txt

$ git commit -m '第三次提交' hello.txt
[master d3ba9bf] 第三次提交
 1 file changed, 11 insertions(+), 11 deletions(-)
7、查看版本信息
$ git reflog
e79f67b (HEAD -> master) HEAD@{0}: commit: 第二次提交
3d42b70 HEAD@{1}: commit (initial): 第一次提交

$ git log
commit e79f67bfe1ddf5cdc8c6c82da72b31b7c77d1fac (HEAD -> master)
Author: PengHuAnZhi <penghuanzhi@pwrd.com>
Date:   Mon Oct 4 15:15:59 2021 +0800

    第二次提交

commit 3d42b70d442404281dac0fefae28b7740f229d94
Author: PengHuAnZhi <penghuanzhi@pwrd.com>
Date:   Mon Oct 4 15:10:44 2021 +0800

    第一次提交
8、版本窜梭
$ git reflog
d3ba9bf (HEAD -> master) HEAD@{0}: commit: 第三次提交
e79f67b HEAD@{1}: commit: 第二次提交
3d42b70 HEAD@{2}: commit (initial): 第一次提交

$ git reset --hard e79f67b
HEAD is now at e79f67b 第二次提交

$ git reflog
e79f67b (HEAD -> master) HEAD@{0}: reset: moving to e79f67b
d3ba9bf HEAD@{1}: commit: 第三次提交
e79f67b (HEAD -> master) HEAD@{2}: commit: 第二次提交
3d42b70 HEAD@{3}: commit (initial): 第一次提交
实际上就是
HEAD指向分支master,然后master指向具体的版本号

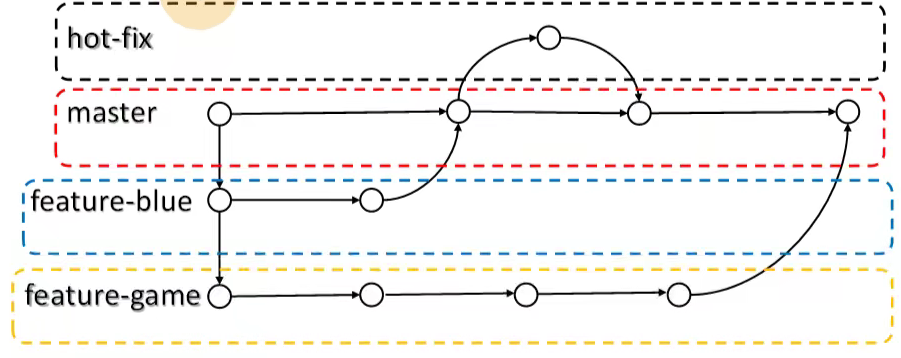
分支的操作
在版本控制过程中,同时推进多个任务,为每个任务,我们就可以创建每个任务的单独分支。使用分支意味着程序员可以把自己的工作从开发主线上分离开来,开发自己分支的时候,不会影响主线分支的运行。对于初学者而言,分支可以简单理解为副本,一个分支就是一个单独的副本。(分支底层其实也是指针的引用)
1、创建分支
$ git branch hot-fix
2、查看分支
$ git branch -v
  hot-fix d3ba9bf 第三次提交
* master  d3ba9bf 第三次提交
3、切换分支
$ git checkout hot-fix
Switched to branch 'hot-fix'

$ git reflog
79b2699 (HEAD -> hot-fix) HEAD@{0}: commit: 在hot-fix分支上第一次修改
d3ba9bf (master) HEAD@{1}: checkout: moving from master to hot-fix
d3ba9bf (master) HEAD@{2}: reset: moving to d3ba9bf
e79f67b HEAD@{3}: reset: moving to e79f67b
e79f67b HEAD@{4}: reset: moving to e79f67b
d3ba9bf (master) HEAD@{5}: commit: 第三次提交
e79f67b HEAD@{6}: commit: 第二次提交
3d42b70 HEAD@{7}: commit (initial): 第一次提交
4、合并分支
- 正常合并
回到
master分支
$ git merge hot-fix
Updating d3ba9bf..79b2699
Fast-forward
 hello.txt | 1 -
 1 file changed, 1 deletion(-)
- 异常合并
切换到
hot-fix分支,对文件进行修改并提交,然后切换回master分支,再次修改当前文件并提交,然后再次回到master分支执行合并分支命令
$ git merge hot-fix
Auto-merging hello.txt
CONFLICT (content): Merge conflict in hello.txt#合并冲突在hello.txt中
Automatic merge failed; fix conflicts and then commit the result.#自动合并失败
打开文件查看
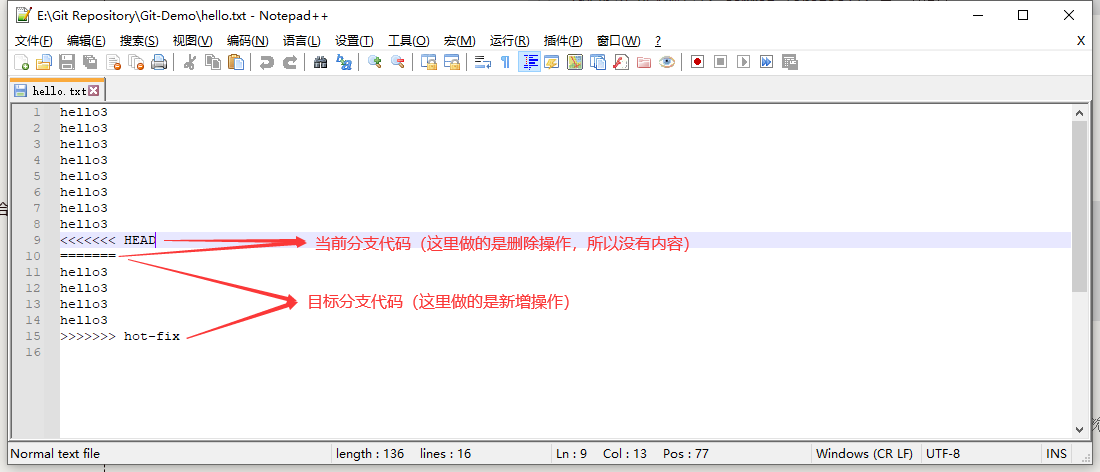
手动将要保留的内容保存,并将特殊符号给删除掉

重新提交一下
$ git commit -m '第一次处理hot-fix和master分支冲突' hello.txt
fatal: cannot do a partial commit during a merge.#可以看到失败了,因为这里处理冲突后,再次提交不能携带文件名了,因为两个分支都修改过,不知道是哪个分支的文件,这里不应该携带文件名

$ git commit -m '第一次处理hot-fix和master分支冲突'
[master 292003c] 第一次处理hot-fix和master分支冲突
合并成功后是不修改原来的
hot-fix分支的
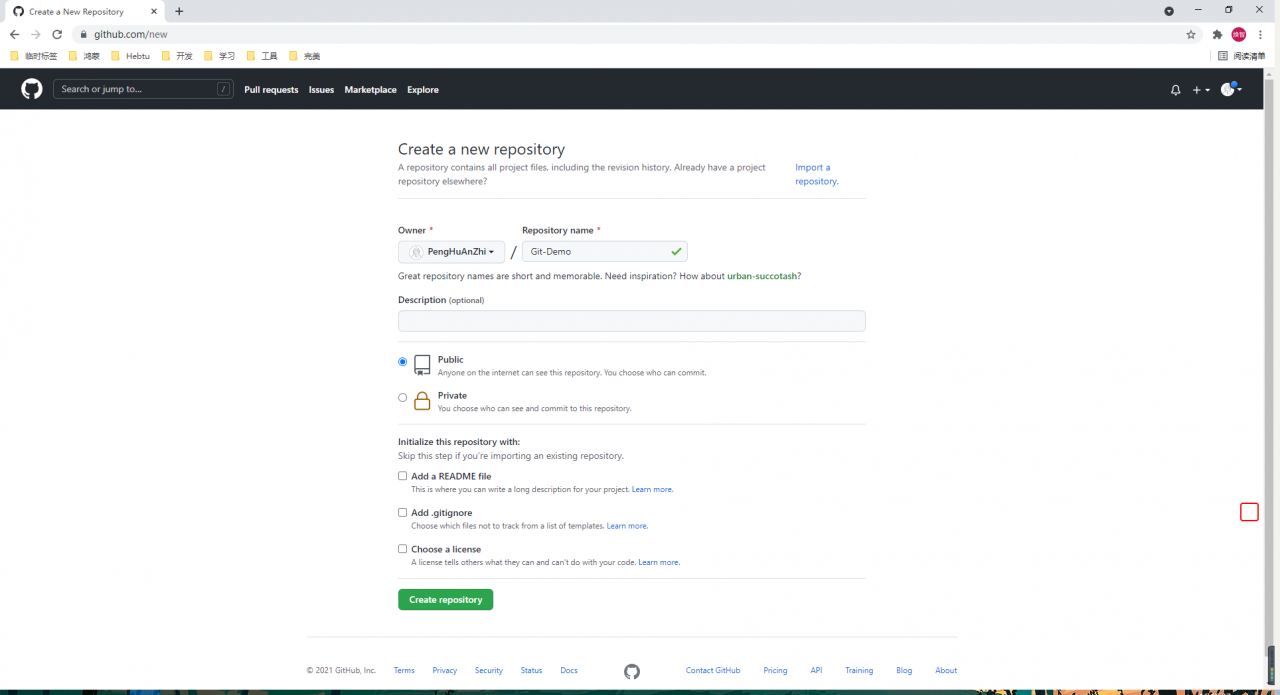
Github操作
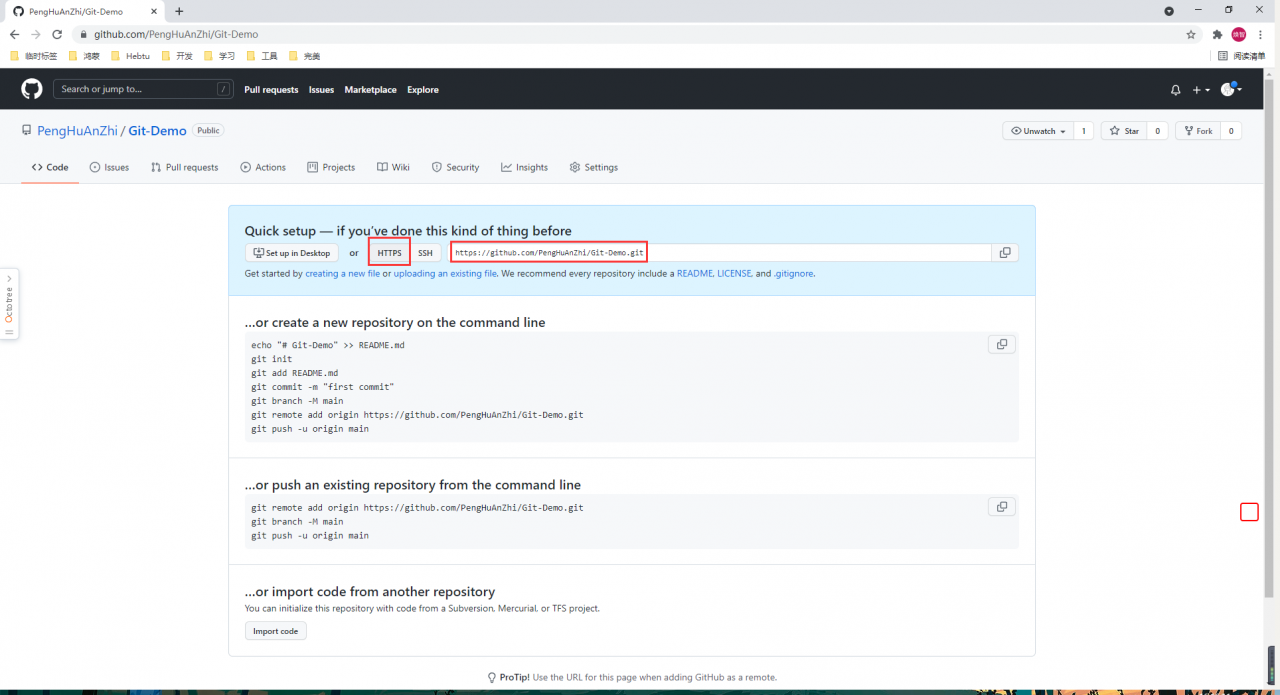
远程创建一个代码库,名称和本地仓库保持一致
复制
HTTPS选项下的链接
1、别名
因为仓库的地址链接较长,我们可以起一个别名
#创建别名
$ git remote add git-demo https://github.com/PengHuAnZhi/Git-Demo.git

#查看别名
$ git remote -v
git-demo        https://github.com/PengHuAnZhi/Git-Demo.git (fetch)#用于拉取
git-demo        https://github.com/PengHuAnZhi/Git-Demo.git (push)#用于推送
2、推送
为了一定的代码提交规范,保证当前位于
master分支再执行推送
$ git push git-demo master
弹出框,选择通过浏览器登录
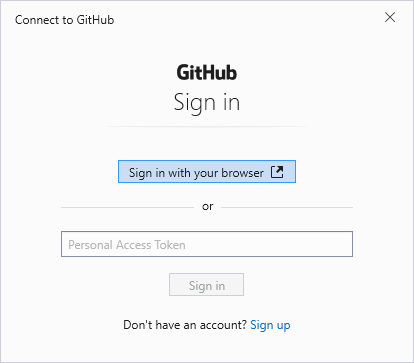

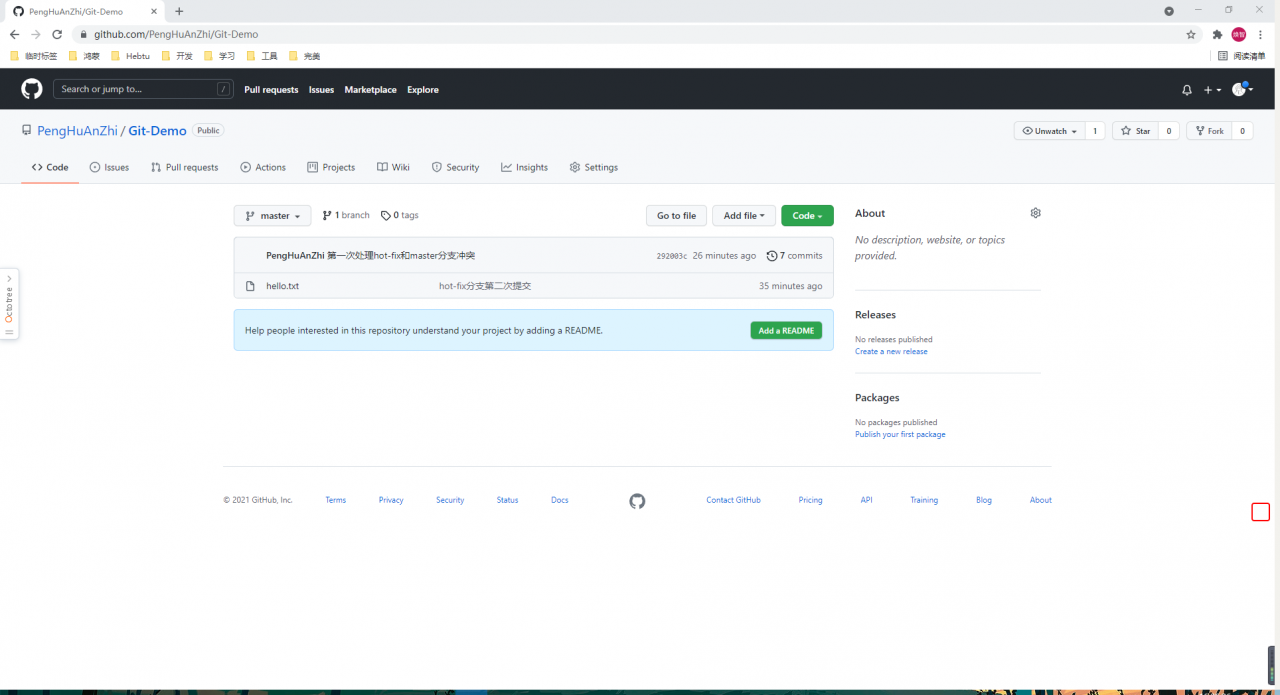
之后就可以看到远程仓库提交成功
$ git push git-demo master

Enumerating objects: 19, done.
Counting objects: 100% (19/19), done.
Delta compression using up to 12 threads
Compressing objects: 100% (13/13), done.
Writing objects: 100% (19/19), 1.52 KiB | 520.00 KiB/s, done.
Total 19 (delta 5), reused 0 (delta 0), pack-reused 0
remote: Resolving deltas: 100% (5/5), done.
To https://github.com/PengHuAnZhi/Git-Demo.git
 * [new branch]      master -> master
3、拉取
直接在远程仓库修改文件
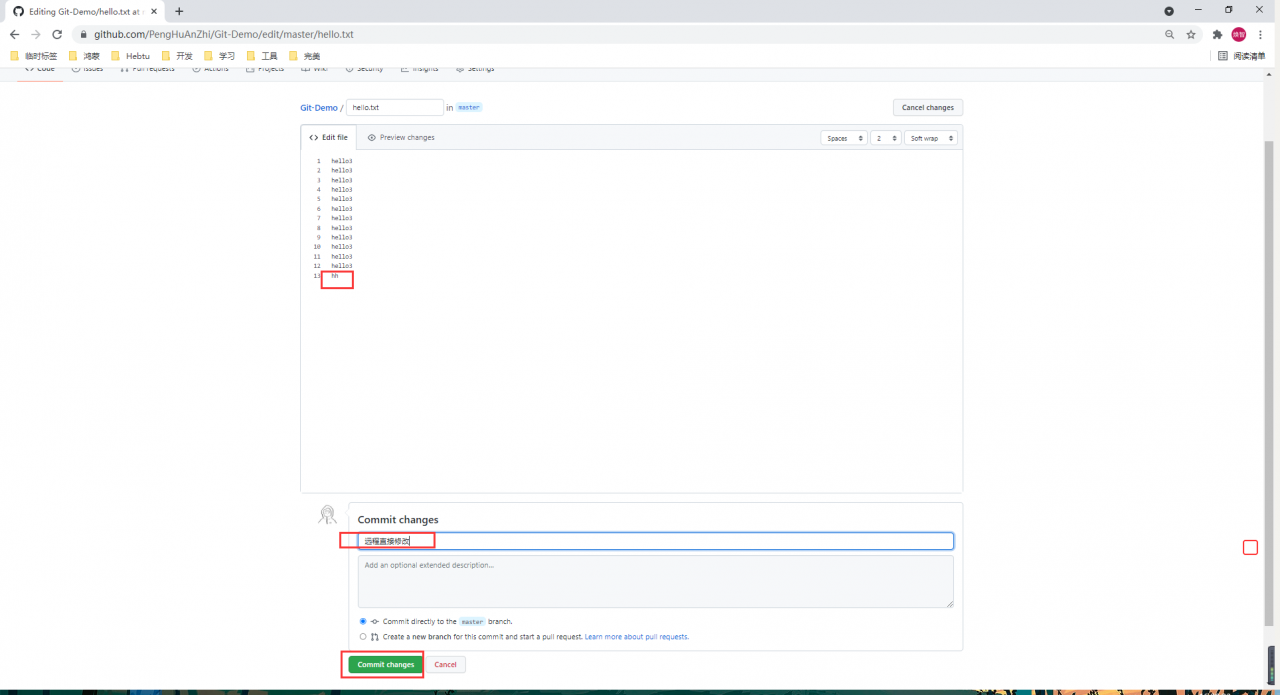
执行拉取命令
$ git pull git-demo master
remote: Enumerating objects: 5, done.
remote: Counting objects: 100% (5/5), done.
remote: Compressing objects: 100% (2/2), done.
remote: Total 3 (delta 1), reused 0 (delta 0), pack-reused 0
Unpacking objects: 100% (3/3), 685 bytes | 4.00 KiB/s, done.
From https://github.com/PengHuAnZhi/Git-Demo
 * branch            master     -> FETCH_HEAD
   292003c..9e71278  master     -> git-demo/master
Updating 292003c..9e71278
Fast-forward
 hello.txt | 3 ++-
 1 file changed, 2 insertions(+), 1 deletion(-)

4、克隆
git clone https://github.com/PengHuAnZhi/Git-Demo.git
克隆会做三件事情,1、拉取代码;2、初始化本地仓库;3、创建别名(别名默认为
Origin)
5、跨团队协作
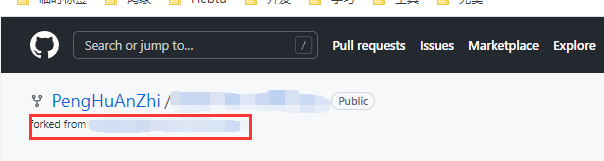
将别的团队的代码拉取到自己的仓库进行更改,且修改记录只存在于自己的仓库,原始仓库不会记录

fork完毕后可以看到项目下方有明显标注来源
在
fork后的新项目中提交更改,原始仓库是不会有任何记录的,我们如果需要让这些更改同步到远程仓库,可以创建一个Pull requests

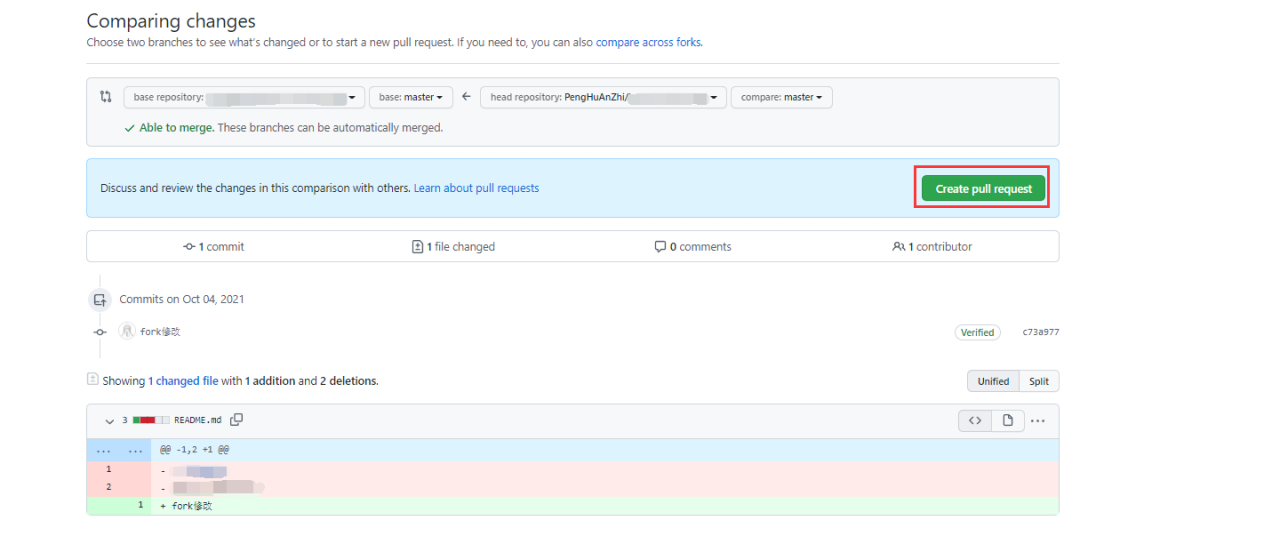
最后就可以填写我们
Pull requests的详细信息了,最后点击Create pull request即可,原始仓库管理员既可以查看更改,以及选择是否合并

6、SSH免密登录
在
Windows用户主目录(如:C:\Users\Administrator)下Git bash here
#-t 指定加密算法,rsa著名的非对称加密算法
#-C 备注
$ ssh-keygen -t rsa -C penghuanzhi@pwrd.com
直接敲三次回车,不需要输入内容,然后就可以看到当前文件夹中生成了一个
.ssh隐藏文件夹,其中
- id_rsa:私钥
- id_rsa.pub:公钥
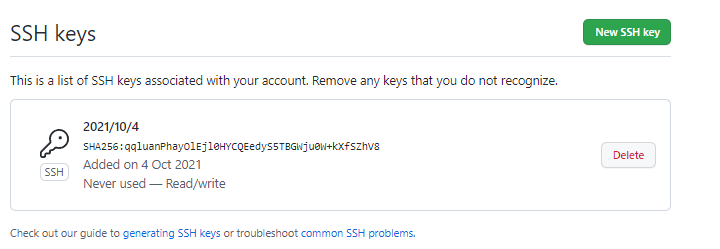
此时将公钥内容复制,回到
Github,进入当前用户的settings,找到SSH and GPG keys
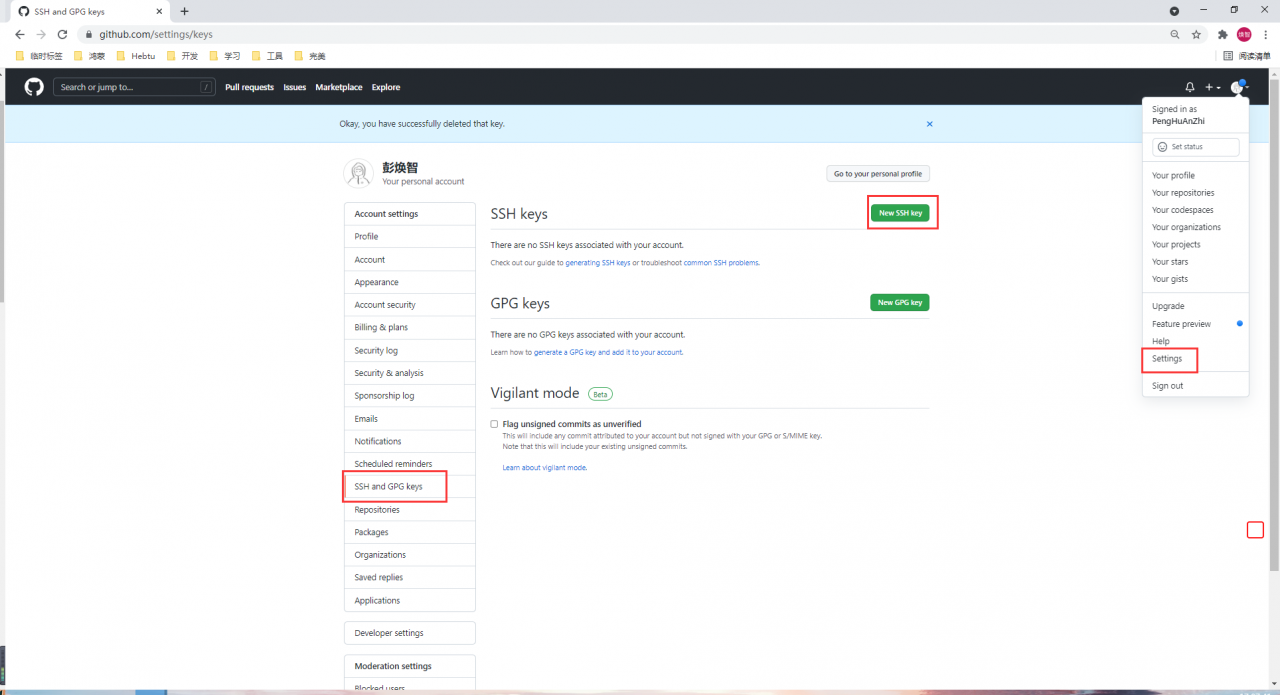
创建一个
SSH key,将刚才复制的公钥填入,添加即可
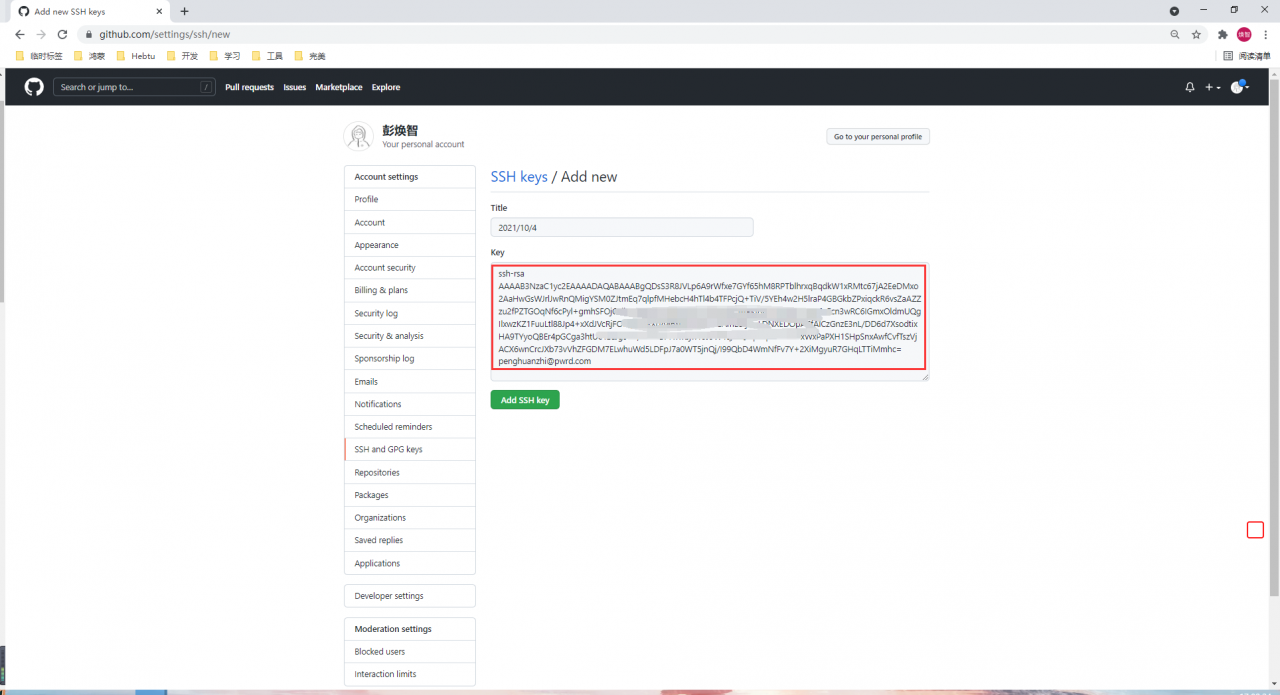
这时候就可以复制仓库的
SSH版本的链接,回到本地克隆,即可达到不用输入密码即可登录
IDEA集成Git
1、配置Git忽略文件
与项目的实际功能无关,不参与服务器上部署运行。把它们忽略掉能够屏蔽
IDE工具之间的差异,在用户的家目录下面新建一个文件命名为git.ignore,内容模板如下
# Compiled class file
*.class

# Log file
*.log

# BlueJ files
*.ctxt

# Mobile Tools for Java (J2ME)
.mtj.tmp/# Package Files #
*.jar
*.war
*.nar
*.ear
*.zip
*.tar.gz
*.rar

hs_err_pid*

.classpath
.project
.settings
target
.idea
*.iml
然后在用户家目录下面找到一个
.gitconfig的隐藏文件,编辑,在后面新增如下内容,注意使用正斜线,而不是反斜线
[core]
	excludesfile = C:/Users/Administrator/git.ignore
2、定位Git程序

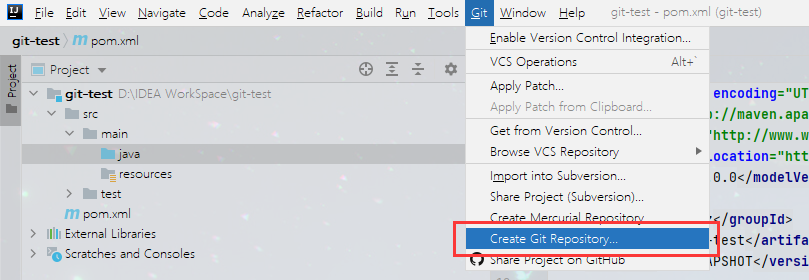
3、初始化本地库
选择当前项目创建一个
Git仓库,添加完毕后,红色文件表示未被追踪并添加到暂存区,灰色文件表示被忽略,绿色表示已被添加到暂存区
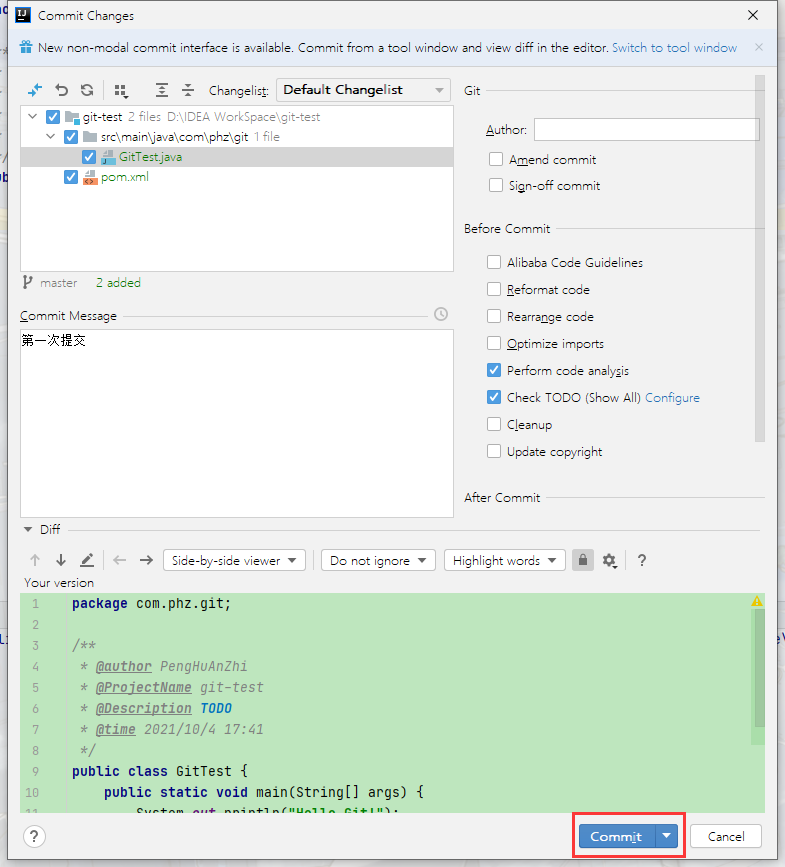
将未被追踪的文件添加到暂存区中

4、提交本地库

5、切换版本
修改文件,提交,重复两次,然后将版本信息展示
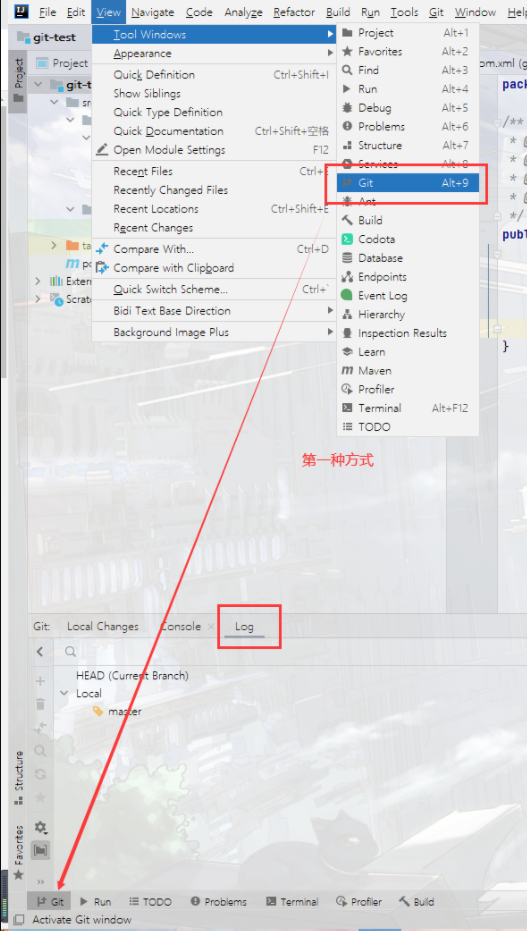
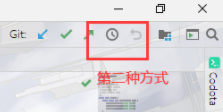
在需要切换的版本上面右击选择
checkout

6、切换分支

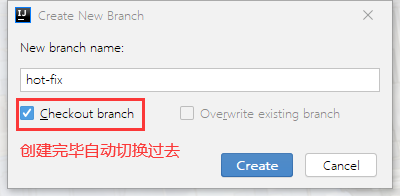
需要切换点击
checkout即可

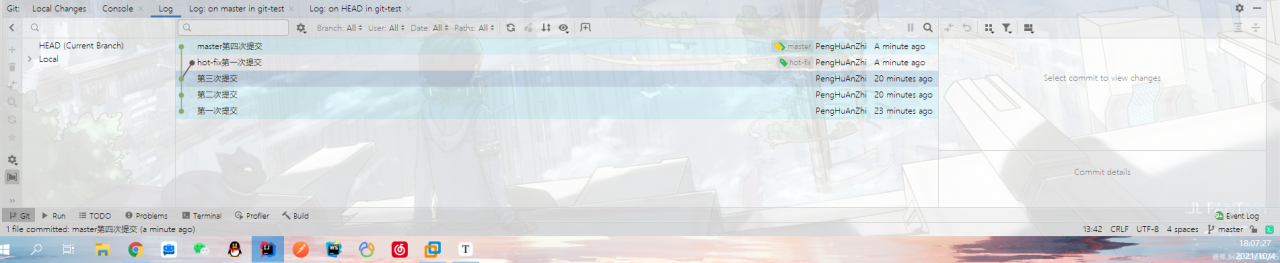
7、合并分支
在
hot-fix分支上修改内容提交本地仓库,然后切换回master分支同样修改内容提交本地仓库,黄色是HEAD指针,绿色是master指针
然后在
master分支上点开Git Branches,在待合并分支上选择Merge into Current
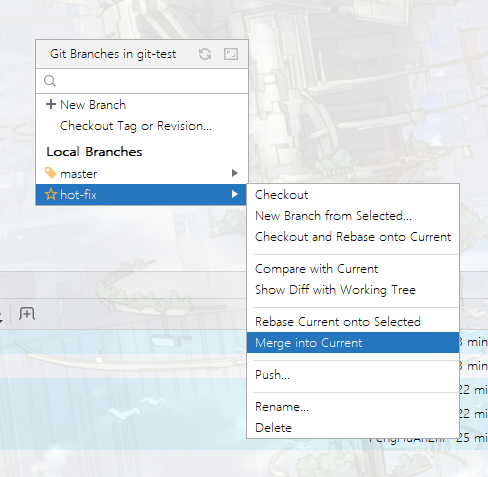
如果没有冲突,直接就合并成功,但当前我们有冲突,会弹出如图所示的页面,提示我们冲突需要处理
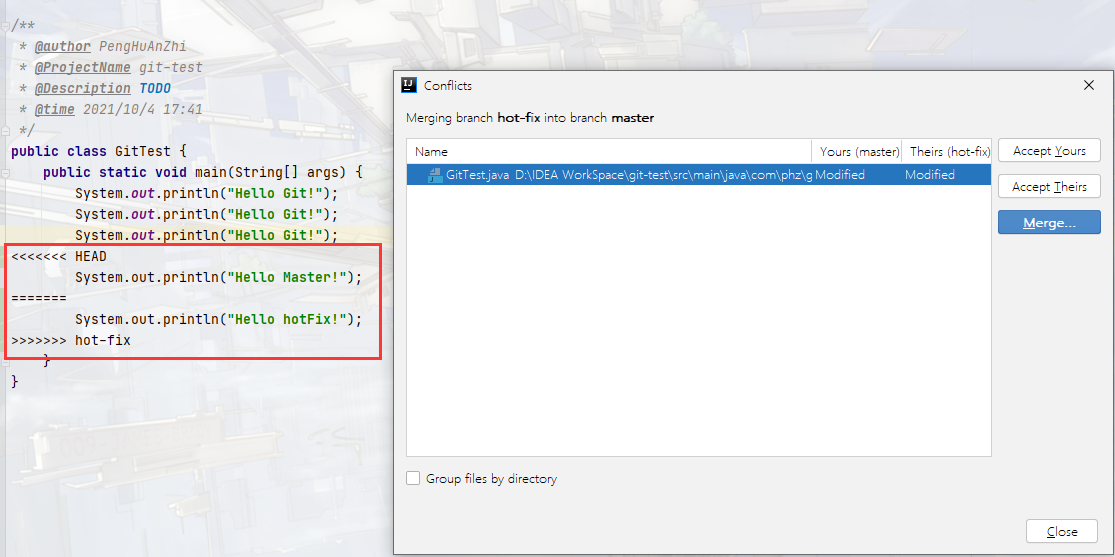
然后我们点击
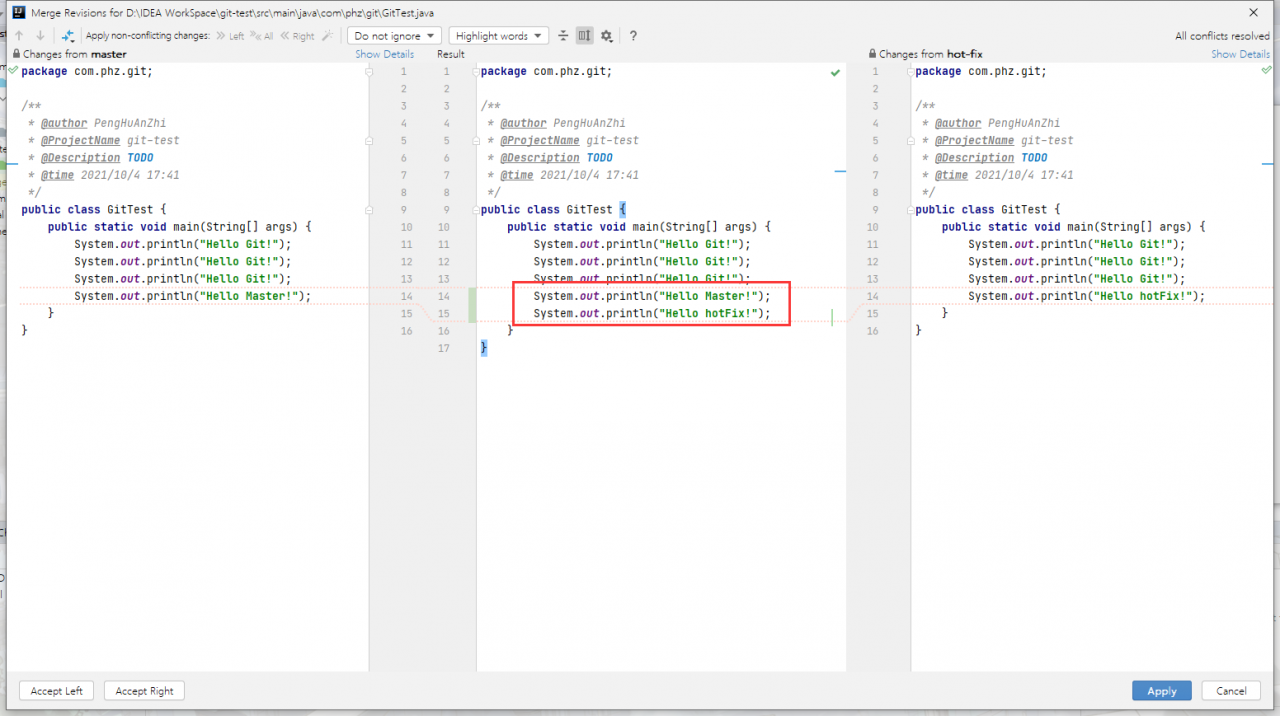
merge,我们可以在弹出来的页面进行合并操作

这里我选择将两次修改都添加(视具体情况而定),然后
Apply即把冲突解决完毕

IDEA集成Github
1、添加Github账号
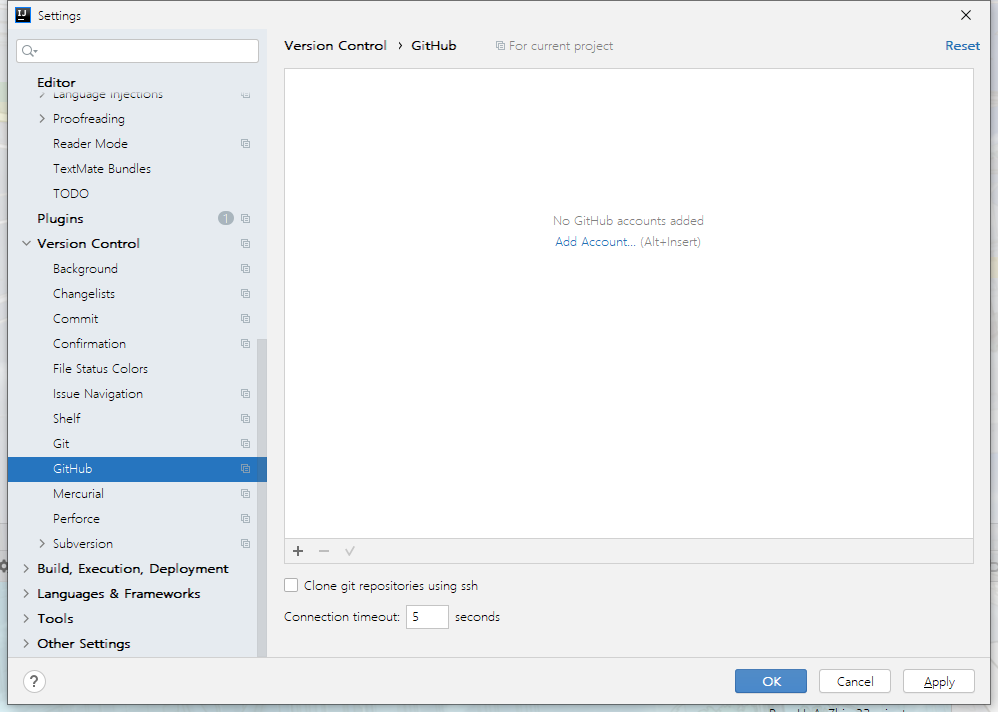
点击
Add Account会跳转Github登录页面,同意即可登录(以前是需要输入账号密码或者SSH进行登录的,但是据说2021年8月14日起就不允许通过账号密码进行git操作了,所以现在更加的便捷)
2、分享项目到Github上
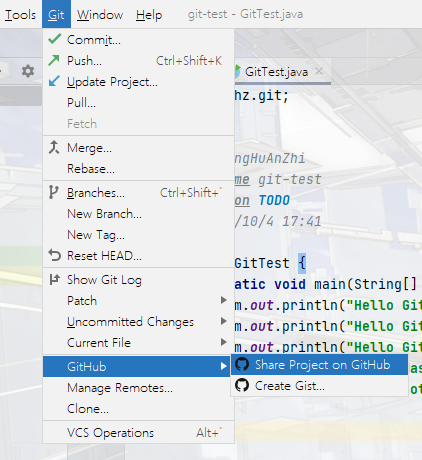
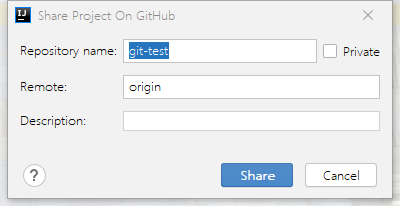
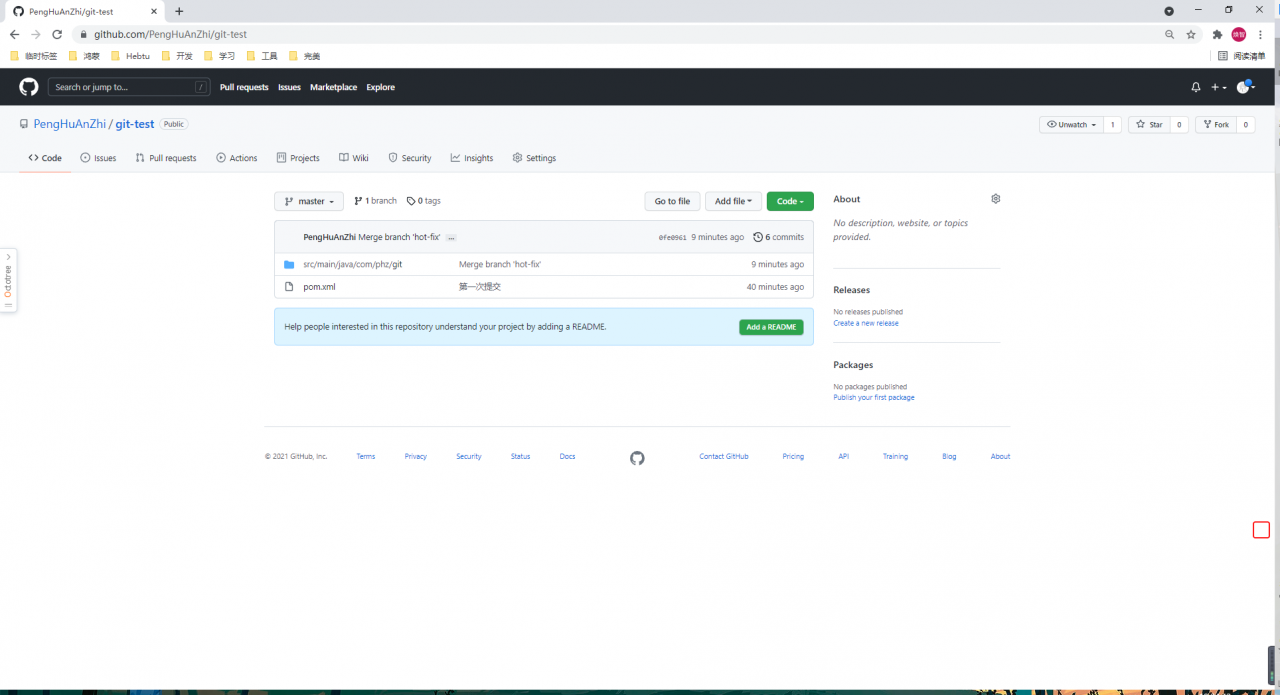
点击
Share后就可以在远程库看到了
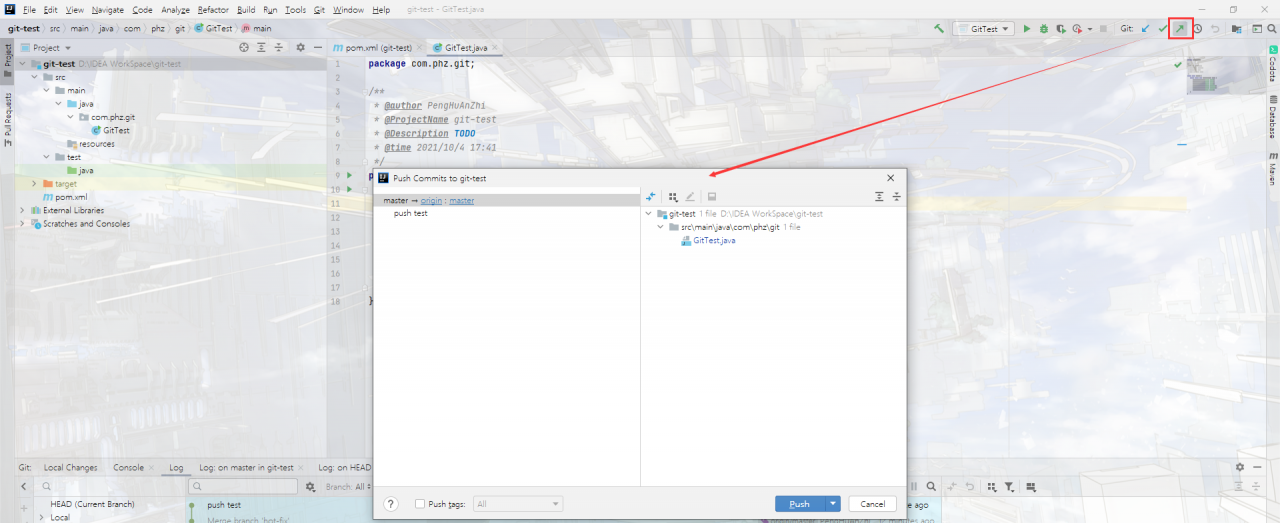
3、推送
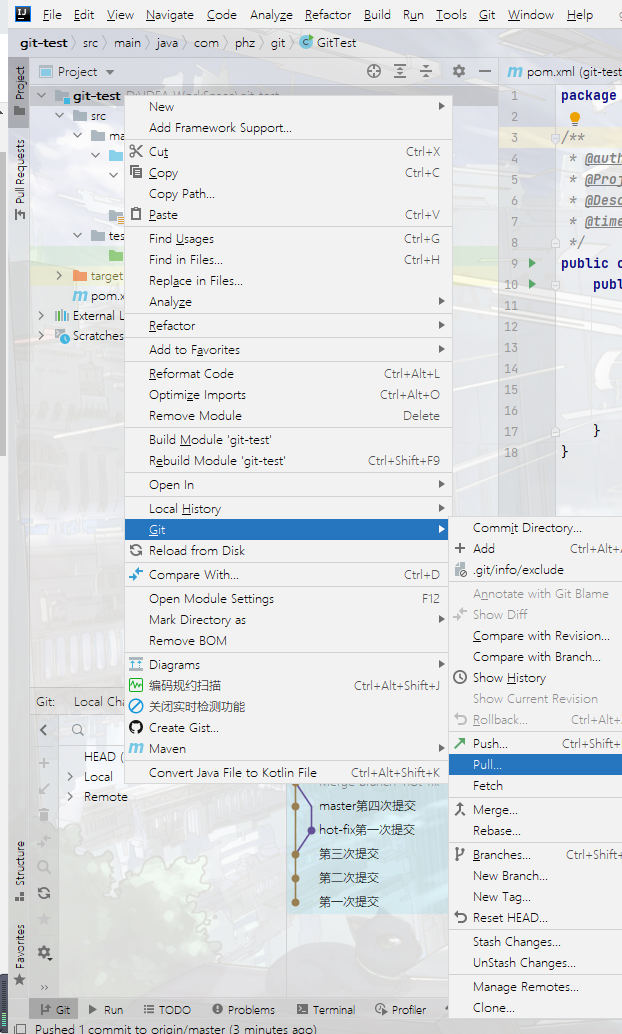
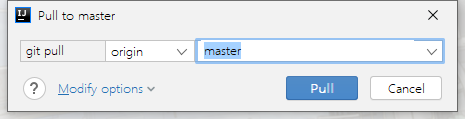
4、拉取
远程手动修改
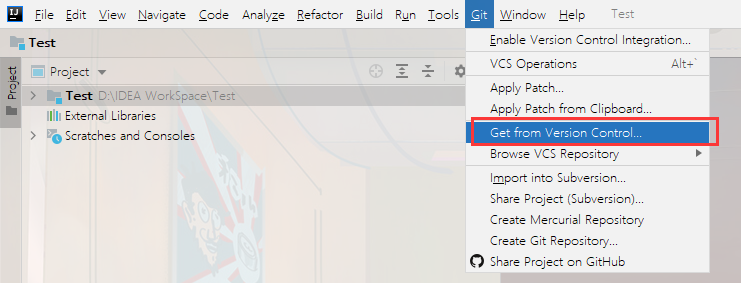
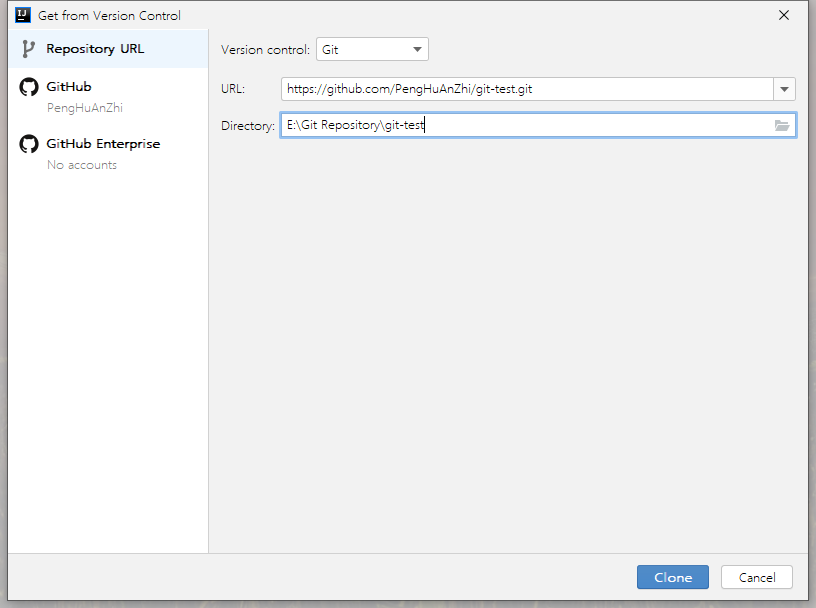
5、克隆
备注
同理,
IDEA去集成Gitee和GitLab都是差不多的,只需要到插件市场下载对应的插件即可