目录
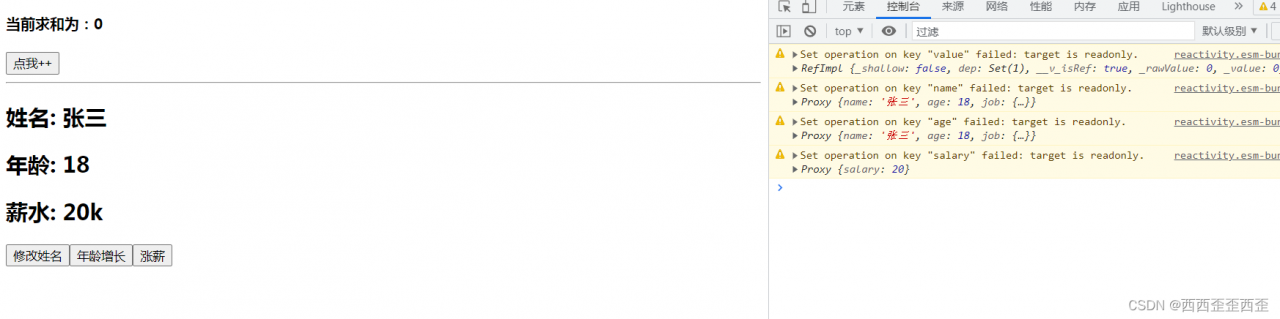
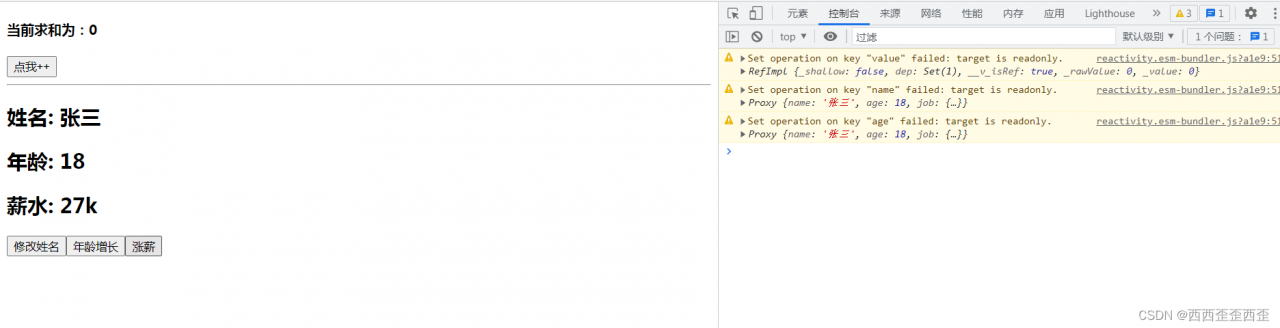
159.readonly与shallowReadonly
- readonly: 让一个响应式数据变为只读的(深只读)。
- shallowReadonly:让一个响应式数据变为只读的(浅只读)。
- 应用场景: 不希望数据被修改时。
<template>
  <h4>当前求和为:{{sum}}</h4>
  <button @click="sum++">点我++</button>
  <hr>
  <h2>姓名: {{name}}</h2>
  <h2>年龄: {{age}}</h2>
  <h2>薪水: {{job.j1.salary}}k</h2>
  <button @click="name+='~'">修改姓名</button>
  <button @click="age++">年龄增长</button>
  <button @click="job.j1.salary++">涨薪</button>
</template>

<script>
import { reactive, readonly, ref, shallowReadonly, toRefs } from '@vue/reactivity'

export default {
  name: 'Demo',
  setup(){
    // 数据
    let sum = ref(0)
    let person =reactive({
      name:'张三',
      age:18,
      job:{
        j1:{
          salary:20
        }
      }
    })

    // person = readonly(person)
    person = shallowReadonly(person)
    sum = readonly(sum)

    // 返回一个对象(常用)
    return{
      sum,
      ...toRefs(person)
    }

  }
}
</script>
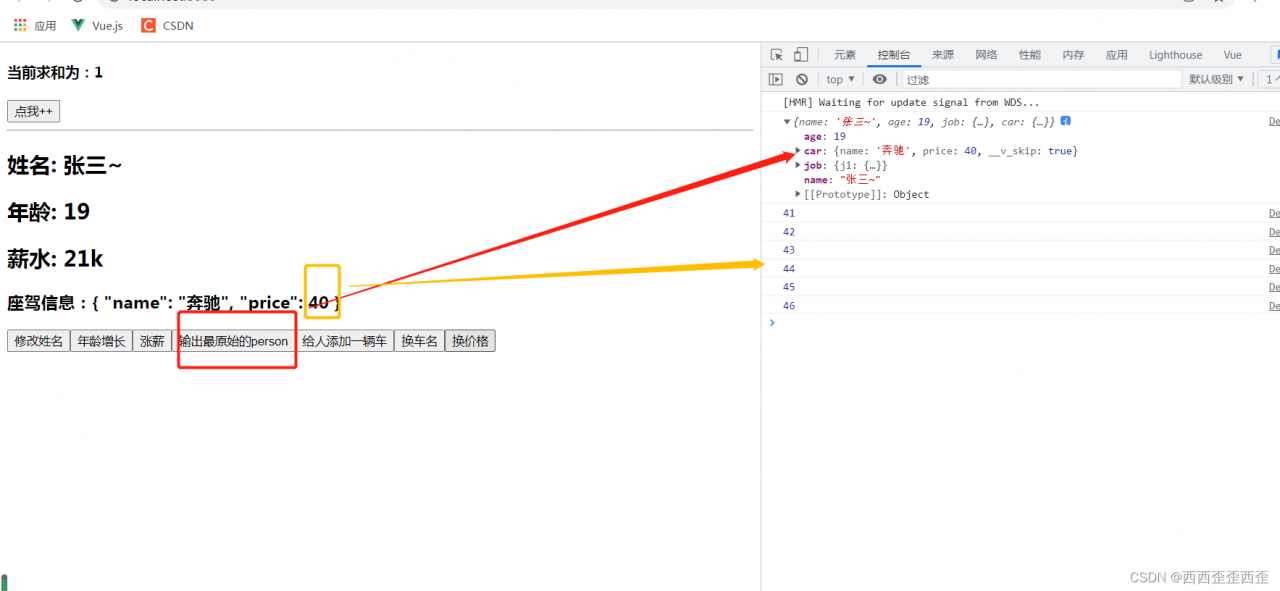
160.toRaw与markRaw
- toRaw:
- 作用:将一个由
reactive生成的响应式对象转为普通对象。 - 使用场景:用于读取响应式对象对应的普通对象,对这个普通对象的所有操作,不会引起页面更新。
- 作用:将一个由
- markRaw:
- 作用:标记一个对象,使其永远不会再成为响应式对象。(数据可以改,页面不变化)
- 应用场景:
- 有些值不应被设置为响应式的,例如复杂的第三方类库等。
- 当渲染具有不可变数据源的大列表时,跳过响应式转换可以提高性能。
<template>
  <h4>当前求和为:{{sum}}</h4>
  <button @click="sum++">点我++</button>
  <hr>
  <h2>姓名: {{name}}</h2>
  <h2>年龄: {{age}}</h2>
  <h2>薪水: {{job.j1.salary}}k</h2>
  <h3>座驾信息:{{car}}</h3>
  <button @click="name+='~'">修改姓名</button>
  <button @click="age++">年龄增长</button>
  <button @click="job.j1.salary++">涨薪</button>
  <button @click="showRawPerson">输出最原始的person</button>
  <button @click="addCar">给人添加一辆车</button>
  <button @click="car.name+='!'">换车名</button>
  <button @click="changePrice">换价格</button>
</template>

<script>
import { markRaw, reactive, ref, toRaw, toRefs } from '@vue/reactivity'

export default {
  name: 'Demo',
  setup(){
    // 数据
    let sum = ref(0)
    let person =reactive({
      name:'张三',
      age:18,
      job:{
        j1:{
          salary:20
        }
      },
      car:{}
    })

    function showRawPerson(){
      const p = toRaw(person)
      console.log(p);
    }

    function addCar(){
      let car = {name:'奔驰',price:40}
      person.car = markRaw(car)
    }

    function changePrice(){
      person.car.price++
      console.log(person.car.price);
    }

    // 返回一个对象(常用)
    return{
      sum,
      ...toRefs(person),
      showRawPerson,
      addCar,
      changePrice
    }

  }
}
</script>
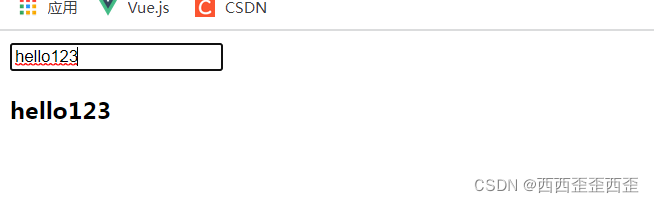
161.customRef
作用:创建一个自定义的 ref,并对其依赖项跟踪和更新触发进行显式控制。
实现防抖效果:
<template>
	<input type="text" v-model="keyword">
	<h3>{{keyword}}</h3>
</template>

<script>
	import {ref,customRef} from 'vue'
	export default {
		name:'Demo',
		setup(){
			// let keyword = ref('hello') //使用Vue准备好的内置ref
			//自定义一个myRef
			function myRef(value,delay){
				let timer
				//通过customRef去实现自定义
				return customRef((track,trigger)=>{
					return{
						get(){
							track() //提前告诉Vue这个value值是需要被“追踪”的
							return value
						},
						set(newValue){
                            // 清除定时器
							clearTimeout(timer)
							timer = setTimeout(()=>{
								value = newValue
								trigger() //告诉Vue去更新界面
							},delay)
						}
					}
				})
			}
			let keyword = myRef('hello',500) //使用程序员自定义的ref
			return {
				keyword
			}
		}
	}
</script>
162.provide与inject
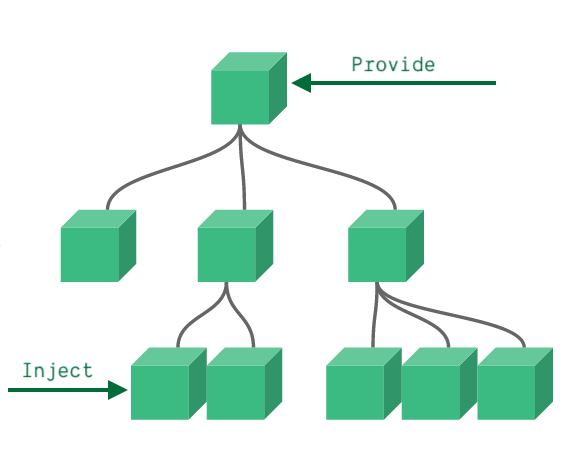
作用:实现祖与后代组件间通信
套路:父组件有一个
provide选项来提供数据,后代组件有一个inject选项来开始使用这些数据具体写法:
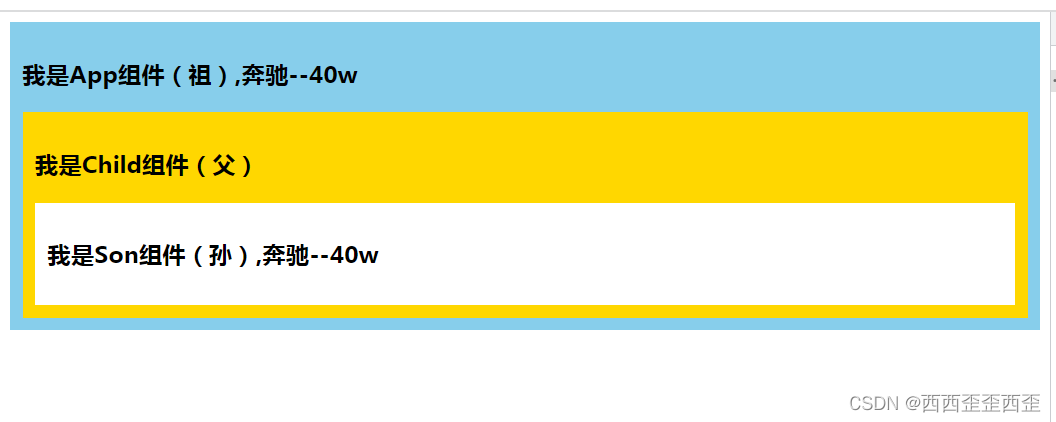
祖组件中:
  <div class="app">
    <h3>我是App组件(祖),{{name}}--{{price}}</h3>
    <child></child>
  </div>
</template>

<script>
import { reactive, toRefs } from '@vue/reactivity'
import Child from './components/Child'
import { provide } from '@vue/runtime-core'
export default {
  name: 'App',
  components:{
    Child
  },
  setup(){
    let car = reactive({name:'奔驰',price:'40w'})
    provide('car',car)//给自己的后代传递数据
    return{...toRefs(car)}
  }
}
</script>

<style>
  .app{
    background-color: skyblue;
    padding: 10px;
  }
</style>
后代组件中:
<template>
  <div class="son">
    <h3>我是Son组件(孙),{{car.name}}--{{car.price}}</h3>
  </div>
</template>

<script>
import { inject } from '@vue/runtime-core'

export default {
  name: 'Son',
  setup(){
    let car = inject('car')
    return{car}
  }
}
</script>

<style>
  .son{
    background-color: #fff;
    padding: 10px;
  }
</style>
163.响应式数据的判断
- isRef: 检查一个值是否为一个 ref 对象
- isReactive: 检查一个对象是否是由
reactive创建的响应式代理 - isReadonly: 检查一个对象是否是由
readonly创建的只读代理 - isProxy: 检查一个对象是否是由
reactive或者readonly方法创建的代理
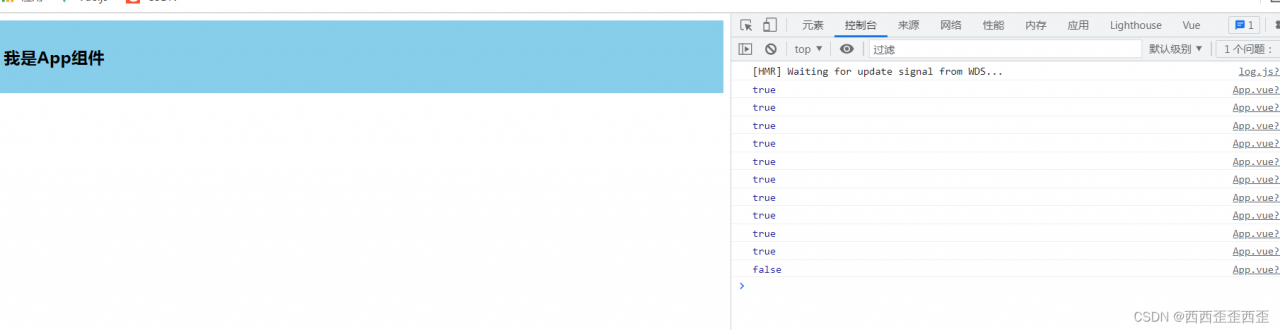
<script>
import { isProxy, isReactive, isReadonly, isRef, reactive, readonly, ref } from '@vue/reactivity'
export default {
  name: 'App',
  setup(){
    let car = reactive({name:'奔驰',price:'40w'})
    let sum = ref(0)
    let car2 = readonly(car)

    console.log(isRef(sum));
    console.log(isReactive(car));
    console.log(isReadonly(car2));
    console.log(isProxy(car));
    console.log(isProxy(car2));
    console.log(isProxy(sum));
  }
}
</script>
164.CompositionAPI的优势
1.Options API 存在的问题
使用传统OptionsAPI(配置式API)中,新增或者修改一个需求,就需要分别在data,methods,computed里修改 。

2.Composition API 的优势
我们可以更加优雅的组织我们的代码,函数。让相关功能的代码更加有序的组织在一起。


165.Fragment组件
- 在Vue2中: 组件必须有一个根标签
- 在Vue3中: 组件可以没有根标签, 内部会将多个标签包含在一个Fragment虚拟元素中
- 好处: 减少标签层级, 减小内存占用
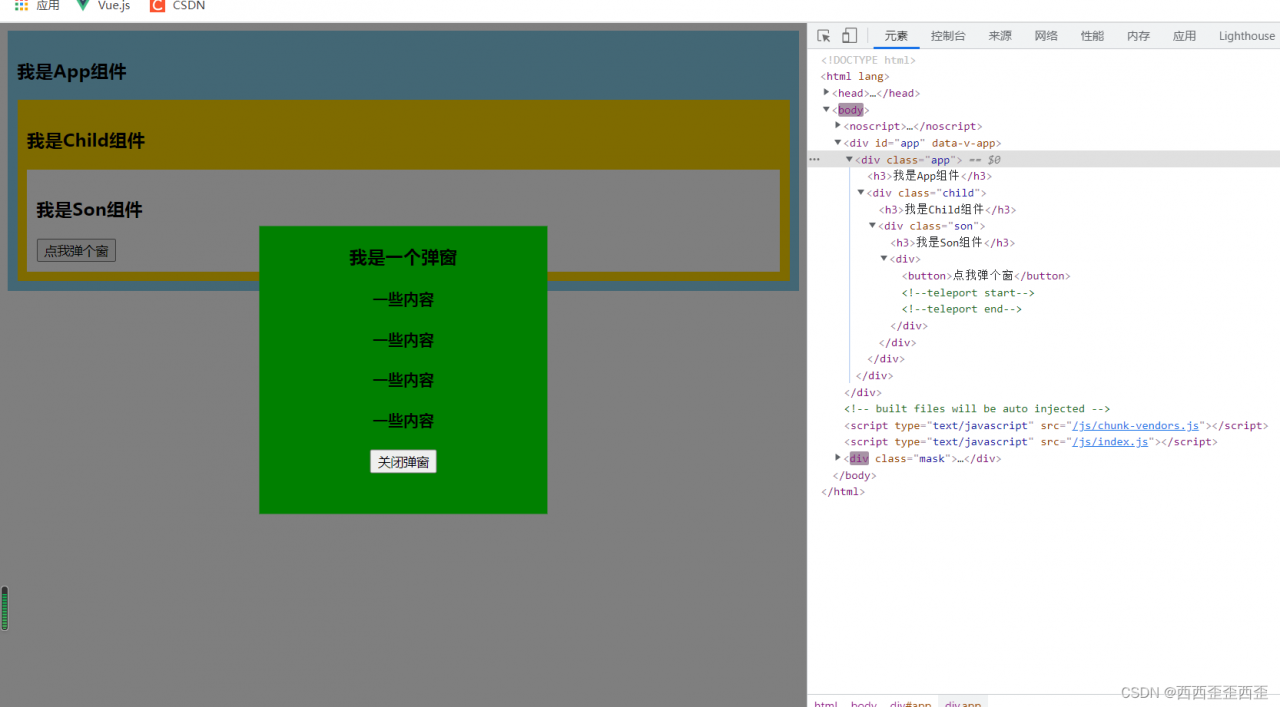
166.Teleport组件
什么是Teleport?—— Teleport 是一种能够将我们的组件html结构移动到指定位置的技术
<teleport to="移动位置">
	<div v-if="isShow" class="mask">
		<div class="dialog">
			<h3>我是一个弹窗</h3>
			<button @click="isShow = false">关闭弹窗</button>
		</div>
	</div>
</teleport> 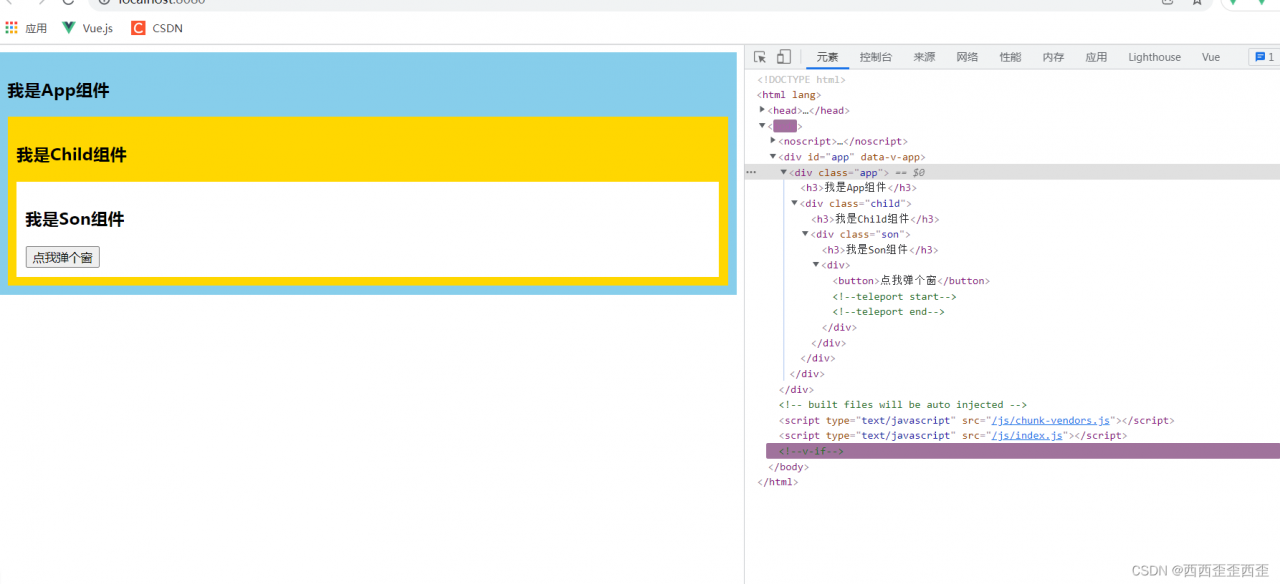
<template>
  <div>
      <button @click="isShow=true">点我弹个窗</button>
      <teleport to='body'>
        <div v-if="isShow" class="mask">
            <div class="dialog">
                <h3>我是一个弹窗</h3>
                <h4>一些内容</h4>
                <h4>一些内容</h4>
                <h4>一些内容</h4>
                <h4>一些内容</h4>
                <button @click="isShow=false">关闭弹窗</button>
            </div>
        </div>
      </teleport>
  </div>
</template>

<script>
import { ref } from '@vue/reactivity'
export default {
    name:'Dialog',
    setup(){
        let isShow = ref(false)
        return {isShow}
    }
}
</script>

<style>
    .dialog{
        width: 300px;
        height: 300px;
        background-color: green;
        position: absolute;
        top: 50%;
        left: 50%;
        transform: translate(-50%,-50%);
        text-align: center;
    }
    .mask{
        position: absolute;
        top: 0;bottom: 0;left: 0;right: 0;
        background-color: rgba(0,0,0,0.5);
    }
</style>
<template>
  <div class="son">
    <h3>我是Son组件</h3>
    <Dialog></Dialog>
  </div>
</template>

<script>
import Dialog from './Dialog.vue'
export default {
  name: 'Son',
  components:{Dialog}
}
</script>
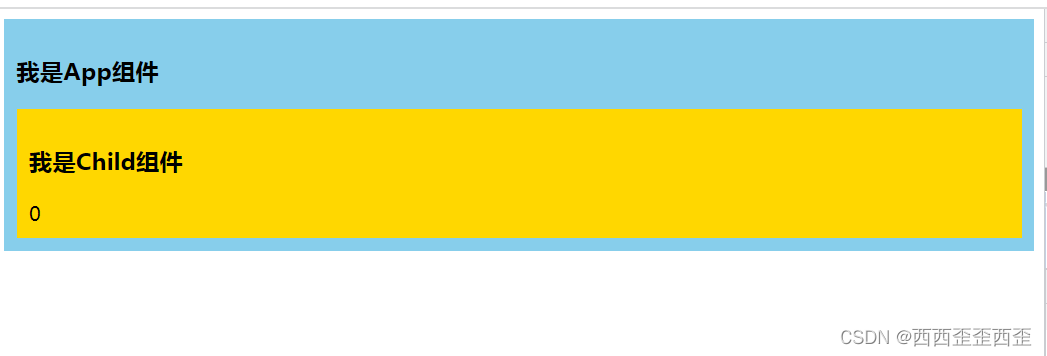
167.Suspense组件
等待异步组件时渲染一些额外内容,让应用有更好的用户体验
使用步骤:
异步引入组件
import {defineAsyncComponent} from 'vue'
const Child = defineAsyncComponent(()=>import('./components/Child.vue'))
使用
Suspense包裹组件,并配置好default与fallback<template> <div class="app"> <h3>我是App组件</h3> <Suspense> <template v-slot:default> <Child/> </template> <template v-slot:fallback> <h3>加载中.....</h3> </template> </Suspense> </div> </template>
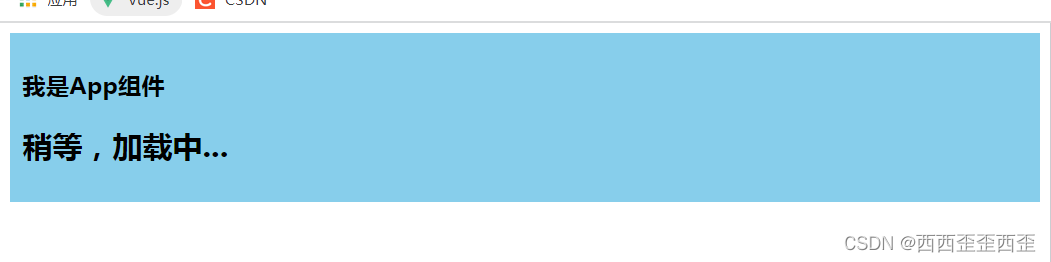
<template>
  <div class="app">
    <h3>我是App组件</h3>
    <Suspense>
      <template v-slot:default>
        <Child></Child>
      </template>
      <template v-slot:fallback>
        <h2>稍等,加载中...</h2>
      </template>
    </Suspense>
  </div>
</template>

<script>
// import Child from './components/Child' //静态引入
import { defineAsyncComponent } from '@vue/runtime-core'
const Child = defineAsyncComponent(()=>import('./components/Child')) //异步引入

export default {
  name: 'App',
  components:{
    Child
  },

}
</script>

<style>
  .app{
    background-color: skyblue;
    padding: 10px;
  }
</style>
<template>
  <div class="child">
    <h3>我是Child组件</h3>
    {{sum}}
  </div>
</template>

<script>
import { ref } from '@vue/reactivity';

export default {
  name: 'Child',
  async setup() {
    let sum = ref(0)
    let p = new Promise((resolve)=>{
      setTimeout(() => {
        resolve({sum})
      }, 3000);
    })
    return await p
  }
}
</script>

<style>
  .child{
    background-color: gold;
    padding: 10px;
  }
</style>
168.Vue3中的其他改变
1.全局API的转移
Vue 2.x 有许多全局 API 和配置。
例如:注册全局组件、注册全局指令等。
//注册全局组件
Vue.component('MyButton', {
  data: () => ({
    count: 0
  }),
  template: '<button @click="count++">Clicked {{ count }} times.</button>'
})

//注册全局指令
Vue.directive('focus', {
  inserted: el => el.focus()
}
Vue3.0中对这些API做出了调整:
将全局的API,即:
Vue.xxx调整到应用实例(app)上2.x 全局 API( Vue)3.x 实例 API ( app)Vue.config.xxxx app.config.xxxx Vue.config.productionTip 移除 Vue.component app.component Vue.directive app.directive Vue.mixin app.mixin Vue.use app.use Vue.prototype app.config.globalProperties
2.其他改变
data选项应始终被声明为一个函数。
过度类名的更改:
Vue2.x写法
.v-enter,
.v-leave-to {
  opacity: 0;
}
.v-leave,
.v-enter-to {
  opacity: 1;
}
Vue3.x写法
.v-enter-from,
.v-leave-to {
  opacity: 0;
}

.v-leave-from,
.v-enter-to {
  opacity: 1;
}
移除keyCode作为 v-on 的修饰符,同时也不再支持
config.keyCodes移除
v-on.native修饰符父组件中绑定事件
<my-component
  v-on:close="handleComponentEvent"
  v-on:click="handleNativeClickEvent"
/>
子组件中声明自定义事件
<script>
  export default {
    emits: ['close']
  }
</script>
移除过滤器(filter)
过滤器虽然这看起来很方便,但它需要一个自定义语法,打破大括号内表达式是 “只是 JavaScript” 的假设,这不仅有学习成本,而且有实现成本!建议用方法调用或计算属性去替换过滤器。
......
完结,撒花
版权声明:本文为weixin_58214412原创文章,遵循CC 4.0 BY-SA版权协议,转载请附上原文出处链接和本声明。