1、安装java
- 下载 Java下载地址:http://www.java.com/zh_CN/download/manual.jsp
- 安装JDK
- 配置环境变量
2、安装eclipse
- 下载 地址:http://www.eclipse.org/downloads/ 选择“Eclipse IDE for Java Developers”进行下载
- 解压后双击 eclipse.exe 启动程序,首次启动需要你指定 Java 的项目目录
- 创建java项目。选择菜单栏 File—>New —> Java Project
Eclipse编码修改
Window-> Preferences,在弹出窗口Preferences中general->workspace, text file encoding 选择other 选项为UTF-8
3、安装selenium
Selenium 是一个用于 Web 应用程序测试的工具,支持多平台(Linux 、Windows、MAC)、多浏览器(FireFox、Chrome、IE、Opera、Edge)、多语言(Java、Python、Ruby、C#、JavaScript、C++)去实现自动化测试。目前在 Web 自动化领域应用越来越广泛。
我们有最终目的是要用 Java 去编写 Selenium 自动化测试脚本,所以我们需要安装 Java 版的 Selenium 包。
- 下载java版的selenium
- eclipse导入selenium。在创建的项目上右键 Build Path---->Add Libraries…选择 User Library 选项–>点击 User Libraries…创建一个 Library 的目录,名字随便取–>选择解压的 selenium-java 目录,添加其下面的所有 jar 文件
4、安装浏览器驱动
浏览器驱动下载地址:http://npm.taobao.org/mirrors/,对应自己的浏览器版本号
5、试写一个自动化脚本
package com.mypro.jase;
import java.util.Set;

import org.openqa.selenium.By;
import org.openqa.selenium.Cookie;
import org.openqa.selenium.Dimension;
import org.openqa.selenium.WebDriver;
import org.openqa.selenium.WebElement;
import org.openqa.selenium.chrome.ChromeDriver;
import org.openqa.selenium.interactions.Actions;

public class SeleniumTest {
	public static void main(String arg[]) throws InterruptedException {
		System.out.println("start selenium");
		//设置浏览器驱动,第二个参数为下载的浏览器驱动地址
		System.setProperty("webdriver.chrome.driver", "E:\\autoTest\\chromedriver.exe");
		WebDriver driver = new ChromeDriver();

		//设置浏览器窗口大小
		driver.manage().window().setSize(new Dimension(800,800));
		//设置跳转链接
		driver.get("https://www.baidu.com");

		//清除文本
		//driver.findElement(By.id("user")).clear();
		//在输入框中输入值
		//driver.findElement(By.id("user")).sendKeys("superadmin");

	    //等待6秒
		Thread.sleep(6000);


		//点击按钮
		//driver.findElement(By.id("suoding")).click();

		//获取cookie
		Set<Cookie> cookie = driver.manage().getCookies();
		System.out.println(cookie);

		//模拟浏览器后退/前进按钮
		driver.get("http://taobao.com");
		driver.navigate().back();
		driver.navigate().forward();

		//模拟浏览器刷新
		driver.navigate().refresh();

		//获取输入框的宽高
//		WebElement size = driver.findElement(By.id("kw"));
//		System.out.println(size.getSize());

		//鼠标事件
//	    Actions action = new Actions(driver);
//	    action.clickAndHold(driver.findElement(By.linkText("设置"))).perform();
		//driver.close();
	}
}
6、java项目转为web项目
https://blog.csdn.net/l4432321/article/details/52049125
7、转为maven项目
安装配置maven:https://blog.csdn.net/u012369153/article/details/52881488
转为maven项目:右键项目–configure–Convert to Maven Project
setting.xml配置:https://www.cnblogs.com/yangxia-test/p/4409736.html
a. 本地仓库地址:
<localRepository>D:\maven-repository</localRepository>
b.镜像设置:
标签中设置国内仓库地址,参考:
https://zengmiaogen.blog.csdn.net/article/details/89366592
c. eclipse中设置setting,在Windows–preferences窗口中找到maven-user setting,选择setting.xml所在位置,如下图所示: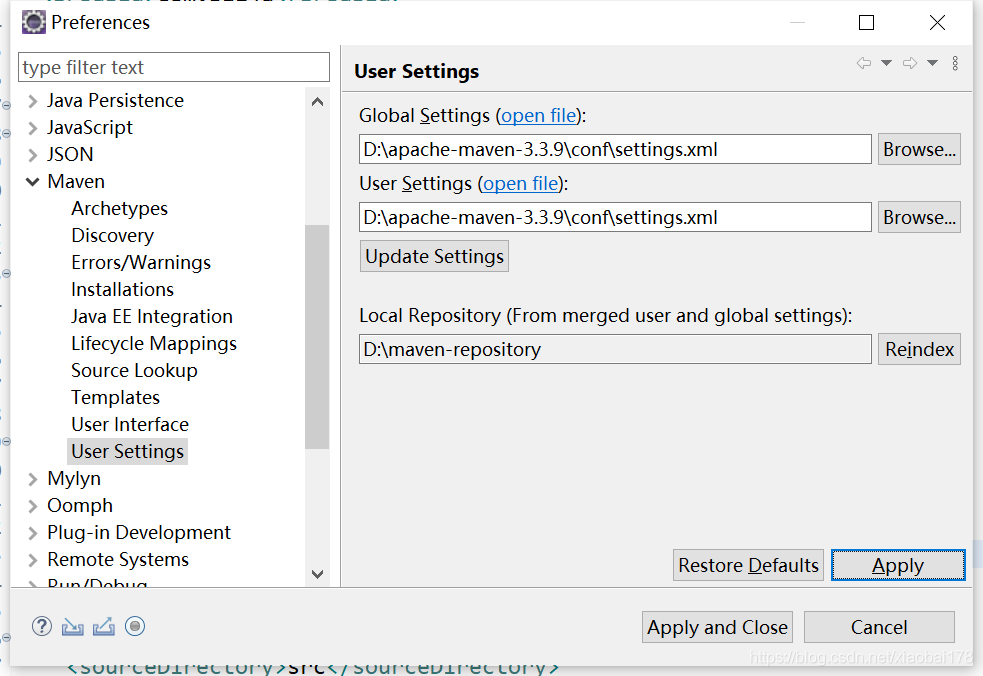
d. 在pom.xml中添加dependency,则会从maven镜像仓库中自动下载该依赖所需的jar包,下载的jar包会保存到本地的maven仓库,并在项目下生成Maven-Dependencies目录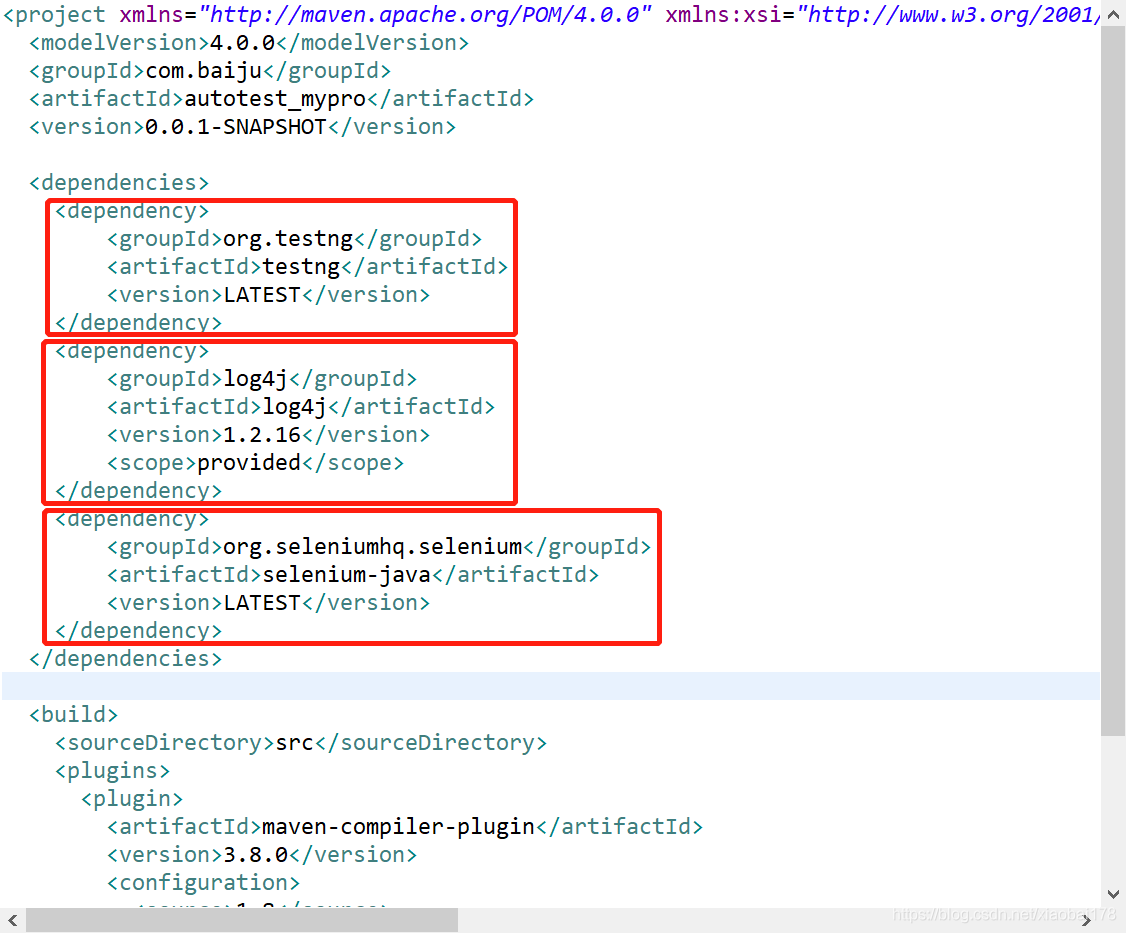

8、转为testNG项目
配置testNG:https://blog.csdn.net/jlminghui/article/details/70877949
转为testNG:右键项目–TestNG–Convert to TestNG
运行:右键testng.xml–run as–testngSuite
testng.xml的配置: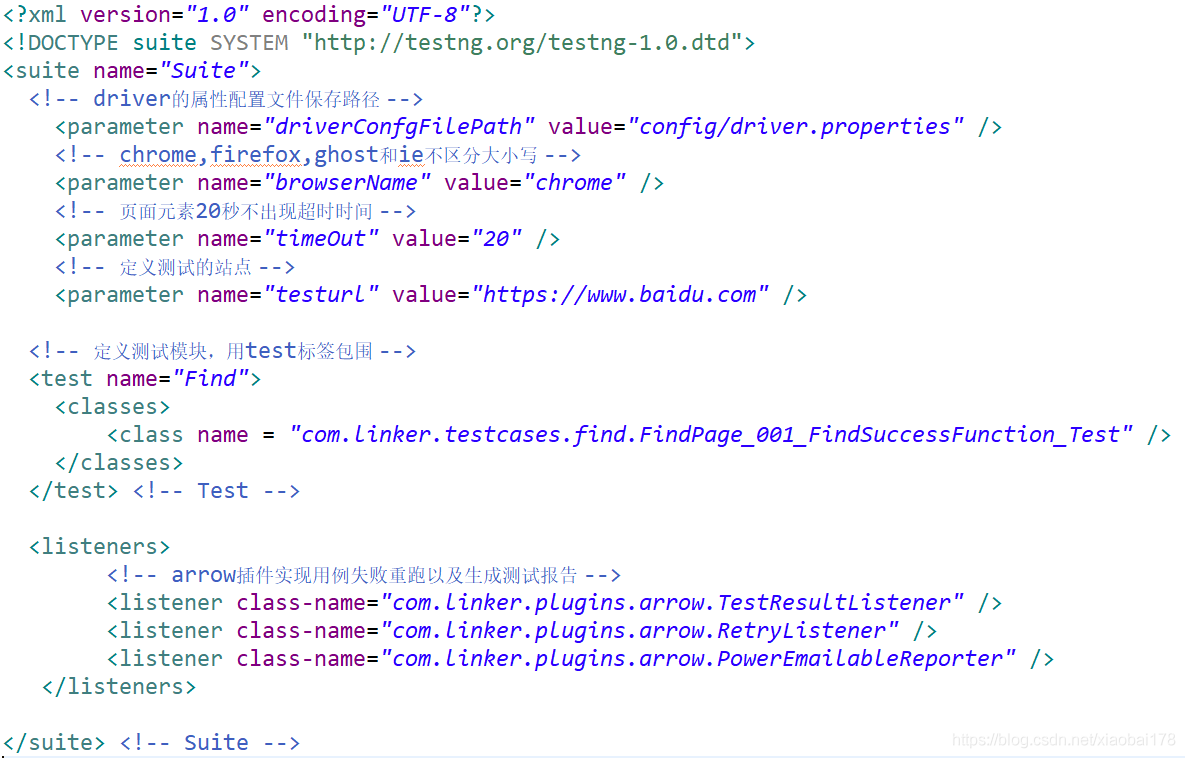
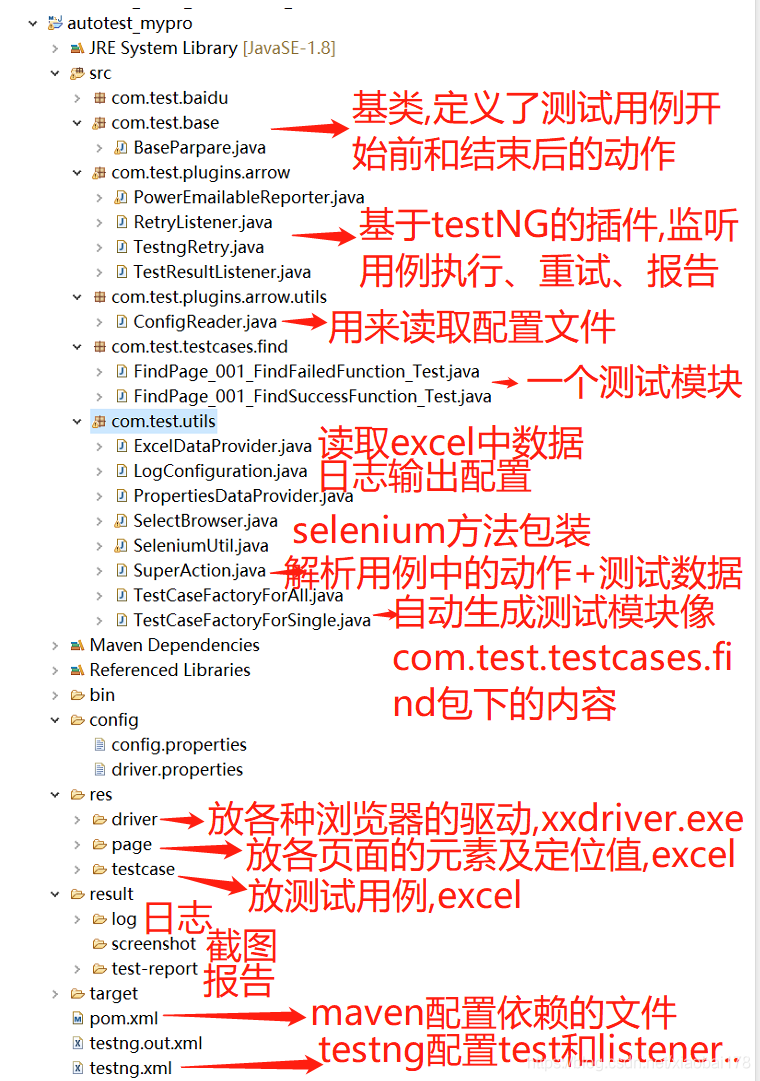
整个框架如下图: