1.安装
conda activate abc	#激活虚拟环境
pip install jupyter	#安装
jupyter notebook --generate-config	#生成配置文件,同时会显示文件路径,如下图
![]()
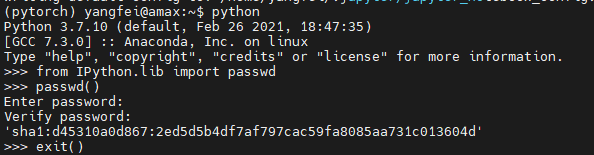
2.生产密文
python   #进入pyton环境
from IPython.lib import passwd
passwd() #设置登录密码,然后会生成一串密文
exit()   #退出Python环境
3.修改默认配置文件
vim ~/.jupyter/jupyter_notebook_config.py
添加如下内容:
c.NotebookApp.ip='*'
c.NotebookApp.password = u'sha1:xxxxxxxxxxx(上一步生成的密文)'
c.NotebookApp.port = 7777  #随便指定一个闲置端口
c.NotebookApp.open_browser = False	#禁止自动打开浏览器
c.NotebookApp.allow_remote_access = True	#远程访问
c.NotebookApp.allow_root = True
4.运行
服务器上启动
jupyter notebook
浏览器输入http://IP:7777/ #自己的ip和设置的端口号
5.切换虚拟环境
conda activate pytorch   #pytorch是我的虚拟环境命名
conda install ipykernel
python -m ipykernel install --user --name pytorch --display-name "Python [conda env:pytorch]" #两处pytorch替换为自己的虚拟环境
jupyter notebook  #再进运行即可
版权声明:本文为qq_42921511原创文章,遵循CC 4.0 BY-SA版权协议,转载请附上原文出处链接和本声明。