前言
开发过程中,经常会有一些独立于业务之外的配置模块。如果我们将这些可独立于业务代码之外的功能配置模块封装成一个个starter,复用的时候只需要将其在pom中引用依赖即可,SpringBoot为我们完成自动装配,那么将会简化我们的开发.今天就带大家一起自定义一个属于自己的starter.
step1:创建一个maven工程,引入相关依赖
创建一个maven工程(注意项目名称应该为xxx-spring-boot-starter,例如example-spring-boot-starter),并引入相关的依赖.
依赖:
<dependency>
            <groupId>org.springframework.boot</groupId>
            <artifactId>spring-boot-configuration-processor</artifactId>
            <version>2.1.6.RELEASE</version>
            <optional>true</optional>
        </dependency>
        <dependency>
            <groupId>org.springframework.boot</groupId>
            <artifactId>spring-boot-autoconfigure</artifactId>
            <version>2.1.6.RELEASE</version>
        </dependency>
step2:定义properties类
@ConfigurationProperties(prefix = ExampleProperties.PREFIX)
public class ExampleProperties {

    static final String PREFIX = "example";

    /**
     * 名称
     */
    private String name;

    /**
     * 年龄
     */
    private int age;


    public String getName() {
        return name;
    }

    public void setName(String name) {
        this.name = name;
    }

    public int getAge() {
        return age;
    }

    public void setAge(int age) {
        this.age = age;
    }

}
step3:定义自动配置类以及需要导入的bean
public class Example {

    private String name;

    private Integer age;

    public String getName() {
        return name;
    }

    public void setName(String name) {
        this.name = name;
    }

    public Integer getAge() {
        return age;
    }

    public void setAge(Integer age) {
        this.age = age;
    }

}
@EnableConfigurationProperties(ExampleProperties.class)
@Configuration
public class ExampleAutoConfiguration {

    private final ExampleProperties exampleProperties;

    public ExampleAutoConfiguration(ExampleProperties exampleProperties){
        this.exampleProperties = exampleProperties;
    }
    @Bean
    public Example example(){
        Example example = new Example();
        example.setName(exampleProperties.getName());
        example.setAge(exampleProperties.getAge());
        return example;
    }
}
在这里我们可以根据自己的条件利用Conditional注解按条件导入bean(这里我就简单的导入一下Example这个类)
step4:创建spring.factories文件,并配置自动配置类
第一步:创建resources/META-INF文件夹,在META-INF文件夹下创建spring.factories文件.
第二步:将我们的自动配置类以键值对的形式配置到spring.factories文件中,键为org.springframework.boot.autoconfigure.EnableAutoConfiguration
值就是我们自动配置类的全类名.
org.springframework.boot.autoconfigure.EnableAutoConfiguration=\
  org.example.configuration.ExampleAutoConfiguration
step5:利用maven进行打包
利用maven将我们自定义的starter install或者最好是配置私服deploy到公司自己的私服(这里我就先install到自己本地),注意pom文件中配置的构建插件不能使用spring-boot的插件,否则会依赖不了,这个我就不做过多解释了.
简单测试一下
引入自定义的starter
        <dependency>
            <groupId>org.example</groupId>
            <artifactId>example-spring-boot-starter</artifactId>
            <version>1.0-SNAPSHOT</version>
        </dependency>
在application.properties或者application.yml文件中配置属性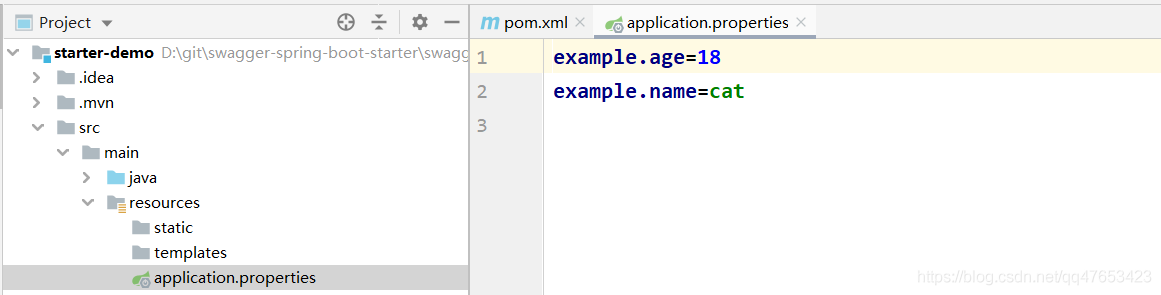
写一个controller测试一下看是否实现了自动装配
@RestController
@RequestMapping("demo")
public class DemoController {

    @Autowired
    private Example example;

    @RequestMapping("test")
    public Example test(){
        return example;
    }
}
访问一下接口,得到数据,说明我们已经实现了自动装配了
关于条件注解的讲解
@ConditionalOnBean:仅仅在当前上下文中存在某个对象时,才会实例化一个Bean。
@ConditionalOnClass:某个class位于类路径上,才会实例化一个Bean。
@ConditionalOnExpression:当表达式为true的时候,才会实例化一个Bean。基于SpEL表达式的条件判断。
@ConditionalOnMissingBean:仅仅在当前上下文中不存在某个对象时,才会实例化一个Bean。
@ConditionalOnMissingClass:某个class类路径上不存在的时候,才会实例化一个Bean。
@ConditionalOnNotWebApplication:不是web应用,才会实例化一个Bean。
@ConditionalOnWebApplication:当项目是一个Web项目时进行实例化。
@ConditionalOnNotWebApplication:当项目不是一个Web项目时进行实例化。
@ConditionalOnProperty:当指定的属性有指定的值时进行实例化。
@ConditionalOnJava:当JVM版本为指定的版本范围时触发实例化。
@ConditionalOnResource:当类路径下有指定的资源时触发实例化。
@ConditionalOnJndi:在JNDI存在的条件下触发实例化。
@ConditionalOnSingleCandidate:当指定的Bean在容器中只有一个,或者有多个但是指定了首选的Bean时触发实例化。