第一种:vue + element 之 el-menu
此种方法适用于固定的三层之内的动态数据渲染菜单,若要实现无线菜单需使用递归,请看第二种方法。
@select : 菜单栏激活回调
1、数据结构:
menuData :[
        {
          index: '/',
          icon: 'el-icon-menu',
          title: '导航',
          id:1,
          // children:[
          //   {
          //     index: '/',
          //     title: '选项1',
          //   }
          // ]
        },
        {
          index: '/one',
          icon: 'el-icon-menu',
          title: '导航二',
          id:2,
          children: [
            {
              index: '/one',
              title: '导航二选项1',
              id:2-1,
            },
            {
              index: '/two',
              title: '导航二选项2',
              id:2-2,
            }
          ]
        },
        {
          index: '/two1',
          icon: 'el-icon-menu',
          title: '导航三',
          id:3,
          children:[
            {
              index: '/two1',
              title: '导航三选项1',
              id:3-1,
            },
            {
              index: '/two2',
              title: '导航三选项2',
              id:3-2,
            },
            {
              index: '/two31',
              title: '导航三选项3',
              id:3-3,
              children:[
                {
                  index: '/two31',
                  title: '导航三选项111',
                  id:3-3-1,
                },
                {
                  index: '/two32',
                  title: '导航三选项222',
                  id:3-3-2,
                }
              ]
            }
          ]
        },
      ],
2、代码结构:
<!--
              :default-active 一进页面默认显示的页面
              unique-opened 保持一个子菜单的打开
              router 采用路由模式 菜单上的index就是点击跳转的页面
              text-color 菜单文字的颜色
              active-text-color 菜单激活后文字的颜色
             -->
            <el-menu
              :default-active="$route.path"
              class="el-menu-vertical-demo"
              unique-opened
              router
              background-color="#2a3f54"
              text-color="#fff"
              active-text-color="orangered"
              @select="handleSelect"
              >
            <template v-for="item in menuData" >
              <el-menu-item :index="item.index" v-if="item.children == undefined">
                <template slot="title">
                    <i :class="item.icon"></i>
                    <span>{{item.title}}</span>
                </template>
              </el-menu-item>
              <el-submenu :index="item.index" v-if="item.children != undefined" >
                <template slot="title">
                    <i :class="item.icon"></i>
                    <span slot="title">{{item.title}}</span>
                </template>
                <template v-for="item2 in item.children" >
                  <el-menu-item :index="item2.index" v-if="item2.children == undefined">{{item2.title}}</el-menu-item>
                  <el-submenu :index="item2.index" v-if="item2.children != undefined" >
                    <template slot="title">
                      <span slot="title">{{item2.title}}</span>
                    </template>
                    <template v-for="item3 in item2.children" >
                      <el-menu-item :index="item3.index">{{item3.title}}</el-menu-item>
                    </template>
                  </el-submenu>
                </template>
              </el-submenu>
            </template>

            </el-menu>
3、效果图: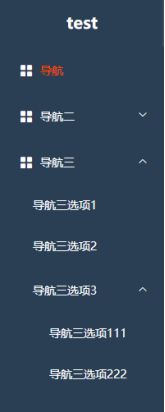
第二种:vue + element 之 el-menu
此种方法为递归实现无线菜单
1、数据结构
  menuData :[
    {
      index: '/',
      icon: 'el-icon-menu',
      title: '导航',
      id:1,
    },
    {
      index: '/one',
      icon: 'el-icon-menu',
      title: '导航二',
      id:2,
      children: [
        {
          index: '/one',
          title: '导航二选项1',
          id:2-1,
        },
        {
          index: '/two',
          title: '导航二选项2',
          id:2-2,
        }
      ]
    },
    {
      index: '/two1',
      icon: 'el-icon-menu',
      title: '导航三',
      id:3,
      children:[
        {
          index: '/two1',
          title: '导航三选项1',
          id:3-1,
        },
        {
          index: '/two2',
          title: '导航三选项2',
          id:3-2,
        },
        {
          index: '/two31',
          title: '导航三选项3',
          id:3-3,
          children:[
            {
              index: '/two31',
              title: '导航三选项111',
              id:3-3-1,
            },
            {
              index: '/two32',
              title: '导航三选项222',
              id:3-3-2,
              children:[
                {
                  index: '/two321',
                  title: '导航三选项222-1',
                  id:3-3-2-1,
                },
              ]
            }
          ]
        }
      ]
    },
  ],
2、代码结构
(1) 首先在components中新建一个组件 MenuTree.vue
(2)组件的代码结构为:
<template>
  <div>
    <template v-for="menu in this.menuData">
      <el-submenu :key="menu.id" :index="menu.index" v-if="menu.children">
          <template slot="title">
              <i :class="menu.icon"></i>
              <span slot="title">{{menu.title}}</span>
          </template>
          <menu-tree :menuData="menu.children"></menu-tree>
      </el-submenu>
      <el-menu-item :key="menu.id" :index="menu.index" v-else>
          <i :class="menu.icon"></i>
          <span slot="title">{{menu.title}}</span>
      </el-menu-item>
    </template>
  </div>
</template>

<script>
export default {
  props: ['menuData'],
  name: 'MenuTree'
}
</script>
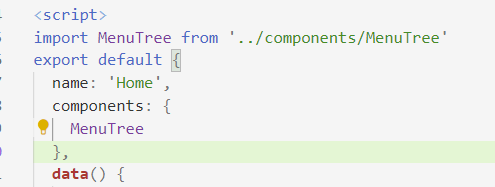
(3) 在需要使用组件的文件中导入组件 并注册组件
import MenuTree from '../components/MenuTree'
  components: {
    MenuTree
  },
(4)在需要使用组件的地方插入组件
<!--
  :default-active 一进页面默认显示的页面
  unique-opened 保持一个子菜单的打开
  router 采用路由模式 菜单上的index就是点击跳转的页面
  text-color 菜单文字的颜色
  active-text-color 菜单激活后文字的颜色
 -->
<el-menu
  :default-active="$route.path"
  class="el-menu-vertical-demo"
  unique-opened
  router
  background-color="#2a3f54"
  text-color="#fff"
  active-text-color="orangered"
  @select="handleSelect"
  >
  <menu-tree :menuData="menuData"></menu-tree>
</el-menu>
3、效果图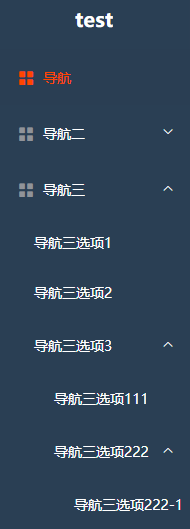
第三种: vue + element 之 el-tree
此种方法利用递归实现了无限循环 但需要对数据进行一定的格式处理
1、数据结构
一: 请求数据 赋值给本地数据
that.menuList1 = res.data.menuList
that.menuList1[0].urlPath = that.menuList1[0].menuUrl[0].urlPath
that.menuList1[0].menuUrl = []
that.setMenus(that.menuList1)
that.menuList = that.menuList1
that.loading = false
二: 对数据进行处理
setMenus(menus) {
   if (!menus || !menus.length) return;

   menus.forEach(t => {
    if (t.menus && !t.menus.length && t.menuUrl && t.menuUrl.length) {
      t.menus = t.menuUrl.map(m => {
        return {
          id: m.id,
          menuTitle: m.urlTitle,
          ...m
        };
      });
    }

    this.setMenus(t.menus);
   });
 },
2、代码结构
<el-tree
		v-show="isCollapseFont"
		:data="menuList"
		node-key="id"
		:default-expand-all="false"
		expand-on-click-node
		auto-expand-parent
		@node-click = "clickFn"
		:props="defaultProps"
		icon-class="el-icon-arrow-left"
		:accordion="true"
		:render-after-expand="false"
        >
	  <span class="custom-tree-node" slot-scope="{ node, data }">

			<span class="icon" style="font-size: 0.085rem;float: left;margin-left: 0.1rem;margin-right: 0.05rem">
			  <span :class="data.menuIcon"></span>
			</span>
		  <span style="font-size: 0.09rem;float: left">{{ node.label }}</span>
	  </span>
</el-tree>
3、效果图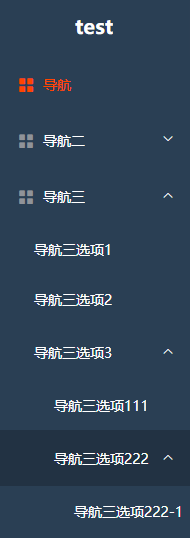
版权声明:本文为weixin_44643019原创文章,遵循CC 4.0 BY-SA版权协议,转载请附上原文出处链接和本声明。