在第二篇我们已经部署好了一个服务 mqbroker.cmd -n localhost:9876 ,在此基础上,我们来做一个springboot的demo示例
网上很多有整合rocketmq的,但是部分没有使用官方rocketmq-spring-boot-starter,因为官方start是近几年出的,使用起来很简单,但是要注意版本之间的对应关系,好了,下面直接介绍整合步骤吧。
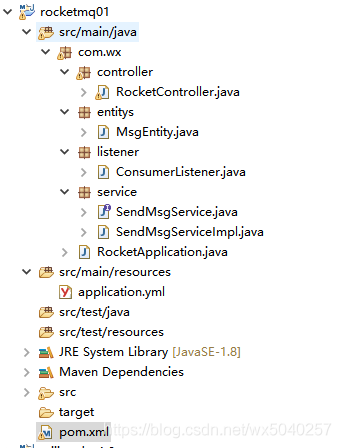
一、建立maven工程
不多说了,看看作者的工程目录
二、在pom文件里面添加依赖
<project xmlns="http://maven.apache.org/POM/4.0.0" xmlns:xsi="http://www.w3.org/2001/XMLSchema-instance" xsi:schemaLocation="http://maven.apache.org/POM/4.0.0 http://maven.apache.org/xsd/maven-4.0.0.xsd">
  <modelVersion>4.0.0</modelVersion>
  <groupId>com.wx</groupId>
  <artifactId>rocketmq01</artifactId>
  <version>0.0.1-SNAPSHOT</version>

  <description>rocketmq测试</description>

	<!-- 统一配置版本 -->
	<properties>
	    <maven-jar-plugin.version>3.1.1</maven-jar-plugin.version>
		<java.version>1.8</java.version>
		<mybatis-spring.version>1.2.1</mybatis-spring.version>
		<druid.version>1.0.28</druid.version>
		<fastjson.version>1.2.31</fastjson.version>
		<junit.version>4.12</junit.version>
	</properties>


    <!-- 设置spring boot的parent -->
	<parent>
		<groupId>org.springframework.boot</groupId>
		<artifactId>spring-boot-starter-parent</artifactId>
		<version>2.1.12.RELEASE</version>
	</parent>

	<dependencies>

	   <!-- https://mvnrepository.com/artifact/org.apache.rocketmq/rocketmq-client -->
		<dependency>
		   <groupId>org.apache.rocketmq</groupId>
		   <artifactId>rocketmq-client</artifactId>
		   <version>4.5.2</version>
		</dependency>

	   <dependency>
           <groupId>org.apache.rocketmq</groupId>
           <artifactId>rocketmq-spring-boot-starter</artifactId>
           <version>2.0.3</version>
       </dependency>

		<!-- 单元测试工具junit -->
		<dependency>
			<groupId>junit</groupId>
			<artifactId>junit</artifactId>
			<version>${junit.version}</version>
			<scope>test</scope>
		</dependency>

		<!-- 导入spring boot的web支持 -->
		<dependency>
			<groupId>org.springframework.boot</groupId>
			<artifactId>spring-boot-starter-web</artifactId>
		</dependency>

		<dependency>
			<groupId>org.springframework.boot</groupId>
			<artifactId>spring-boot-starter-test</artifactId>
			<scope>test</scope>
		</dependency>

        <!-- 获得配置文件的值需要用到 -->
        <dependency>
            <groupId>org.springframework.boot</groupId>
            <artifactId>spring-boot-configuration-processor</artifactId>
            <optional>true</optional>
        </dependency>

		<dependency>
			<groupId>org.springframework</groupId>
			<artifactId>spring-context-support</artifactId>
		</dependency>

		<!-- fastjson -->
		<dependency>
			<groupId>com.alibaba</groupId>
			<artifactId>fastjson</artifactId>
			<version>${fastjson.version}</version>
		</dependency>

		<!--commons -->
		<dependency>
			<groupId>org.apache.commons</groupId>
			<artifactId>commons-lang3</artifactId>
			<version>3.6</version>
		</dependency>
		<dependency>
			<groupId>commons-configuration</groupId>
			<artifactId>commons-configuration</artifactId>
			<version>1.10</version>
		</dependency>
		<dependency>
			<groupId>commons-io</groupId>
			<artifactId>commons-io</artifactId>
			<version>2.5</version>
		</dependency>
		<dependency>
			<groupId>org.apache.httpcomponents</groupId>
			<artifactId>httpclient</artifactId>
			<version>4.5.9</version>
		</dependency>
		<dependency>
			<groupId>org.springframework</groupId>
			<artifactId>spring-context-support</artifactId>
		</dependency>


		<!-- 集合工具类 -->
		<dependency>
			<groupId>commons-collections</groupId>
			<artifactId>commons-collections</artifactId>
			<version>3.2.2</version>
		</dependency>


		<!-- https://mvnrepository.com/artifact/commons-httpclient/commons-httpclient -->
		<dependency>
			<groupId>commons-httpclient</groupId>
			<artifactId>commons-httpclient</artifactId>
			<version>3.1</version>
		</dependency>


	</dependencies>

	<repositories>
		<repository>
			<id>public</id>
			<name>aliyun nexus</name>
			<url>http://maven.aliyun.com/nexus/content/groups/public/</url>
			<releases>
				<enabled>true</enabled>
			</releases>
		</repository>
	</repositories>
	<build>
		<finalName>${project.artifactId}${project.version}</finalName>
		<plugins>
			<!-- 设置通过jdk1.8编译项目 -->
			<plugin>
				<groupId>org.apache.maven.plugins</groupId>
				<artifactId>maven-compiler-plugin</artifactId>
				<configuration>
					<source>${java.version}</source>
					<target>${java.version}</target>
					<encoding>utf-8</encoding>
				</configuration>
			</plugin>
			<plugin>
				<groupId>org.apache.maven.plugins</groupId>
				<artifactId>maven-resources-plugin</artifactId>
				<configuration>
					<encoding>UTF-8</encoding>
				</configuration>
			</plugin>
			<!-- 可通过maven命令运行项目 -->
			<plugin>
				<groupId>org.springframework.boot</groupId>
				<artifactId>spring-boot-maven-plugin</artifactId>
				<configuration>
				    <!-- 打成jar包后 里面的配置文件可编辑 -->
					<executable>false</executable>
					<includeSystemScope>true</includeSystemScope>
				</configuration>
			</plugin>

		</plugins>
	</build>
</project>
这里关键的依赖是
<dependency>
<groupId>org.apache.rocketmq</groupId>
<artifactId>rocketmq-client</artifactId>
<version>4.5.2</version>
</dependency>
<dependency>
<groupId>org.apache.rocketmq</groupId>
<artifactId>rocketmq-spring-boot-starter</artifactId>
<version>2.0.3</version>
</dependency>
注意版本号,随便写启动是会报错的
三、配置application.yml
server:
  #tomcat端口号
  port: 8080

rocketmq:
  name-server: localhost:9876
  producer:
    group: wx-group

# 禁用spring boot权限控制系统
security:
  basic:
    enabled: false

spring:
  #自带json解析工具配置
  jackson:
    time-zone: GMT+8
    date-format: yyyy-MM-dd HH:mm:ss
    serialization:
      fail-on-empty-beans: false
注意rockketmq里面的配置,localhost:9876 是我们部署后启动的broker地址和端口
四、编写消息实体类
package com.wx.entitys;

import java.io.Serializable;

/**
 * 消息对象
 * @author wx
 */
public class MsgEntity implements Serializable{

	private static final long serialVersionUID = 1L;

	private String msgName;
	private String msgContent;

	public MsgEntity() {
	}

	public MsgEntity(String msgName, String msgContent) {
		super();
		this.msgName = msgName;
		this.msgContent = msgContent;
	}

	public void setMsgContent(String msgContent) {
		this.msgContent = msgContent;
	}
	public String getMsgContent() {
		return msgContent;
	}
	public void setMsgName(String msgName) {
		this.msgName = msgName;
	}
	public String getMsgName() {
		return msgName;
	}
}
注意要实现Serializable接口近序列化
四、编写生产者接口及实现类
package com.wx.service;

import com.wx.entitys.MsgEntity;

/**
 * 生产者发布消息接口
 * @author wx
 */
public interface SendMsgService {

	boolean sendMsg(MsgEntity msg);
}
package com.wx.service;

import org.apache.rocketmq.spring.core.RocketMQTemplate;
import org.springframework.beans.factory.annotation.Autowired;
import org.springframework.messaging.MessagingException;
import org.springframework.stereotype.Service;

import com.wx.entitys.MsgEntity;

/**
 * 生产者发布消息实现类
 * @author wx
 */
@Service
public class SendMsgServiceImpl implements SendMsgService{

	@Autowired
    private RocketMQTemplate rocketMQTemplate;

	public boolean sendMsg(MsgEntity msg) {
		try {
            //指定消息主题发送消息
			rocketMQTemplate.convertAndSend("wx-topic", msg);
		} catch (MessagingException e) {
			e.printStackTrace();
		}
        return true;
	}

}
五、编写订阅消息的监听(消费者)
package com.wx.listener;

import org.apache.rocketmq.spring.annotation.RocketMQMessageListener;
import org.apache.rocketmq.spring.core.RocketMQListener;
import org.springframework.stereotype.Component;

import com.wx.entitys.MsgEntity;

/**
 * 消费者订阅消息的监听器
 * @author wx
 */
@Component
@RocketMQMessageListener(topic = "wx-topic",consumerGroup="mm-group")
public class ConsumerListener implements RocketMQListener<MsgEntity>{

	public void onMessage(MsgEntity msg) {
		System.out.println("消息标题:"+msg.getMsgName());
		System.out.println("消息内容:"+msg.getMsgContent());
		//此处可接上数据库调用,对消息持久化存起来或进行处理
	}
}
六:编写前端控制器模拟消息发送
package com.wx.controller;

import ch.qos.logback.classic.Logger;
import org.slf4j.LoggerFactory;
import org.springframework.beans.factory.annotation.Autowired;
import org.springframework.web.bind.annotation.RequestMapping;
import org.springframework.web.bind.annotation.RequestParam;
import org.springframework.web.bind.annotation.RestController;

import com.wx.entitys.MsgEntity;
import com.wx.service.SendMsgService;

import java.util.*;

/**
 * 模拟消息发送控制器
 * @author wx
 * Version 1.0
 */
@RestController
@RequestMapping("/rocket")
public class RocketController {

	private static Logger logger = (Logger) LoggerFactory.getLogger(RocketController.class);

	@Autowired
	private SendMsgService sendMsg;

	/**
	 * 模拟消息发送
	 * @param msgName 消息标题
	 * @param content 消息内容
	 * @return
	 */
	@RequestMapping("/send.do")
	public String send(String msgName,String content){
        MsgEntity msg=new MsgEntity(msgName, content);
        if(sendMsg.sendMsg(msg)){
        	return "消息发送成功";
        }else{
        	return "消息发送失败";
        }
	}


}
七、启动类
package com.wx;


import org.springframework.boot.SpringApplication;
import org.springframework.boot.autoconfigure.SpringBootApplication;


@SpringBootApplication
public class RocketApplication {

	public static void main(String[] args) {
		SpringApplication.run(RocketApplication.class, args);
		System.out.println("启动成功!");
	}


}
八、启动,测试
浏览器执行http://localhost:8080/rocket/send.do?msgName=mazi&content=wellcome to rocket's world

查看控制台:
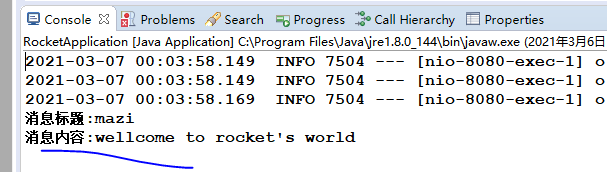
消息成功接收了,ok,大功告成!