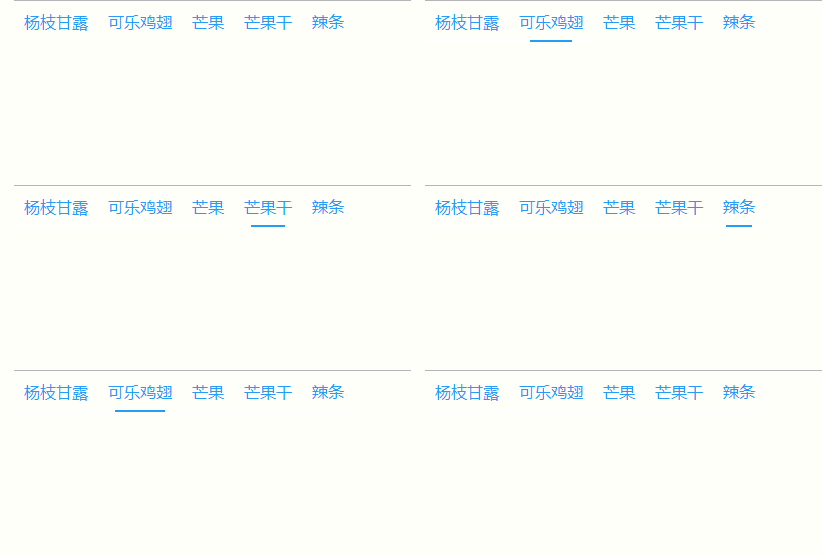
1、下划线跟随效果
// css部分
ul{
   display: flex;
   flex-direction: row;
   margin:0;
   padding:0;
}
ul li{
   list-style: none;
   color:#249DF7;
   padding:10px;
    /* 设置relative,作为伪类::after定位的参照和width的参照基准 */
   position: relative;
   cursor: pointer;
}
ul li::after{
   content:"";
   position:absolute;
   bottom:0;
    /* 设置原本定位 */
   left:100%;
   height:2px;
   /* 一定设置原本的宽度为0,这样过渡效果才显示 */
   width:0;
   background-color:#249DF7;
  /* 设置过渡效果 */
   transition: all .2s linear;
}
ul li:hover::after{
   /* 鼠标移入改变宽度 */
   width:100%;
   /* 鼠标移入改变定位 */
   left:0;
}
/* + 相邻选择器 */
ul li:hover + li::after{
   /* 输入移入当前li时设置其相邻的li的定位left:0,这样hover相邻li时就算改为其定位left:0时,
   改变定位过渡效果就不展现,也就实现跟随的效果 */
   left:0;
}
效果如下:

2、下划线向两边展开
设置::after和::before的定位都为50%,但是hover的时候::before的定位left为0
//css部分
ul{
  display: flex;
  flex-direction: row;
  margin:0;
  padding:0;
}
ul li{
  list-style: none;
  color:#249DF7;
  padding:10px;
  /* 设置relative,作为伪类::after定位的参照和width的参照基准 */
  position: relative;
  cursor: pointer;
}
ul li::before,ul li::after{
  content:"";
  position:absolute;
  bottom:0;
  left:50%;
  height:2px;
  width:0;
  background-color:#249DF7;
  transition: all .2s linear;
}
ul li:hover::before{
  width:50%;
  left:0;
}
ul li:hover::after{
   width:50%;
}
效果如下:

版权声明:本文为qq_38892710原创文章,遵循CC 4.0 BY-SA版权协议,转载请附上原文出处链接和本声明。