目录
一、经典的vnc配置方法,适用于tigervnc-server-1.9.x及以前
二、tigervnc-server-1.10.1以后的vnc配置
单位某客户端必须在CentOS 8.3上以图形界面方式运行(真是坑),不得不为其配置vnc服务,记录该过程。
一、经典的vnc配置方法,适用于tigervnc-server-1.9.x及以前
经典的vnc配置步骤。
- 使用屏幕号:1。
- 安装tigervnc-server tigervnc。
- 用vncserver :1开启vnc服务。
- vncpasswd设置vnc密码。
- 检查一下是否监听了5901端口(590x端口,x是屏幕号)。
- 使用vncviewer连接<ip>:1,注意是屏幕号,不是端口号。
[root@wp ~]# export DISPLAY=:1

[root@wp ~]# yum install tigervnc-server tigervnc

[root@wp ~]# vncserver :1

[root@wp ~]# vncpasswd
Password:
Verify:
Would you like to enter a view-only password (y/n)? n
A view-only password is not used

[root@wp ~]# netstat -tunlp | grep 5901
tcp        0      0 0.0.0.0:5901            0.0.0.0:*               LISTEN      1642/Xvnc
tcp6       0      0 :::5901                 :::*                    LISTEN      1642/Xvnc
二、tigervnc-server-1.10.1以后的vnc配置
和以往一样使用命令vncserver :1。回显提示vncserver已经被systemd单元代替,可以查看/usr/share/doc/tigervnc/HOWTO.md文档来获取更多信息。tigervnc-server-1.10.1版本以后,不能再使用vncserver命令直接开启vnc服务,需要使用systemd进行服务管理。
[root@test18 ~]# vncserver :1
vncserver has been replaced by a systemd unit.
Please read /usr/share/doc/tigervnc/HOWTO.md for more information.
在此记录完整的配置vnc过程。
1、安装"Server with GUI",开启vnc服务必须让服务器有图形界面的支持。
[root@test18 ~]# yum groupinstall "Server with GUI"2、配置环境变量DISPLAY,本例选择屏幕号:1,并使其生效
[root@test18 ~]# vim .bashrc
export DISPLAY=:1
[root@test18 ~]# source .bashrc
3、安装vncserver
[root@test18 ~]# yum install tigervnc-server tigervnc4、配置vncserver的用户及其使用的屏幕号,编辑/etc/tigervnc/vncserver.users,本例使用root访问(根据实际情况使用账户,用root并不是个好的选择),屏幕号与之前保持一致:1
[root@test18 ~]# vim /etc/tigervnc/vncserver.users
:1=root
5、配置vncserver默认选项,编辑/etc/tigervnc/vncserver-config-defaults。注意session选项,应该匹配/usr/share/xsessions/目录下的内容,比如有/usr/share/xsessions/gnome.desktop文件,那么才能写session=gnome。详情可以man 8 vncsession查看手册。
[root@test18 ~]# ls /usr/share/xsessions/
com.redhat.Kiosk.desktop  gnome-custom-session.desktop  gnome-xorg.desktop  xinit-compat.desktop
gnome-classic.desktop     gnome.desktop                 openbox.desktop

[root@test18 ~]# vim /etc/tigervnc/vncserver-config-defaults
session=gnome
securitytypes=vncauth,tlsvnc
desktop=sandbox
geometry=1366x768
alwaysshared
6、配置vnc密码
[root@test18 ~]# vncpasswd
Password:
Verify:
Would you like to enter a view-only password (y/n)? n
A view-only password is not used
7、在root家目录创建相应目录.config/systemd/user/,把vncserver的systemd单元复制过来。注意命名和之前使用的屏幕号一致:1
[root@test18 ~]# mkdir -p .config/systemd/user/
[root@test18 ~]# cp /lib/systemd/system/vncserver@.service .config/systemd/user/vncserver@:1.service
8、加载新的systemd单元。注意--user选项,应该能看到Loaded是我们配置的vncserver的systemd单元
[root@test18 ~]# systemctl --user daemon-reload
[root@test18 ~]# systemctl --user status -l vncserver@\:1.service
● vncserver@:1.service - Remote desktop service (VNC)
   Loaded: loaded (/root/.config/systemd/user/vncserver@:1.service; disabled; vendor preset: enabled)
   Active: inactive (dead)
9、启动vncserver服务,注意--user选项。如果看到Active,说明服务启动。如果看到类似如下报错,那么参看下一步可选项,配置selinux上下文。
[root@test18 ~]# systemctl --user start vncserver@\:1.service
[root@test18 ~]# systemctl --user status -l vncserver@\:1.service
● vncserver@:1.service - Remote desktop service (VNC)
   Loaded: loaded (/root/.config/systemd/user/vncserver@:1.service; disabled; vendor preset: enabled)
   Active: inactive (dead)

Mar 14 12:15:48 test18.abcd.com vncsession[1846]: vncsession: vncserver exited with status=71
Mar 14 12:15:48 test18.abcd.com vncsession[1846]: pam_unix(tigervnc:session): session closed for user root
Mar 14 12:15:48 test18.abcd.com systemd[1769]: vncserver@:1.service: Succeeded.
Mar 14 12:16:23 test18.abcd.com systemd[1769]: Starting Remote desktop service (VNC)...
Mar 14 12:16:23 test18.abcd.com vncsession[1892]: pam_systemd(tigervnc:session): Cannot create session: Already running in a session or user slice
Mar 14 12:16:23 test18.abcd.com vncsession[1892]: pam_unix(tigervnc:session): session opened for user root by (uid=0)
Mar 14 12:16:23 test18.abcd.com systemd[1769]: Started Remote desktop service (VNC).
Mar 14 12:16:23 test18.abcd.com vncsession[1892]: vncsession: vncserver exited with status=71
Mar 14 12:16:23 test18.abcd.com vncsession[1892]: pam_unix(tigervnc:session): session closed for user root
Mar 14 12:16:23 test18.abcd.com systemd[1769]: vncserver@:1.service: Succeeded.
10、可选步骤,配置selinux。
办法一、禁用selinux,禁用后重启一下服务器即可。
办法二、配置.vnc目录的selinux上下文。先查询一下,发现家目录下.vnc需要xdm_home_t 。使用semanage fcontext -a -t xdm_home_t "/root/.vnc(/.*)?"加上这个上下文。使用restorecon -Rv .vnc/使其生效。再启动vnc服务就Active了!
[root@test18 ~]# semanage fcontext -l | grep vnc
.vnc(/.*)?                                         all files          system_u:object_r:xdm_home_t:s0
/home/[^/]+/\.vnc(/.*)?                            all files          unconfined_u:object_r:xdm_home_t:s0
/home/\.vnc(/.*)?                                  all files          system_u:object_r:xdm_home_t:s0
/usr/bin/Xvnc                                      regular file       system_u:object_r:xserver_exec_t:s0
/usr/bin/nova-novncproxy                           regular file       system_u:object_r:nova_exec_t:s0
/usr/bin/nova-vncproxy                             regular file       system_u:object_r:nova_exec_t:s0
/usr/bin/nova-xvpvncproxy                          regular file       system_u:object_r:nova_exec_t:s0
/usr/bin/x11vnc                                    regular file       system_u:object_r:xserver_exec_t:s0
/usr/libexec/vncsession-start                      regular file       system_u:object_r:vnc_session_exec_t:s0
/usr/sbin/vncsession                               regular file       system_u:object_r:vnc_session_exec_t:s0
/var/run/vncsession-:[0-9]*\.pid                   regular file       system_u:object_r:vnc_session_var_run_t:s0


[root@test18 ~]# semanage fcontext -a -t xdm_home_t "/root/.vnc(/.*)?"
[root@test18 ~]# restorecon -Rv .vnc/
Relabeled /root/.vnc from system_u:object_r:admin_home_t:s0 to system_u:object_r:xdm_home_t:s0
Relabeled /root/.vnc/passwd from system_u:object_r:admin_home_t:s0 to system_u:object_r:xdm_home_t:s0
Relabeled /root/.vnc/test18.abcd.com:1.log from system_u:object_r:admin_home_t:s0 to system_u:object_r:xdm_home_t:s0

[root@test18 ~]# systemctl --user start vncserver@\:1.service
[root@test18 ~]# systemctl --user status -l vncserver@\:1.service
● vncserver@:1.service - Remote desktop service (VNC)
   Loaded: loaded (/root/.config/systemd/user/vncserver@:1.service; disabled; vendor preset: enabled)
   Active: active (running) since Sun 2021-03-14 20:48:25 CST; 1s ago
11、配置防火墙vncserver服务入栈规则,一定要reload生效,查看允许的服务有vnc-server
[root@test18 ~]# firewall-cmd --permanent --add-service=vnc-server
success
[root@test18 ~]# firewall-cmd --reload
success
[root@test18 ~]# firewall-cmd --list-all
public (active)
  target: default
  icmp-block-inversion: no
  interfaces: ens33
  sources:
  services: cockpit dhcpv6-client ssh vnc-server
  ports:
  protocols:
  masquerade: no
  forward-ports:
  source-ports:
  icmp-blocks:
  rich rules:
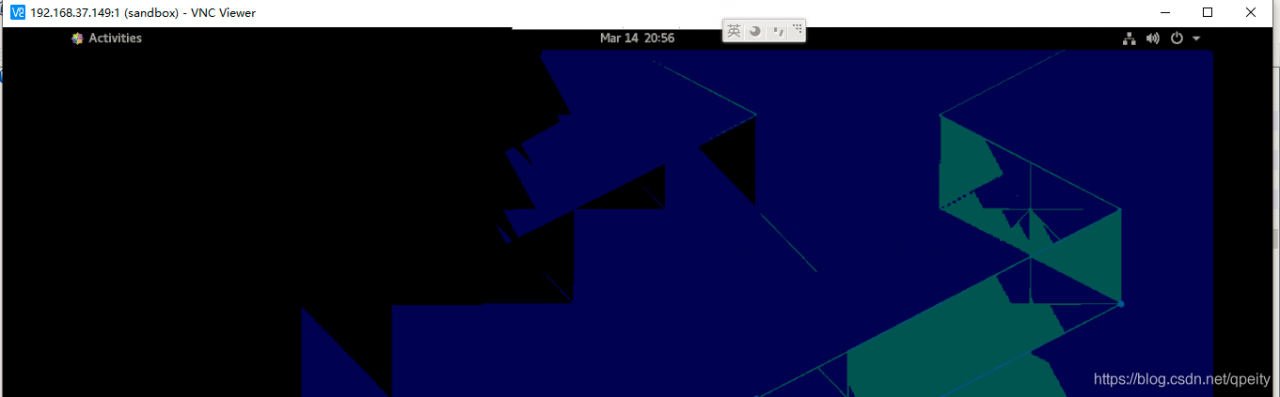
12、在本地使用vncviewer连接<ip>:1,并输入vnc密码可以看到图形界面。
附/usr/share/doc/tigervnc/HOWTO.md文件内容
# What has changed
The previous Tigervnc versions had a wrapper script called `vncserver` which
could be run as a user manually to start *Xvnc* process. The usage was quite
simple as you just run
```
$ vncserver :x [vncserver options] [Xvnc options]
```
and that was it. While this was working just fine, there were issues when users
wanted to start a Tigervnc server using *systemd*. For these reasons things were
completely changed and there is now a new way how this all is supposed to work.

 # How to start Tigervnc server

## Add a user mapping
With this you can map a user to a particular port. The mapping should be done in
`/etc/tigervnc/vncserver.users` configuration file. It should be pretty
straightforward once you open the file as there are some examples, but basically
the mapping is in form
```
:x=user
```
For example you can have
```
:1=test
:2=vncuser
```

## Configure Xvnc options
To configure Xvnc parameters, you need to go to the same directory where you did
the user mapping and open `vncserver-config-defaults` configuration file. This
file is for the default Xvnc configuration and will be applied to every user
unless any of the following applies:
* The user has its own configuration in `$HOME/.vnc/config`
* The same option with different value is configured in
  `vncserver-config-mandatory` configuration file, which replaces the default
  configuration and has even a higher priority than the per-user configuration.
  This option is for system administrators when they want to force particular
  *Xvnc* options.

Format of the configuration file is also quite simple as the configuration is
in form of
```
option=value
option
```
for example
```
session=gnome
securitytypes=vncauth,tlsvnc
desktop=sandbox
geometry=2000x1200
localhost
alwaysshared
```
### Note:
There is one important option you need to set and that option is the session you
want to start. E.g when you want to start GNOME desktop, then you have to use
```
session=gnome
```
which should match the name of a session desktop file from `/usr/share/xsessions`
directory.

## Set VNC password
You need to set a password for each user in order to be able to start the
Tigervnc server. In order to create a password, you just run
```
$ vncpasswd
```
as the user you will be starting the server for.
### Note:
If you were using Tigervnc before for your user and you already created a
password, then you will have to make sure the `$HOME/.vnc` folder created by
`vncpasswd` will have the correct *SELinux* context. You either can delete this
folder and recreate it again by creating the password one more time, or
alternatively you can run
```
$ restorecon -RFv /home/<USER>/.vnc
```

## Start the Tigervnc server
Finally you can start the server using systemd service. To do so just run
```
$ systemctl start vncserver@:x
```
as root or
```
$ sudo systemctl start vncserver@:x
```
as a regular user in case it has permissions to run `sudo`. Don't forget to
replace the `:x` by the actual number you configured in the user mapping file.
Following our example by running
```
$ systemctl start vncserver@:1
```
you will start a Tigervnc server for user `test` with a GNOME session.

### Note:
If you were previously using Tigervnc and you were used to start it using
*systemd* then you will need to remove previous *systemd* configuration files,
those you most likely copied to `/etc/systemd/system/vncserver@.service`,
otherwise this service file will be preferred over the new one installed with
latest Tigervnc.

# Limitations
You will not be able to start a Tigervnc server for a user who is already
logged into a graphical session. Avoid running the server as the `root` user as
it's not a safe thing to do. While running the server as the `root` should work
in general, it's not recommended to do so and there might be some things which
are not working properly.