一、 Sidecar简介
什么是Sidecar模式(挎斗模式)? Sidecar模式是一种将应用功能从应用本身剥离出来作为单独进程的方式。该模式允许我们向应用无侵入添加多种功能,避免了为满足第三方组件需求而向应用添加额外的配置代码。
此模式之所以称作“挎斗”(Sidecar),是因为它类似于三轮摩托车上的挎斗。 在此模式中,挎斗附加到父应用程序,为应用程序提供支持性功能。 此外,挎斗与父应用程序具有相同的生命周期:与父应用程序一起创建,一起停用。 挎斗模式有时也称为搭档模式,这是一种分解模式。
非JVM微服务可操作Eureka的REST端点,从而实现注册与发现。事实上,也可使用Sidecar更方便整合非JVM微服务。Spring Cloud Netflix Sidecar的灵感来自Netflix Prana,它包括了一个简单的HTTP API来获取指定服务所有实例信息(例如主机和端口)。不仅如此,还可通过内嵌的Zuul来代理服务调用,该代理从Eureka Server中获取信息。非JVM微服务需要实现监控检查,以便Sidecar将它的状态上报给Eureka Server,健康检查的形式如下:
{"status":"UP"}
其中,status用于描述微服务的状态,常见取值有:UP、DOWN、OUT_OF_SERVICE以及UNKNOWN等。
二、 创建Nodejs环境
2.1 windows安装nodejs环境
参考文章:https://www.cnblogs.com/lsgxeva/p/7754365.html
2.2 编写listener.js
nodejs 必须添加健康接口并返回状态{"status":"UP"}
var http = require('http');
var url = require("url");
var path = require('path');
// 创建server
var server = http.createServer(function(req, res) {
  // 获得请求的路径
  var pathname = url.parse(req.url).pathname;
  res.writeHead(200, { 'Content-Type' : 'application/json; charset=utf-8' });
  // 访问http://localhost:8060/,将会返回{"index":"欢迎来到首页"}
  if (pathname === '/') {
    res.end(JSON.stringify({ "index" : "Hello Payne!" }));
  }
  // 访问http://localhost:8060/health.json,将会返回{"status":"UP"}
  else if (pathname === '/health.json') {
    res.end(JSON.stringify({ "status" : "UP" }));
  }
  // 其他情况返回404
  else {
    res.end("404");
  }
});
// 创建监听,并打印日志
server.listen(8060, function() {
  console.log('listening on localhost:8060');
});
注意: JSON.stringify({ “status” : “UP” }) “UP”必须是大写,否则Eureka Server 将不识别。如下图所示:
2.3 运行listener.js
win+R==>cmd==>node listener.js![]()
根据js程序:
访问:http://localhost:8060/
{“index”:“Hello Payne!”}
访问:http://localhost:8060/health.json
{“status”:“UP”}
证明node环境已经准备就绪;
三、 Spring Cloud 后端代码
新建sidecar-server项目
3.1 更改pom文件
添加spring-cloud-netflix-sidecar依赖
<dependency>
	<groupId>org.springframework.cloud</groupId>
	<artifactId>spring-cloud-starter-netflix-eureka-client</artifactId>
</dependency>
<dependency>
	<groupId>org.springframework.cloud</groupId>
	<artifactId>spring-cloud-netflix-sidecar</artifactId>
</dependency>
3.2 更改启动类
添加EnableSidecar注解,@EnableSidecar是一个组合注解,它整合了三个注解,分别是:@EnableCircuitBreaker、@EnableDiscoveryClient、@EnableZuulProxy
@SpringBootApplication
@EnableSidecar
public class SidecarServerApplication {

	public static void main(String[] args) {
		SpringApplication.run(SidecarServerApplication.class, args);
	}
}
3.3 资源文件
server.port=8082
spring.application.name=sidecar-server
eureka.client.service-url.defaultZone = http://localhost:8080/eureka/

sidecar.port=8060
sidecar.health-uri=http://localhost:${sidecar.port}/health.json
management.endpoints.web.exposure.include=*
3.4 验证结果
依次启动Eureka-server,sidecar-server(8082)
访问sidecar-server: http://127.0.0.1:8082/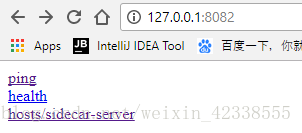

http://127.0.0.1:8082/actuator/health 查看sidecar-server运行状态。
{“status”:“UP”}
访问Eureka server:http://localhost:8080/

可以看到我们Sidecar-server状态是好的,node已经被sidecar装入Eureka server进行管理了;
当我们停掉Nodejs:
继续访问和health接口:

四、 Node通过Zuul路由访问Java API
**背景:**当下微服务比较流行,就出现一个问题,服务越来越细化,前台一个页面可能需要请求多个微服务,这样就出现一种讨论是否需要聚合层,比如java后端写一个聚合接口,通过聚合接口把所有需要调用的微服务调用一次然后在聚合层统一处理,再返回给前端,这样前端就不需要调用多处后端API,这样的做法不太好。
使用nodejs,使得前端通过zuul路由调用后端API,这样聚合层就相当于在前端处理了。
4.1 修改zuul-server
添加api路由,指向eureka-client
zuul.routes.api.path=/api/**
zuul.routes.api.serviceId=eureka-client
4.2 修改listener.js
添加新的前端API
...
  else if (pathname === '/hi'){
	console.log('=============== ') ;
	//请求后端开始//
	var options = {
		host: 'localhost',
		port: 8085,
		path: '/api/hello?token==5',
		method: 'GET',
		headers:{
			'accept': '*/*',
			'content-type': "application/atom+xml"
		}
	};
	var req = http.request(options, function (res) {
		console.log('STATUS: ' + res.statusCode);
		console.log('HEADERS: ' + JSON.stringify(res.headers));
		res.on('data',function (data) {
			 console.log('BODY: ' + data);
		});

	});
	req.end();
	res.end("SUCCESS");
	//请求后端结束//
  }
......
4.3 结果
以此启动eureka-server(8080),zuul-server(8085),eureka-client(8081)
访问:http://localhost:8060/hi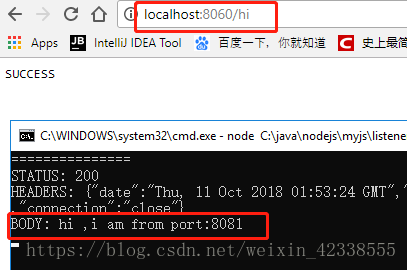
五、总结
- SideCar的设计很优雅,它完全不会去入侵其他应用的代码。
- Sidecar是一个用于监听非JVM应用程序(可以是Python或者Node或者Php等等)的一个工具,通过Sidecar可以实现Java和第三方应用程序的双向交互
- 第三方应用程序必须要实现一个health监测的接口,实时向Sidecar报告自己的状态,告诉Sidecar自己还在运行着。
- Sidecar应用程序必须和第三方应用程序运行在同一台电脑上,也就是说他们之间是localhost,不能是ip访问