主要说明
Swagger 目前知道的作用可以整合接口形成测试界面
SpringCloud使用流程如下
1、导入依赖
		<!-- swagger - api接口文档生成、维护 -->
        <dependency>
            <groupId>io.springfox</groupId>
            <artifactId>springfox-swagger2</artifactId>
            <version>2.8.0</version>
        </dependency>
        <dependency>
            <groupId>io.springfox</groupId>
            <artifactId>springfox-swagger-ui</artifactId>
            <version>2.8.0</version>
        </dependency>
2、添加配置
package com.datasource.myself.common.config;

import org.springframework.context.annotation.Bean;
import org.springframework.context.annotation.Configuration;
import springfox.documentation.builders.PathSelectors;
import springfox.documentation.builders.RequestHandlerSelectors;
import springfox.documentation.spi.DocumentationType;
import springfox.documentation.spring.web.plugins.Docket;
import springfox.documentation.swagger2.annotations.EnableSwagger2;

/**
 * @author yangsisen
 * @createTime 2021-03-12 10:36
 * @description swagger配置类 - api生成、维护配置类
 */
@Configuration
@EnableSwagger2
public class SwaggerConfig {

    @Bean
    public Docket createRestApi(){
        return new Docket(DocumentationType.SWAGGER_2)
                .pathMapping("/")
                .select()
                .apis(RequestHandlerSelectors.basePackage("com.datasource.myself"))
                .paths(PathSelectors.any())
                .build();
//                .apiInfo(new ApiInfoBuilder()
//                        .title("SpringBoot整合Swagger")//配置页面标题
//                        .description("SpringBoot整合Swagger,详细信息......")//配置页面描述
//                        .version("9.0")//版本信息
//                        .contact(new Contact("啊啊啊啊","blog.csdn.net","aaa@gmail.com"))//内容
//                        .license("The Apache License")
//                        .licenseUrl("http://www.baidu.com")
//                        .build());
    }
}
3、主要注释
| 序号 | 项目图片 | 备注 |
|---|---|---|
| 1 | 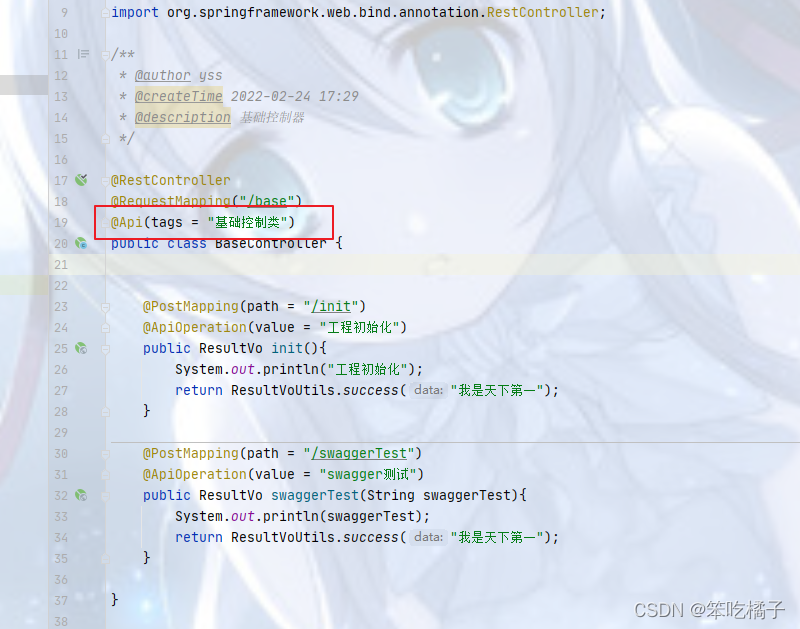 | @Api(tags = “基础控制类”) |
| 2 | 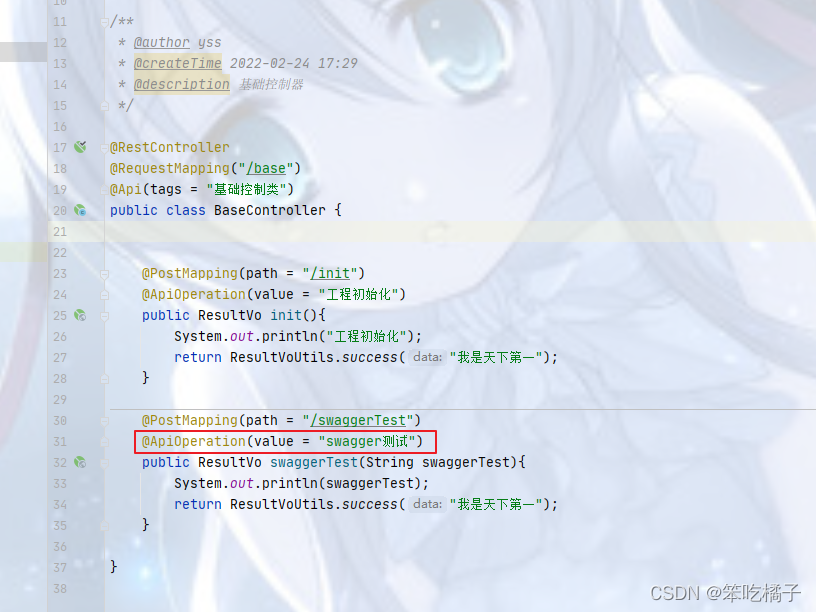 | @ApiOperation(value = “工程初始化”) |
| 3 | 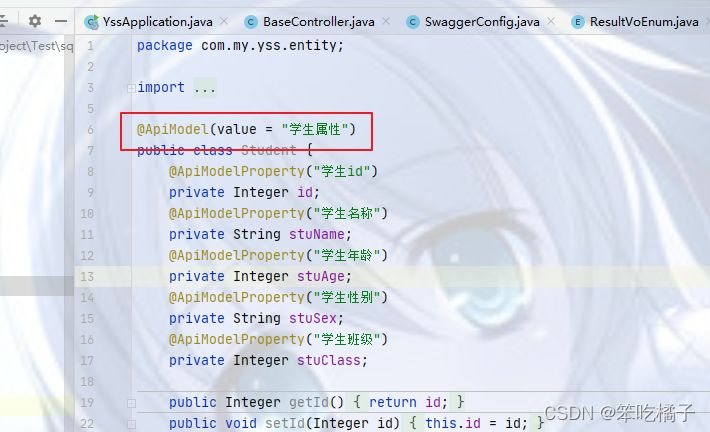 | @ApiModel(value = “学生属性”) |
| 4 | 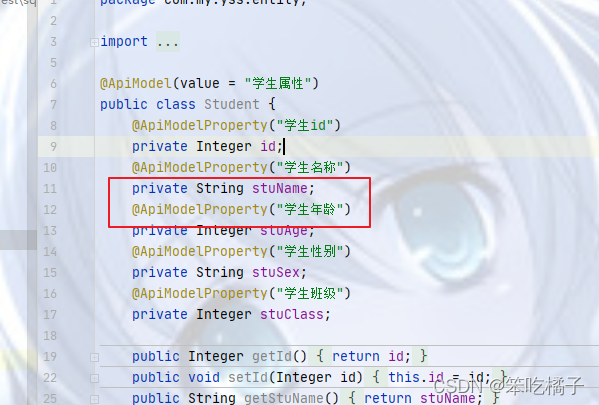 | @ApiModelProperty(“学生名称”) |
4、Swagger使用说明
| 序号 | 项目图片 | 说明 |
|---|---|---|
| 1 | 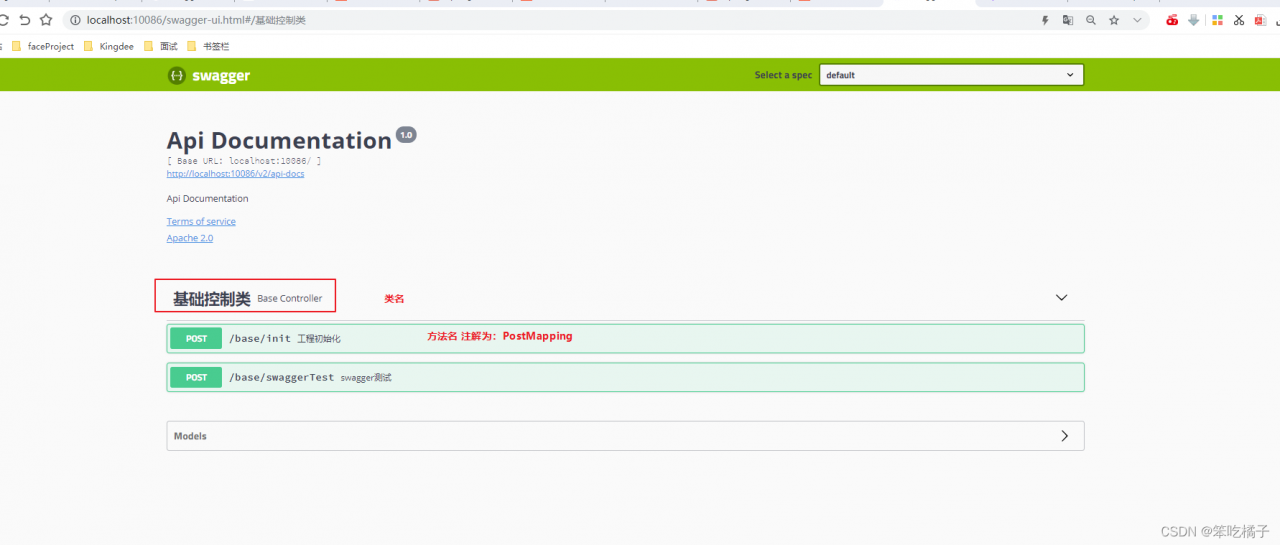 | 登录:登录地址为http://localhost:10086/swagger-ui.html |
| 2 | 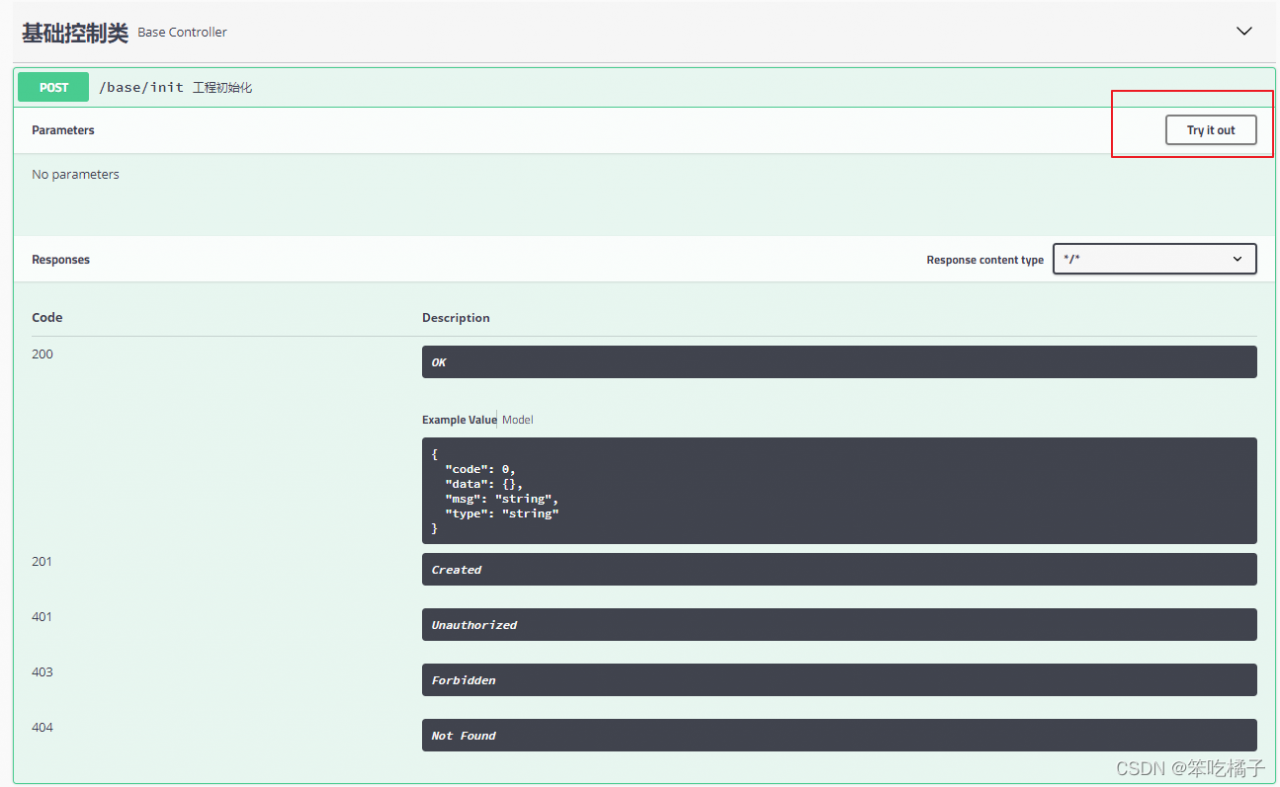 | 点击测试 |
| 3 | 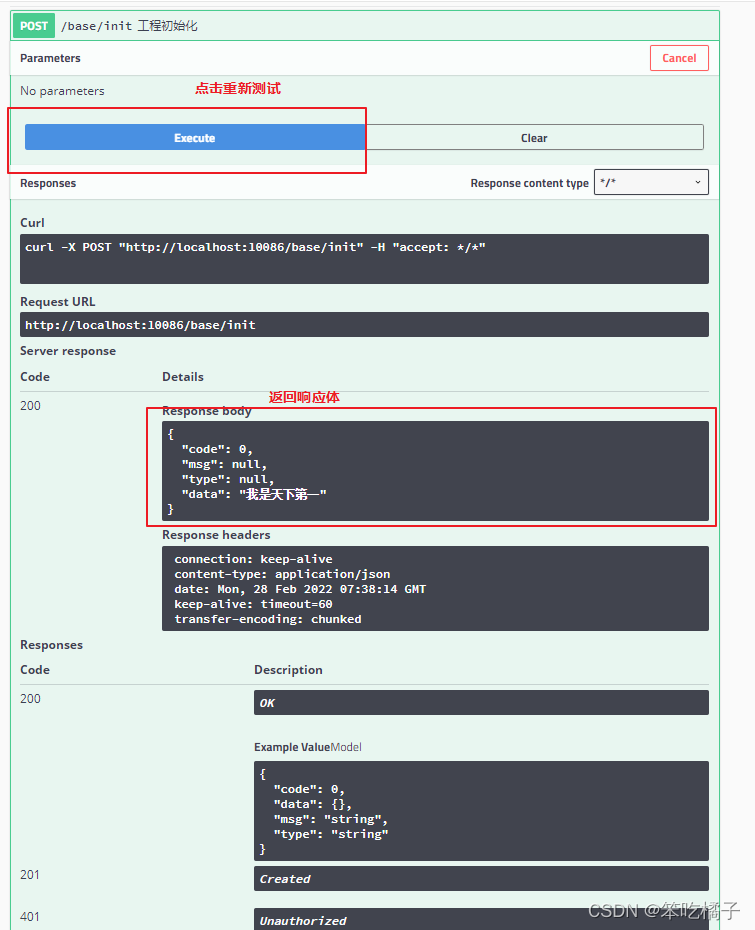 | 无参运行,直接获取响应体 |
| 4 | 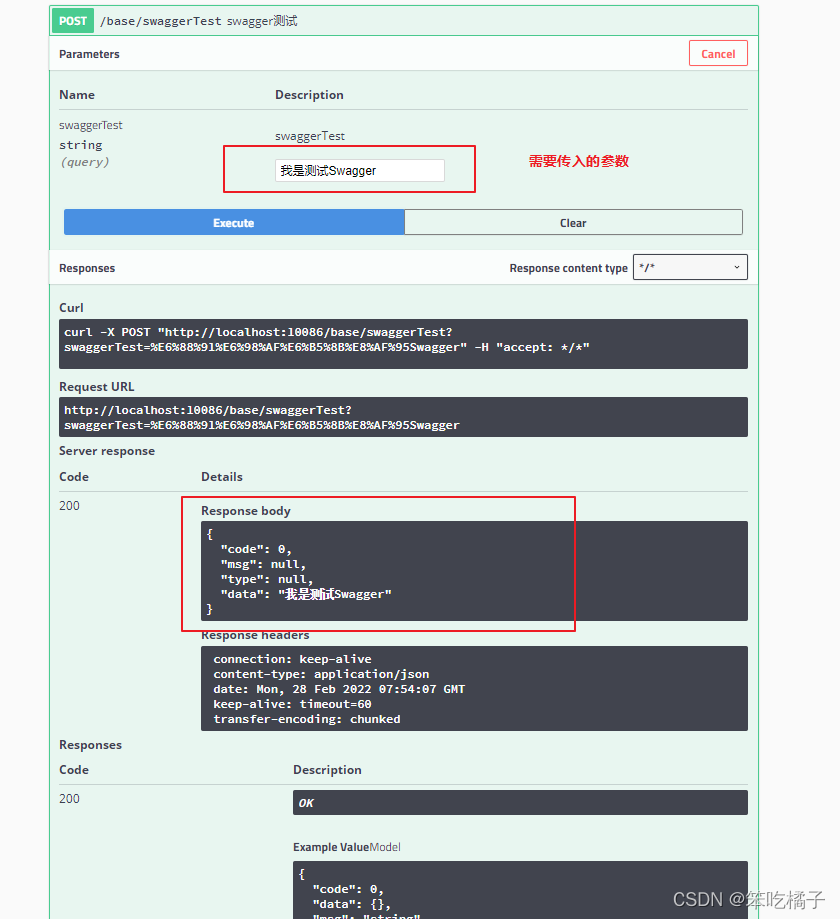 | 需要传参,传入参数(该测试方法为返回原本你传入的参数) |
5、使用过程种可能出现的问题
| 序号 | 项目图片 | 问题 | 解决 |
|---|---|---|---|
| 1 |  | boot版本过高 | 添加yml配置:spring.mvc.pathmatch.matching-strategy:ant_path_matcher |
| 2 | |||
| 3 |
版权声明:本文为shhbshdis原创文章,遵循CC 4.0 BY-SA版权协议,转载请附上原文出处链接和本声明。