1、认识 Spring Cache
Spring Cache是Spring提供的一整套缓存解决方案。它本身并不提供缓存实现,而是提供统一的接口和代码规范、配置、注解等,以便整合各种Cache方案,使用户不用关心Cache的细节。
Spring支持“透明”地向应用程序添加缓存,将缓存应用于方法,在方法执行前检查缓存中是否有可用的数据。这样可以减少方法执行的次数,同时提高响应的速度。缓存的应用方式“透明”,不会对调用者造成任何干扰。只要通过注解@EnableCaching启用了缓存支持,Spring Boot就会自动处理好缓存的基础配置。
Spring Cache作用在方法上。当调用一个缓存方法时,会把该方法参数和返回结果作为一个“键值对”(key / value)存放在缓存中,下次用同样的参数来调用该方法时将不再执行该方法,而是直接从缓存中获取结果进行返回。所以在使用Spring Cache时,要保证在缓存的方法和方法参数相同时返回相同的结果。
Spring Boot提供的声明式缓存(cache)注解,如下表:
| 注解 | 说明 |
|---|---|
| @EnableCaching | 开启缓存。 |
| @Cacheable | 可以作用在类和方法上,以键值对的方式缓存类或方法的返回值。 |
| @CachePut | 方法被调用,然后结果被缓存。 |
| @CacheEvict | 清空缓存。 |
| @Caching | 用来组合多个注解标签。 |
声明式缓存注解的详细使用:《Spring使用Cache、整合Ehcache》
2、认识Redis
Redis是目前使用最广泛的内存数据存储系统之一。它支持更丰富的数据结构,支持数据持久化、事务、HA(高可用 High Available)、双机集群系统、主从库。
Redis是 key-value 存储系统。它支持的 value 类型包含 String、List、Set、Zset(有序集合)和 Hash。这些数据类型都支持push/pop、add/remove,以及取交集、并集、差集或更丰富的操作,而且这些操作都是原子性的。在此基础上,Redis支持各种不同方式的排序和算法。
3、创建SpringBoot项目与数据表
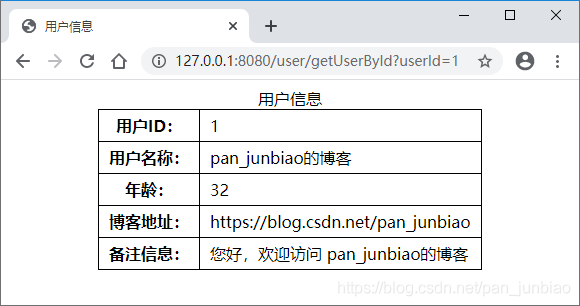
【实例】整合SpringBoot与MyBaits框架、采用Redis做缓存,实现用户数据的相关操作功能,比如,新增用户、根据用户ID查询用户信息、更新用户信息、根据用户ID删除用户等。如下图:
3.1 创建项目
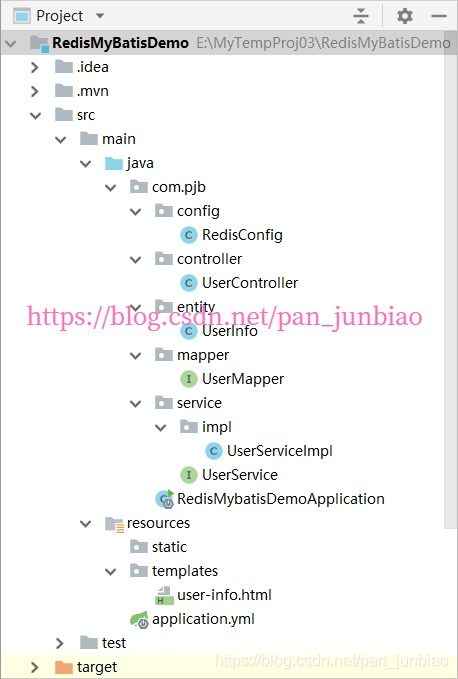
(1)创建SpringBoot项目,项目结构如下图:
(2)使用Maven添加依赖文件
在pom.xml配置信息文件中,添加Redis、MyBatis、MySQL数据库、Thymeleaf模板引擎等相关依赖:
<!-- Redis启动器 -->
<dependency>
    <groupId>org.springframework.boot</groupId>
    <artifactId>spring-boot-starter-data-redis</artifactId>
    <version>2.3.4.RELEASE</version>
</dependency>

<!-- MyBatis与SpringBoot整合依赖 -->
<dependency>
    <groupId>org.mybatis.spring.boot</groupId>
    <artifactId>mybatis-spring-boot-starter</artifactId>
    <version>2.1.3</version>
</dependency>

<!-- MySQL的JDBC数据库驱动 -->
<dependency>
    <groupId>mysql</groupId>
    <artifactId>mysql-connector-java</artifactId>
    <version>8.0.20</version>
</dependency>

<!-- 引入Thymeleaf模板引擎 -->
<dependency>
    <groupId>org.springframework.boot</groupId>
    <artifactId>spring-boot-starter-thymeleaf</artifactId>
</dependency>
3.2 创建数据表
使用MySQL数据库,创建 tb_user 用户信息表,并添加数据。
-- 判断数据表是否存在,存在则删除
DROP TABLE IF EXISTS tb_user;

-- 创建“用户信息”数据表
CREATE TABLE IF NOT EXISTS tb_user
(
	user_id INT AUTO_INCREMENT PRIMARY KEY COMMENT '用户编号',
	user_name VARCHAR(50) NOT NULL COMMENT '用户姓名',
	age int default(0) NOT NULL COMMENT '年龄',
	blog_url VARCHAR(50) NOT NULL COMMENT '博客地址',
	blog_remark VARCHAR(50) COMMENT '博客信息'
) COMMENT = '用户信息表';

-- 添加数据
INSERT INTO tb_user(user_name,age,blog_url,blog_remark) VALUES('pan_junbiao的博客',32,'https://blog.csdn.net/pan_junbiao','您好,欢迎访问 pan_junbiao的博客');
4、Redis实现数据缓存
4.1 Redis的配置
首先在 application.yml 配置文件中配置Spring目标缓存管理器,支持 Ehcache、Generic、Redis、Jcache等。这里配置使用Redis。
#Spring配置
spring:
  #缓存管理器
  cache:
    type: redis
在 application.yml 配置文件中配置Redis、MyBatis,完整的配置信息如下:
#Spring配置
spring:
#缓存管理器
cache:
type: redis
#Redis配置
redis:
database: 0 #Redis数据库索引(默认为0)
host: 127.0.0.1 #Redis服务器地址
port: 6379 #Redis服务器连接端口
password: #Redis服务器连接密码(默认为空)
jedis:
pool:
max-active: 8 #连接池最大连接数(使用负值表示没有限制)
max-wait: -1s #连接池最大阻塞等待时间(使用负值表示没有限制)
max-idle: 8 #连接池中的最大空闲连接
min-idle: 0 #连接池中的最小空闲连接
lettuce:
shutdown-timeout: 100ms #关闭超时时间,默认值100ms
#使用Thymeleaf模板引擎
thymeleaf:
mode: HTML5
encoding: UTF-8
cache: false #使用Thymeleaf模板引擎,关闭缓存
servlet:
content-type: text/html
#DataSource数据源
datasource:
url: jdbc:mysql://localhost:3306/db_admin?useSSL=false&
username: root
password: 123456
driver-class-name: com.mysql.cj.jdbc.Driver
#MyBatis配置
mybatis:
type-aliases-package: com.pjb.entity #别名定义
configuration:
log-impl: org.apache.ibatis.logging.stdout.StdOutImpl #指定 MyBatis 所用日志的具体实现,未指定时将自动查找
map-underscore-to-camel-case: true #开启自动驼峰命名规则(camel case)映射
lazy-loading-enabled: true #开启延时加载开关
aggressive-lazy-loading: false #将积极加载改为消极加载(即按需加载),默认值就是false
#lazy-load-trigger-methods: "" #阻挡不相干的操作触发,实现懒加载
cache-enabled: true #打开全局缓存开关(二级环境),默认值就是true4.2 Redis配置类(config层)
在com.pjb.config包中,创建RedisConfig类(Redis配置类),并继承CachingConfigurerSupport类。
package com.pjb.config;

import com.fasterxml.jackson.annotation.JsonAutoDetect;
import com.fasterxml.jackson.annotation.PropertyAccessor;
import com.fasterxml.jackson.databind.ObjectMapper;
import org.springframework.cache.CacheManager;
import org.springframework.cache.annotation.CachingConfigurerSupport;
import org.springframework.cache.interceptor.KeyGenerator;
import org.springframework.context.annotation.Bean;
import org.springframework.context.annotation.Configuration;
import org.springframework.data.redis.cache.RedisCacheManager;
import org.springframework.data.redis.connection.RedisConnectionFactory;
import org.springframework.data.redis.core.RedisTemplate;
import org.springframework.data.redis.core.StringRedisTemplate;
import org.springframework.data.redis.serializer.Jackson2JsonRedisSerializer;

import java.lang.reflect.Method;

/**
 * Redis配置类
 * @author pan_junbiao
 **/
@Configuration
public class RedisConfig extends CachingConfigurerSupport
{
    /**
     * 缓存对象集合中,缓存是以key-value形式保存的,
     * 当不指定缓存的key时,SpringBoot会使用keyGenerator生成Key。
     */
    @Bean
    public KeyGenerator keyGenerator()
    {
        return new KeyGenerator()
        {
            @Override
            public Object generate(Object target, Method method, Object... params) {
                StringBuilder sb = new StringBuilder();
                //类名+方法名
                sb.append(target.getClass().getName());
                sb.append(method.getName());
                for (Object obj : params) {
                    sb.append(obj.toString());
                }
                return sb.toString();
            }
        };
    }

    /**
     * 缓存管理器
     */
    @SuppressWarnings("rawtypes")
    @Bean
    public CacheManager cacheManager(RedisConnectionFactory connectionFactory)
    {
        RedisCacheManager cacheManager = RedisCacheManager.create(connectionFactory);
        //设置缓存过期时间

        return cacheManager;
    }

    /**
     * 实例化RedisTemplate对象
     */
    @Bean
    public RedisTemplate<String, String> redisTemplate(RedisConnectionFactory factory)
    {
        StringRedisTemplate template = new StringRedisTemplate(factory);
        Jackson2JsonRedisSerializer jackson2JsonRedisSerializer = new Jackson2JsonRedisSerializer(Object.class);
        ObjectMapper om = new ObjectMapper();
        om.setVisibility(PropertyAccessor.ALL, JsonAutoDetect.Visibility.ANY);
        om.enableDefaultTyping(ObjectMapper.DefaultTyping.NON_FINAL);
        jackson2JsonRedisSerializer.setObjectMapper(om);
        template.setValueSerializer(jackson2JsonRedisSerializer);
        template.afterPropertiesSet();
        return template;
    }
}
4.3 创建实体类(Entity层)
在com.pjb.entity包中,创建UserInfo类(用户信息实体类)。
package com.pjb.entity;

import java.io.Serializable;

/**
 * 用户信息实体类
 * @author pan_junbiao
 **/
public class UserInfo implements Serializable
{
    private int userId; //用户编号
    private String userName; //用户姓名
    private int age; //年龄
    private String blogUrl; //博客地址
    private String blogRemark; //博客信息

    //省略getter与setter方法...
}注意:实体类必须实现 Serializable 接口,否则无法实现缓存功能。
4.4 数据库映射层(Mapper层)
在com.pjb.mapper包中,创建UserMapper接口(用户信息Mapper动态代理接口)。
package com.pjb.mapper;

import com.pjb.entity.UserInfo;
import org.apache.ibatis.annotations.*;
import org.springframework.stereotype.Repository;

/**
 * 用户信息Mapper动态代理接口
 * @author pan_junbiao
 **/
@Mapper
@Repository
public interface UserMapper
{
    /**
     * 根据用户ID,获取用户信息
     */
    @Select("SELECT * FROM tb_user WHERE user_id = #{userId}")
    public UserInfo getUserById(int userId);

    /**
     * 新增用户,并获取自增主键
     */
    @Insert("INSERT INTO tb_user(user_name,age,blog_url,blog_remark) VALUES(#{userName},#{age},#{blogUrl},#{blogRemark});")
    @Options(useGeneratedKeys = true, keyColumn = "user_id", keyProperty = "userId")
    public int insertUser(UserInfo userInfo);

    /**
     * 修改用户
     */
    @Update("UPDATE tb_user SET user_name = #{userName} ,age = #{age} ,blog_url = #{blogUrl} ,blog_remark = #{blogRemark} WHERE user_id = #{userId}")
    public int updateUser(UserInfo userInfo);

    /**
     * 删除用户
     */
    @Delete("DELETE FROM tb_user WHERE user_id = #{userId}")
    public int deleteUser(int userId);
}
4.5 业务逻辑层(Service层)
在com.pjb.service包下,创建UserService接口(用户信息业务逻辑接口)。
package com.pjb.service;

import com.pjb.entity.UserInfo;

/**
 * 用户信息业务逻辑接口
 * @author pan_junbiao
 **/
public interface UserService
{
    /**
     * 根据用户ID,获取用户信息
     */
    public UserInfo getUserById(int userId);

    /**
     * 新增用户,并获取自增主键
     */
    public UserInfo insertUser(UserInfo userInfo);

    /**
     * 修改用户
     */
    public UserInfo updateUser(UserInfo userInfo);

    /**
     * 删除用户
     */
    public int deleteUser(int userId);
}
在com.pjb.service.impl包下,创建UserServiceImpl类(用户信息业务逻辑类)。
package com.pjb.service.impl;

import com.pjb.entity.UserInfo;
import com.pjb.mapper.UserMapper;
import com.pjb.service.UserService;
import org.springframework.beans.factory.annotation.Autowired;
import org.springframework.cache.annotation.CacheConfig;
import org.springframework.cache.annotation.CacheEvict;
import org.springframework.cache.annotation.CachePut;
import org.springframework.cache.annotation.Cacheable;
import org.springframework.stereotype.Service;
import org.springframework.transaction.annotation.Propagation;
import org.springframework.transaction.annotation.Transactional;

/**
 * 用户信息业务逻辑类
 * @author pan_junbiao
 * 缓存就在这层工作
 * @Cacheable,将查询结果缓存到redis中,(key="#p0")指定传入的第一个参数作为redis的key。
 * @CachePut,指定key,将更新的结果同步到redis中
 * @CacheEvict,指定key,删除缓存数据,allEntries=true,方法调用后将立即清除缓存
 **/
@CacheConfig(cacheNames = "userCache")
@Service
@Transactional(propagation = Propagation.REQUIRED, readOnly = false, rollbackFor = Exception.class)
public class UserServiceImpl implements UserService
{
    @Autowired
    private UserMapper userMapper;

    /**
     * 根据用户ID,获取用户信息
     */
    @Override
    @Cacheable(key = "#p0") // #p0 表示第一个参数
    public UserInfo getUserById(int userId)
    {
        return userMapper.getUserById(userId);
    }

    /**
     * 新增用户,并获取自增主键
     */
    @Override
    @CachePut(key = "#p0.userId")
    public UserInfo insertUser(UserInfo userInfo)
    {
        userMapper.insertUser(userInfo);
        return userInfo;
    }

    /**
     * 修改用户
     */
    @Override
    @CachePut(key = "#p0.userId")
    public UserInfo updateUser(UserInfo userInfo)
    {
        userMapper.updateUser(userInfo);
        return userInfo;
    }

    /**
     * 删除用户
     * 如果在@CacheEvict注解中添加allEntries=true属性,
     * 将会删除所有的缓存
     */
    @Override
    @CacheEvict(key = "#p0")
    public int deleteUser(int userId)
    {
        return userMapper.deleteUser(userId);
    }
}
从上述代码可以看出,查询用户的方法使用了 @Cacheable 注解来开启缓存。添加和修改方法使用了 @CachePut 注解,它是先处理方法,然后把结果进行缓存的。要想删除数据,则需要使用 @CacheEvict 注解来清空缓存。
@CacheConfig注解:如果所有的 @Cacheable() 里面都有一个 value=“xxx” 的属性,这显然如果方法多了,写起来也是挺累的,如果可以一次性声明完 那就省事了,所以有了 @CacheConfig 这个配置,@CacheConfig is a class-level annotation that allows to share the cache names,如果你在方法写别的名字,那么依然以方法的名字为准。
4.6 控制器方法(Controller层)
在com.pjb.controller包中,创建UserController类(用户控制器),实现用户数据的查询、新增、修改、删除,并实现数据的返回。
package com.pjb.controller;

import com.pjb.entity.UserInfo;
import com.pjb.service.UserService;
import org.springframework.beans.factory.annotation.Autowired;
import org.springframework.stereotype.Controller;
import org.springframework.web.bind.annotation.RequestMapping;
import org.springframework.web.bind.annotation.ResponseBody;
import org.springframework.web.servlet.ModelAndView;

/**
 * 用户信息控制器
 * @author pan_junbiao
 **/
@Controller
@RequestMapping("/user")
public class UserController
{
    @Autowired
    private UserService userService;

    /**
     * 获取用户信息
     */
    @RequestMapping("getUserById")
    public ModelAndView getUserById(int userId)
    {
        //根据用户ID,获取用户信息
        UserInfo userInfo = userService.getUserById(userId);

        if(userInfo==null)
        {
            userInfo = new UserInfo();
        }

        //返回结果
        ModelAndView modelAndView = new ModelAndView();
        modelAndView.addObject("userInfo",userInfo);
        modelAndView.setViewName("/user-info.html");
        return modelAndView;
    }

    /**
     * 新增用户
     */
    @ResponseBody
    @RequestMapping("insertUser")
    public boolean insertUser()
    {
        //创建新用户
        UserInfo userInfo = new UserInfo();
        userInfo.setUserName("pan_junbiao的博客");
        userInfo.setAge(32);
        userInfo.setBlogUrl("https://blog.csdn.net/pan_junbiao");
        userInfo.setBlogRemark("您好,欢迎访问 pan_junbiao的博客");

        //执行新增方法
        userService.insertUser(userInfo);

        //返回结果
        return userInfo.getUserId() > 0 ? true : false;
    }

    /**
     * 修改用户
     */
    @ResponseBody
    @RequestMapping("updateUser")
    public boolean updateUser(int userId)
    {
        UserInfo userInfo = new UserInfo();
        userInfo.setUserId(userId);
        userInfo.setUserName("pan_junbiao的博客_02");
        userInfo.setAge(35);
        userInfo.setBlogUrl("https://blog.csdn.net/pan_junbiao");
        userInfo.setBlogRemark("您好,欢迎访问 pan_junbiao的博客");

        //执行修改方法
        userService.updateUser(userInfo);

        //返回结果
        return true;
    }

    /**
     * 删除用户
     */
    @ResponseBody
    @RequestMapping("deleteUser")
    public boolean deleteUser(int userId)
    {
        //执行新增方法
        int result = userService.deleteUser(userId);

        //返回结果
        return result > 0 ? true : false;
    }
}
4.7 显示页面(View层)
在 resources/templates 目录下,创建 user-info.html 用户信息显示页面。
<!DOCTYPE html>
<html lang="en" xmlns:th="http://www.thymeleaf.org">
<head>
    <meta charset="UTF-8">
    <title>用户信息</title>
    <meta name="author" content="pan_junbiao的博客">
    <style>
        table { border-collapse: collapse; margin-bottom: 10px}
        table,table tr th, table tr td { border:1px solid #000000; padding: 5px 10px;}
    </style>
</head>
<body>
<div align="center">
    <table>
        <caption>用户信息</caption>
        <tr>
            <th>用户ID:</th>
            <td th:text="${userInfo.userId}"></td>
        </tr>
        <tr>
            <th>用户名称:</th>
            <td th:text="${userInfo.userName}"></td>
        </tr>
        <tr>
            <th>年龄:</th>
            <td th:text="${userInfo.age}"></td>
        </tr>
        <tr>
            <th>博客地址:</th>
            <td th:text="${userInfo.blogUrl}"></td>
        </tr>
        <tr>
            <th>备注信息:</th>
            <td th:text="${userInfo.blogRemark}"></td>
        </tr>
    </table>
</div>
</body>
</html>
执行结果:
(1)使用Redis从缓存数据中获取用户信息,如下图:

(2)使用Redis Desktop Manager(RDM)可视化工具查询缓存数据,如下图:
