Spring Boot加载自定义配置文件
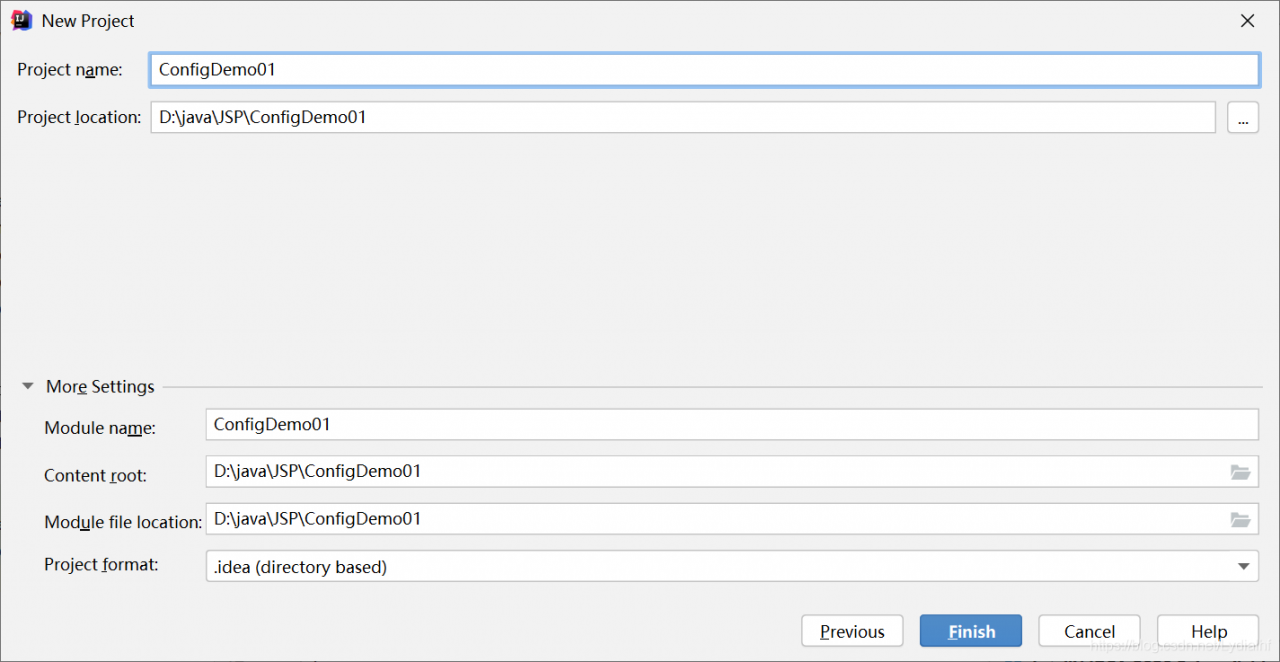
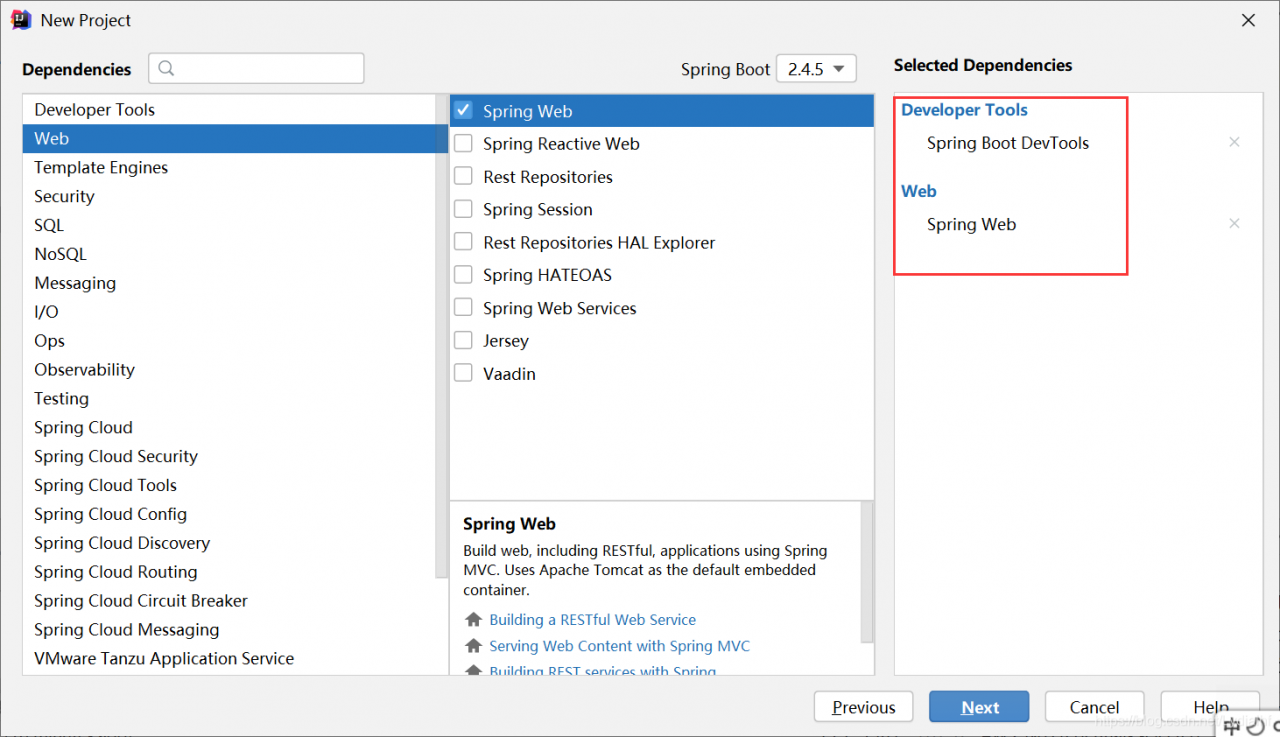
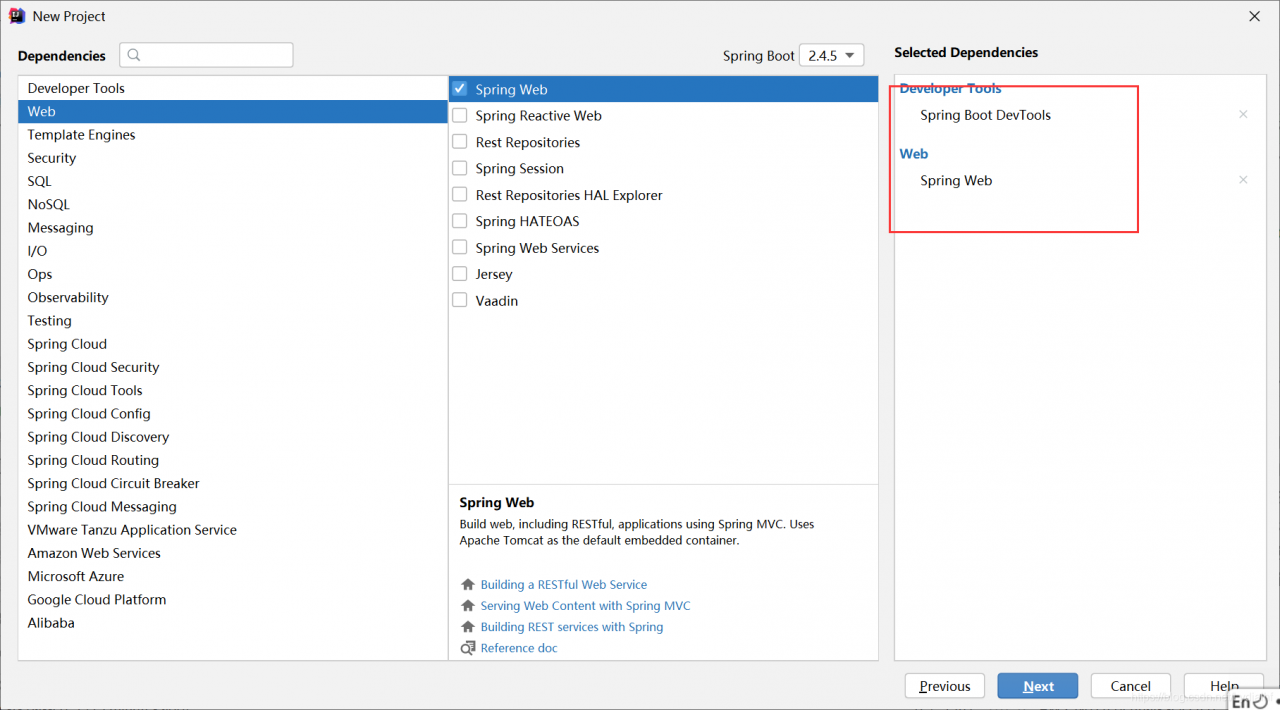
1、创建Spring Boot Web项目ConfigDemo01
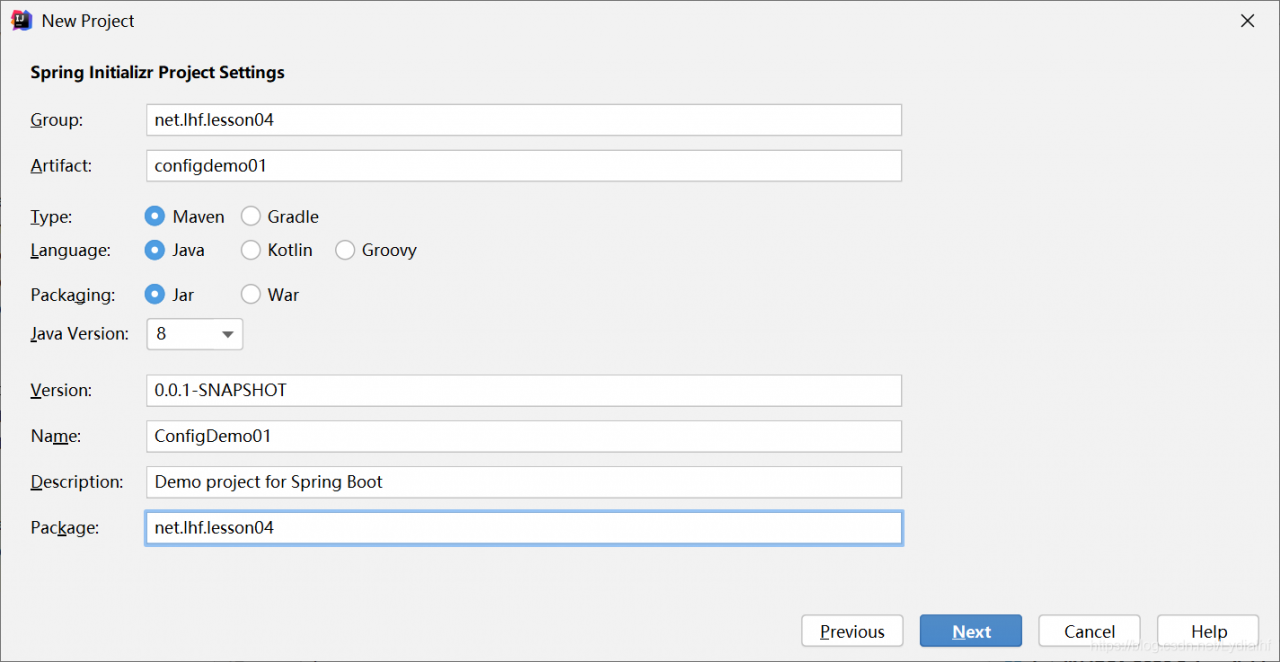
设置项目元数据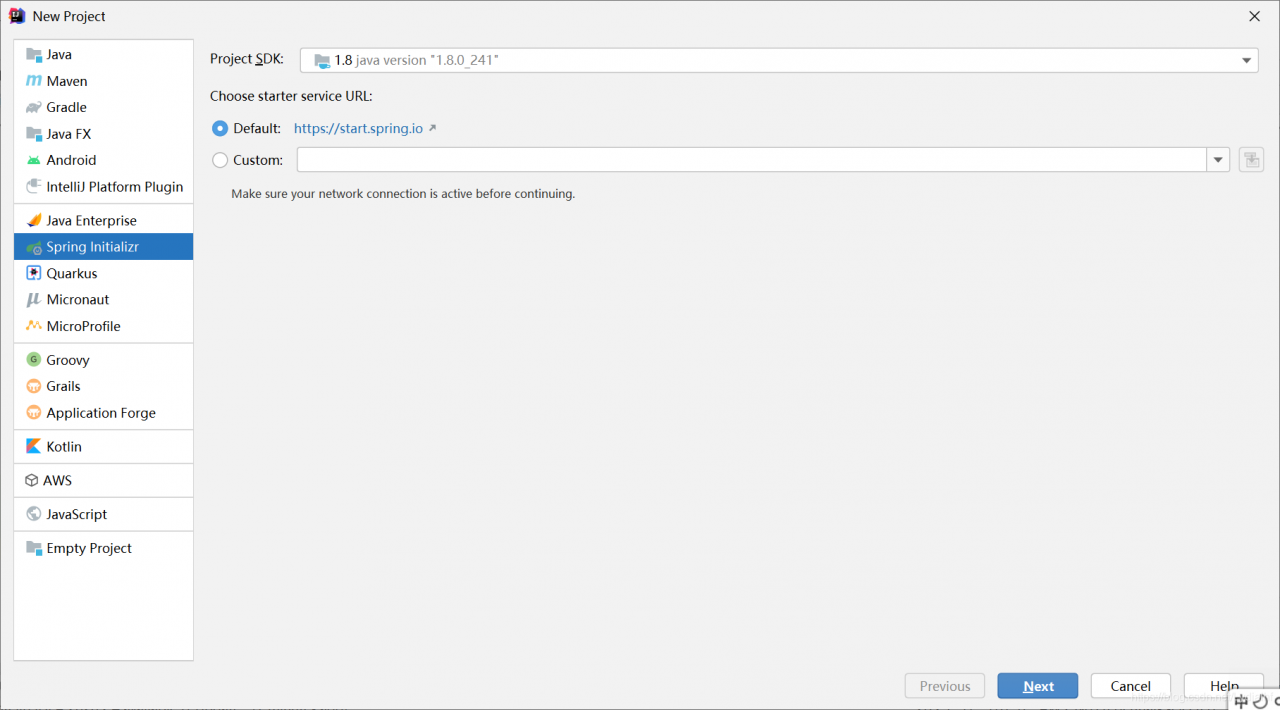
2、创建自定义配置文件
在resources下创建myconfig.properties文件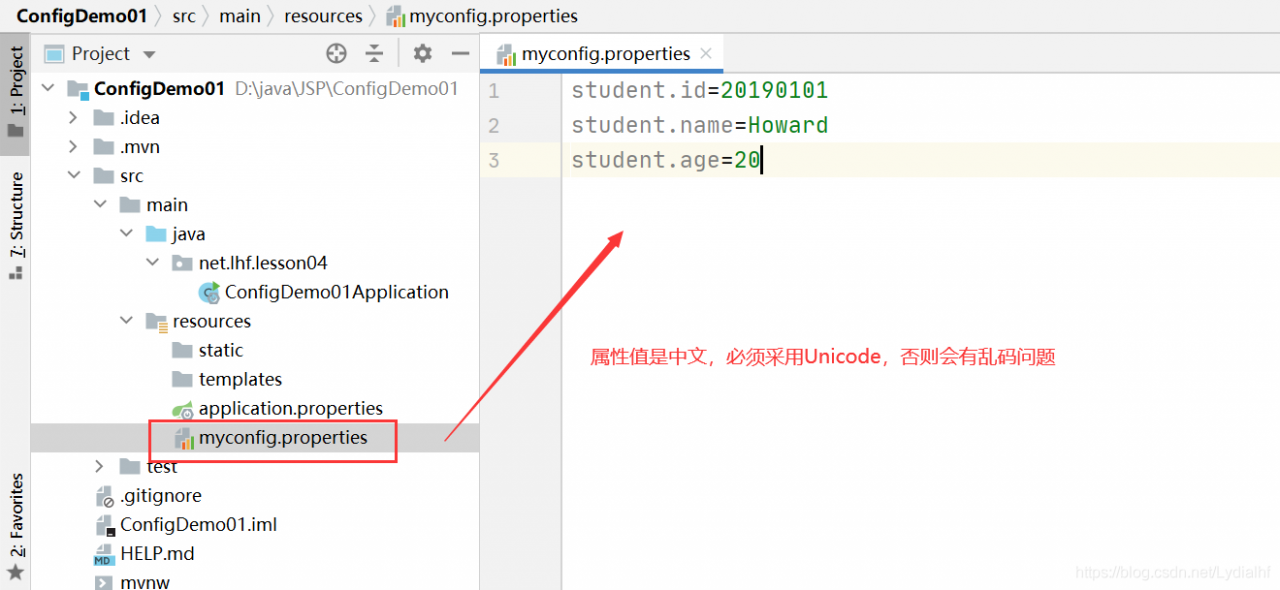
3、创建自定义配置类
在net.lhf.lesson04.config包里创建配置类StudentConfig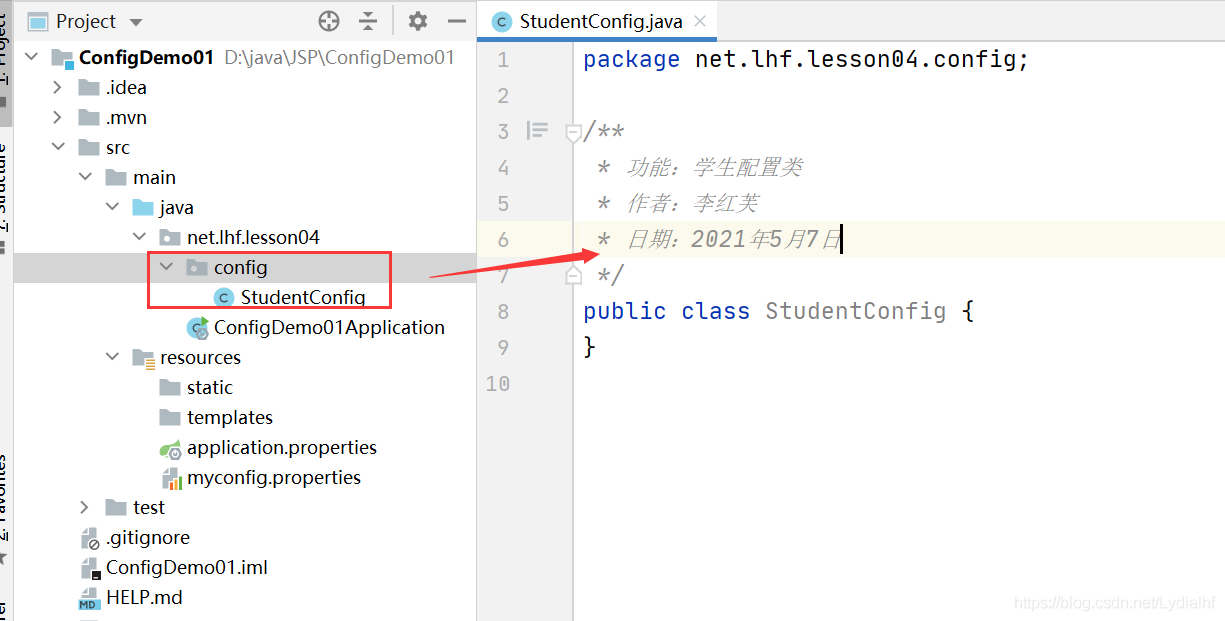

package net.lhf.lesson04.config;

/**
 * 功能:学生配置类
 * 作者:李红芙
 * 日期:2021年5月7日
 */

import org.springframework.boot.context.properties.ConfigurationProperties;
import org.springframework.context.annotation.PropertySource;
import org.springframework.stereotype.Component;

@Component //让Spring容器来管理Bean
@PropertySource("classpath:myconfig.properties") //加载自定义配置文件
@ConfigurationProperties(prefix = "student") // 此注解必须要Component注解
public class StudentConfig {
    private String id;
    private String name;
    private int age;

    public String getId() {
        return id;
    }

    public void setId(String id) {
        this.id = id;
    }

    public String getName() {
        return name;
    }

    public void setName(String name) {
        this.name = name;
    }

    public int getAge() {
        return age;
    }

    public void setAge(int age) {
        this.age = age;
    }

    @Override
    public String toString() {
        return "StudentConfig{" +
                "id='" + id + '\'' +
                ", name='" + name + '\'' +
                ", age=" + age +
                '}';
    }
}
4、编写测试方法
点开测试类ConfigDemo01ApplicationTests
编写测试方法
注入学生配置实体
输出学生配置实体信息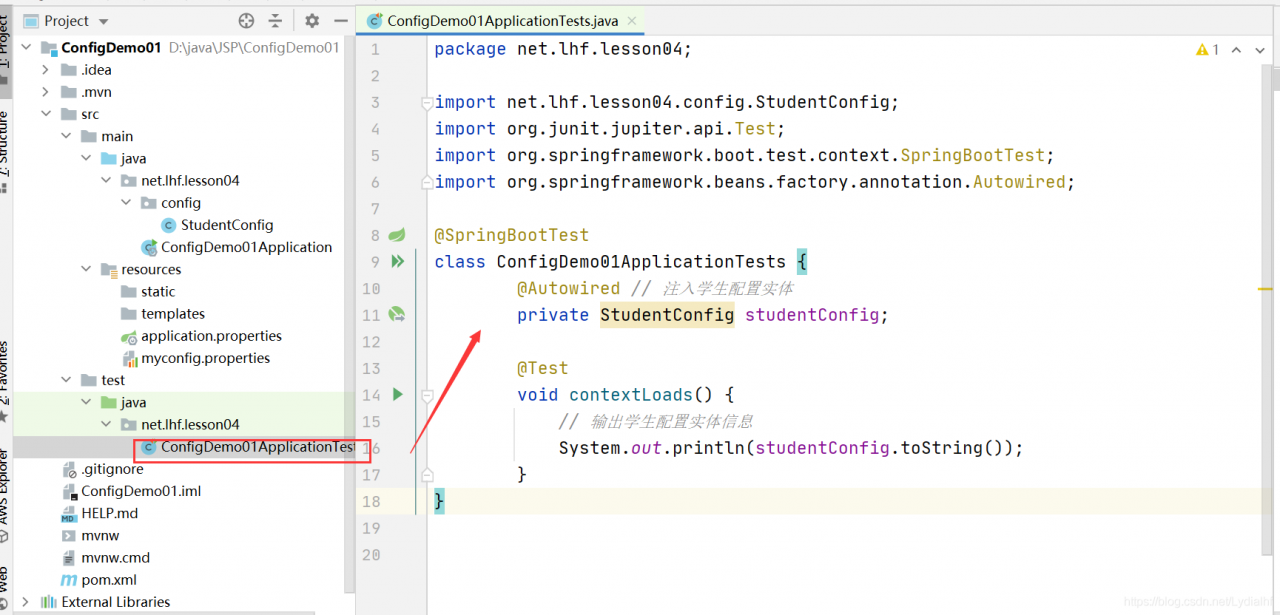
package net.lhf.lesson04;

import net.lhf.lesson04.config.StudentConfig;
import org.junit.jupiter.api.Test;
import org.springframework.boot.test.context.SpringBootTest;
import org.springframework.beans.factory.annotation.Autowired;

@SpringBootTest
class ConfigDemo01ApplicationTests {
        @Autowired // 注入学生配置实体
        private StudentConfig studentConfig;

        @Test
        void contextLoads() {
            // 输出学生配置实体信息
            System.out.println(studentConfig.toString());
        }
}
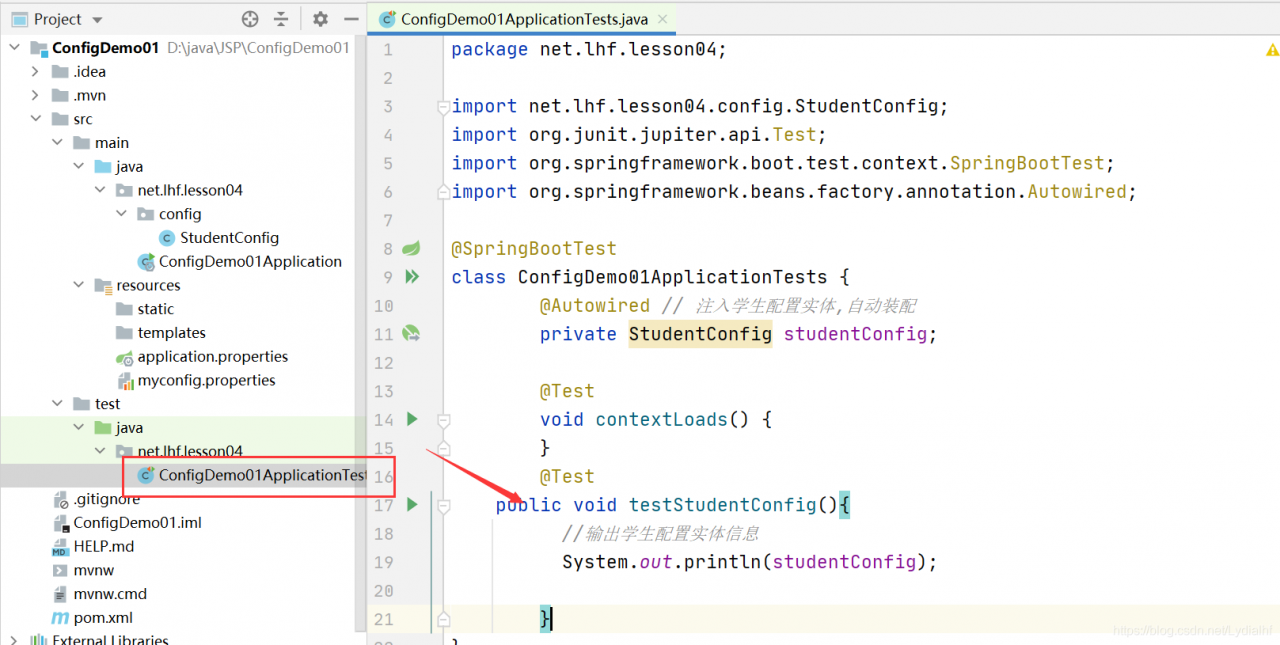
package net.lhf.lesson04;

import net.lhf.lesson04.config.StudentConfig;
import org.junit.jupiter.api.Test;
import org.springframework.boot.test.context.SpringBootTest;
import org.springframework.beans.factory.annotation.Autowired;

@SpringBootTest
class ConfigDemo01ApplicationTests {
        @Autowired // 注入学生配置实体,自动装配
        private StudentConfig studentConfig;

        @Test
        void contextLoads() {
        }
        @Test
    public void testStudentConfig(){
          //输出学生配置实体信息
          System.out.println(studentConfig);

        }
}
4、运行测试方法
5、修改测试方法代码
说明:注入的StudentConfig名称不必是studentConfig,在Spring Boot 2.3.2里,StudentConfig的注解@Component默认是单例的,因此不会因为注入名称是studentConfig1而产生的两个StudentConfig实例。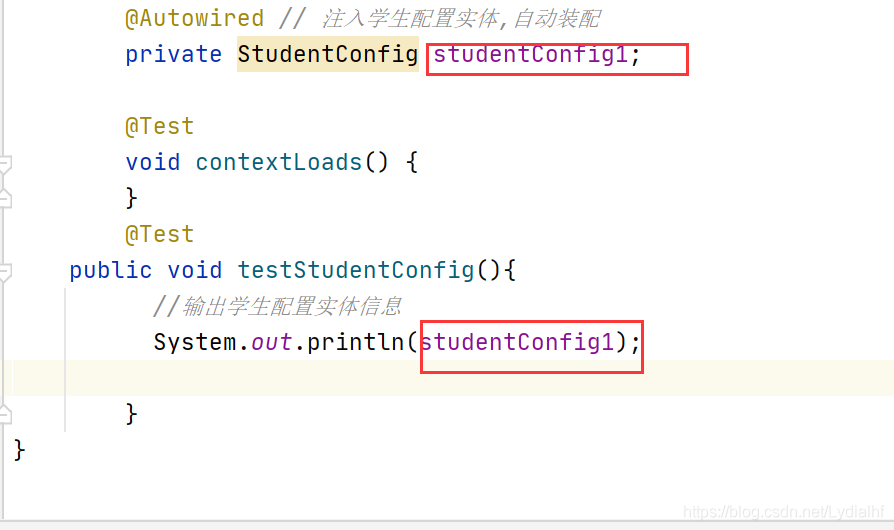
6、再次运行测试方法
使用@ImportResource加载XML配置文件
1、创建创建Spring Boot Web项目ConfigDemo02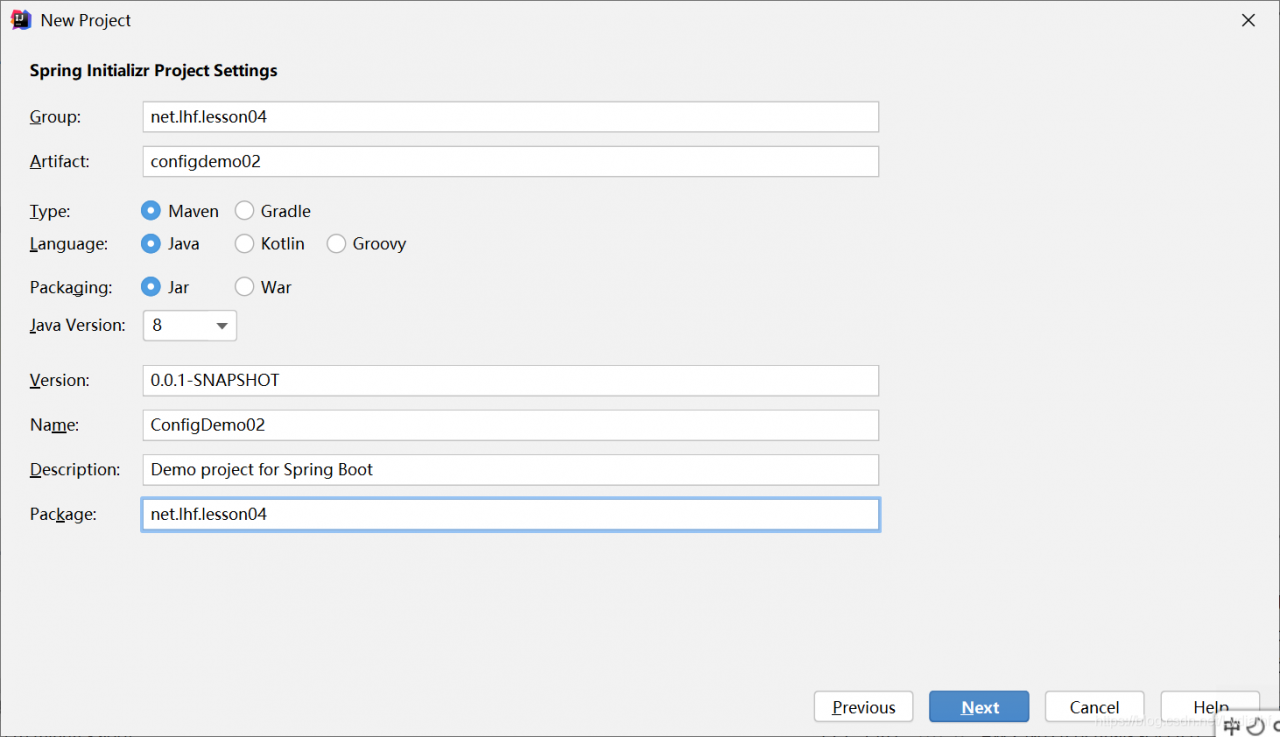
创建Bean - 自定义服务类
在net.lhf.lesson04包里创建CustomService类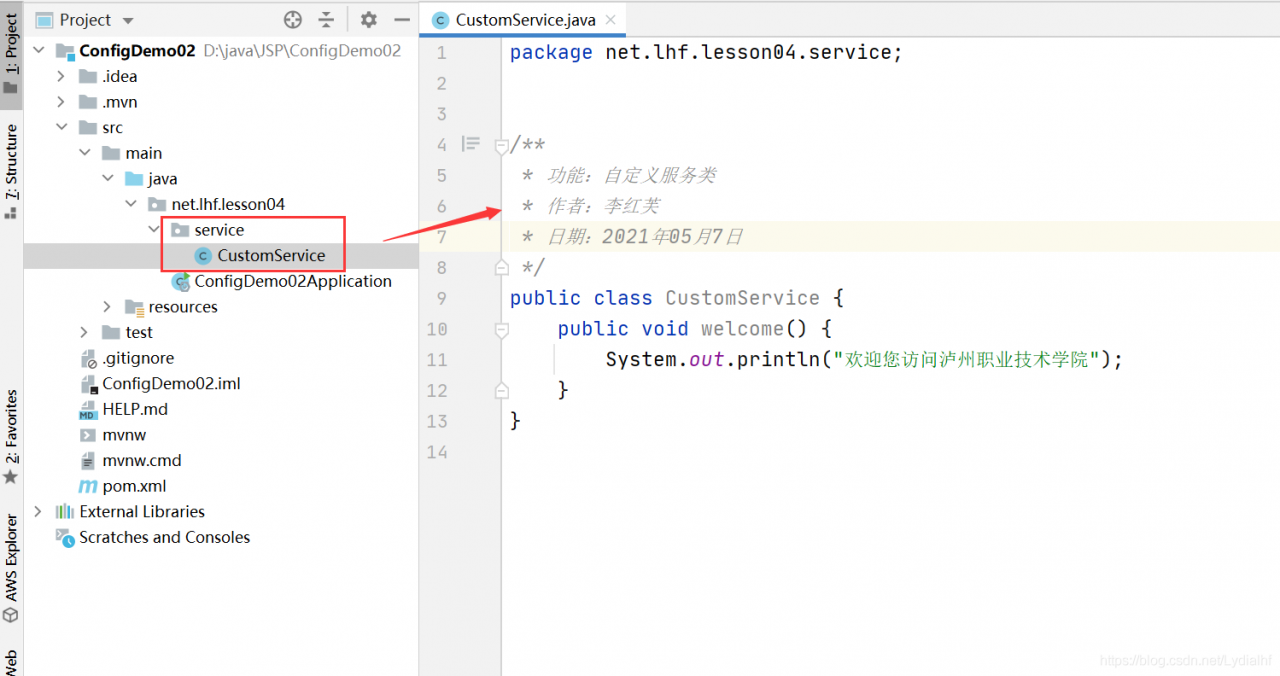
package net.lhf.lesson04.service;


/**
 * 功能:自定义服务类
 * 作者:李红芙
 * 日期:2021年05月7日
 */
public class CustomService {
    public void welcome() {
        System.out.println("欢迎您访问泸州职业技术学院");
    }
}
创建自定义JavaBean配置文件
在resources目录里创建配置文件beans.xml
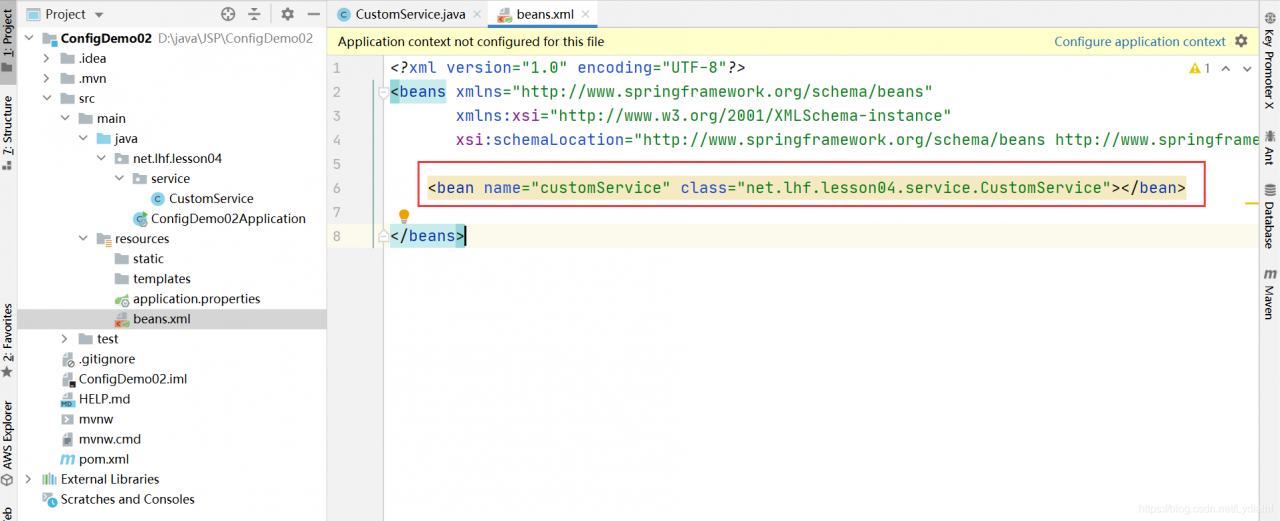
<?xml version="1.0" encoding="UTF-8"?>
<beans xmlns="http://www.springframework.org/schema/beans"
       xmlns:xsi="http://www.w3.org/2001/XMLSchema-instance"
       xsi:schemaLocation="http://www.springframework.org/schema/beans http://www.springframework.org/schema/beans/spring-beans.xsd">

    <bean name="customService" class="net.lhf.lesson04.service.CustomService"></bean>

</beans>
在启动类上添加注解,加载自定义JavaBean配置文件
在启动类上添加注解@ImportResource(“classpath:beans.xml”)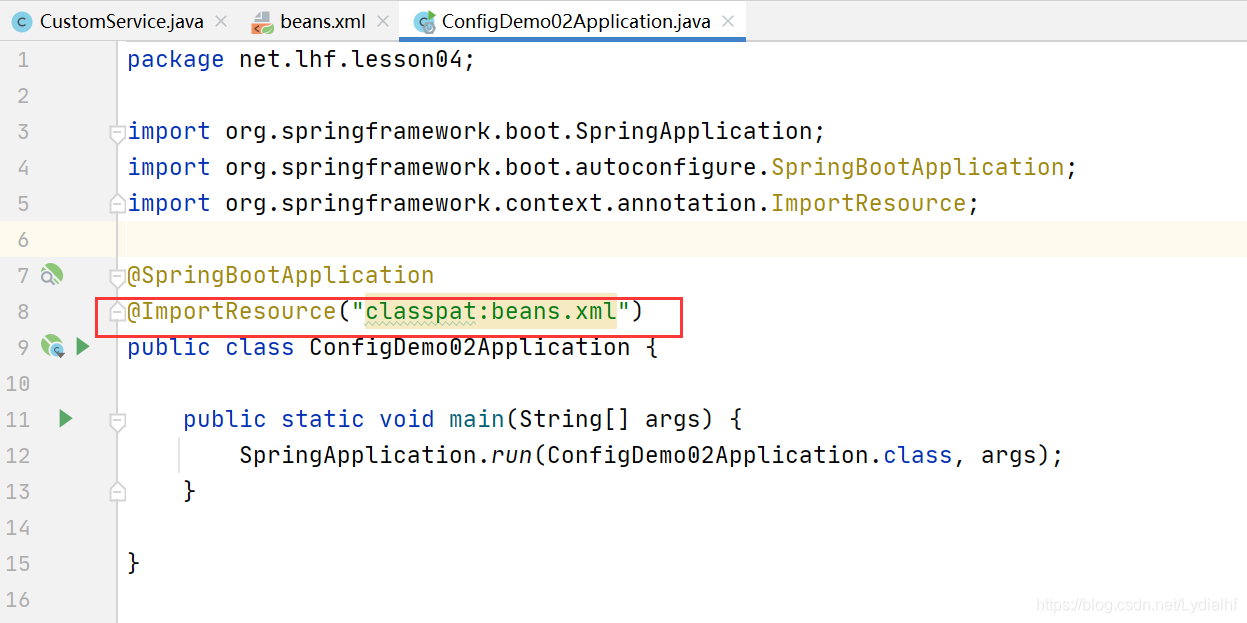
打开测试类,编写测试方法
点开测试类ConfigDemo02ApplicationTests
注入在JavaBean配置文件里定义的Bean,然后调用其方法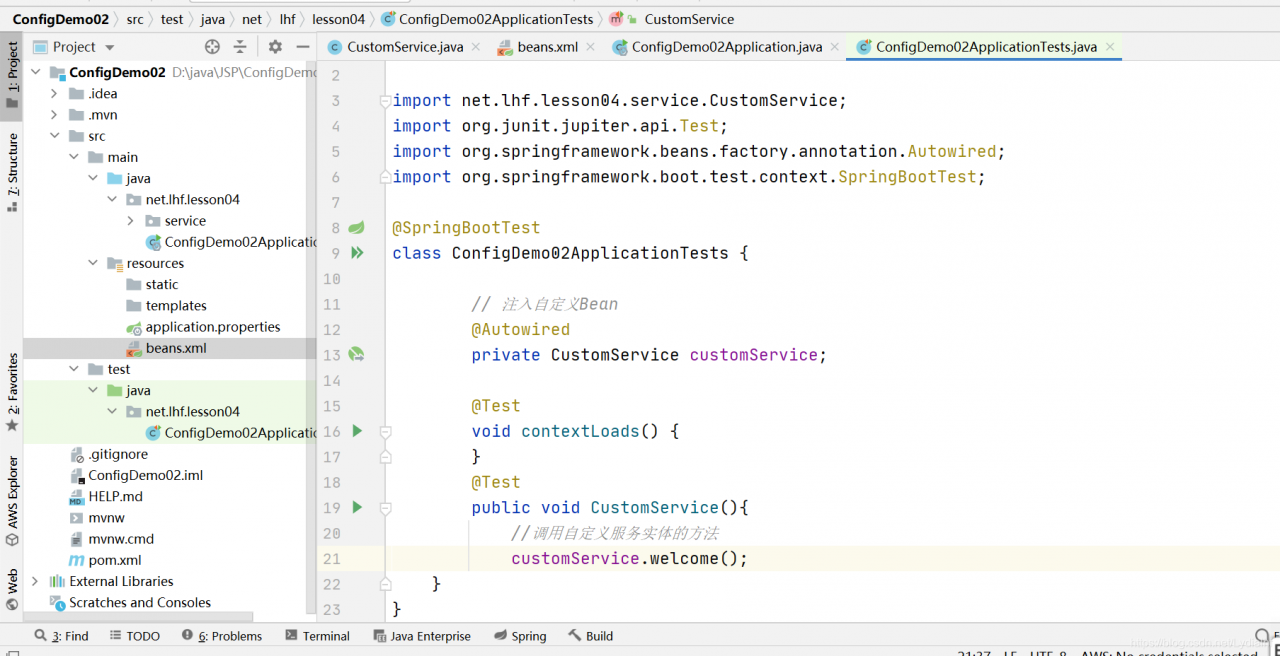
package net.lhf.lesson04;

import net.lhf.lesson04.service.CustomService;
import org.junit.jupiter.api.Test;
import org.springframework.beans.factory.annotation.Autowired;
import org.springframework.boot.test.context.SpringBootTest;

@SpringBootTest
class ConfigDemo02ApplicationTests {

        // 注入自定义Bean
        @Autowired
        private CustomService customService;

        @Test
        void contextLoads() {
        }
        @Test
        public void CustomService(){
            //调用自定义服务实体的方法
            customService.welcome();
    }
}
运行测试方法contextLoads(),查看结果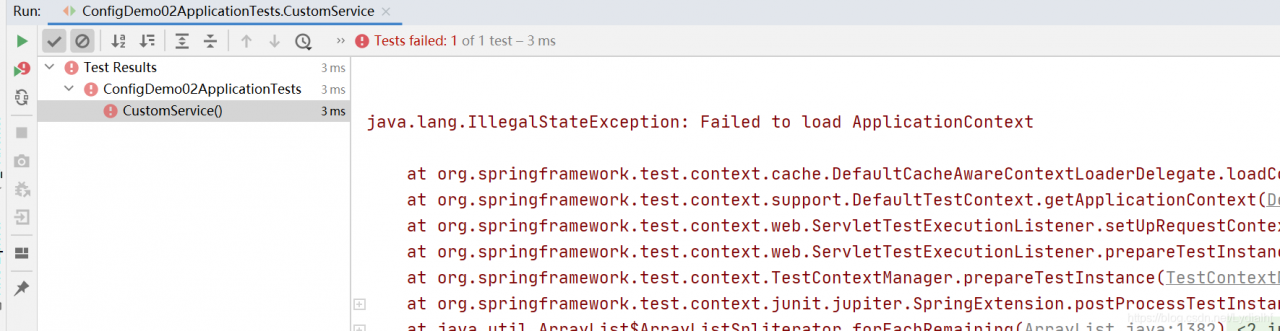
出现错误,删除@server注解,出现冲突
运行测试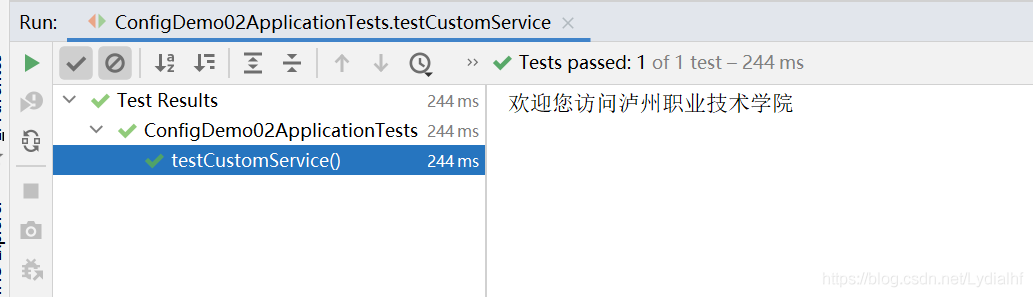
使用@Configuration编写自定义配置类
使用@Configuration编写自定义配置类,这是Spring Bboot的推荐方式
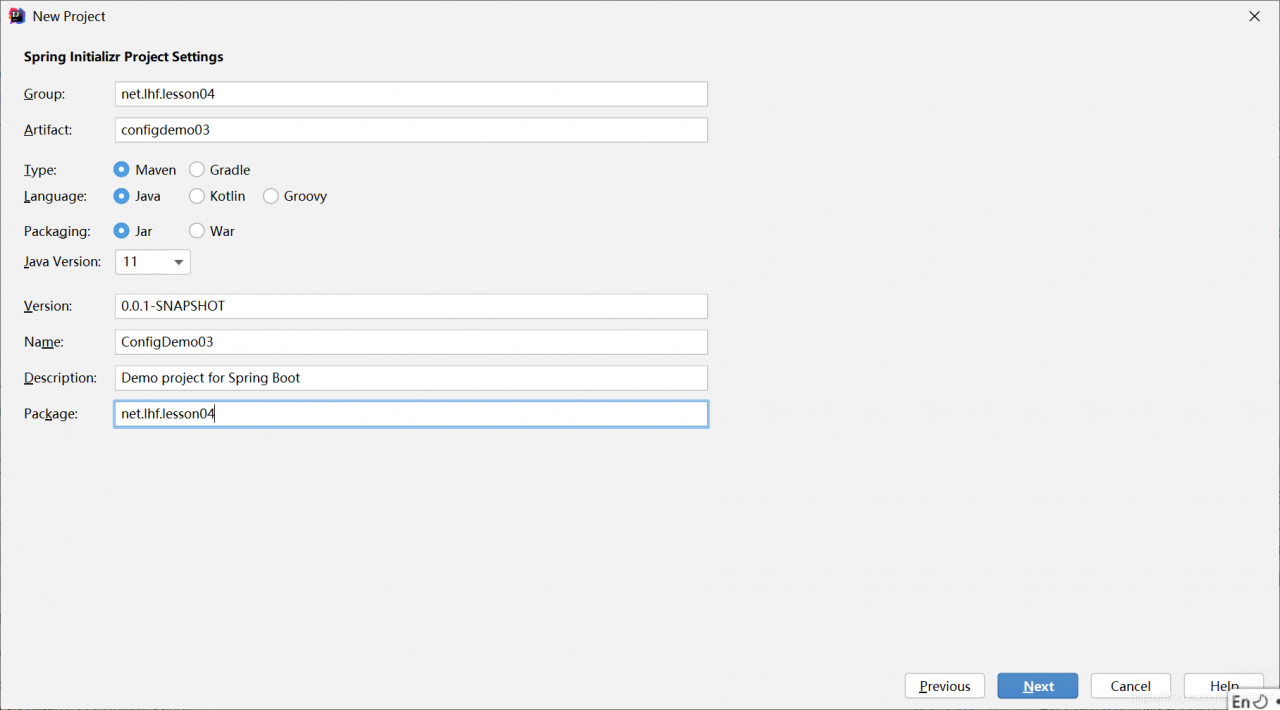
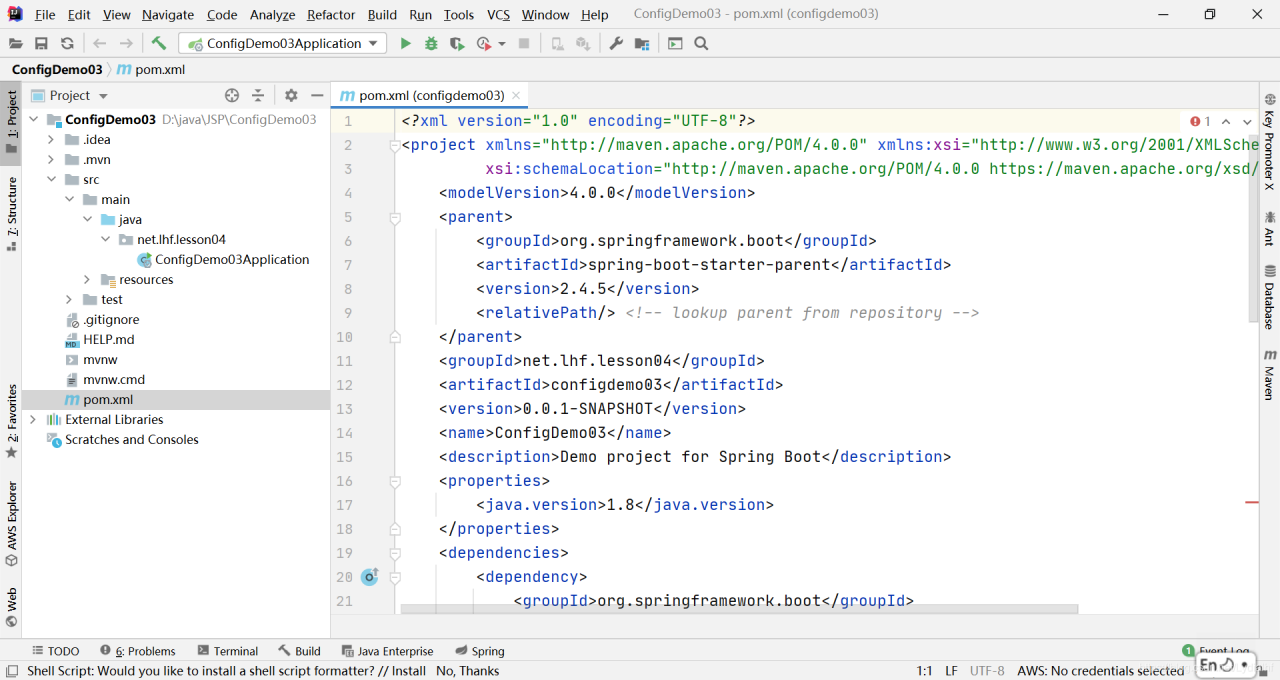
1、创建Spring Boot Web项目ConfigDemo03
设置项目元数据

创建Bean - 自定义服务类
在net.lhf.lesson04.service包里创建CustomService类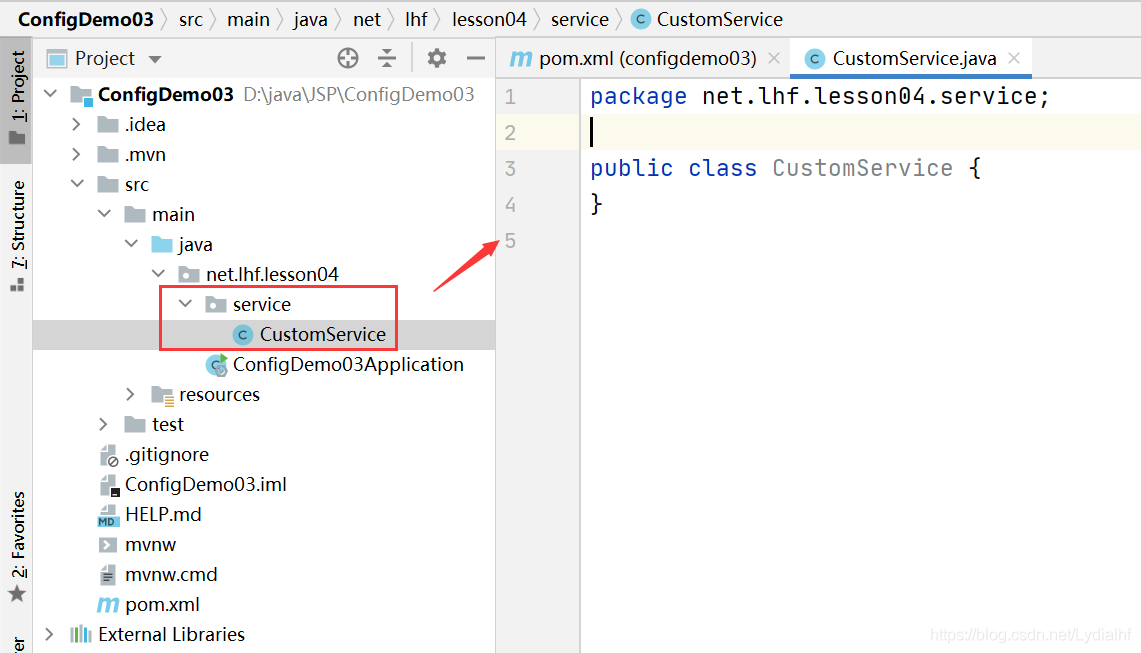
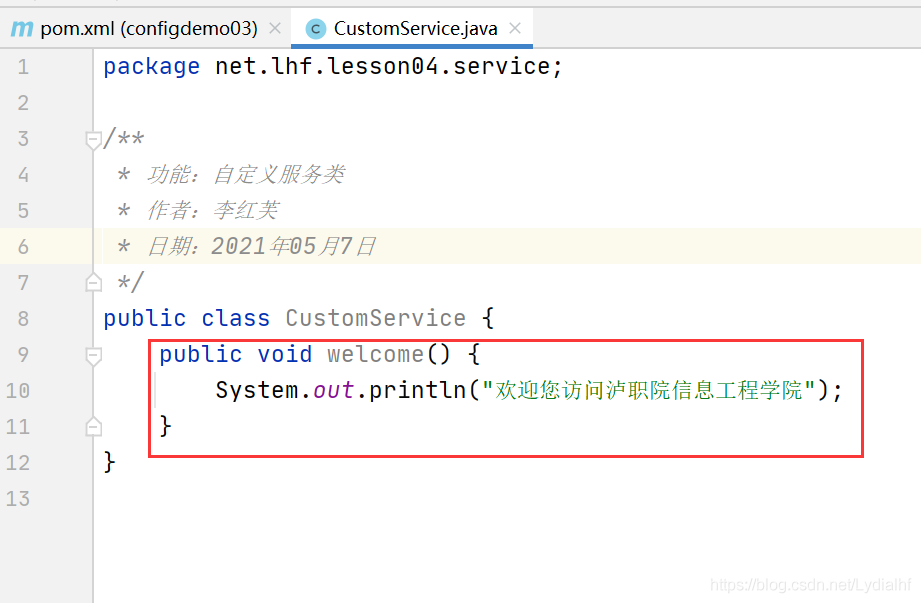
package net.lhf.lesson04.service;

/**
 * 功能:自定义服务类
 * 作者:李红芙
 * 日期:2021年05月7日
 */
public class CustomService {
    public void welcome() {
        System.out.println("欢迎您访问泸职院信息工程学院");
    }
}
创建自定义配置类CustomConfig
在net.lhf.lesson04.config包里创建自定义配置类CustomConfig
添加注解方法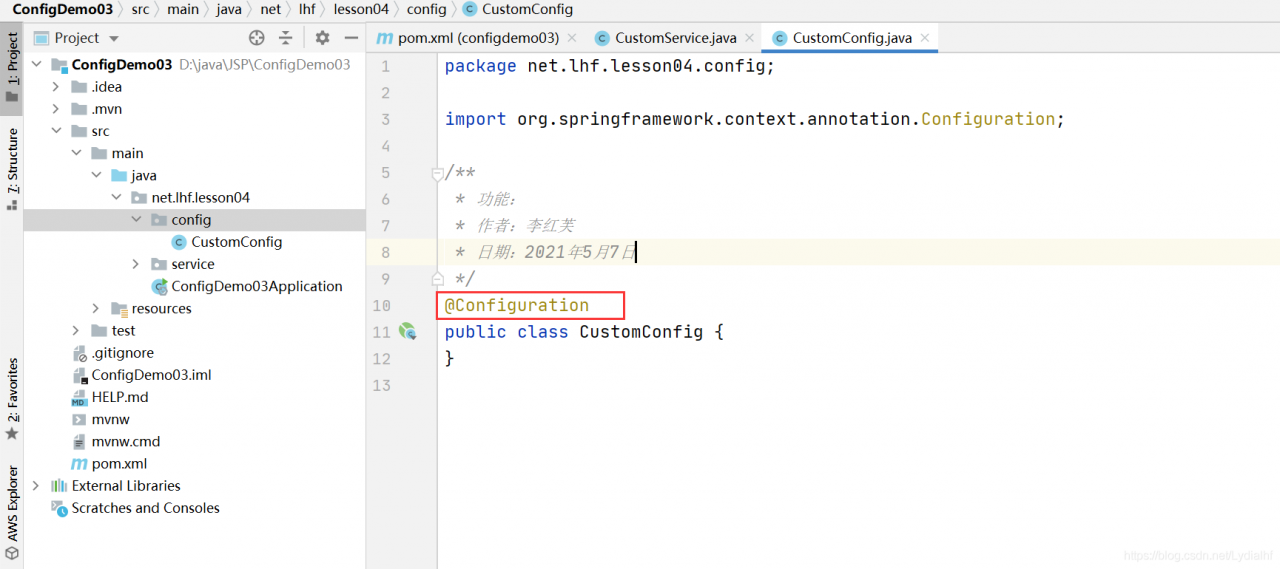
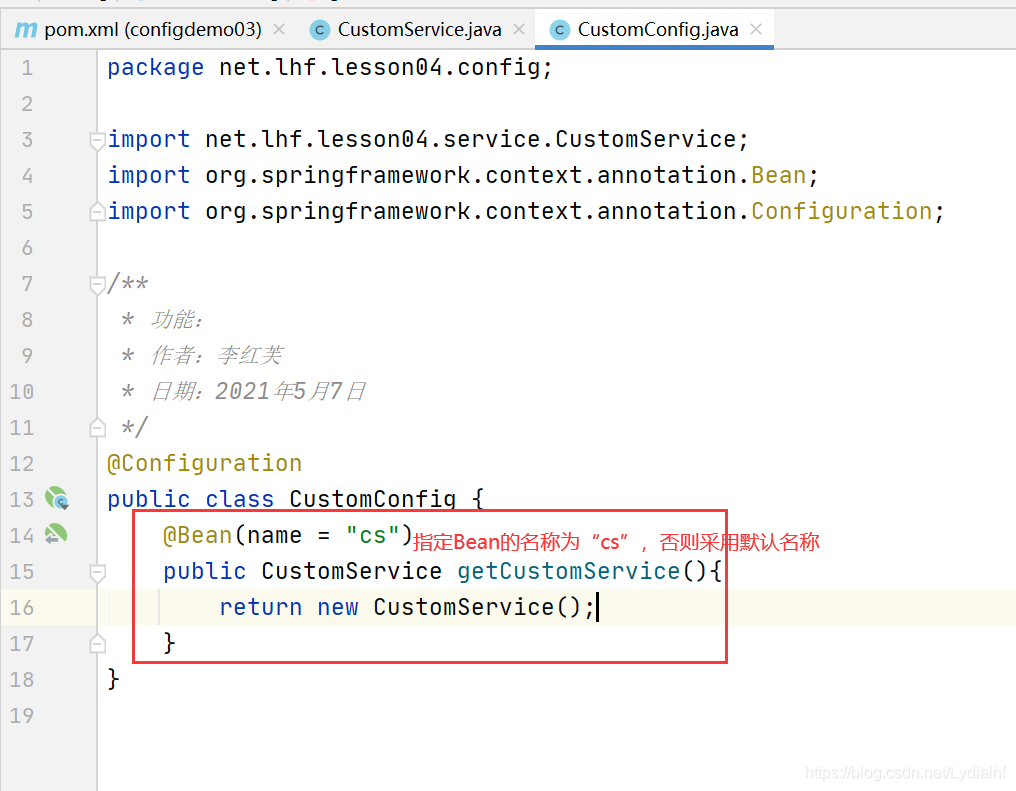
package net.lhf.lesson04.config;

import net.lhf.lesson04.service.CustomService;
import org.springframework.context.annotation.Bean;
import org.springframework.context.annotation.Configuration;

/**
 * 功能:自定义配置类
 * 作者:李红芙
 * 日期:2021年5月7日
 */
@Configuration
public class CustomConfig {
    @Bean(name = "cs")//指定Bean的名称为”cs“,否则采用默认名称
    public CustomService getCustomService(){
        return new CustomService();
    }
}
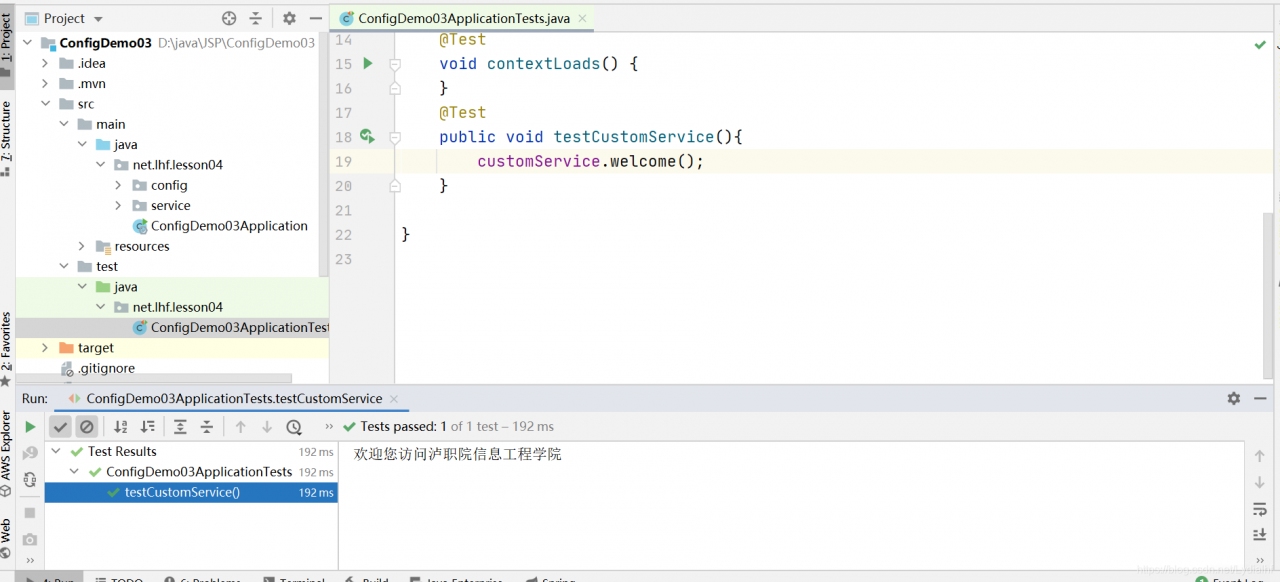
打开测试类,编写测试方法
点开测试类ConfigDemo03ApplicationTests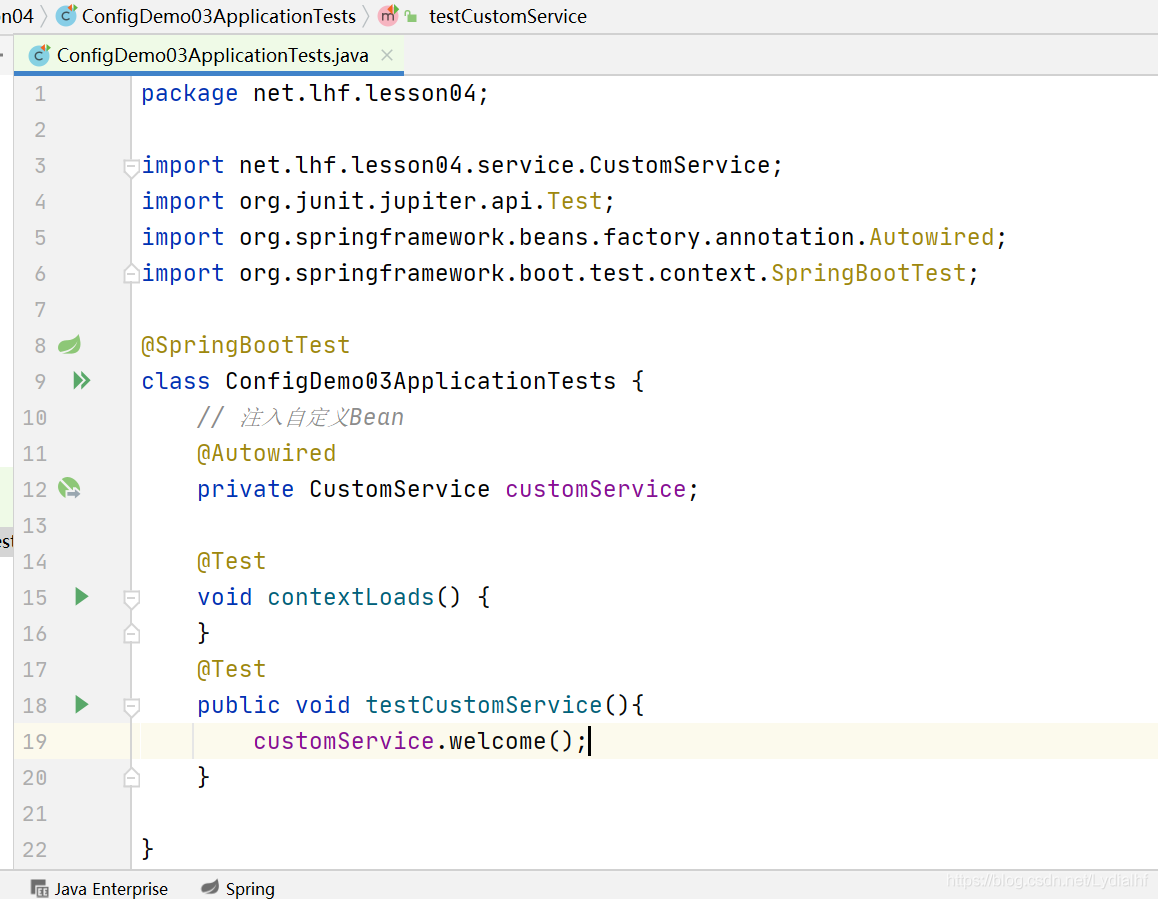
运行测试方法contextLoads(),查看结果