Linux环境搭建speedtest服务器爬坑过程
服务器要求
- 操作系统:CentOS Linux release 7.6s
- 需开放端口:8080、5060(OoklaServer),443(Https)
搭建过程
一、安装Httpd
yum install httpd httpd-devel
服务启动
service httpd start
查看http的服务端口是否开启
netstat –tunlp | grep 80
二、安装PHP环境
由于linux的yum源不存在php7.x,所以我们要更改yum源:
rpm -Uvh https://dl.fedoraproject.org/pub/epel/epel-release-latest-7.noarch.rpm
rpm -Uvh https://mirror.webtatic.com/yum/el7/webtatic-release.rpm
yum 安装php72w和各种拓展,选自己需要的即可:
yum -y install php72w php72w-cli php72w-common php72w-devel php72w-embedded php72w-fpm php72w-gd php72w-mbstring php72w-opcache php72w-pdo php72w-xml
启动php
service php-fpm restart
三、上传Speedtest软件包
在官网Speedtest.net 下载speedtest软件包,将speedtest安装包上传到服务器
下载软件包:http_legacy_fallback.zip、OoklaServer.tgz
解压http_legacy_fallback.zip文件到/var/www/html
cp http_legacy_fallback.zip /var/www/html
cd /var/www/html
unzip http_legacy_fallback.zip
将服务器防火墙对80和8080、443端口放开
firewall-cmd --zone=public --add-port=80/tcp
firewall-cmd --zone=public --add-port=8080/tcp
firewall-cmd --zone=public --add-port=443/tcp
尝试访问公网ip下的服务器文件
http:// “你的公网ip”/crossdomain.xml(将*内的内容替换成你的公网ip)
如果出现下图说明配置成功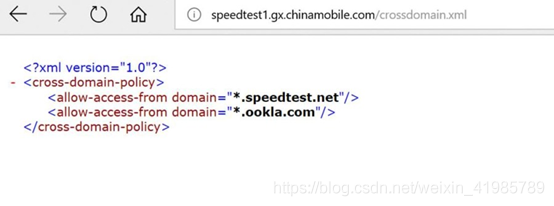
申请域名、生成SSL证书、实现https访问
1、安装mod_ssl和openssl
yum install mod_ssl openssl
2、通过域名、生成SSL证书
访问Cerbot用于生成免费SSL证书 Certbot网址
选择Apache和系统(如果与我不同,请自行选择)
选择后下方会生成需要执行的代码
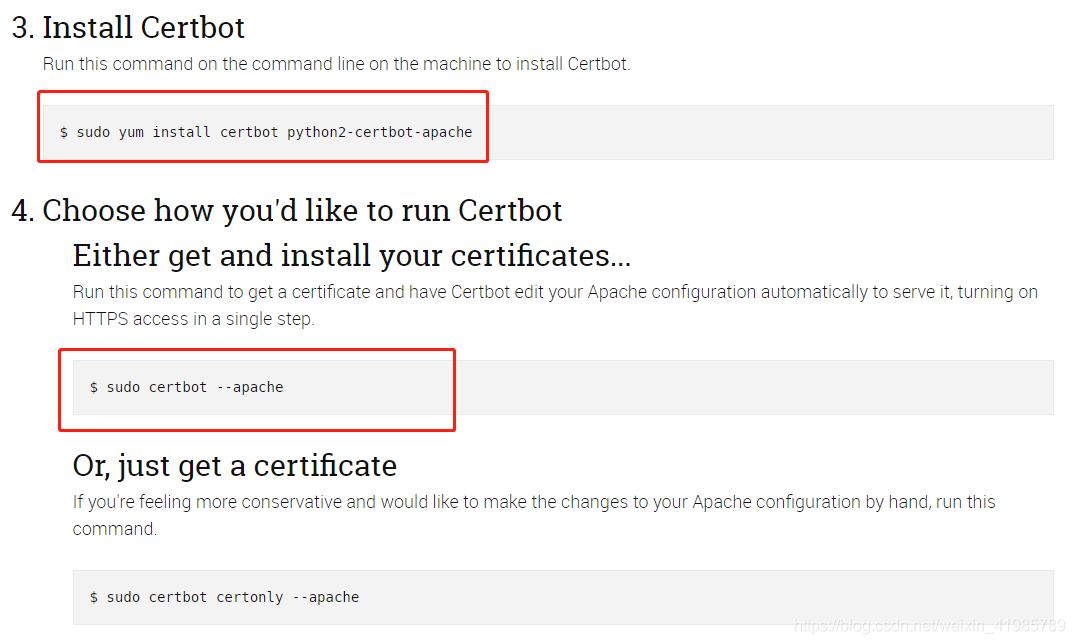
第一步、安装Cerbot软件
sudo yum install certbot python2-certbot-apache
第二部、执行Cerbot
sudo certbot --apache
将会出现下面的选项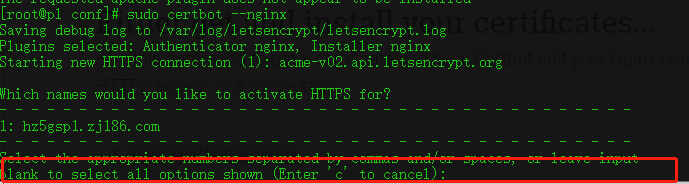
请在这输入你的域名
输入域名后就能正常执行完整
接着就会在/etc/letsencrypt/live/路径下生成对应域名的文件夹,cd进去,可以看到四个文件
将文件写到Apache的配置文件中
我的ssl配置文件的位置在/etc/httpd/conf的httpd-le-ssl.conf
vim打开
vim /etc/httpd/conf/httpd-le-ssl.conf
添加证书路径
<IfModule mod_ssl.c>
<VirtualHost *:443>
    ServerAdmin test@test.example.com
    ServerName  你的域名
    ServerAlias test
    DocumentRoot /var/www/html
SSLCertificateFile 证书路径/cert.pem
SSLCertificateKeyFile 证书路径/privkey.pem
Include /etc/letsencrypt/options-ssl-apache.conf
SSLCertificateChainFile 证书路径/chain.pem
</VirtualHost>
</IfModule>
重启Apaches
尝试访问公网ip下的服务器文件
https:// “你的域名”/crossdomain.xml(将*内的内容替换成你的域名)
如果与上面那次一样那就说明成功了
OoklaServer程序安装
参考官网安装教程,这里采用手动安装
- 下载OoklaServer.Tar,解压后选择对应系统版本
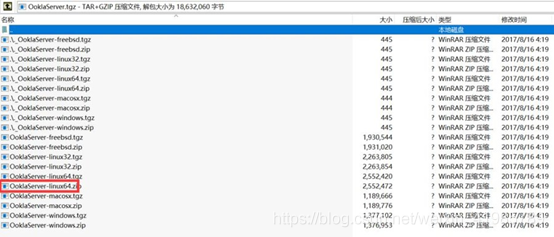
- 修正执行权限
chmod a+x OoklaServer
- 将默认配置
OoklaServer.properties.default重命名为OoklaServer.properties - 启动
./OoklaServer --daemon - 验证
- 登录Ookla服务器上线前验证网站
HOST:你的域名:8080
LEGACY HTTP URL:https://你的域名/upload.php(这里upload.php可以根据实际文件修改后缀名)
验证必须Https为passed 不然上线无用
版权声明:本文为weixin_41985789原创文章,遵循CC 4.0 BY-SA版权协议,转载请附上原文出处链接和本声明。