一、MQ队列的优缺点
1.1 MQ队列的缺点
1)系统更复杂,多了一个MQ组件
2)消息传递路径更长,延时会增加
3)消息可靠性和重复性互为矛盾,消息不丢不重难以同时保证
4)上游无法知道下游的执行结果,这一点是很致命的
1.2 MQ队列的优点
1)不需要预留buffer,上游任务执行完,下游任务总会在第一时间被执行
2)依赖多个任务,被多个任务依赖都很好处理,只需要订阅相关消息即可
3)有任务执行时间变化,下游任务都不需要调整执行时间
二、简单使用
2.1 AMQP简介
AMQP,即Advanced Message Queuing Protocol,一个提供统一消息服务的应用层标准高级消息队列协议,是应用层协议的一个开放标准,为面向消息的中间件设计。基于此协议的客户端与消息中间件可传递消息,并不受客户端/中间件不同产品,不同的开发语言等条件的限制。Erlang中的实现有RabbitMQ等。
2.2 添加依赖
<!-- https://mvnrepository.com/artifact/org.springframework.boot/spring-boot-starter-amqp -->
<dependency>
    <groupId>org.springframework.boot</groupId>
    <artifactId>spring-boot-starter-amqp</artifactId>
    <version>2.1.7.RELEASE</version>
</dependency>
2.3 添加配置
#RabbitMQ配置
spring.rabbitmq.host=127.0.0.1
spring.rabbitmq.port=5672
spring.rabbitmq.username=guest
spring.rabbitmq.password=guest
spring.rabbitmq.virtual-host=/
#消费者数量
spring.rabbitmq.listener.simple.concurrency=10
#消费者最大数量
spring.rabbitmq.listener.simple.max-concurrency=10
#消费,每次从队列中取多少个,取多了,可能处理不过来
spring.rabbitmq.listener.simple.prefetch=1
spring.rabbitmq.listener.auto-startup=true
#消费失败的数据重新压入队列
spring.rabbitmq.listener.simple.default-requeue-rejected=true
#发送,队列满的时候,发送不进去,启动重置
spring.rabbitmq.template.retry.enabled=true
#一秒钟之后重试
spring.rabbitmq.template.retry.initial-interval=1000
#
spring.rabbitmq.template.retry.max-attempts=3
#最大间隔 10s
spring.rabbitmq.template.retry.max-interval=10000
spring.rabbitmq.template.retry.multiplier=1.0
2.4 发送者
- 发送者需要指定所使用的队列的名称
@Service
public class MQSend {
    public static final Logger log = LoggerFactory.getLogger(MQSend.class);
    @Autowired
    AmqpTemplate amqpTemplate;
    public void send(String str){
        amqpTemplate.convertAndSend(MQConfig.MQ_Queue,str);
        log.info("发送的消息是" + str);
    }
}
2.5 接收者
@Service
public class MQReceive {
    public static Logger log  = LoggerFactory.getLogger(MQReceive.class);
    @Autowired
    AmqpTemplate amqpTemplate;
    @RabbitListener(queues = MQConfig.MQ_Queue)
    public void receive(String str){
        log.info("接收到的消息" + str);
    }
}
测试:
@Controller
public class test {
    @Autowired
    MQSend mqSend;
    @RequestMapping("/hello")
    public String hello(){
        mqSend.send("你好呀");
        return "hello";
    }
}
结果:
2019-08-27 00:02:32.326  INFO 15288 --- [nio-8080-exec-1] com.mq.demo.MQSend                       : 发送的消息是你好呀
2019-08-27 00:02:32.337  INFO 15288 --- [ntContainer#0-2] com.mq.demo.MQReceive                    : 接收到的消息你好呀
2.6 MQ配置类
@Configuration
public class MQConfig {
	public static final String QUEUE="queue";
	public static final String MIAOSHA_QUEUE="miaosha.queue";

	public static final String TOPIC_QUEUE1="topic.queue1";
	public static final String TOPIC_QUEUE2="topic.queue2";
	public static final String HEADER_QUEUE="header.queue";
	public static final String TOPIC_EXCHANGE="topic.exchange";
	public static final String FANOUT_EXCHANGE="fanout.exchange";
	public static final String HEADER_EXCHANGE="header.exchange";
	public static final String ROUTINIG_KEY1="topic.key1";
	public static final String ROUTINIG_KEY2="topic.#";
	/**
	 * Direct模式,交换机Exchange:
	 * 发送者,将消息往外面发送的时候,并不是直接投递到队列里面去,而是先发送到交换机上面,然后由交换机发送数据到queue上面去,
	 * 做了依次路由。
	 */
	@Bean
	public Queue queue() {
		//名称,是否持久化
		return new Queue(QUEUE,true);5
	}

	@Bean
	public Queue miaoshaqueue() {
		//名称,是否持久化
		return new Queue(MIAOSHA_QUEUE,true);
	}
三、RabbitMQ的四种模式
3.1 direct交换机模式

发送者把消息发送到交换机上,再把消息发送到队列中
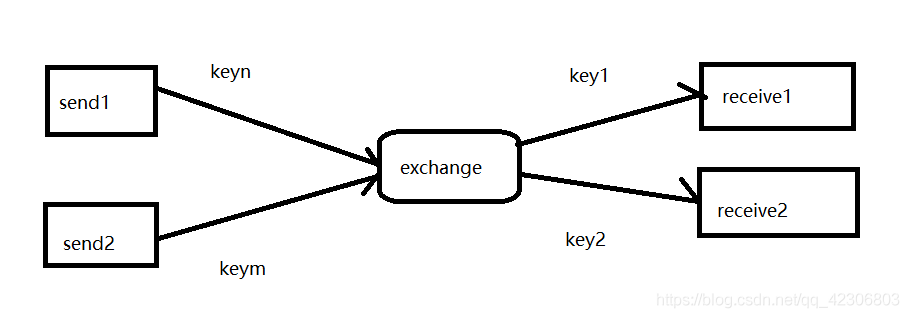
3.2 Topic模式
3.2.1 config类
@Configuration
public class MQConfig{
    public static final String MQ_Queue = "queue";
    public static final String Topic_Queue1 = "topic_queue1";
    public static final String Topic_Queue2 = "topic_queue2";
    public static final String Topic_Exchange = "topicExchange";
    public static final String Rout_Key1 = "topic.key1";
    public static final String Rout_Key2 = "topic.#";
    //#代表0个或者多个单词
    @Bean
    public Queue getQueue(){

         return new Queue(MQ_Queue, true);
    }
    @Bean
    public Queue getQueue1(){

        return new Queue(Topic_Queue1, true);
    }
    @Bean
    public Queue getQueue2(){

        return new Queue(Topic_Queue2, true);
    }
    @Bean
    public TopicExchange topicExchange(){
        return new TopicExchange(Topic_Exchange);
    }
    @Bean
    public Binding topicBinding1(){
        return BindingBuilder.bind(getQueue1()).to(topicExchange()).with(Rout_Key1);
    }
    @Bean
    public Binding topicBinding2(){
        return BindingBuilder.bind(getQueue2()).to(topicExchange()).with(Rout_Key2);
    }
}
需要自定义n个队列和n个key,和一个交换机,并把不同的队列与对应的key通过交换机进行绑定
3.2.2 发送者
@Service
public class MQSend {
    public static final Logger log = LoggerFactory.getLogger(MQSend.class);
    @Autowired
    AmqpTemplate amqpTemplate;
    public void sendTopic(String msg){
        log.info("发送的消息是" + msg);
        amqpTemplate.convertAndSend(MQConfig.Topic_Exchange, MQConfig.Rout_Key1,msg+"1");
        amqpTemplate.convertAndSend(MQConfig.Topic_Exchange, MQConfig.Rout_Key2,msg+"2");
    }
}
不同的队列发送的每个消息需要指定一个key值。
3.2.3 接受者
@Service
public class MQReceive {
    public static Logger log  = LoggerFactory.getLogger(MQReceive.class);
    @Autowired
    AmqpTemplate amqpTemplate;
    @RabbitListener(queues = MQConfig.Topic_Queue1)
    public void receive1(String str){
        log.info("接收到Queue1的消息" + str);
    }
    @RabbitListener(queues = MQConfig.Topic_Queue2)
    public void receive2(String msg){
        log.info("接收到Queue2的消息" + msg);
    }
}
每个接收的方法都指定监听一个队列的消息。他是系统自动调用的。每个队列绑定一个key,他通过识别消息的key值与自己绑定的key值进行对比来确定是否接受该消息。
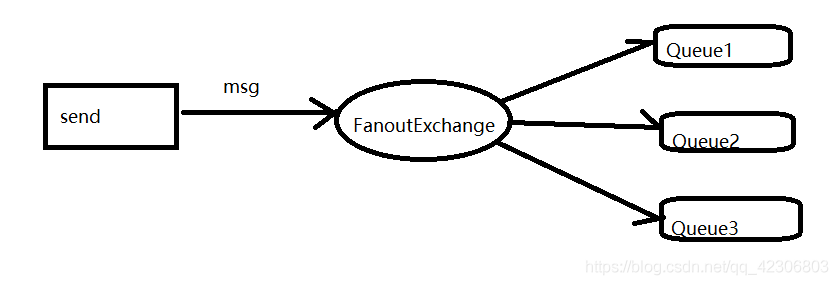
3.3 Fanout模式(广播模式)
发送消息到FanoutExchange交换机上,然后就交换机将消息发给所有与之绑定的队列。
3.3.1 config:
@Configuration
public class MQConfig{
    public static final String MQ_Queue = "queue";
    public static final String Fanout_Queue1 = "Fanout_queue1";
    public static final String Fanout_Queue2 = "Fanout_queue2";
    public static final String Fanout_Exchange = "FanoutExchange";
    //#代表0个或者多个单词
    @Bean
    public Queue getQueue(){

        return new Queue(MQ_Queue, true);
    }
    @Bean
    public Queue getQueue1(){

        return new Queue(Fanout_Queue1, true);
    }
    @Bean
    public Queue getQueue2(){

        return new Queue(Fanout_Queue2, true);
    }
    @Bean
    public FanoutExchange FanoutExchange(){
        return new FanoutExchange(Fanout_Exchange);
    }
    @Bean
    public Binding topicBinding1(){
        return BindingBuilder.bind(getQueue1()).to(FanoutExchange());
    }
    @Bean
    public Binding topicBinding2(){
        return BindingBuilder.bind(getQueue2()).to(FanoutExchange());
    }
}
3.3.2 发送者
@Service
public class MQSend {
    public static final Logger log = LoggerFactory.getLogger(MQSend.class);
    @Autowired
    AmqpTemplate amqpTemplate;
    public void sendTopic(String msg){
        log.info("发送的消息是" + msg);
        amqpTemplate.convertAndSend(MQConfig.Fanout_Exchange,"", msg);
    }
}
3.3.3 接收者
@Service
public class MQReceive {
    public static Logger log  = LoggerFactory.getLogger(MQReceive.class);
    @Autowired
    AmqpTemplate amqpTemplate;
    @RabbitListener(queues = MQConfig.Fanout_Queue1)
    public void receive1(String str){
        log.info("接收到Queue1的消息" + str);
    }
    @RabbitListener(queues = MQConfig.Fanout_Queue2)
    public void receive2(String msg){
        log.info("接收到Queue2的消息" + msg);
    }
}
3.3.4 结果
结果:
2019-08-27 12:17:50.381  INFO 10804 --- [nio-8080-exec-1] com.mq.demo.MQSend                       : 发送的消息是你好呀
2019-08-27 12:17:50.480  INFO 10804 --- [tContainer#0-10] com.mq.demo.MQReceive                    : 接收到Queue2的消息你好呀
2019-08-27 12:17:50.480  INFO 10804 --- [ntContainer#1-1] com.mq.demo.MQReceive                    : 接收到Queue1的消息你好呀
3.4 Header模式
需要满足所有的key才能将消息发送到消息队列中,这些key是以键值对的形式存在map中。
3.4.1 config
@Configuration
public class MQConfig{
    public static final String Header_Queue = "Header_queue";
    public static final String Headers_Exchange = "HeadersExchange";
    //#代表0个或者多个单词
    @Bean
    public Queue getQueue(){

        return new Queue(Header_Queue, true);
    }
    @Bean
    public HeadersExchange HeadersExchange(){
        return new HeadersExchange(Headers_Exchange);
    }
    @Bean
    public Binding HeaderBinding1(){
        HashMap<String, Object> map = new HashMap<>();
        map.put("header1","hello");
        map.put("header2","world");
        return BindingBuilder.bind(getQueue()).to(HeadersExchange()).whereAll(map).match();
    }
}
3.4.2 发送者
@Service
public class MQSend {
    public static final Logger log = LoggerFactory.getLogger(MQSend.class);
    @Autowired
    AmqpTemplate amqpTemplate;
    public void sendTopic(String msg){
        log.info("发送的消息是" + msg);
        MessageProperties messageProperties = new MessageProperties();
        messageProperties.setHeader("header1","hello");
        messageProperties.setHeader("header2","world");
        Message obj = new Message(msg.getBytes(),messageProperties);
        amqpTemplate.convertAndSend(MQConfig.Headers_Exchange,"", obj);
    }
}
3.4.3 接收者
@Service
public class MQReceive {
    public static Logger log  = LoggerFactory.getLogger(MQReceive.class);
    @Autowired
    AmqpTemplate amqpTemplate;
    @RabbitListener(queues = MQConfig.Header_Queue)
    public void receive1(byte[] str){
        log.info("接收到Queue1的消息" + new String(str));
    }
}
3.4.4 测试
@Controller
public class test {
    @Autowired
    MQSend mqSend;
    @RequestMapping("/hello")
    @ResponseBody
    public String hello(){
        mqSend.sendTopic("你好呀");
        return "hello";
    }
}
结果:
-08-27 12:51:25.372  INFO 1452 --- [nio-8080-exec-1] com.mq.demo.MQSend                       : 发送的消息是你好呀
2019-08-27 12:51:25.467  INFO 1452 --- [tContainer#0-10] com.mq.demo.MQReceive                    : 接收到Queue1的消息你好呀
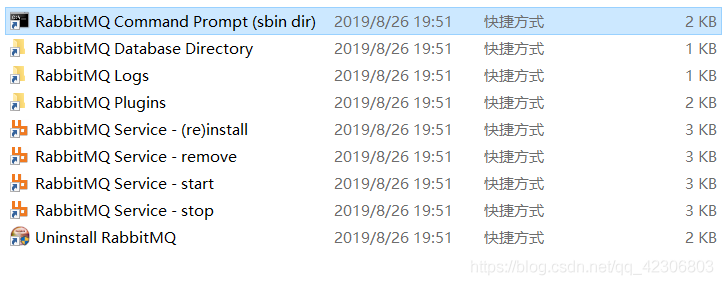
四、RabbitMQ的简单命令
4.1 打开RabbitMq的cmd
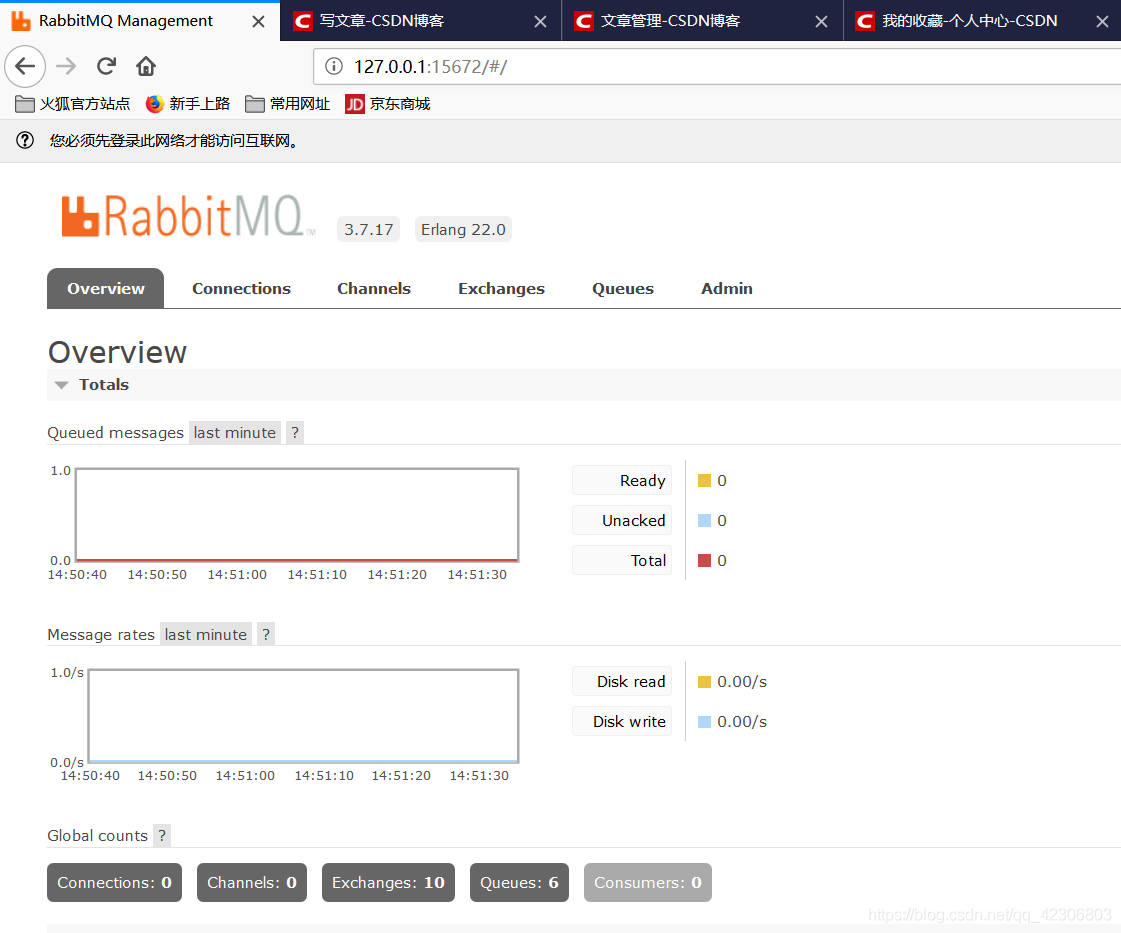
4.2 启动管理工具
rabbitmq-plugins enable rabbitmq_management
4.3 停止启动服务器命令
停止:net stop RabbitMQ
启动:net start RabbitMQ
4.4 浏览器中查看
http://127.0.0.1:15672/
版权声明:本文为qq_42306803原创文章,遵循CC 4.0 BY-SA版权协议,转载请附上原文出处链接和本声明。