文章目录
前言
一、Nginx的安装
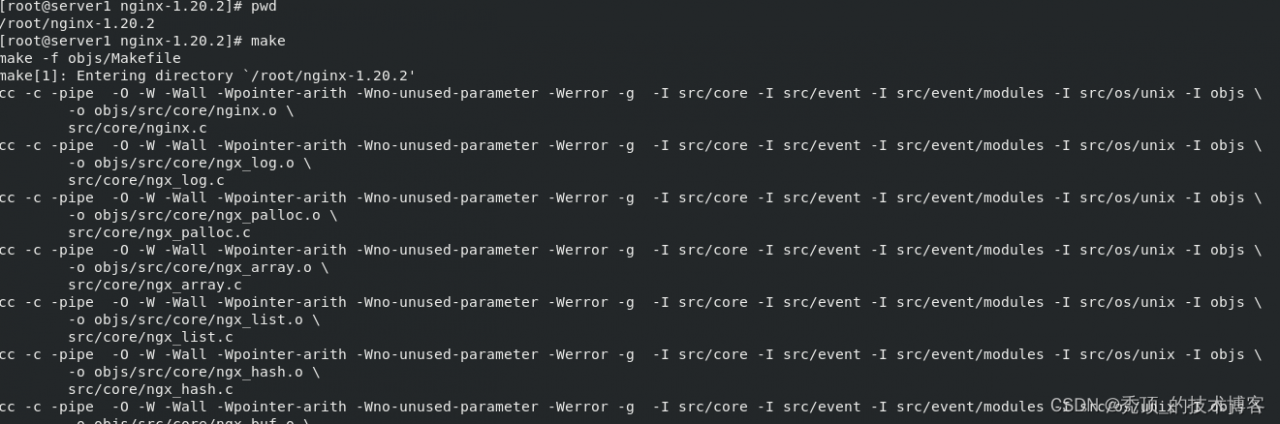
1.编译源码
官网地址
http://nginx.org/en/download.html
tar -zxf nginx-1.20.2.tar.gz
cd nginx-1.20.2
./configure --help					#查看需要的参数
./configure --with-http_ssl_module --with-http_stub_status_module --prefix=/usr/local/nginx
#--prefix表示指定--with-http_ssl_module添加http的网页重写功能--with-http_stub_status_module表示添加http的监控功能
2.下载缺少的组件
yum install pcre-devel gcc openssl-devel -y


3.编译
make							#必须在nginx-1.20.2的同级目录执行
make install
ln -s /usr/local/nginx/sbin/nginx /usr/local/bin #为了方便使用建立软连接

nginx开启时必须保证自己的80端口不被占用,否则会报错
二、Nginx配置
1.Nginx命令
nginx -s reload					#重读配置文件
nginx -s start					#开启,已经开启过在开启会报错
nginx -s stop 					#关闭
nginx -t 						#检测语法是否正确
2.修改配置参数
vim /usr/local/nginx/conf/nginx.conf #配置文件所在位置
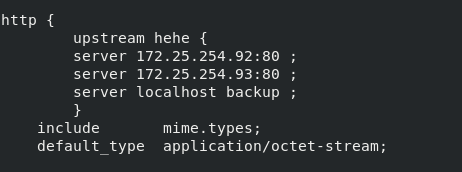
17 http {
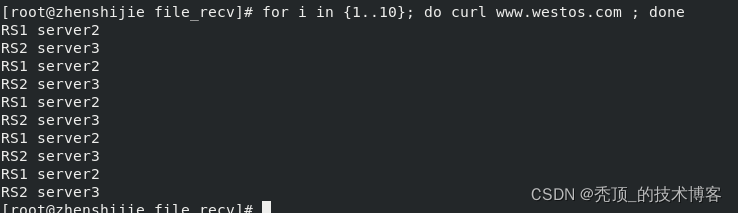
18 upstream hehe { #加入后端RS的两台主机默认调度算法为RR可以支持其他方式
19 server 172.25.254.92:80 ;
20 server 172.25.254.93:80 ;
21 server localhost backup ; #表示备份即所有后端RSdown掉了后VS开始进行RS的工作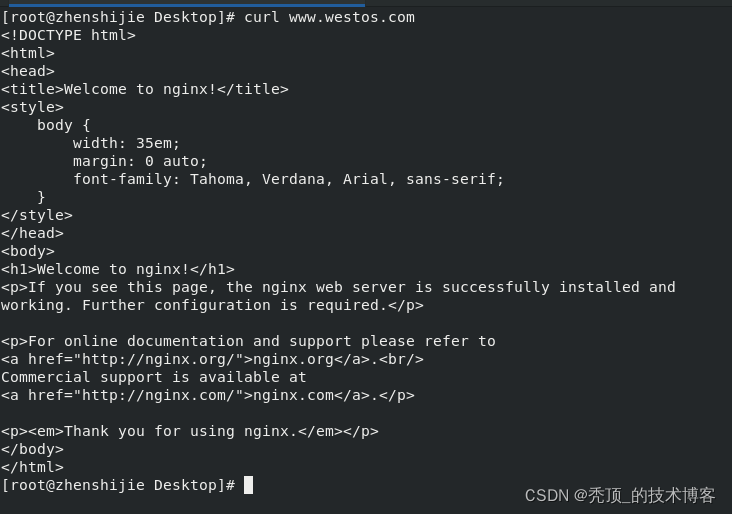
22 }
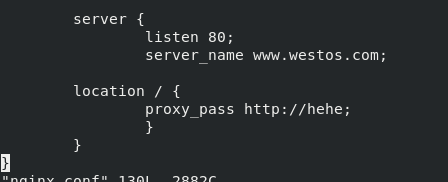
122 server {
123 listen 80; #监听本机80端口
124 server_name www.westos.com;
125
126 location / {
127 proxy_pass http://hehe; #访问本机的www.westos.com为hehe
128 }
129 }

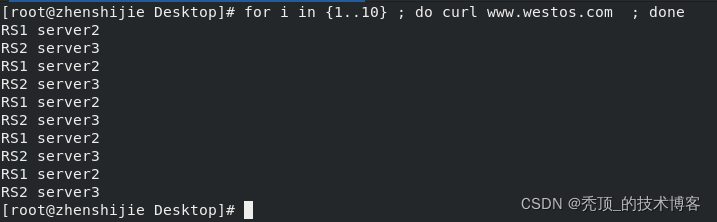 down掉一个后端后
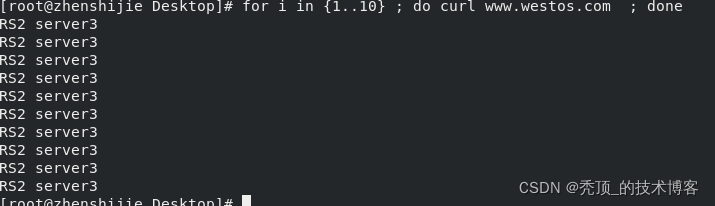

3.添加cookey调度方式
yum install unzip -y #解压工具
unzip nginx-goodies-nginx-sticky-module-ng-08a395c66e42.zip
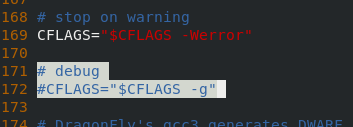
vim /root/nginx-1.20.2/auto/cc/gcc #关闭debug模式
171 # debug
172 #CFLAGS="$CFLAGS -g"
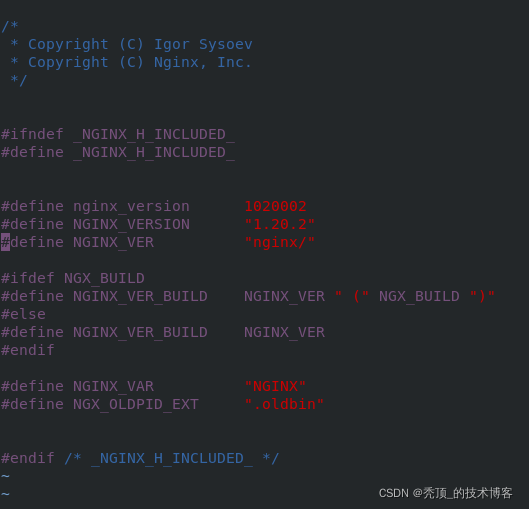
vim /root/nginx-1.20.2/src/core/nginx.h #进行安全优化
14 #define NGINX_VER "nginx" #使得其他人员无法查看自己使用的软件版本信息
./configure --add-module=/root/nginx-goodies-nginx-sticky-module-ng-08a395c66e42 --prefix=/usr/local/nginx --with-http_ssl_module --with-http_stub_status_module
#进行编译--add-module=后跟的即为解压后的目录所在路径
make #完成代码转换
cp ningx /usr/local/ningx/sbin/ningx #覆盖源文件即可
4.基于Cookle的负载均衡模式
http {
        upstream hehe {
        sticky ;
        server 172.25.254.92:80 ;
        server 172.25.254.93:80 ;
        }
        添加后可以在浏览器进行查看不论如何刷新都不会变化,但是不再浏览器访问的时候还是均衡的状态
cookle主要是保持浏览器的状态,由后端RS发送使得器其可以进行状态的保持进行,不会因为调度算法而该变

5.开机自起Nginx
https://www.nginx.com/resources/wiki/start/topics/examples/systemd/ #从官方文档复制
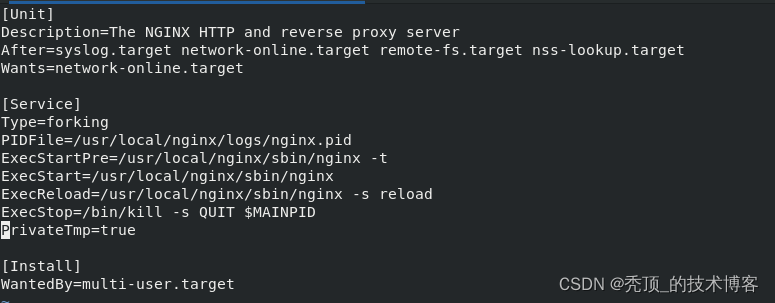
vim /lib/systemd/system/nginx.service #需要创建
[Unit]
Description=The NGINX HTTP and reverse proxy server #服务描述
After=syslog.target network-online.target remote-fs.target nss-lookup.target #服务类型
Wants=network-online.target
[Service]
Type=forking #类型,forking代表后台运行
PIDFile=/usr/local/nginx/logs/nginx.pid #pid路径为/usr/loxal/ningx/logs/nginx.pid
ExecStartPre=/usr/local/nginx/sbin/nginx -t #启动命令的前置命令
ExecStart=/usr/local/nginx/sbin/nginx #启动的路径位置
ExecReload=/usr/local/nginx/sbin/nginx -s reload #重启的路径位置
ExecStop=/bin/kill -s QUIT $MAINPID #关闭命令的位置
PrivateTmp=true #PrivateTmp:true表示给服务分配独立的空间
[Install]
WantedBy=multi-user.targe #服务安装的相关设置,设置为多用户
用户自行创建
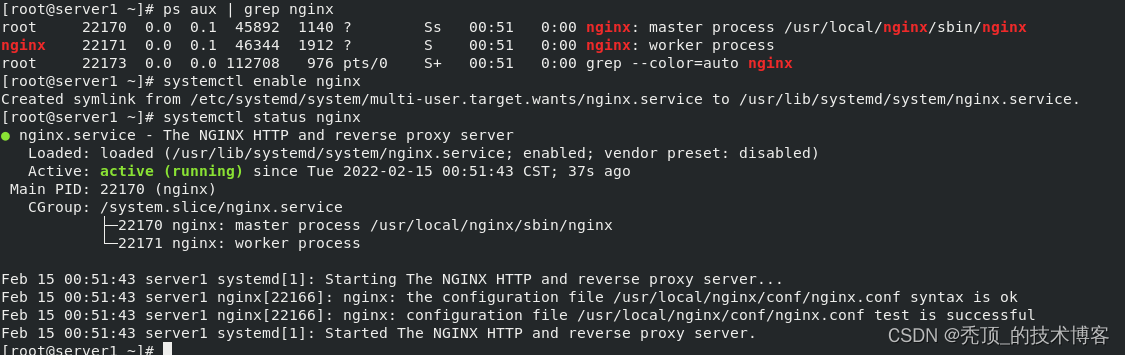
systemctl daemon-reload				#使得systemctl读取文件
nginx -s reload						#加载后可以找到nginx.pid文件,/usr/local/nginx/logs/nginx.pid
总结
版权声明:本文为b_______原创文章,遵循CC 4.0 BY-SA版权协议,转载请附上原文出处链接和本声明。