使用 gitee|github + hexo 快速搭建 hexo-theme-matery 闪烁之狐主题の个人博客

前言
随着编程时间的推移,接触到的技术越来多,记录的文档也越来越多,在巩固回忆的时候寻找起来也越来越繁琐,在此从零搭建一个免费的个人博客,来方便管理文档便于快速查询。

GitHub 博客效果预览:GitHub个人博客
Gitee 博客效果预览:Gitee个人博客
环境需求
下载安装: Git
下载安装: nodc.js
hexo + gitee部署
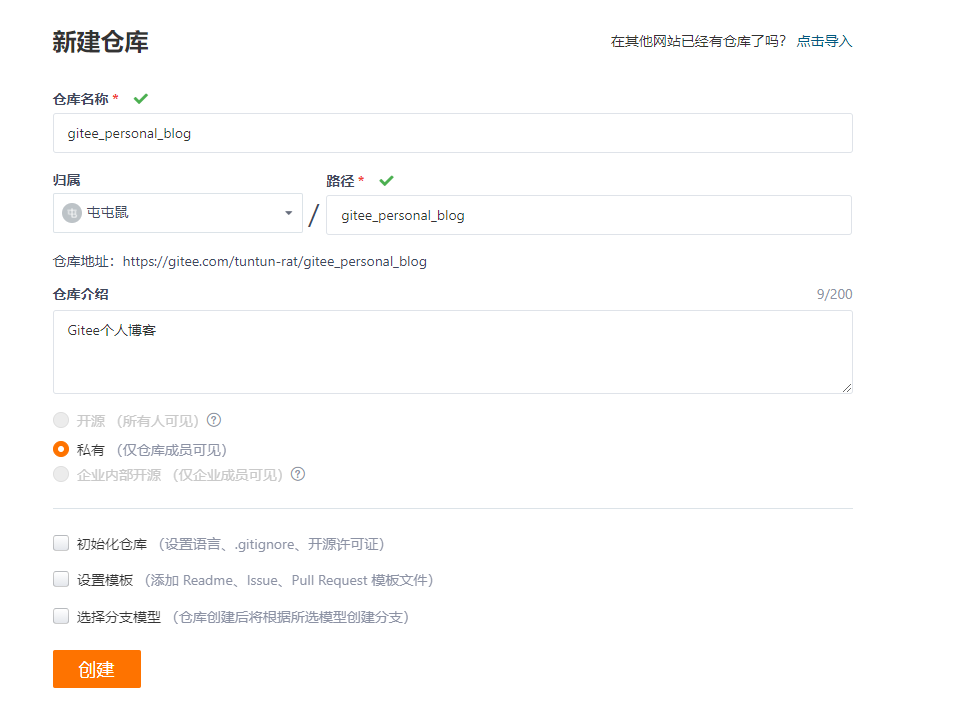
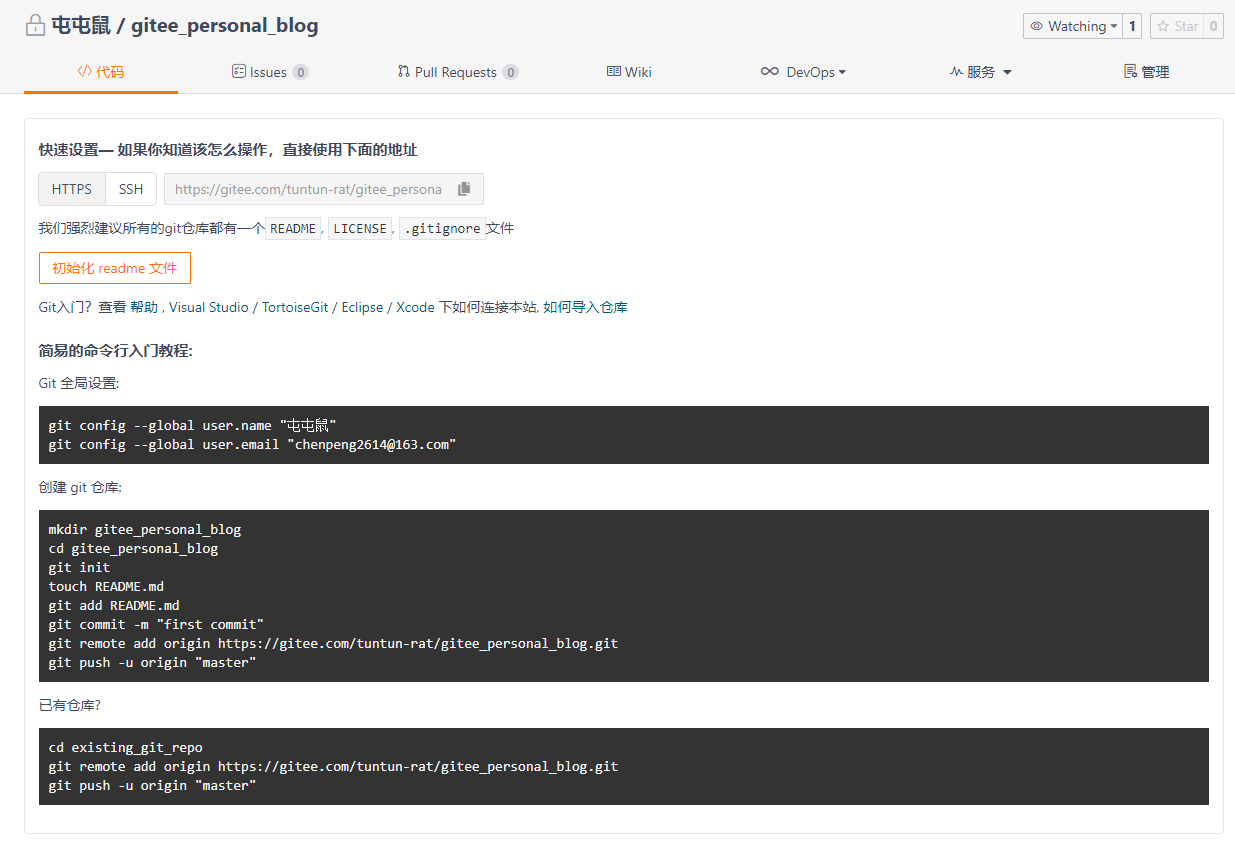
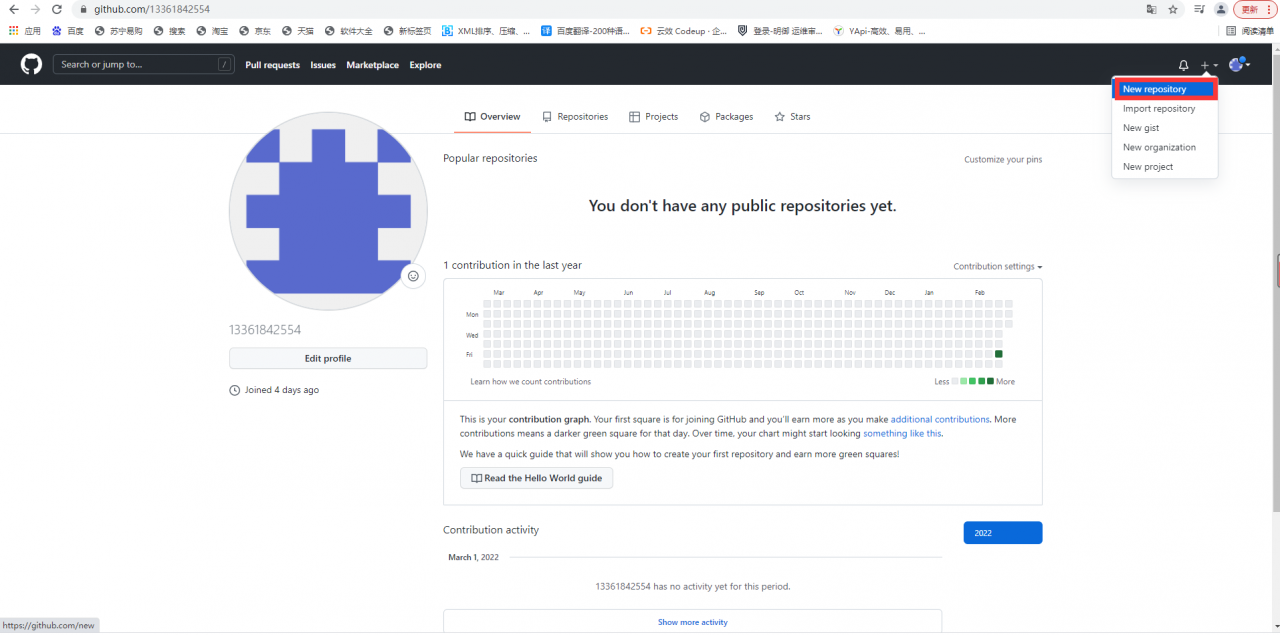
1, 创建 gitee 仓库

2, 搭建 Hexo
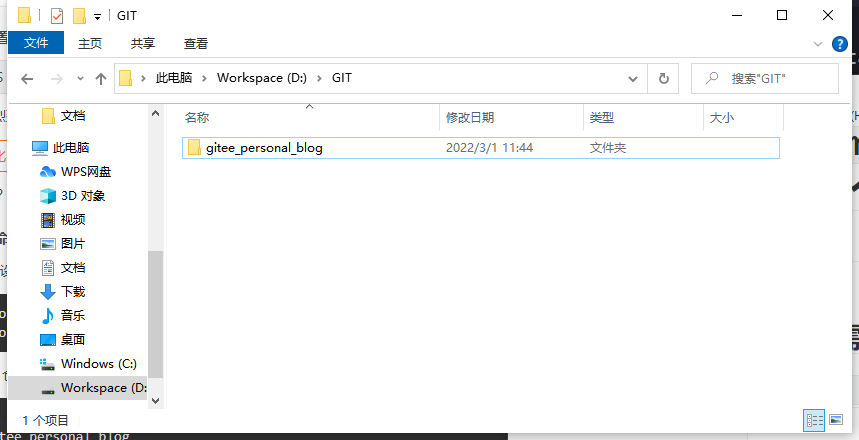
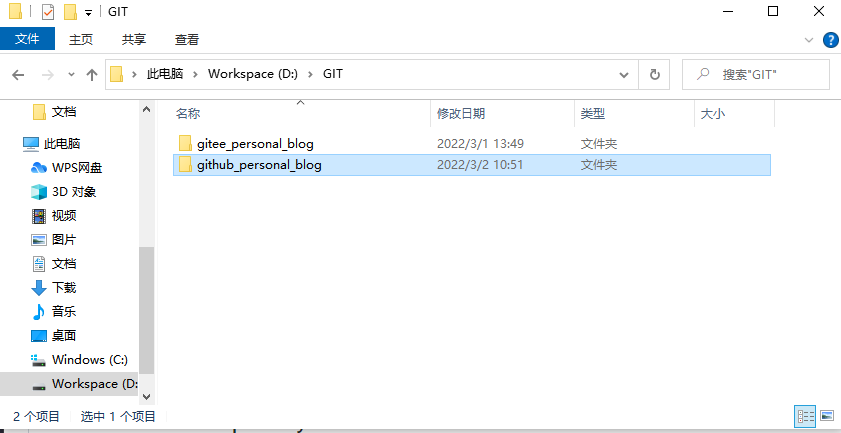
创建文件夹 gitee_personal_blog
打开 cmd 控制台
安装博客的框架(hexo)
npm install -g hexo-cli
初始化 hexo
hexo init
目录介绍
│  .gitignore
│  package.json
│  yarn.lock
│  _config.landscape.yml
│  _config.yml	博客的配置文件
├─.github
├─node_modules 	依赖包
├─scaffolds 	生成文章的一些模板
├─source        用来存放你的文章
└─themes		主题
本地运行 hexo
hexo s
INFO Hexo is running at http://localhost:4000/ . Press Ctrl+C to stop.
Hexo正在运行的信息http://localhost:4000/.按Ctrl+C键停止。
3, 选择主题进行配置
1, 下载 hexo-theme-matery 闪烁之狐主题
切换至 gitee_personal_blog/themes 目录下
# 克隆闪烁之狐主题
git clone https://github.com/blinkfox/hexo-theme-matery.git
在 gitee_personal_blog\themes\hexo-theme-matery 文件夹中 README_CN.md 有着详细的主题配置文档。
2, Hexo 使用 hexo-theme-matery 闪烁之狐主题
编辑 gitee_personal_blog/_config.yml 文件
# Extensions
## Plugins: https://hexo.io/plugins/
## Themes: https://hexo.io/themes/
## theme: landscape
theme: hexo-theme-matery
注:Hexo 的主题一般都存放到 theme 目录下。
4, 实现动态渲染
1, 指定 gitee 仓库地址
# Deployment
## Docs: https://hexo.io/docs/one-command-deployment
deploy:
  type: 'git'
  repo: https://gitee.com/tuntun-rat/gitee_personal_blog.git	# gitee仓库地址
  branch: master	# 分支
2, gitee_personal_blog/blog 目录下安装 git 部署插件
npm install --save hexo-deployer-git
3, 将当前配置部署至 gitee
# 修改 _config.yml 文件后清除缓存文件
hexo clean

# 重新生成静态文件
hexo g

# 部署网站
## 出现 ERROR Deployer not found: git
## 需运行 npm install --save hexo-deployer-git
hexo d
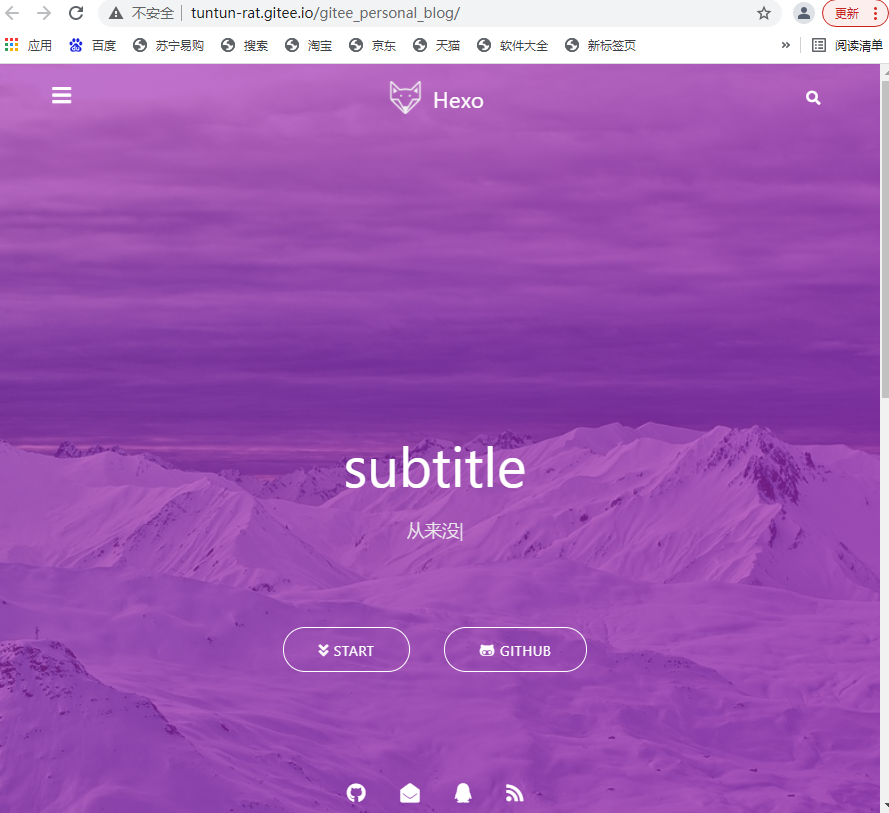
部署成功后,gitee 效果图

4, 启动项目站点
因 Gitee Pages 服务目前需要实名认证后才可使用;
官方文档 :Gitee Pages
实名认证审批后,选择项目分支启动 Gitee Pages 服务

5, 配置 _config.yml
# URL
## Set your site url here. For example, if you use GitHub Page, set url as 'https://username.github.io/project'
## 网址发布地址:http://tuntun-rat.gitee.io/gitee_personal_blog
url: http://tuntun-rat.gitee.io/gitee_personal_blog
permalink: :year/:month/:day/:title/
permalink_defaults:
pretty_urls:
  trailing_index: true # Set to false to remove trailing 'index.html' from permalinks
  trailing_html: true # Set to false to remove trailing '.html' from permalinks
修改配置后重新发布至 github
# 修改 _config.yml 文件后清除缓存文件
hexo clean

# 重新生成静态文件
hexo g

# 部署网站
## 出现 ERROR Deployer not found: git
## 需运行 npm install --save hexo-deployer-git
hexo d
因为文件被修改,更新网站

6, 效果预览图
hexo + github 部署
部署流程与
gitee相似注:因为国内访问
GitHub不太稳定,运行命令报错时,可能是GitHub官网无法访问了;可以打开网页查看GitHub官网看是否能正常访问,或多运行几次;
1, 创建 github 仓库


2, 搭建 Hexo
创建文件夹 github_personal_blog
打开 cmd 控制台
安装博客的框架(hexo)
npm install -g hexo-cli
初始化 hexo
hexo init
目录介绍
│  .gitignore
│  package.json
│  yarn.lock
│  _config.landscape.yml
│  _config.yml	博客的配置文件
├─.github
├─node_modules 	依赖包
├─scaffolds 	生成文章的一些模板
├─source        用来存放你的文章
└─themes		主题
本地运行 hexo
hexo s
INFO Hexo is running at http://localhost:4000/ . Press Ctrl+C to stop.
Hexo正在运行的信息http://localhost:4000/.按Ctrl+C键停止。
3, 选择主题进行配置
1, 下载 hexo-theme-matery 闪烁之狐主题
切换至 github_personal_blog/themes 目录下
# 克隆闪烁之狐主题
git clone https://github.com/blinkfox/hexo-theme-matery.git
在 github_personal_blog\themes\hexo-theme-matery 文件夹中 README_CN.md 有着详细的主题配置文档。
2, Hexo 使用 hexo-theme-matery 闪烁之狐主题
编辑 github_personal_blog/_config.yml 文件
# Extensions
## Plugins: https://hexo.io/plugins/
## Themes: https://hexo.io/themes/
## theme: landscape
theme: hexo-theme-matery	# 访问 theme 目录下的 hexo-theme-matery
注:Hexo 的主题一般都存放到 theme 目录下。
4, 实现动态渲染
1, 指定 github 仓库地址
# Deployment
## Docs: https://hexo.io/docs/one-command-deployment
deploy:
  type: 'git'
  repo: https://github.com/13361842554/github_personal_blog.git	# github 仓库地址
  branch: master	# 分支
2, github_personal_blog 目录下安装 git部署插件
npm install --save hexo-deployer-git
3, 将当前配置部署至 github
# 修改 _config.yml 文件后清除缓存文件
hexo clean

# 重新生成静态文件
hexo g

# 部署网站
## 出现 ERROR Deployer not found: git
## 需运行 npm install --save hexo-deployer-git
hexo d
部署成功后,github 效果图

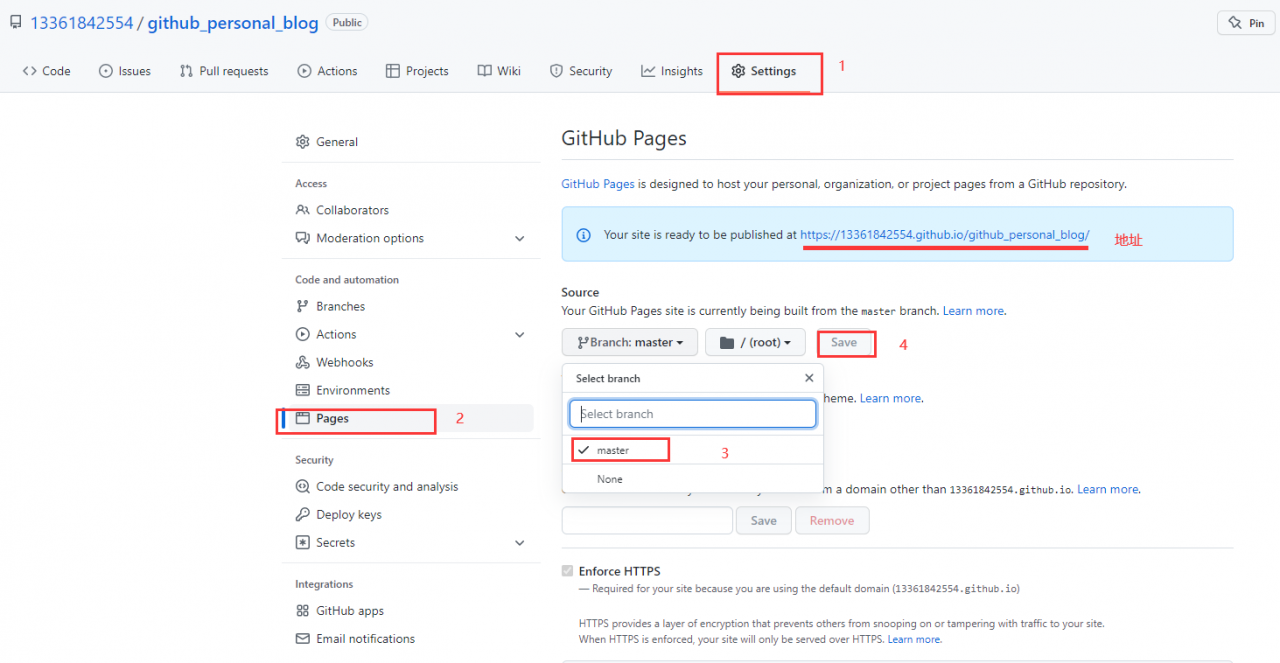
4, 启动项目站点
进入 github_personal_blog 仓库,设置 setting, 找到 GitHub Pages
5, 配置 _config.yml
# URL
## Set your site url here. For example, if you use GitHub Page, set url as 'https://username.github.io/project'
## 网址发布地址:https://13361842554.github.io/github_personal_blog/
url: https://13361842554.github.io
root: /github_personal_blog/	# GitHub 项目名称
permalink: :year/:month/:day/:title/
permalink_defaults:
pretty_urls:
  trailing_index: true # Set to false to remove trailing 'index.html' from permalinks
  trailing_html: true # Set to false to remove trailing '.html' from permalinks
修改配置后重新发布至 github
# 修改 _config.yml 文件后清除缓存文件
hexo clean

# 重新生成静态文件
hexo g

# 部署网站
## 出现 ERROR Deployer not found: git
## 需运行 npm install --save hexo-deployer-git
hexo d
6, 效果预览图

Hexo 常用指令
1, 清除缓存文件
hexo clean
2, 生成静态文件
# 可简写 hexo g
hexo generate
3, 启动服务器
# 可简写 hexo s
hexo server
4, 部署网站
# 可简写 hexo d
hexo deploy
5, 生成静态文件并部署网站
hexo g -d
静态博客网站生成器
Hexo文档:https://hexo.io/zh-cn/docs/
Jekyllcn文档:http://jekyllcn.com/docs/quickstart/
Hugo文档:https://www.gohugo.org/
Hexo主题: https://hexo.bootcss.com/themes/
Jekyllcn主题: http://jekyllthemes.org/
Hugo主题:https://themes.gohugo.io/