本文主要介绍如何获取网络图片,主要有以下两种方式:
- Glide
- JAVA API
以下将对这两种方式进行详细说明:
1、Glide获取网络图片
1.1 在项目中添加glide依赖,不然无法使用glide中的方法!
右键项目,选择open module settings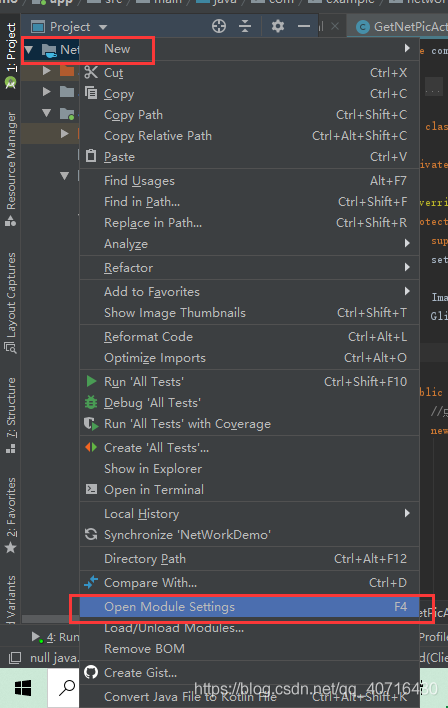
直接搜索Glide,然后添加依赖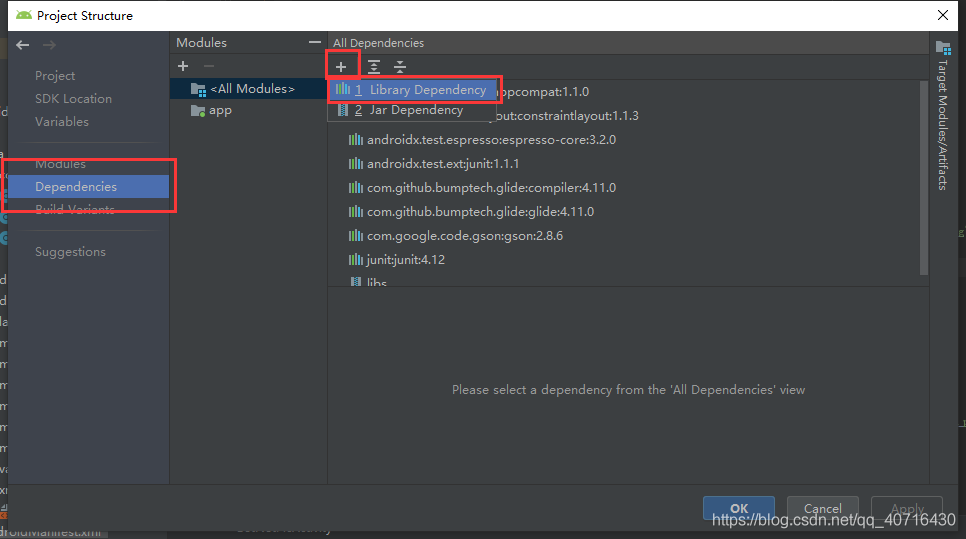
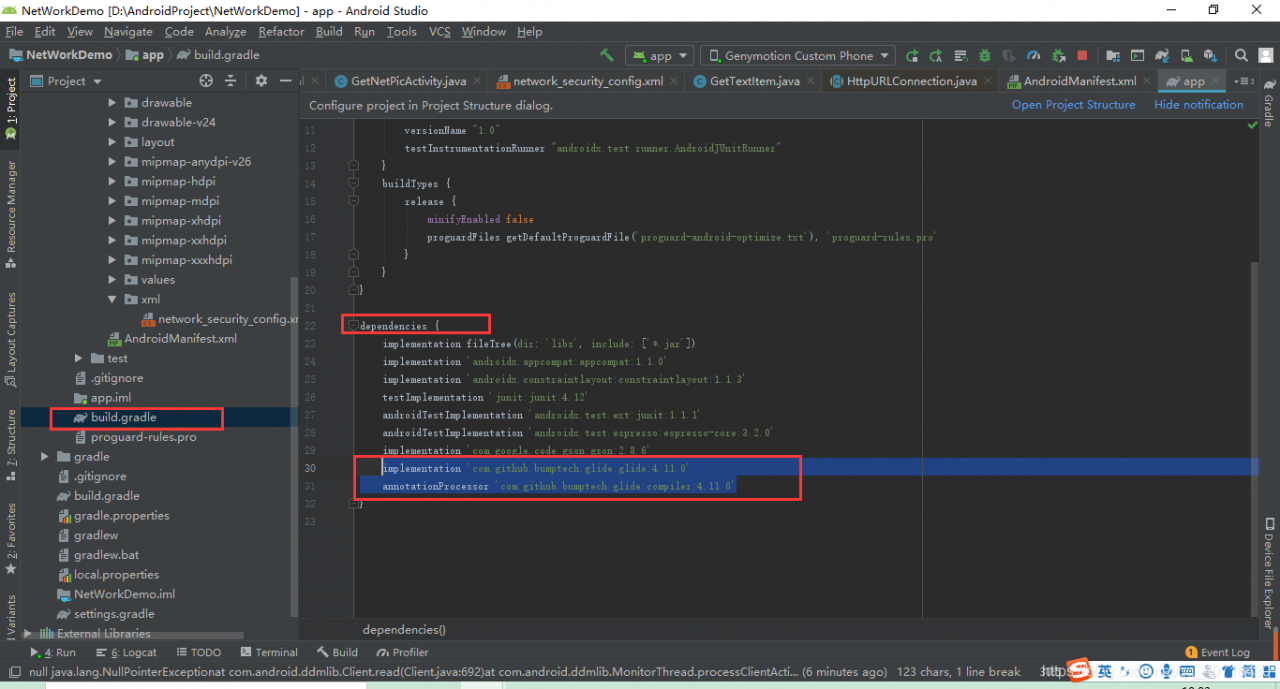
如果找不到Glide,则可以在app下的build.gradle中直接添加该语句:
implementation 'com.github.bumptech.glide:glide:4.11.0'
annotationProcessor 'com.github.bumptech.glide:compiler:4.11.0'

注意!可能依赖添加完后仍无法使用,这时候去rebuild project试试!
1.2 设置一个imageView控件,并通过findViewById找到该控件
1.3 将网络图片的地址放入,实现获取网络图片的功能
ImageView ivPicTwo=findViewById(R.id.iv_picture_two);
Glide.with(this).load("//csdnimg.cn/cdn/content-toolbar/csdn-logo.png?v=20200416.1").into(ivPicTwo);
注意!此处一定要是图片的源地址,可以将该地址在浏览器中打开,可以打开就行!
该语句的意思的是将网络加载的图片放入imageView控件中显示
此处的Glide.with()中的参数可以是: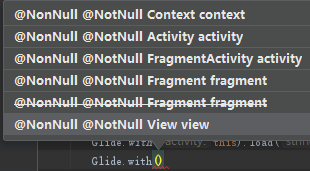
因为本人将该语句放于activity中的oncreate方法中,所以此处的this是指context
——————————————————————————————————
——————————————————————————————————
2、利用JAVA API获取网络图片
2.1 配置manifest
安卓版本27以上,不能使用http协议了,在获取网络图片的时候一定要在manifest中进行配置!!!
android:networkSecurityConfig="@xml/network_security_config"network_security_config,xml
<?xml version="1.0" encoding="utf-8"?>
<network-security-config>
    <domain-config>
        <domain includeSubdomains="true">example.com</domain>
        <domain-config cleartextTrafficPermitted="true">
            <domain includeSubdomains="true">bkimg.cdn.bcebos.com</domain>
        </domain-config>-->
    </domain-config>
</network-security-config>
此处的example.com写你的包名
中写对应图片网址的域名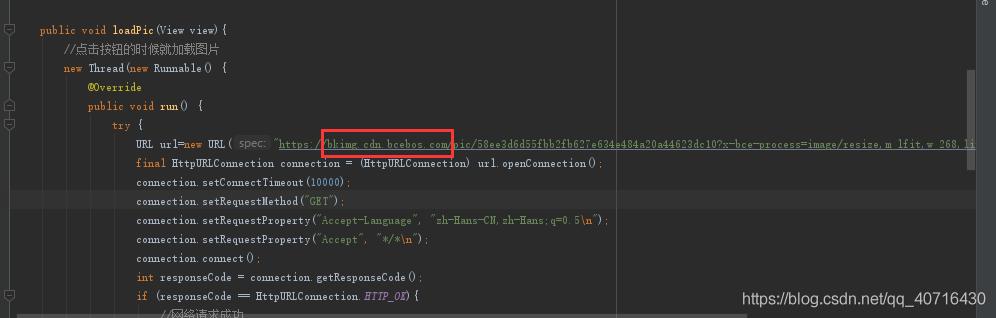
2.2 在子线程中加载网络图片
new Thread(new Runnable() {
    @Override
    public void run() {
2.3 设置URL,connection
URL url=new URL("https://bkimg.cdn.bcebos.com/pic/58ee3d6d55fbb2fb627e634e484a20a44623dc10?x-bce-process=image/resize,m_lfit,w_268,limit_1/format,f_jpg");
final HttpURLConnection connection = (HttpURLConnection) url.openConnection();
connection.setConnectTimeout(10000);
connection.setRequestMethod("GET");
connection.setRequestProperty("Accept-Language", "zh-Hans-CN,zh-Hans;q=0.5\n");
connection.setRequestProperty("Accept", "*/*\n");
connection.connect();
设置响应时间,响应方式,请求头中的内容
网络请求的内容:
2.4 判断是否连接成功
一般来说,连接网络后都要对网络请求是否成功进行一个判断,如果是200,则代表网络请求正常处理,即已经连接上了网络
if (responseCode == HttpURLConnection.HTTP_OK)这里的 HttpURLConnection.HTTP_OK 即代表常量200
2.5 将拿到的数据流转为bitmap格式
InputStream inputStream=connection.getInputStream();
final Bitmap bitmap = BitmapFactory.decodeStream(inputStream);
利用bitmap中的方法将数据流转为bit格式
2.6在UI线程中更新UI
runOnUiThread(new Runnable() {
    @Override
    public void run() {

        ImageView ivPicture=findViewById(R.id.iv_picture);
        ivPicture.setImageBitmap(bitmap);
    }
});
因为UI更新只能在主线程或者在UI线程中进行,不能在子线程中进行,所以要在UI线程中更新imageview,或者就是在主线程中更新!
相关源码:
public void loadPic(View view){
    //点击按钮的时候就加载图片
    new Thread(new Runnable() {
        @Override
        public void run() {
            try {
                URL url=new URL("https://bkimg.cdn.bcebos.com/pic/58ee3d6d55fbb2fb627e634e484a20a44623dc10?x-bce-process=image/resize,m_lfit,w_268,limit_1/format,f_jpg");
                final HttpURLConnection connection = (HttpURLConnection) url.openConnection();
                connection.setConnectTimeout(10000);
                connection.setRequestMethod("GET");
                connection.setRequestProperty("Accept-Language", "zh-Hans-CN,zh-Hans;q=0.5\n");
                connection.setRequestProperty("Accept", "*/*\n");
                connection.connect();
                int responseCode = connection.getResponseCode();
                if (responseCode == HttpURLConnection.HTTP_OK){
                    //网络请求成功
                    Log.d(TAG,"success");
                    InputStream inputStream=connection.getInputStream();
                    final Bitmap bitmap = BitmapFactory.decodeStream(inputStream);

                    runOnUiThread(new Runnable() {
                        @Override
                        public void run() {

                            ImageView ivPicture=findViewById(R.id.iv_picture);
                            ivPicture.setImageBitmap(bitmap);
                        }
                    });

                }
            } catch (Exception e) {
                e.printStackTrace();
            }
        }
    }).start();
}