1.声明
当前内容主要用于本人学习和了解netty中的ObjectDecoder和ObjectEncoder这两个类,明白其主要原理和主要操作
原因:之前使用ObjectDecoder传递对象的时候出现了一个问题,无法传递消息,无法接收消息,碰到了坑,所以要了解!
2.ObjectDecoder源码解析
直接找到解码方法
@Override
protected Object decode(ChannelHandlerContext ctx, ByteBuf in) throws Exception {
    ByteBuf frame = (ByteBuf) super.decode(ctx, in);
    if (frame == null) {
        return null;
    }

    ObjectInputStream ois = new CompactObjectInputStream(new ByteBufInputStream(frame, true), classResolver);
    try {
        return ois.readObject();
    } finally {
        ois.close();
    }
}
发现主要实现:基于ByteBuf实现,通过解析流为对象流方式得到解码后的Object
采用调试方式查看: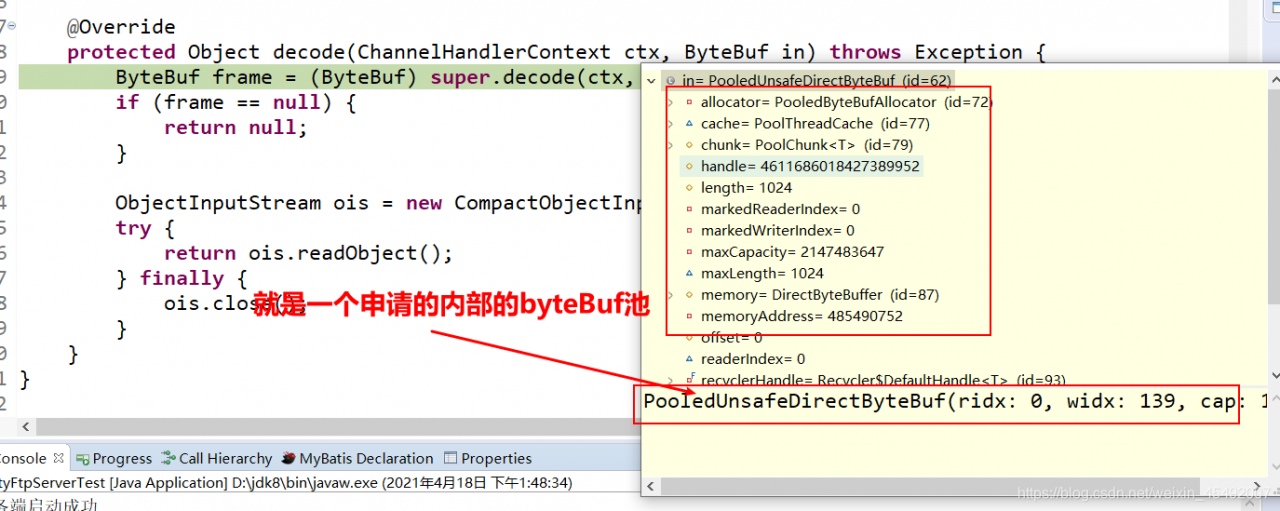
这里明白了,为什么不能调用ReferenceCountUtil.release(msg);,之前有过这个错误!
继续: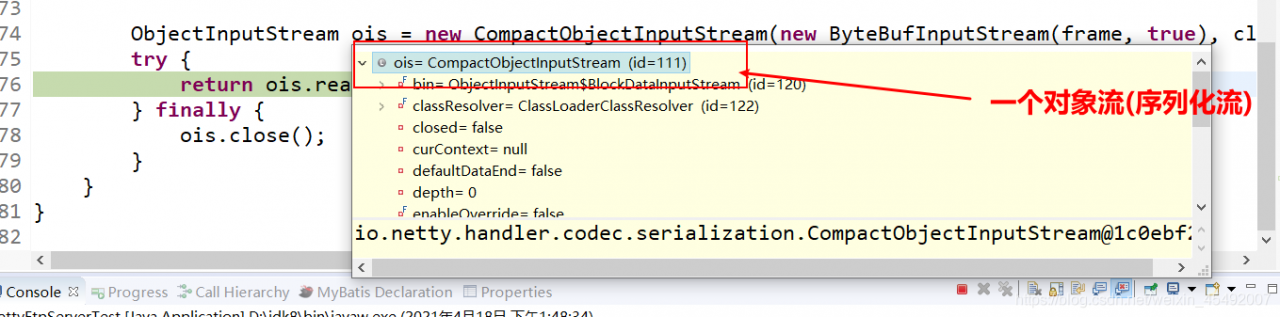
结果得到一个标准的序列化对象输入流,解析为对象的(这就是为什么需要实现序列化接口的要求!)
最后就是标准的readObject方法
3.ObjectEncoder源码解析
直接查看加码方法
  @Override
protected void encode(ChannelHandlerContext ctx, Serializable msg, ByteBuf out) throws Exception {
    int startIdx = out.writerIndex();

    ByteBufOutputStream bout = new ByteBufOutputStream(out);
    ObjectOutputStream oout = null;
    try {
        bout.write(LENGTH_PLACEHOLDER);
        oout = new CompactObjectOutputStream(bout);
        oout.writeObject(msg);
        oout.flush();
    } finally {
        if (oout != null) {
            oout.close();
        } else {
            bout.close();
        }
    }

    int endIdx = out.writerIndex();

    out.setInt(startIdx, endIdx - startIdx - 4);
}
发现传递的为实现序列化的msg,并且采用ObjectOutputStream直接写出对象到ByteBuf中,(所以传输的对象必须实现序列化接口,其中会自动释放掉ByteBuf(父类中实现了))
4.总结
1.使用ObjectDecoder和ObjectEncoder不要手动释放msg,并且传递的对象都是需要实现序列化接口的,否则任何一点出现问题,那么程序就会出现无法接收消息和无法传递消息的问题!
版权声明:本文为weixin_45492007原创文章,遵循CC 4.0 BY-SA版权协议,转载请附上原文出处链接和本声明。