zabbix自定义监控
在实际生产环境中zabbix提供的监控项目,不能满足我们的监控需求,此时我们就要按照zabbix的规范自定义监控项目,达到监控的目的。
相关概念
| 概念 | 释义 |
|---|---|
| item | itme为监控项,item由key+参数组成 |
| Key | 我们可以理解为key是item的唯一标识,在agent端有很多监控项, zabbix-server根据key区分不同的监控项 |
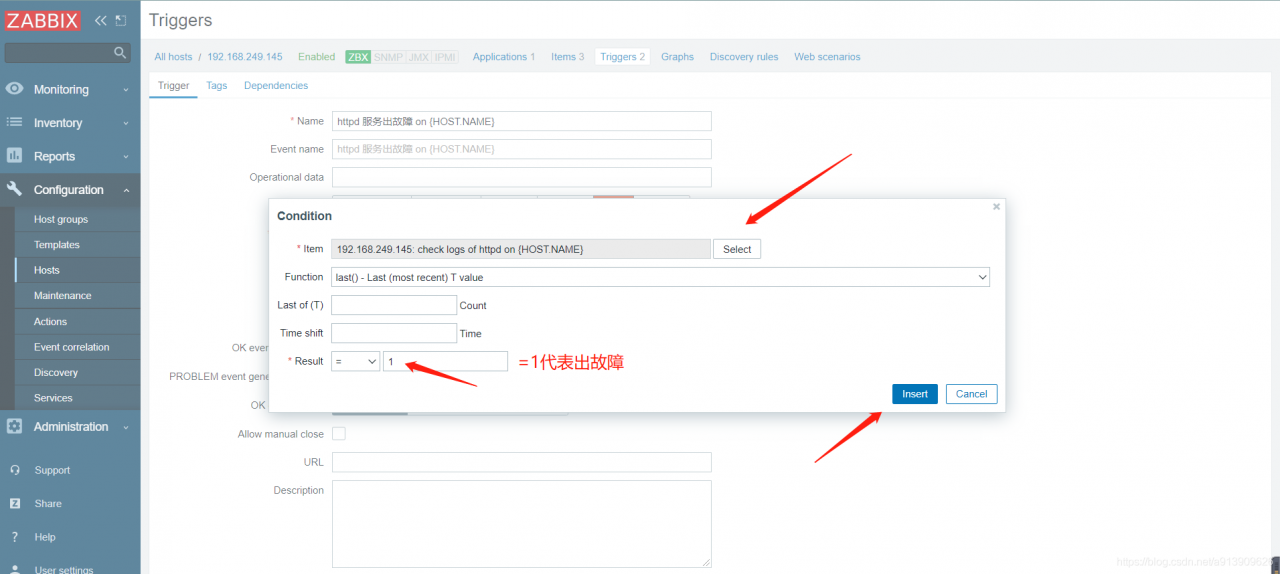
| trigger | 触发器是建立在item数据上的,具有阈值触发事件的功能 |
自定义监控流程
1.修改客户端打开配置文件/usr/local/etc/zabbix_agentd.conf
2.编辑监控脚本
3.在web界面进行配置
下面我们以监控进程、日志文件、mysql主从状态、mysql主从延迟为示例进行演练。
1.自定义监控进程
//修改客户端配置文件
[root@localhost ~]# cd /usr/local/etc
[root@localhost etc]# ls
zabbix_agentd.conf  zabbix_agentd.conf.d
[root@localhost etc]# vim zabbix_agentd.conf
UnsafeUserParameters=1  //找到如下行取消注释并设定等于1
//文末添加如下行
UserParameter=check_process[*],/bin/bash /scripts/check_process.sh $1


//创建脚本存放目录
[root@localhost ~]# mkdir /scripts
//编辑一个脚本
[root@localhost scripts]# vim check_process.sh
#!/bin/bash

process_status=$(ps -ef|grep -Ev "grep|$0"|grep -c $1)

if [ $process_status -eq 0 ];then
    echo '1'
else
    echo '0'
fi
//给脚本执行权限
[root@localhost scripts]# chmod +x check_process.sh
//重启客户端
[root@localhost etc]# pkill zabbix
[root@localhost etc]# zabbix_agentd
[root@localhost etc]# ss -antl
State        Recv-Q        Send-Q               Local Address:Port                Peer Address:Port       Process
LISTEN       0             128                        0.0.0.0:10050                    0.0.0.0:*
LISTEN       0             128                        0.0.0.0:22                       0.0.0.0:*
LISTEN       0             100                      127.0.0.1:25                       0.0.0.0:*
LISTEN       0             128                           [::]:22                          [::]:*
LISTEN       0             100                          [::1]:25                          [::]:*
测试验证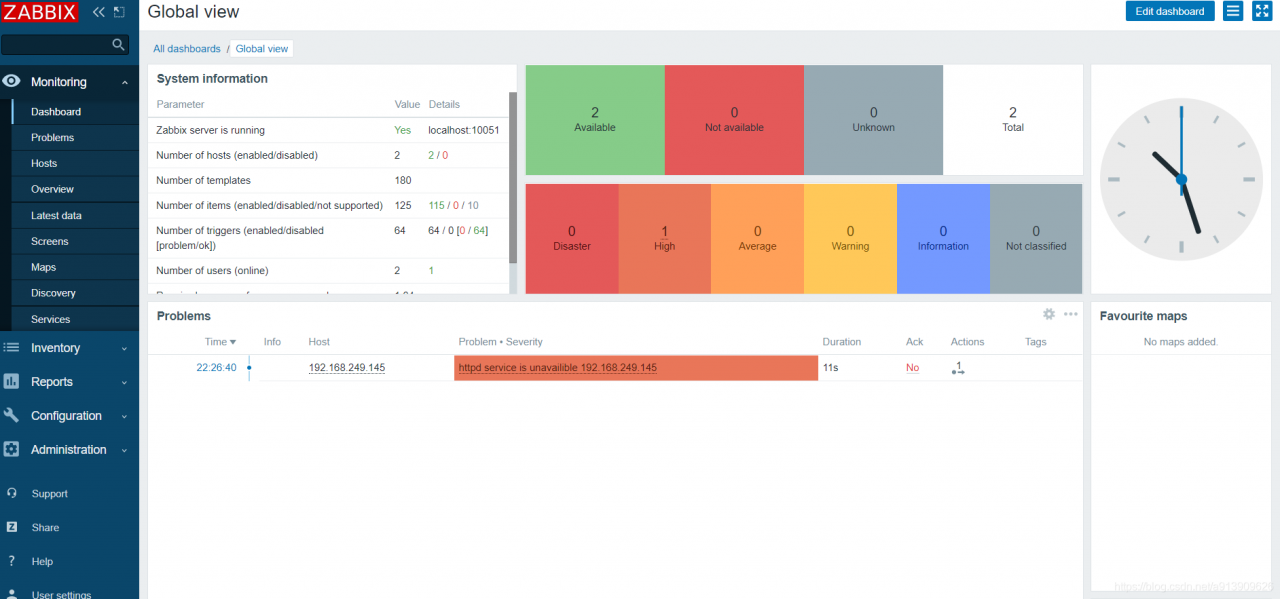
2.自定义监控日志文件
//编辑一个脚本
[root@localhost scripts]# vim log.py
#!/usr/bin/env python3
import sys
import re
def prePos(seekfile):
global curpos
try:
cf = open(seekfile)
except IOError:
curpos = 0
return curpos
except FileNotFoundError:
curpos = 0
return curpos
else:
try:
curpos = int(cf.readline().strip())
except ValueError:
curpos = 0
cf.close()
return curpos
cf.close()
return curpos
def lastPos(filename):
with open(filename) as lfile:
if lfile.readline():
lfile.seek(0,2)
else:
return 0
lastPos = lfile.tell()
return lastPos
def getSeekFile():
try:
seekfile = sys.argv[2]
except IndexError:
seekfile = '/tmp/logseek'
return seekfile
def getKey():
try:
tagKey = str(sys.argv[3])
except IndexError:
tagKey = 'Error'
return tagKey
def getResult(filename,seekfile,tagkey):
destPos = prePos(seekfile)
curPos = lastPos(filename)
if curPos < destPos:
curpos = 0
try:
f = open(filename)
except IOError:
print('Could not open file: %s' % filename)
except FileNotFoundError:
print('Could not open file: %s' % filename)
else:
f.seek(destPos)
while curPos != 0 and f.tell() < curPos:
rresult = f.readline().strip()
global result
if re.search(tagkey, rresult):
result = 1
break
else:
result = 0
with open(seekfile,'w') as sf:
sf.write(str(curPos))
finally:
f.close()
return result
if __name__ == "__main__":
result = 0
curpos = 0
tagkey = getKey()
seekfile = getSeekFile()
result = getResult(sys.argv[1],seekfile,tagkey)
print(result)
//给脚本执行权限
[root@localhost scripts]# chmod +x log.py
//修改客户端配置文件
[root@localhost ~]# vim /usr/local/etc/zabbix_agentd.conf
//加入此行
UserParameter=check_log[*],/scripts/log.py $1 $2 $3
//重启客户端
[root@localhost etc]# pkill zabbix
[root@localhost etc]# zabbix_agentd
[root@localhost etc]# ss -antl
State Recv-Q Send-Q Local Address:Port Peer Address:Port Process
LISTEN 0 128 0.0.0.0:10050 0.0.0.0:*
LISTEN 0 128 0.0.0.0:22 0.0.0.0:*
LISTEN 0 100 127.0.0.1:25 0.0.0.0:*
LISTEN 0 128 [::]:22 [::]:*
LISTEN 0 100 [::1]:25 [::]:*
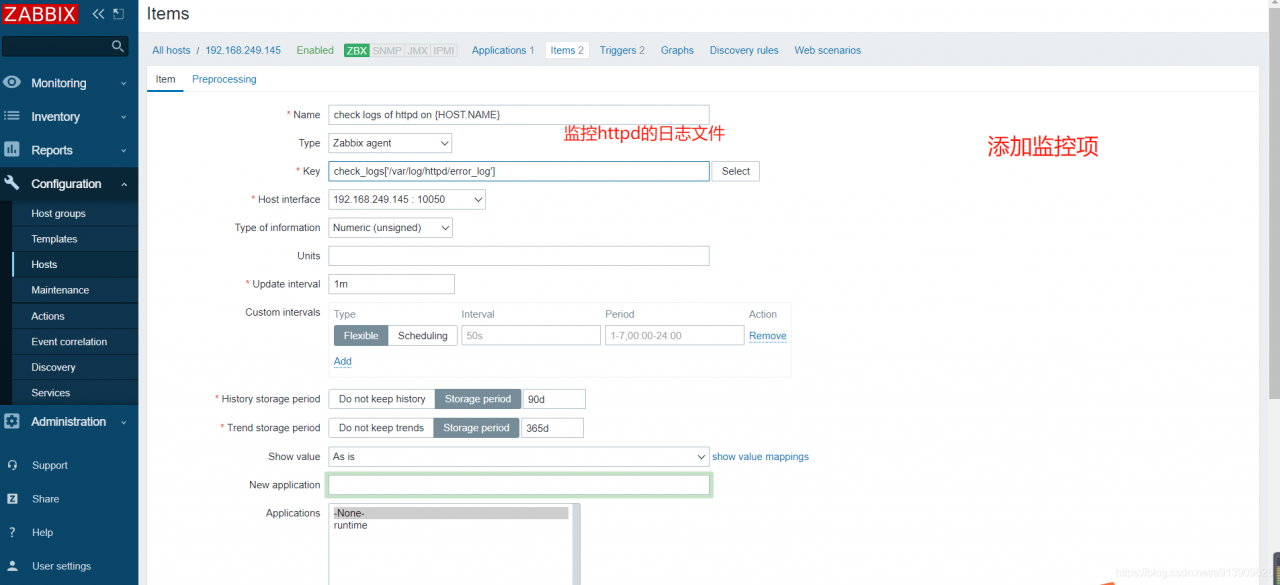
//我们以监控httpd的配置文件为例
//修改日志的所有者有读和执行权限
[root@localhost ~]# setfacl -m u:zabbix:rx /var/log/httpd/
//在服务端先进行测试
[root@zabbix ~]# zabbix_get -s 192.168.249.145 -k check_log['/var/log/httpd/error_log']
0

在客户端收到触发问题
//假设在此文件写入了一个错误
[root@localhost ~]# echo 'Error' >> /var/log/httpd/error_log
测试验证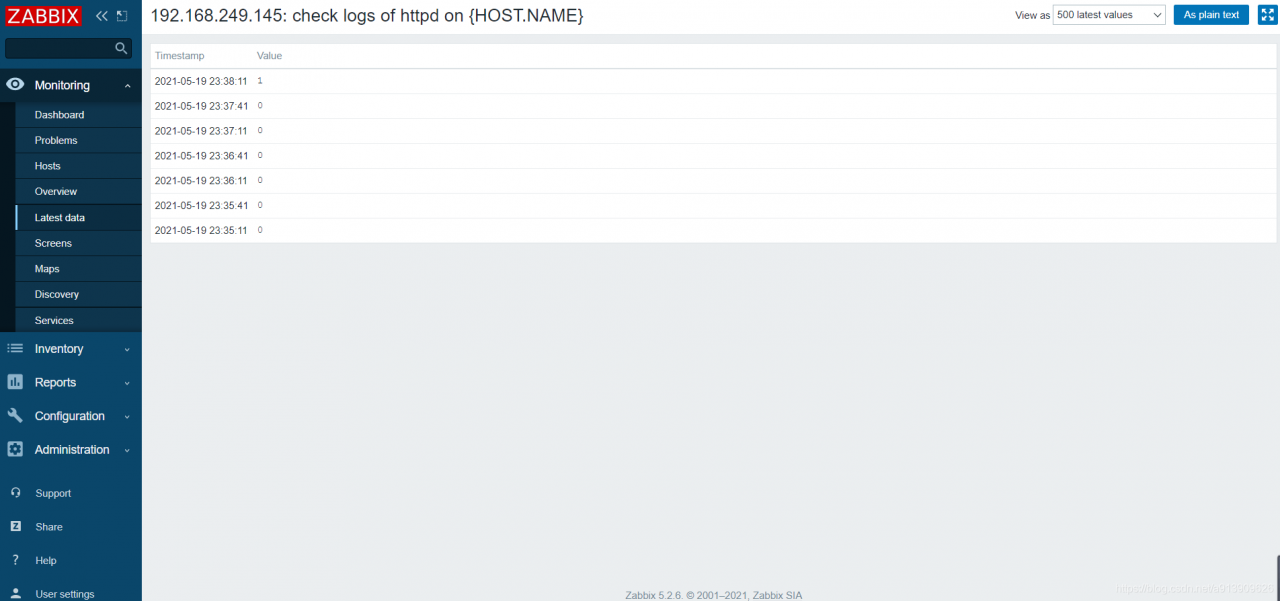
3.自定义mysql主从状态
//编辑脚本
[root@localhost scripts]#  vim mysql_repl.sh

#!/bin/bash
status=$(mysql -uroot -plixirong123! -e 'show slave status\G' 2>/dev/null |grep -E 'Slave_IO_Running|Slave_SQL_Running:'|grep -c 'Yes')

if [ $status -ne 2 ];then
    echo '1'
else
    echo '0'
fi

//编辑配置文件
[root@localhost ~]# vim /usr/local/etc/zabbix_agentd.conf
UserParameter=check_mr,/bin/bash /scripts/mysql_repl.sh

//重启服务
[root@localhost etc]# pkill zabbix
[root@localhost etc]# zabbix_agentd
测试验证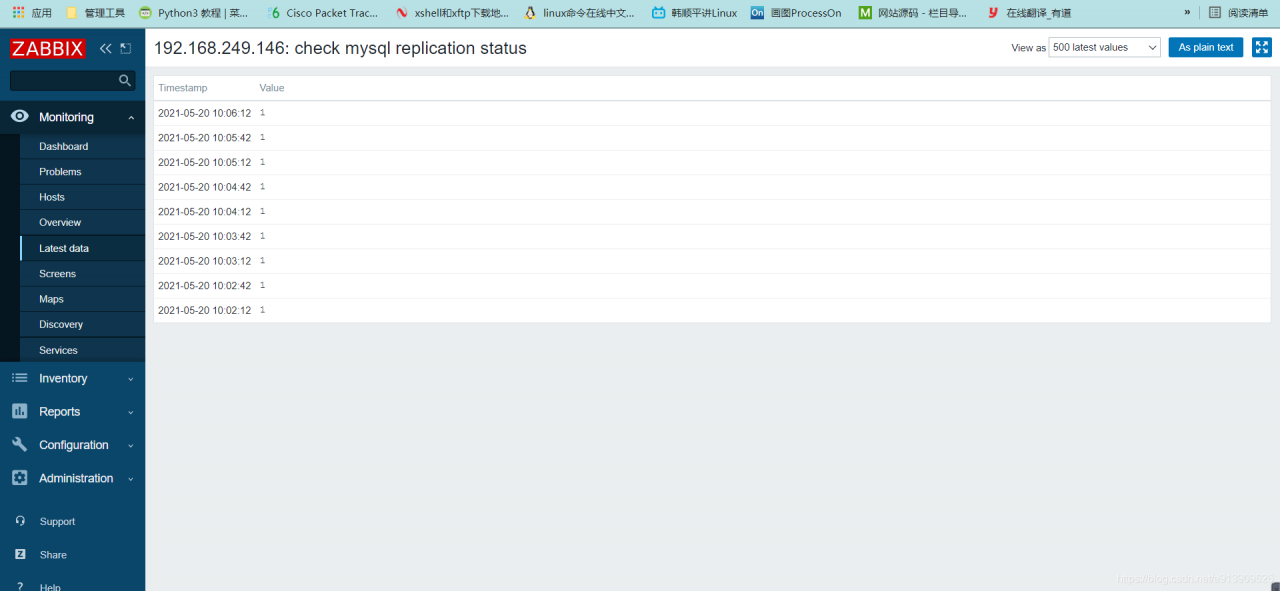
4.自定义mysql主从延迟
//编辑脚本
[root@localhost ~]# cd /scripts/
[root@localhost scripts]#  vim mysql_delay.sh

#!/bin/bash
delay=$(mysql -uroot -plixirong123! -e 'show slave status\G' 2>/dev/null|grep 'Seconds_Behind_Master'|awk '{print $2}')

echo $delay

//给脚本执行权限
[root@localhost scripts]# chmod +x mysql_delay.sh


//编辑配置文件
[root@localhost ~]# vim /usr/local/etc/zabbix_agentd.conf
UserParameter=mysql_delay,/bin/bash /scripts/mysql_delay.sh

//重启服务
[root@localhost etc]# pkill zabbix
[root@localhost etc]# zabbix_agentd


5.自定义监控Keepalived脑裂
在高可用(HA)系统中,当联系2个节点的“心跳线”断开时,本来为一整体、动作协调的HA系统,就分裂成为2个独立的个体。由于相互失去了联系,都以为是对方出了故障。两个节点上的HA软件像“裂脑人”一样,争抢“共享资源”、争起“应用服务”,就会发生严重后果——或者共享资源被瓜分、2边“服务”都起不来了;或者2边“服务”都起来了,但同时读写“共享存储”,导致数据损坏(常见如数据库轮询着的联机日志出错)。
对付HA系统“裂脑”的对策,目前达成共识的的大概有以下几条:
- 添加冗余的心跳线,例如:双线条线(心跳线也HA),尽量减少“裂脑”发生几率;
- 启用磁盘锁。正在服务一方锁住共享磁盘,“裂脑”发生时,让对方完全“抢不走”共享磁盘资源。但使用锁磁盘也会有一个不小的问题,如果占用共享盘的一方不主动“解锁”,另一方就永远得不到共享磁盘。现实中假如服务节点突然死机或崩溃,就不可能执行解锁命令。后备节点也就接管不了共享资源和应用服务。于是有人在HA中设计了“智能”锁。即:正在服务的一方只在发现心跳线全部断开(察觉不到对端)时才启用磁盘锁。平时就不上锁了。
- 设置仲裁机制。例如设置参考IP(如网关IP),当心跳线完全断开时,2个节点都各自ping一下参考IP,不通则表明断点就出在本端。不仅“心跳”、还兼对外“服务”的本端网络链路断了,即使启动(或继续)应用服务也没有用了,那就主动放弃竞争,让能够ping通参考IP的一端去起服务。更保险一些,ping不通参考IP的一方干脆就自我重启,以彻底释放有可能还占用着的那些共享资源。
5.1脑裂产生的原因
一般来说,脑裂的发生,有以下几种原因:
- 高可用服务器对之间心跳线链路发生故障,导致无法正常通信
1、因心跳线坏了(包括断了,老化)
2、因网卡及相关驱动坏了,ip配置及冲突问题(网卡直连)
3、因心跳线间连接的设备故障(网卡及交换机)
4、因仲裁的机器出问题(采用仲裁的方案) - 高可用服务器上开启了 iptables防火墙阻挡了心跳消息传输
- 高可用服务器上心跳网卡地址等信息配置不正确,导致发送心跳失败
- 其他服务配置不当等原因,如心跳方式不同,心跳广插冲突、软件Bug等
注意:
Keepalived配置里同一 VRRP实例如果 virtual_router_id两端参数配置不一致也会导致裂脑问题发生。
5.2 脑裂的常见解决方案
在实际生产环境中,我们可以从以下几个方面来防止裂脑问题的发生:
- 同时使用串行电缆和以太网电缆连接,同时用两条心跳线路,这样一条线路坏了,另一个还是好的,依然能传送心跳消息
- 当检测到裂脑时强行关闭一个心跳节点(这个功能需特殊设备支持,如Stonith、feyce)。相当于备节点接收不到心跳消患,通过单独的线路发送关机命令关闭主节点的电源
- 做好对裂脑的监控报警(如邮件及手机短信等或值班).在问题发生时人为第一时间介入仲裁,降低损失。例如,百度的监控报警短信就有上行和下行的区别。报警消息发送到管理员手机上,管理员可以通过手机回复对应数字或简单的字符串操作返回给服务器.让服务器根据指令自动处理相应故障,这样解决故障的时间更短.
当然,在实施高可用方案时,要根据业务实际需求确定是否能容忍这样的损失。对于一般的网站常规业务.这个损失是可容忍的
5.3 对脑裂进行监控
对脑裂的监控应在备用服务器上进行,通过添加zabbix自定义监控进行。
监控什么信息呢?监控备上有无VIP地址
备机上出现VIP有两种情况:
- 发生了脑裂
- 正常的主备切换
监控只是监控发生脑裂的可能性,不能保证一定是发生了脑裂,因为正常的主备切换VIP也是会到备上的。
监控方案
环境需求
| 主机名 | IP | 所需服务 |
|---|---|---|
| server(zabbix服务端) | 192.168.249.146 | lamp zabbix-server zabbix-agent |
| master(主keepalived) | 192.168.249.141 | keepalived |
| slave(备Keepalived) | 192.168.249.145 | Keepalived zabbix-agent |
关于所需环境的部署这里不在重复,可以参考之前的文章。链接如下:
lamp搭建
zabbix部署
Keepalived高可用
在slave端编写监控Keepalived脑裂脚本
[root@slave ~]# cd /scripts/
[root@slave scripts]# ls
[root@slave scripts]# touch check_keepalived.sh
[root@slave scripts]# chmod +x check_keepalived.sh
[root@slave scripts]# cat check_keepalived.sh
#!/bin/bash

if [ `ip a show ens33 |grep 192.168.249.88|wc -l` -ne 0 ]
then
    echo "1"
else
    echo "0"
fi
把脚本写入zabbix配置文件
[root@slave ~]# vim /usr/local/etc/zabbix_agentd.conf
UnsafeUserParameters=1
UserParameter=check_process[*],/bin/bash /scripts/check_keepalived.sh $1
重启服务
[root@slave scripts]#  pkill zabbix
[root@slave scripts]# zabbix_agentd
创建监控主机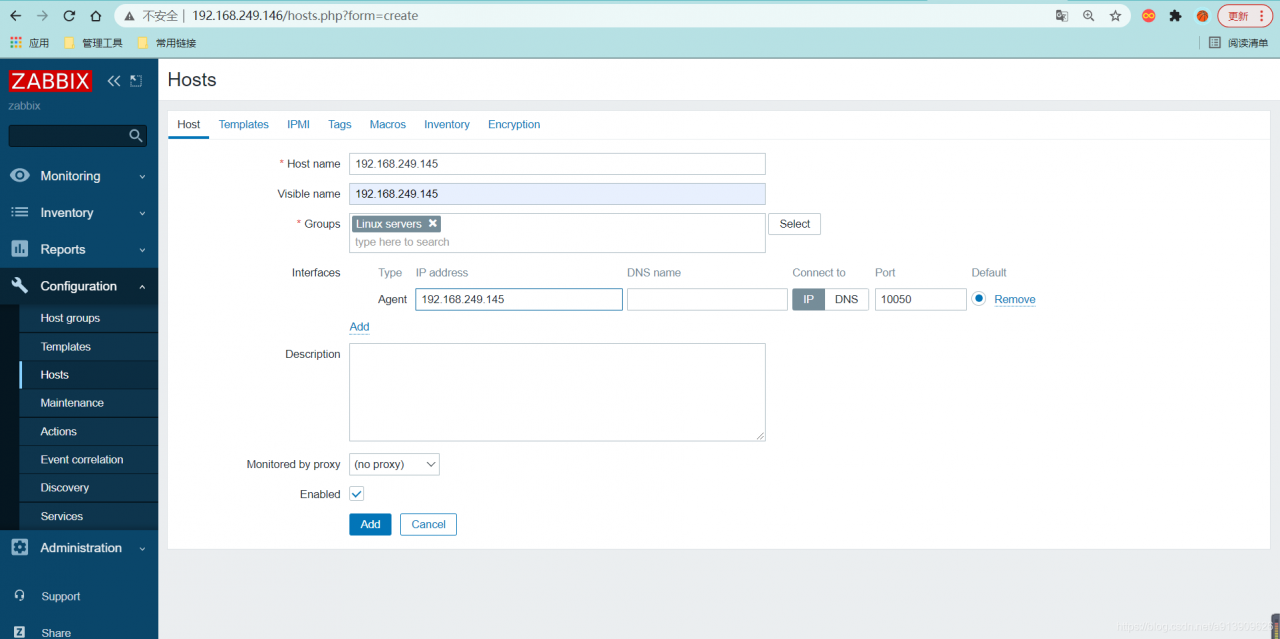
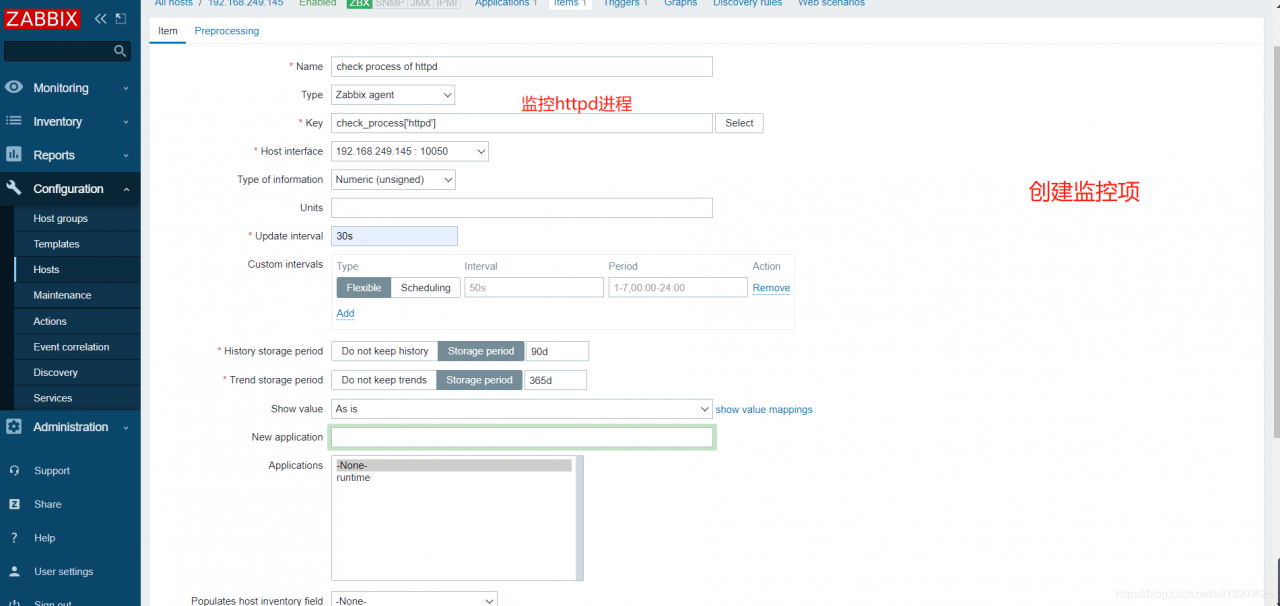
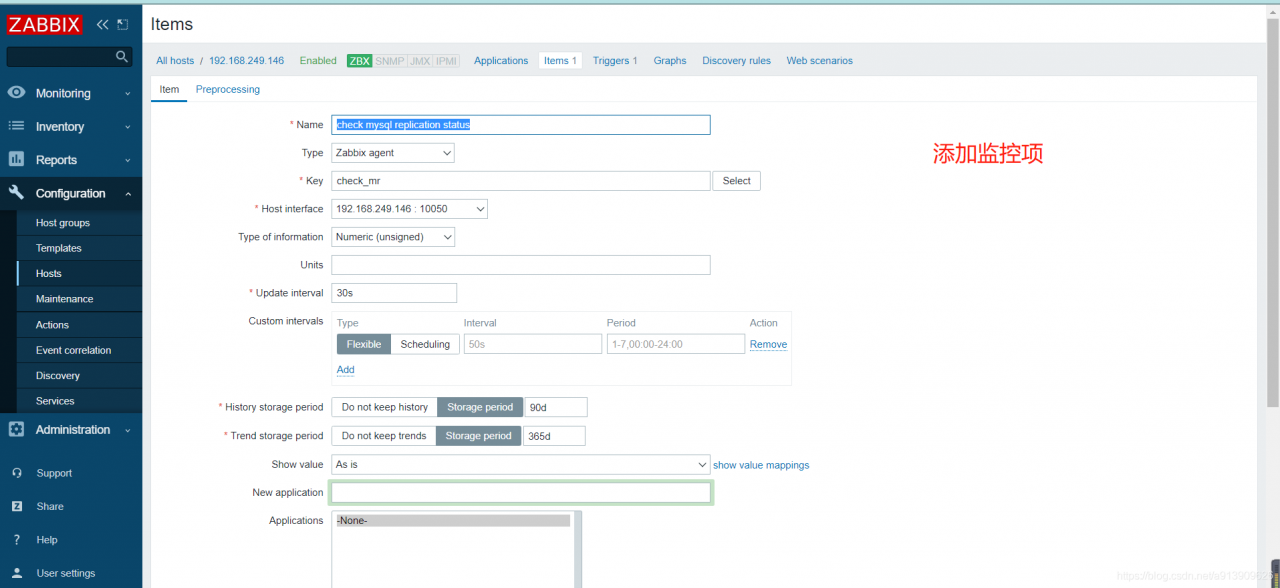
添加监控项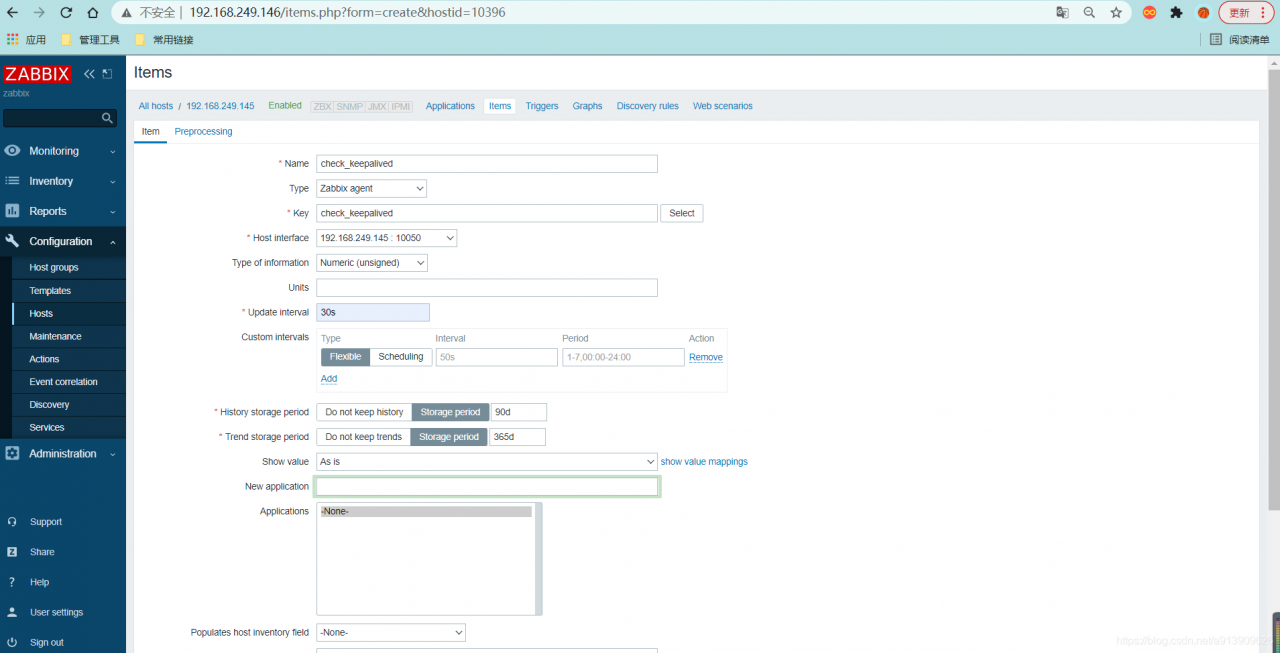
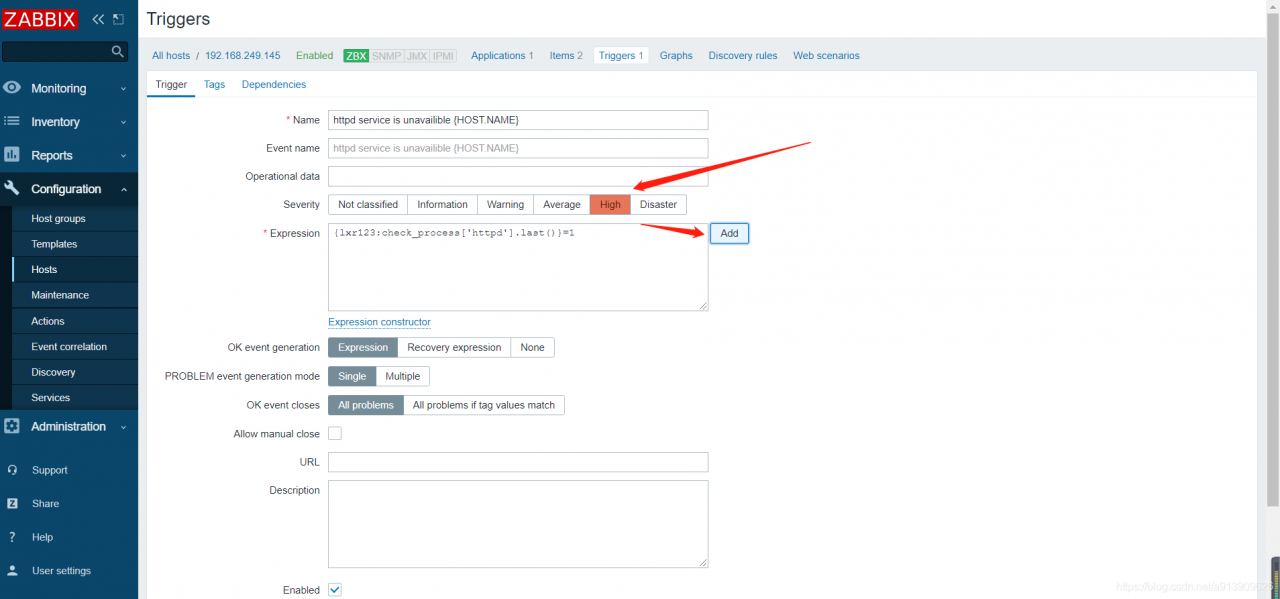
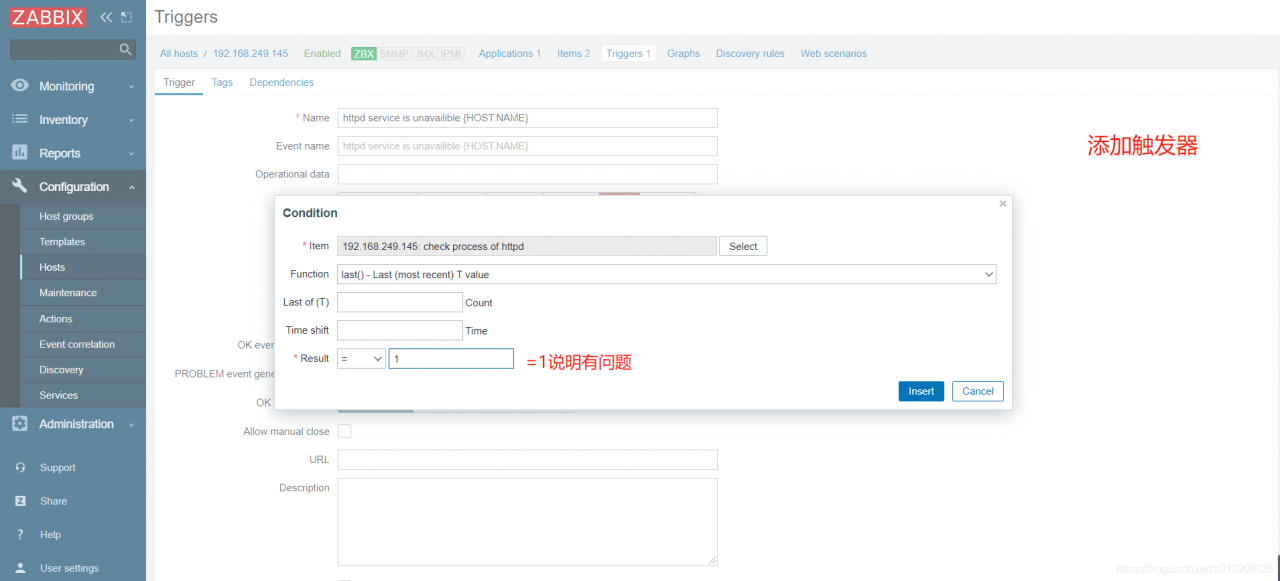
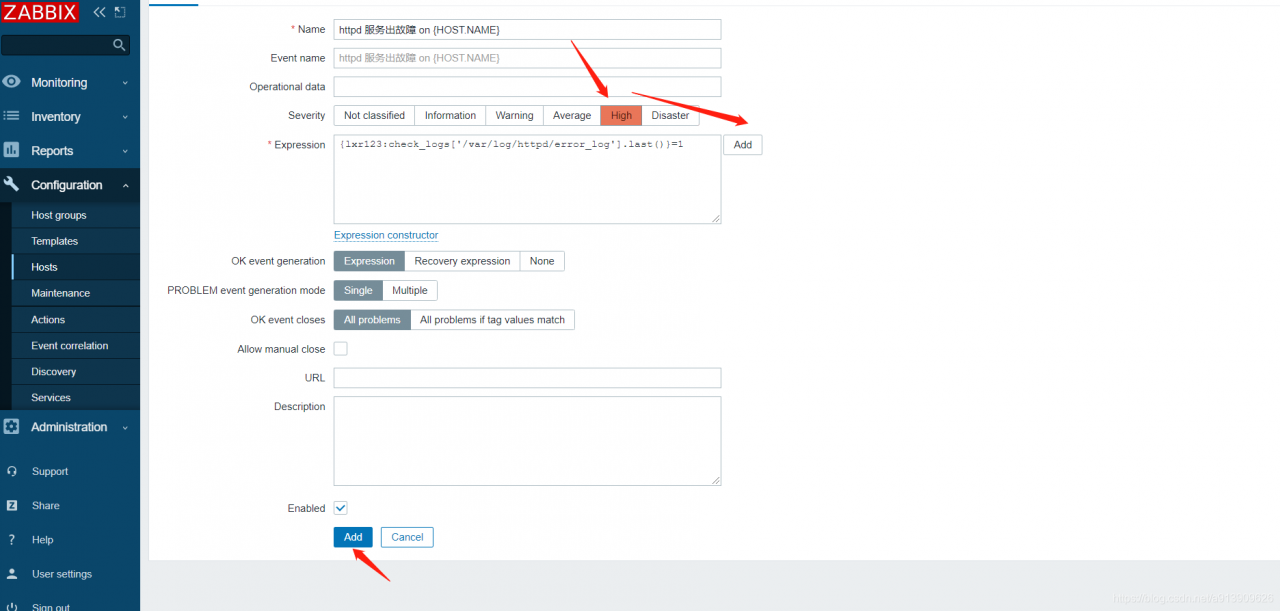
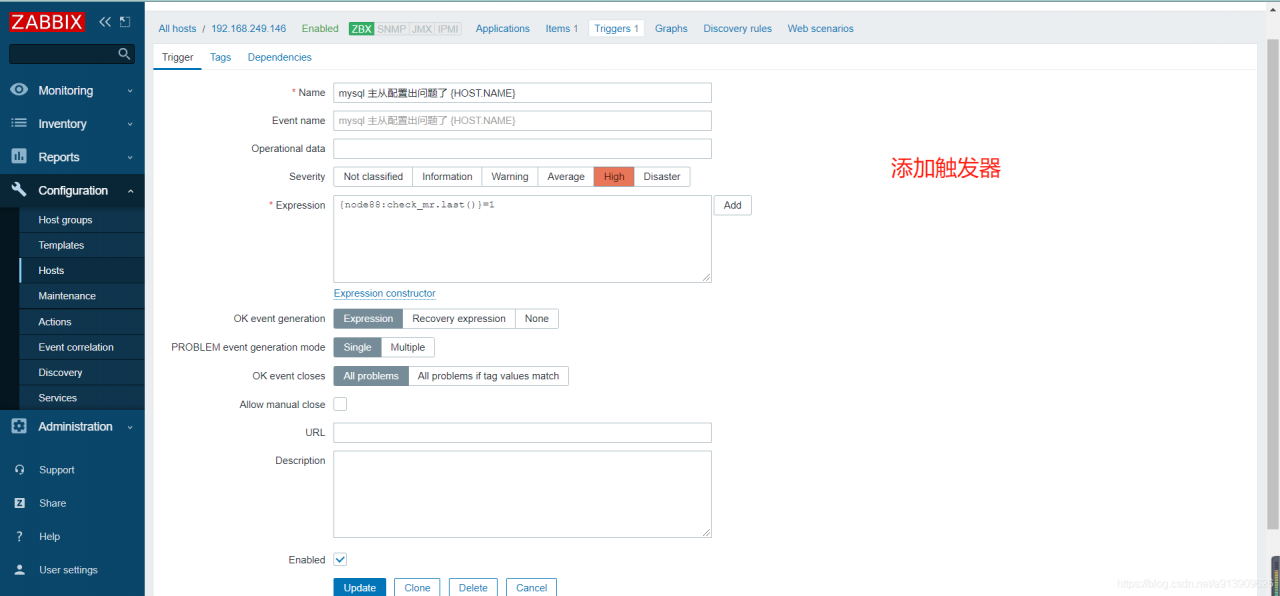
添加触发器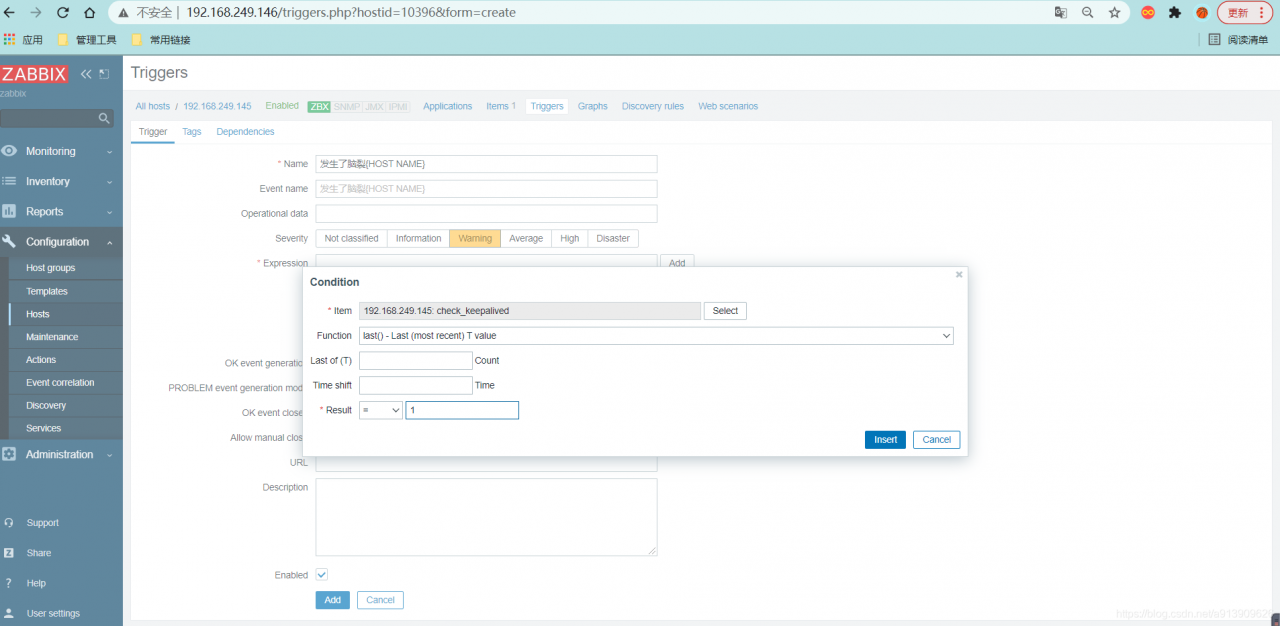
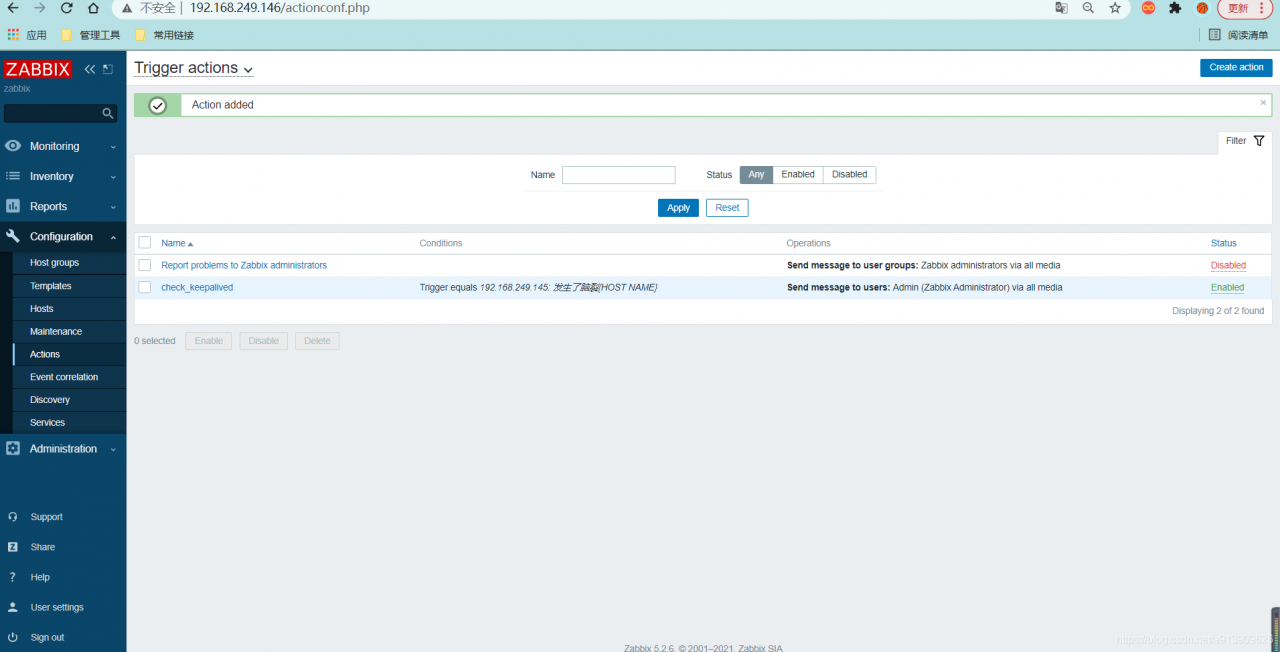
添加动作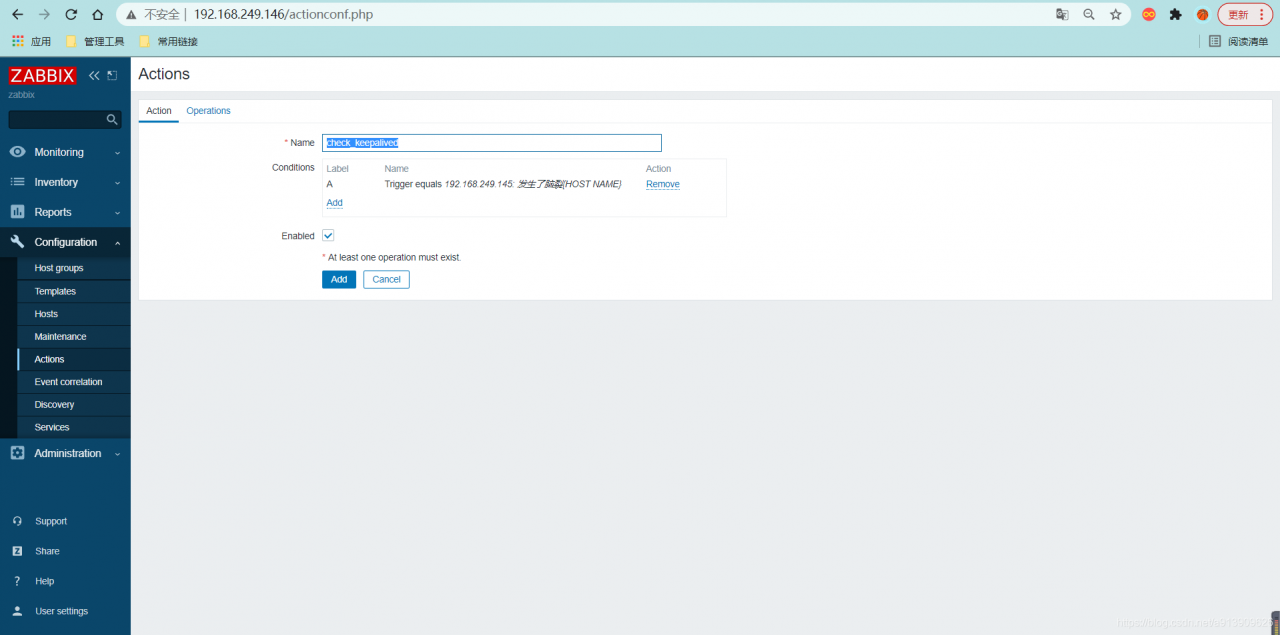
手动触发问题
关掉主上面的Keepalived
 [root@master ~]# systemctl stop keepalived
版权声明:本文为a913909626原创文章,遵循CC 4.0 BY-SA版权协议,转载请附上原文出处链接和本声明。