SpringBoot学习文档
首先真的特别感谢同学的分享以及老师的整理,让我成功入门了springboot的。
一、介绍
小结:
- SpringBoot并不是一个新的开发语言

- Spring Boot 简化了基于Spring的应用开发
- SpringBoot简化了配置
- 能很容易整合很多第三方优秀框架
什么是SpringBoot/SpringBoot的特点
SpringBoot并不是一个新的开发语言,SpringBoot简化了Spring的应用开发,降低了Spring的学习和使用门槛,SpringBoot简化了Spring的配置,并且很容易整合第三方优秀的框架。
二、快速入门
2.1方式一

pom.xml
<?xml version="1.0" encoding="UTF-8"?>
<project xmlns="http://maven.apache.org/POM/4.0.0"
         xmlns:xsi="http://www.w3.org/2001/XMLSchema-instance"
         xsi:schemaLocation="http://maven.apache.org/POM/4.0.0 http://maven.apache.org/xsd/maven-4.0.0.xsd">
    <modelVersion>4.0.0</modelVersion>

    <groupId>org.example</groupId>
    <artifactId>SpringbootDemo01</artifactId>
    <version>1.0-SNAPSHOT</version>
    <!--父工程-->
    <parent>
        <groupId>org.springframework.boot</groupId>
        <artifactId>spring-boot-starter-parent</artifactId>
        <version>2.1.6.RELEASE</version>
    </parent>

    <!--起步依赖web-->
    <dependencies>
        <dependency>
            <groupId>org.springframework.boot</groupId>
            <artifactId>spring-boot-starter-web</artifactId>
        </dependency>
    </dependencies>

</project>
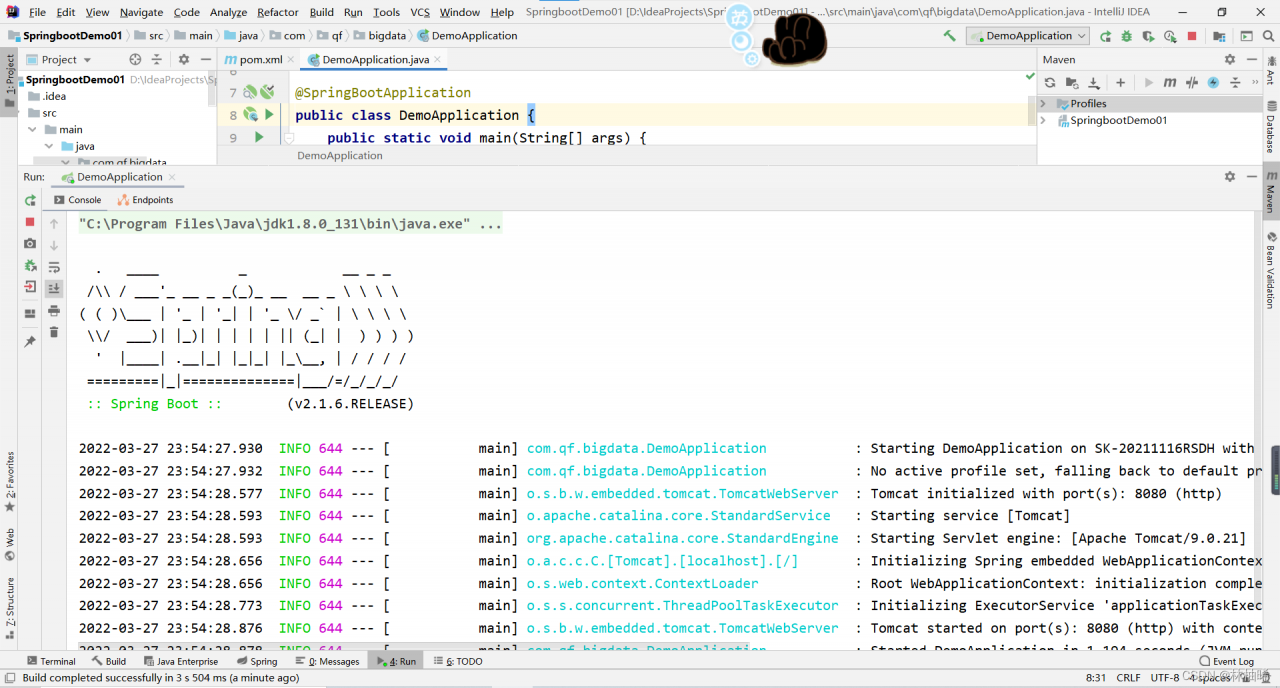
DemoApplication
package com.qf.bigdata;


import org.springframework.boot.SpringApplication;
import org.springframework.boot.autoconfigure.SpringBootApplication;

@SpringBootApplication
public class DemoApplication {
    public static void main(String[] args) {
        SpringApplication.run(DemoApplication.class,args);
    }
}
package com.qf.bigdata.controller;

import org.springframework.web.bind.annotation.RequestMapping;
import org.springframework.web.bind.annotation.RestController;

@RestController
public class HelloController {
   @RequestMapping(value = "/hello")
   public String hello(){
       return "hello springboot!";
   }
}
运行代码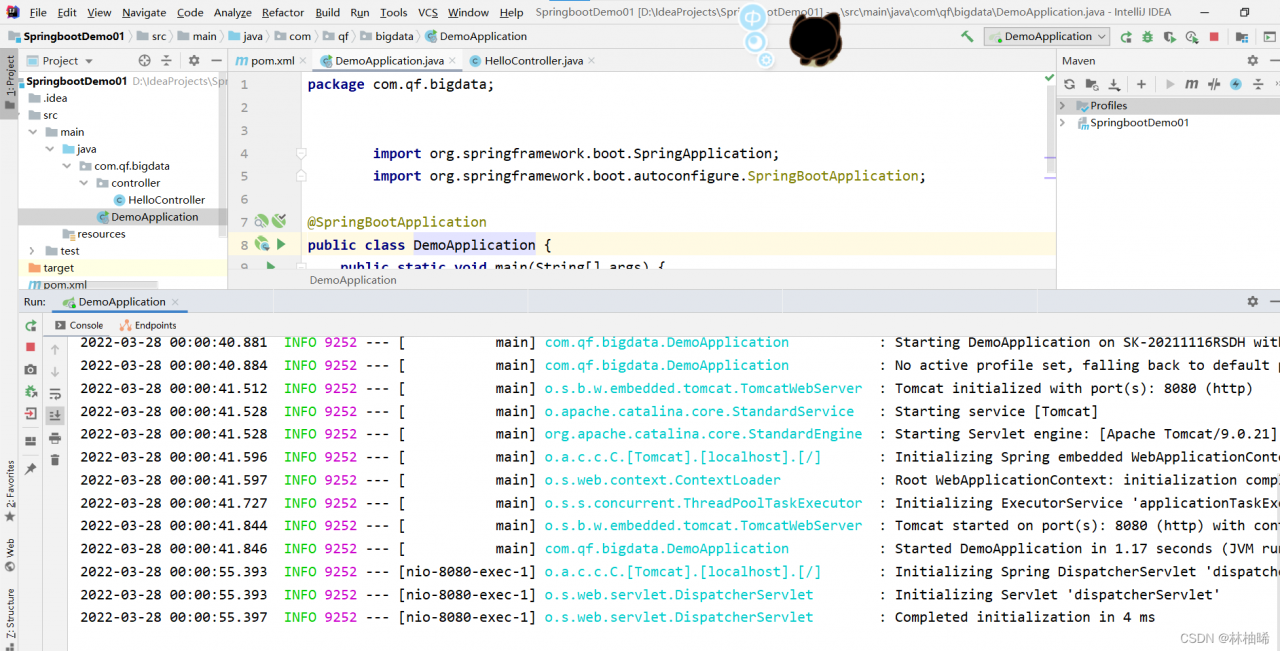
访问http://localhost:8080/hello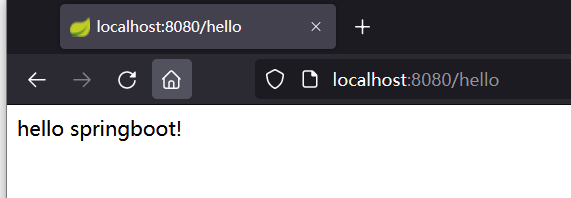
2.2 方式二(建议)
不是建maven,是建一个pring initializr
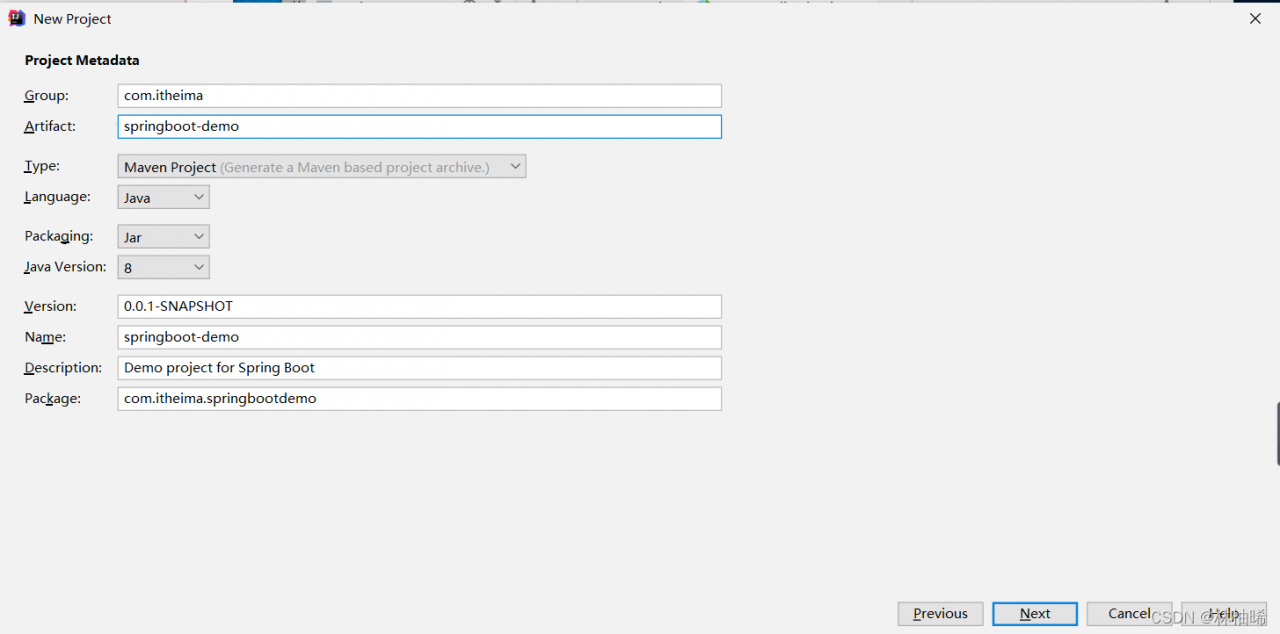
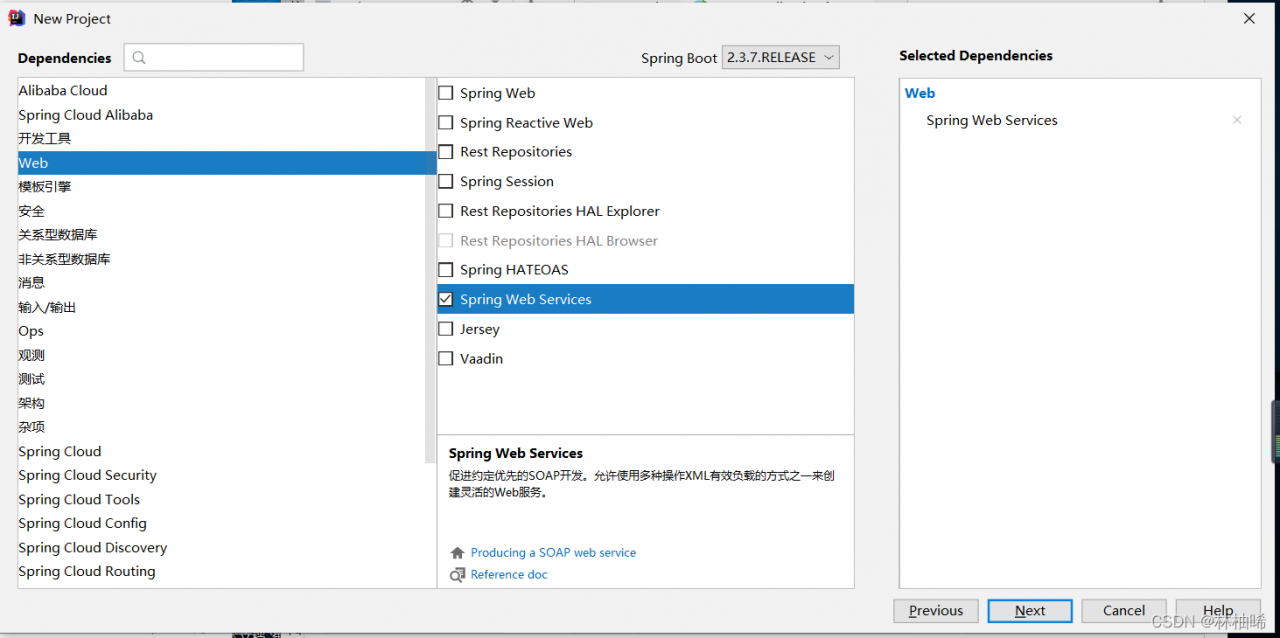
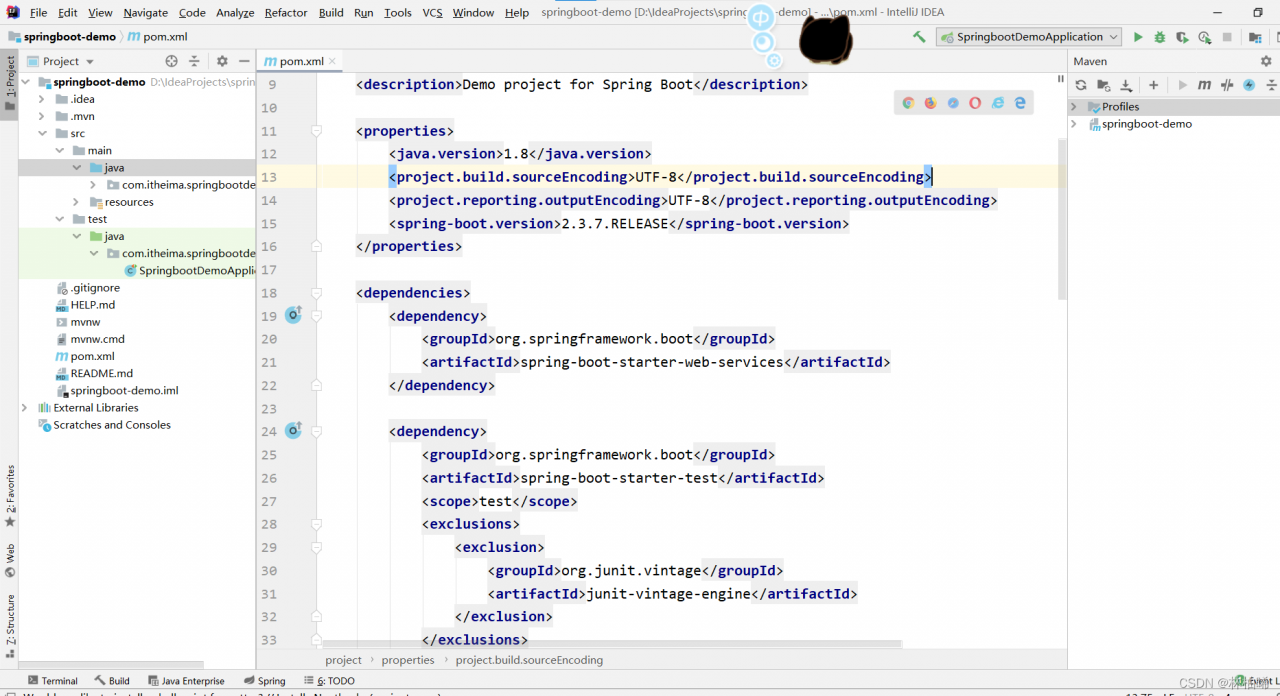
(1)创建spring initializr工程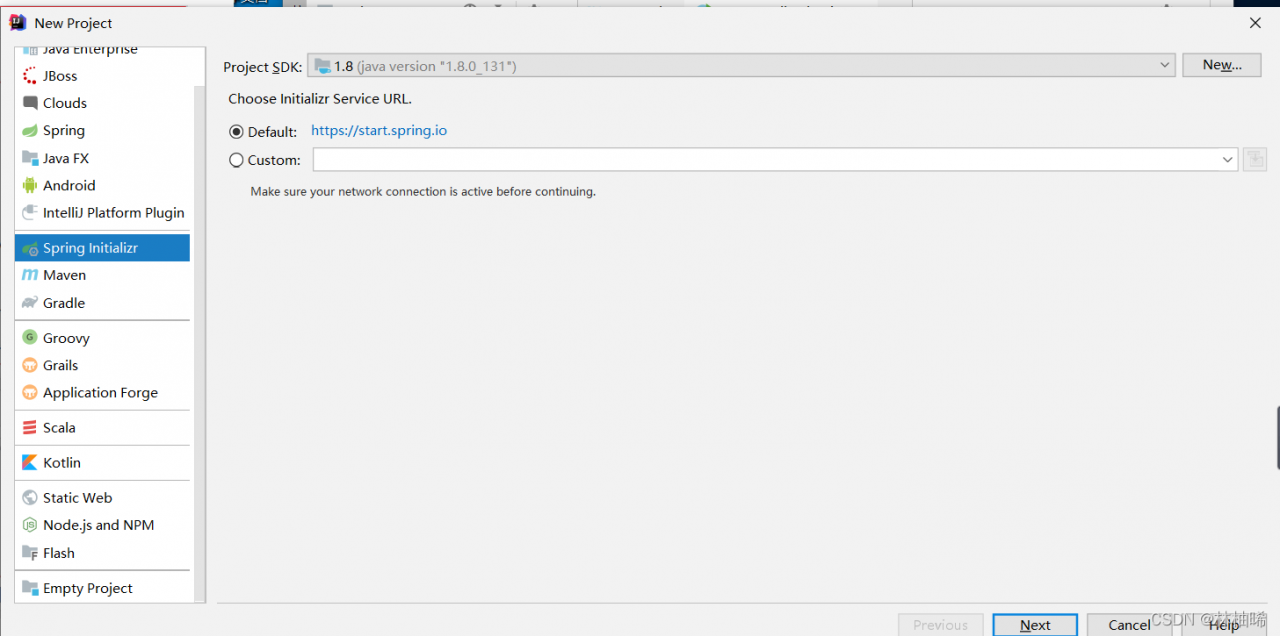
新建module,选择spring initializr,然后下一步(如果默认网址不行可以换https://start.aliyun.com/)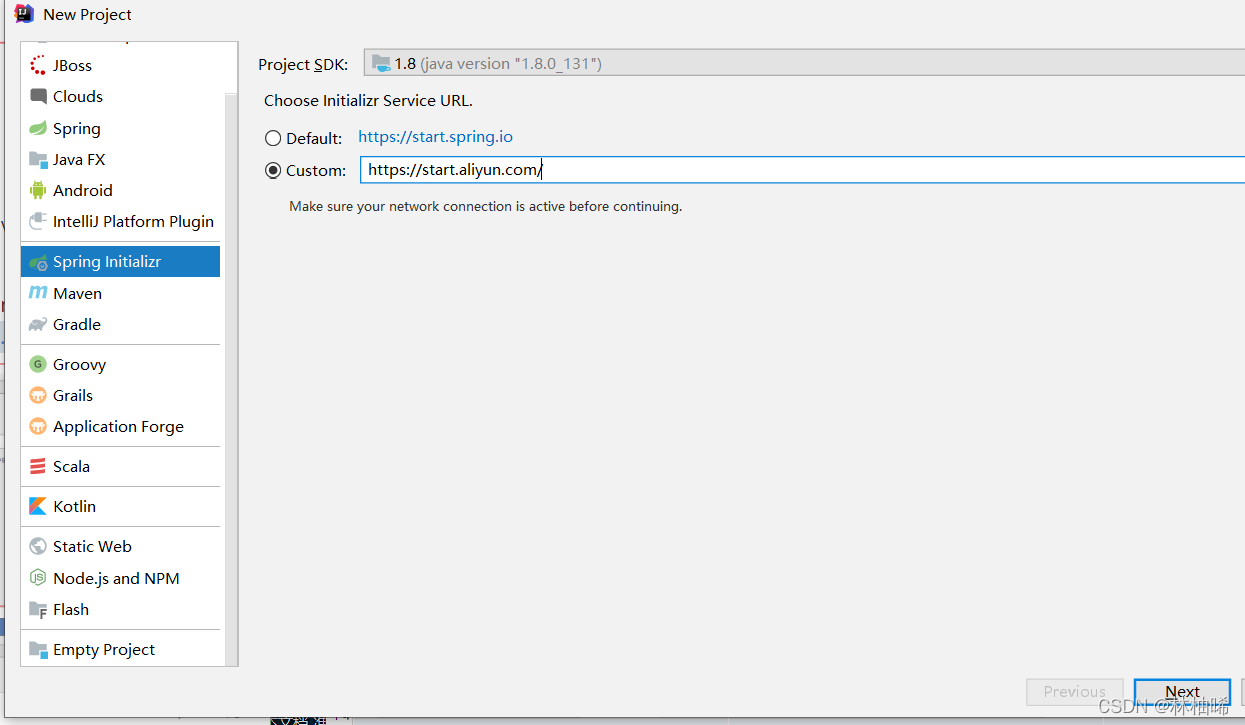
(2)编写HelloController
package com.itheima.springbootdemo.controller;

import org.springframework.web.bind.annotation.RequestMapping;
import org.springframework.web.bind.annotation.RestController;

@RestController
public class HelloController {
  @RequestMapping(value = "/hello")
    public String hello(){
      return "hello spring ! demo2";
  }
}
那个入口是系统自己生成的
[外链图片转存失败,源站可能有防盗链机制,建议将图片保存下来直接上传(img-Rkdy4eU7-1648399162633)(springboot.assets/image-20220328001324244.png)]
访问:http://localhost:8080/hello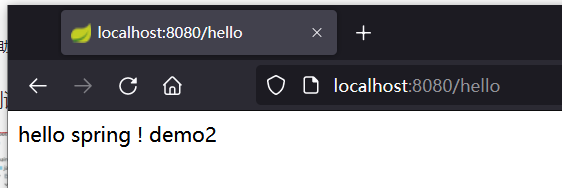
2.3 小结
- 搭建SpringBoot环境有2种方式
- Maven工程直接导包(手动在pom.xml中引入依赖:1.父工程 2.web起步包)
- Spring Initializr方式(勾选起步包,自动引入依赖,同时自动创建启动类)
- 使用SpringBoot,我们只用关注业务逻辑,而不用关注业务
- 启动SpringBoot工程:直接启动启动类的主方法即可(默认集成了tomcat:8080)
三、原理分析
使用了父工程统一管理jar
3.1 自动配置
(1)@SpringBootApplication
该注解是一个组合注解
- @SpringBootConfiguration:与之前@Configuration注解一样,声明为一个配置类
- @ComponentScan:spring IoC容器的扫描包,默认扫描引导程序下的包以及子包,如果我们写的程序不在该包范围内,可以通过该注解指定。
- @EnableAutoConfiguration:springboot实现自动化配置的核心注解。
(2)@SpringBootConfiguration
@Configuration注解。通过上面的注释阅读我们知道:这个注解的作用就是声明当前类是一个配置类,然后Spring会自动扫描到添加了@Configuration的类,并且读取其中的配置信息。而@SpringBootConfiguration是来声明当前类是SpringBoot应用的配置类,项目中只能有一个。所以一般我们无需自己添加。
(3)@EnableAutoConfiguration
@EnableAutoConfiguration告诉Spring Boot基于你所添加的依赖,去“猜测”你想要如何配置Spring。比如我们引入了spring-boot-starter-web,而这个启动器中帮我们添加了tomcat、SpringMVC的依赖。此时自动配置就知道你是要开发一个web应用,所以就帮你完成了web及SpringMVC的默认配置了!
自动配置:自己一般不用修改配置,默认的配置都给配好了。
自动配置原理:
程序启动后,会自动加载所有的jar包中或者工程中的classpath:/META-INF/spring.factories文件,并且会查找key=org.springframework.boot.autoconfigure.EnableAutoConfiguration对应的数据,获取对应的数据,对应的数据是需要程序启动自动创建对象实例的类的全限定名,就会帮我创建这个类的对象到spring容器中,实现自动配置
3.2 小结
- 工程继承了
spring-boot-starter-parent工程,spring-boot-starter-parent继承了spring-boot-dependencies,spring-boot-dependencies实现了jar包管理和版本锁定。工程引入spring-boot-starter-web依赖,该工程又依赖了其他web所需的jar包,maven依赖有传递性。 - 通过
@SpringBootApplication注解完成自动配置,会将当前类作为一个配置类,并且会根据我们所引入的依赖猜测我们的配置,并实现自动配置。
四、SpringBoot配置文件使用
4.1说明
(1)Spriingboot的配置都说默认的
(2)如果想改默认配置就只能使用application.properties或者application.yml(aplication.yaml)来定义配置。
(3)SpringBoot默认从resources目录加载自定义配置文件。
(4)application.properties是键值对类型(一直在用,而且默认生成)
(5)pplication.yml是SpringBoot中一种新的配置文件方式,现在开始流行使用(感觉那个格式和我们写azkaban的.flow文件和project文件格式一样,不能使用制表符)
4.2讲解
4.2.1 application.properties
(1) 语法
格式:key=value
如果是修改SpringBoot中的默认配置,那么key则不能任意编写,必须参考SpringBoot官方文档。
application.properties官方文档:
https://docs.spring.io/spring-boot/docs/current/reference/htmlsingle/
(2)案例
在resources目录下新建application.properties
#tomcat port
server.port=18081
#app context
server.servlet.context-path=/demo
[外链图片转存失败,源站可能有防盗链机制,建议将图片保存下来直接上传(img-846YJotl-1648399162634)(springboot.assets/image-20220328002855079.png)]
此时运行,tomcat端口发生了变化,每次请求,需要加上/demo
web: localhost:18081/demo
把application.properties替换成application.yml
server:
  port: 18081
  servlet:
    context-path: /demo
[外链图片转存失败,源站可能有防盗链机制,建议将图片保存下来直接上传(img-ynvPTQuM-1648399162635)(springboot.assets/image-20220328003601405.png)]
4.2.2 application.yml
(1)语法
普通数据:
说明:
key: value(注意:冒号有一个空格)

示例:
name: tom
对象数据或map
说明:
key:
	key1: value1
	key2: value2

示例:
user:
	name: tom
	age: 23
	addr: beijing
集合数据1:存储简单类型
说明:
key:
	value1
	value2
或:
key: value1,value2

示例:
city:
	- beijing
	- anhui
	- jiangxi
	- shenzhen
或:
city: beijing,anhui,jiangxi,shenzhen
集合数据2:存储对象类型
说明:
key:
	key1: vlaue1
	key2: value2

示例:
student:
	- name: zhangsan
	  age: 23
	  addr: BJ
	- name: lisi
	  age: 25
	  addr: SZ
:
key: value1,value2
示例:
city:
- beijing
- anhui
- jiangxi
- shenzhen
或:
city: beijing,anhui,jiangxi,shenzhen
**集合数据2:存储对象类型**

~~~properties
说明:
key:
	key1: vlaue1
	key2: value2

示例:
student:
	- name: zhangsan
	  age: 23
	  addr: BJ
	- name: lisi
	  age: 25
	  addr: SZ