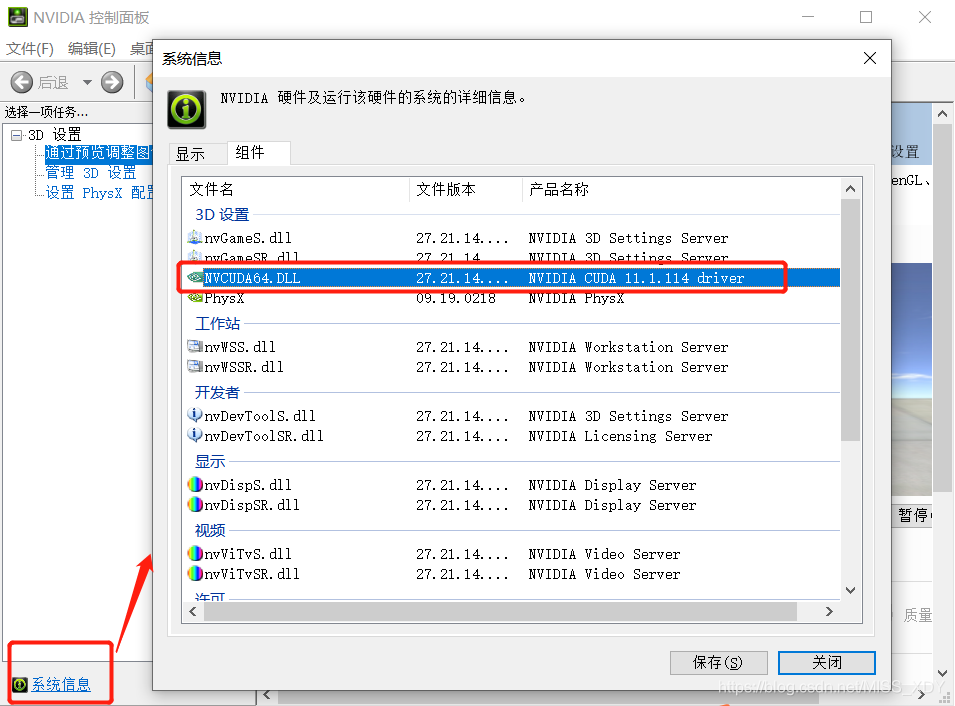
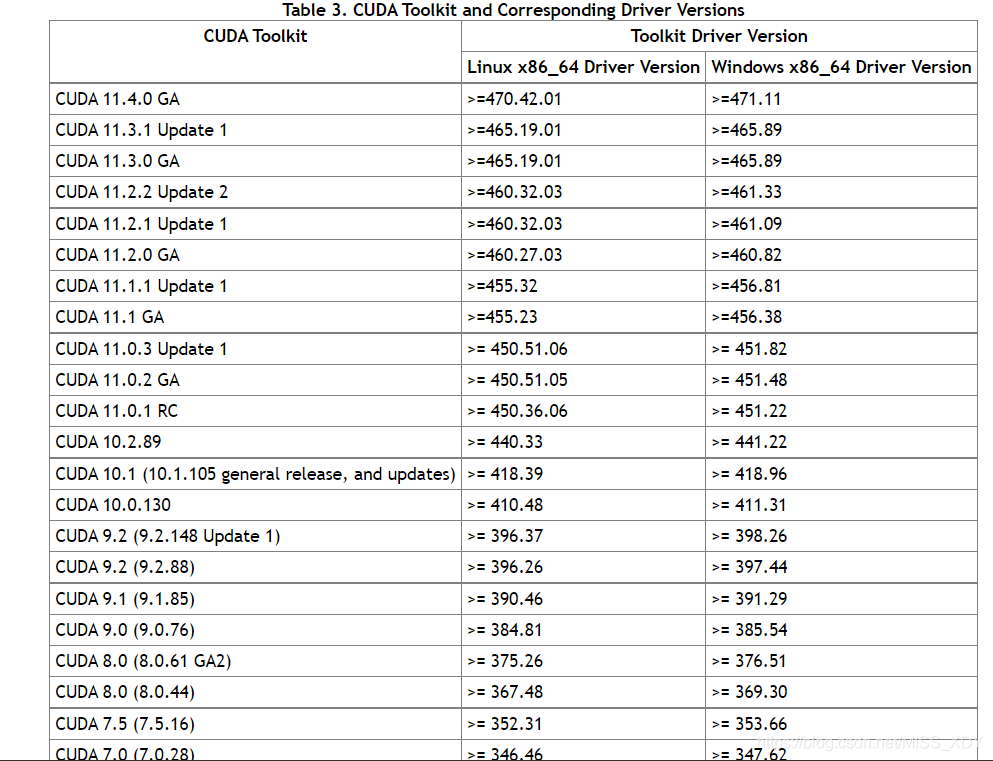
在下载CUDA前先查看自己NVIDIA的版本信息
我选择安装11.1.1版本
CUDA11.1下载链接:
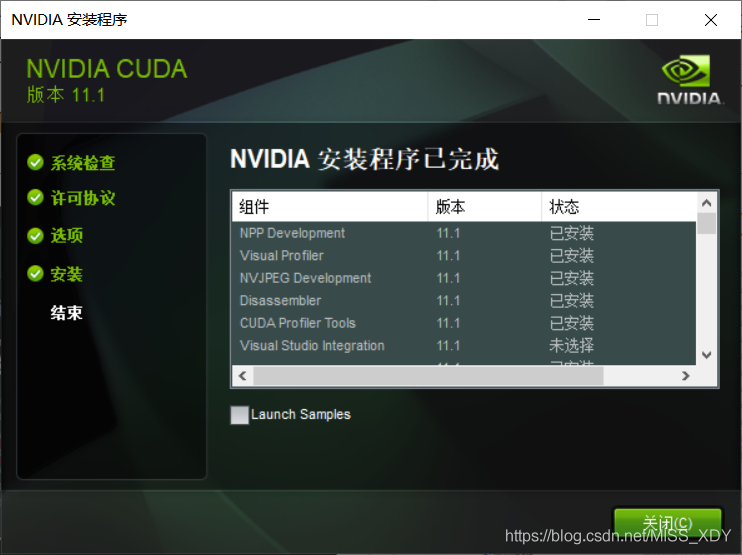
在 CUDA 节 点下,取消”Visual Studio Integration” 一项;在“ Driver components”节点下,比对目前计 算机已经安装的显卡驱动“ Display Driver ”的版本号“ Current Version ”和 CUDA 自带的显卡驱动版本号“ New Version ”,如果“ Current Version ”大于“ New Version”,则需要取消“ Display Driver ”的勾,如果小于或等于,则默认勾选即可,如图 1.27 所示。设置完成后即可正常安装。
安装完成如下
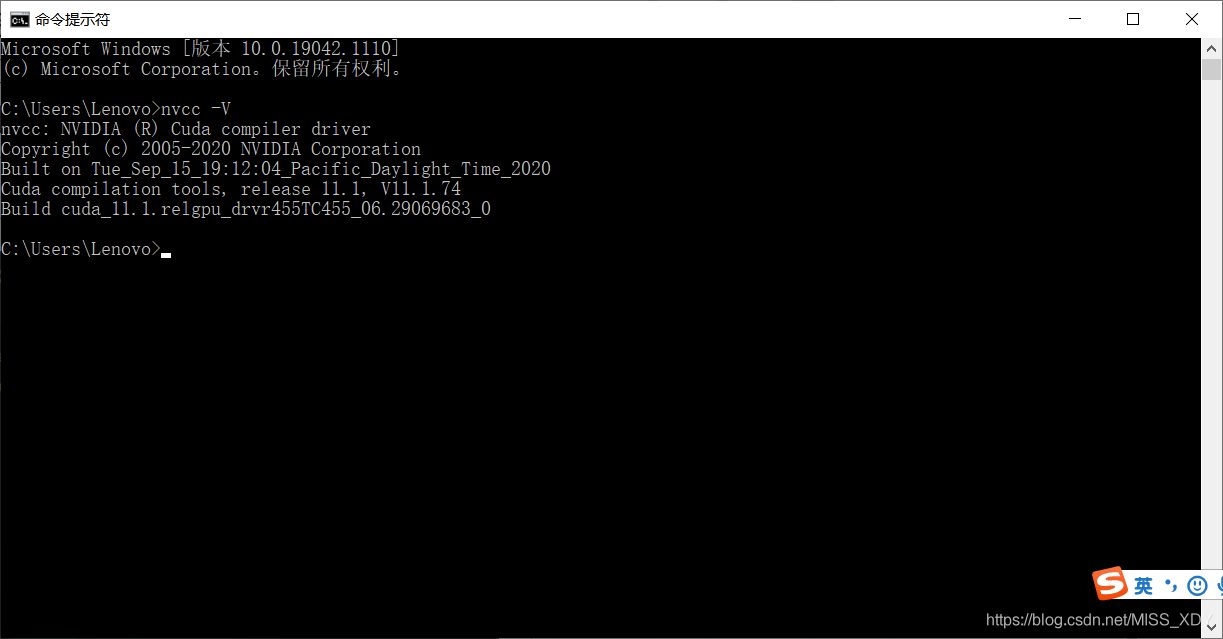
在cmd下测试是否安装成功,输入nvcc -V
cuDNN神经网络加速库安装
https://developer.nvidia.com/cudnn

选择对应的版本号,我选的是第一个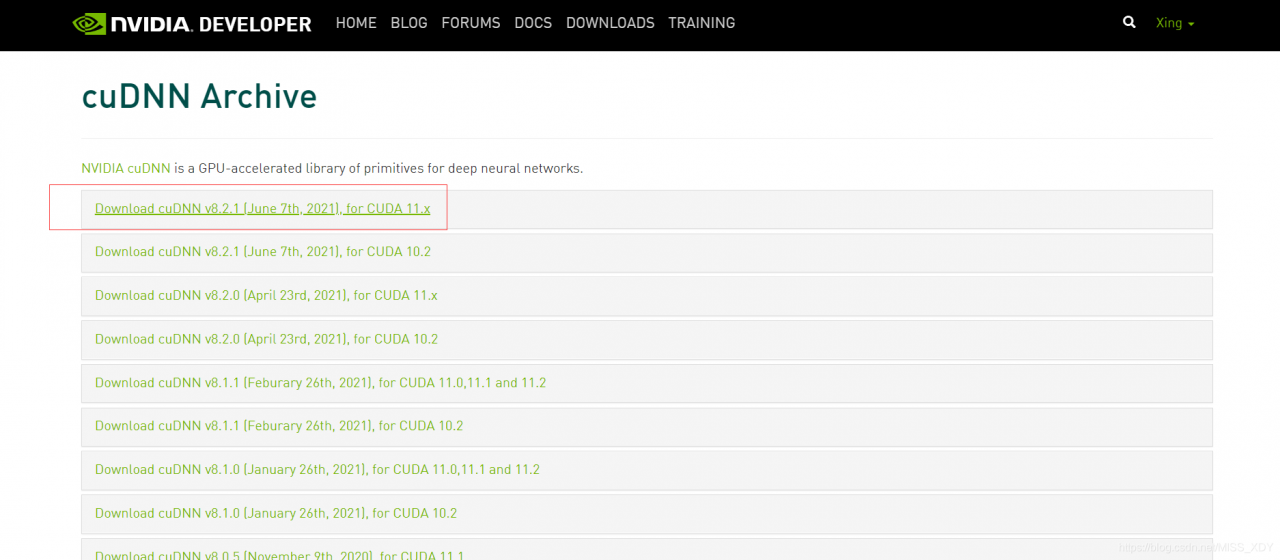
对应Windows版本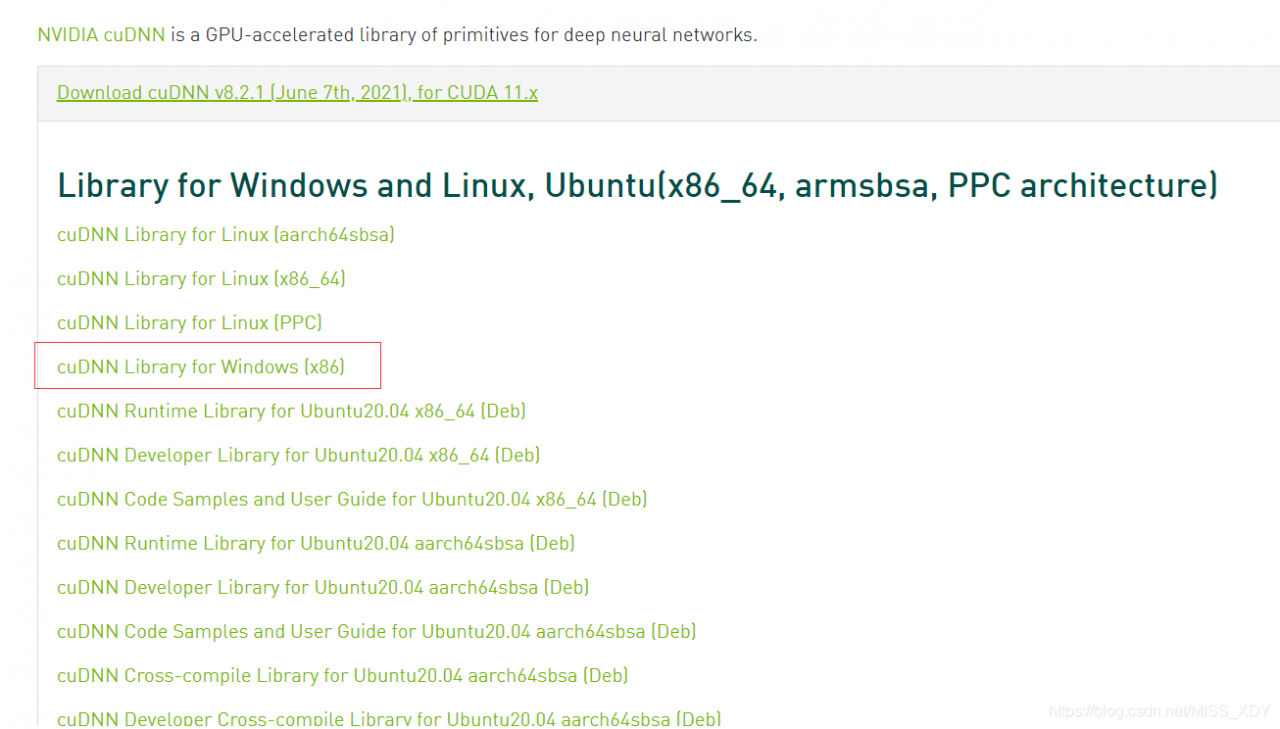
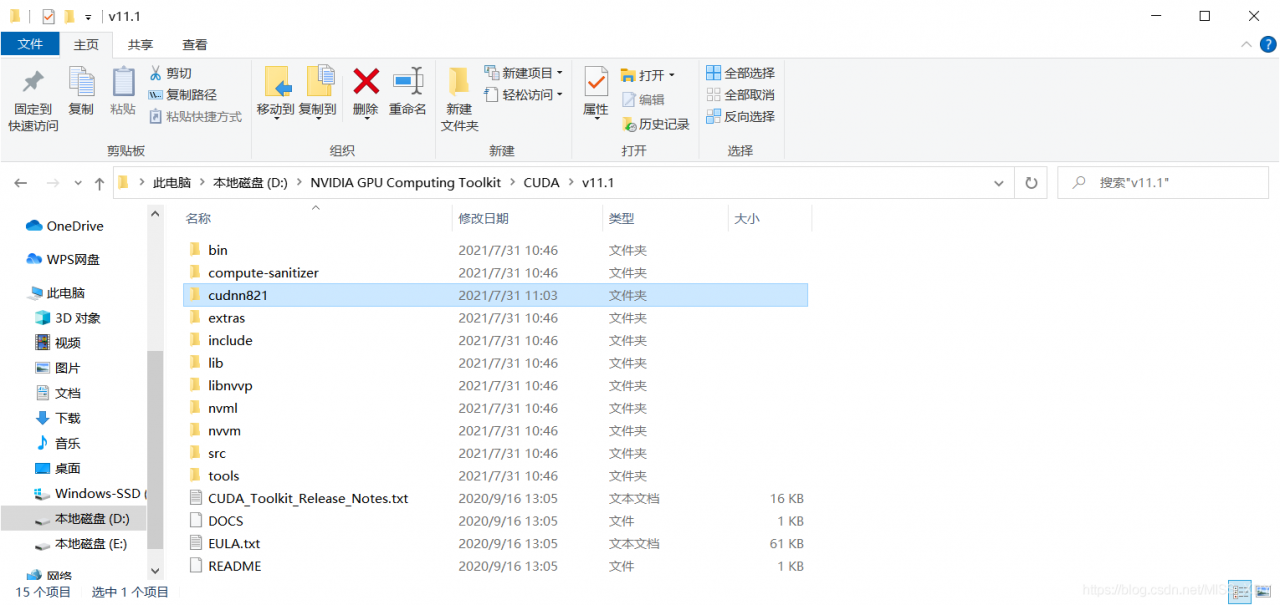
下载后解压,将cuda文件夹改名为cudnn821,将该文件夹移动到CUDA的安装路径下:
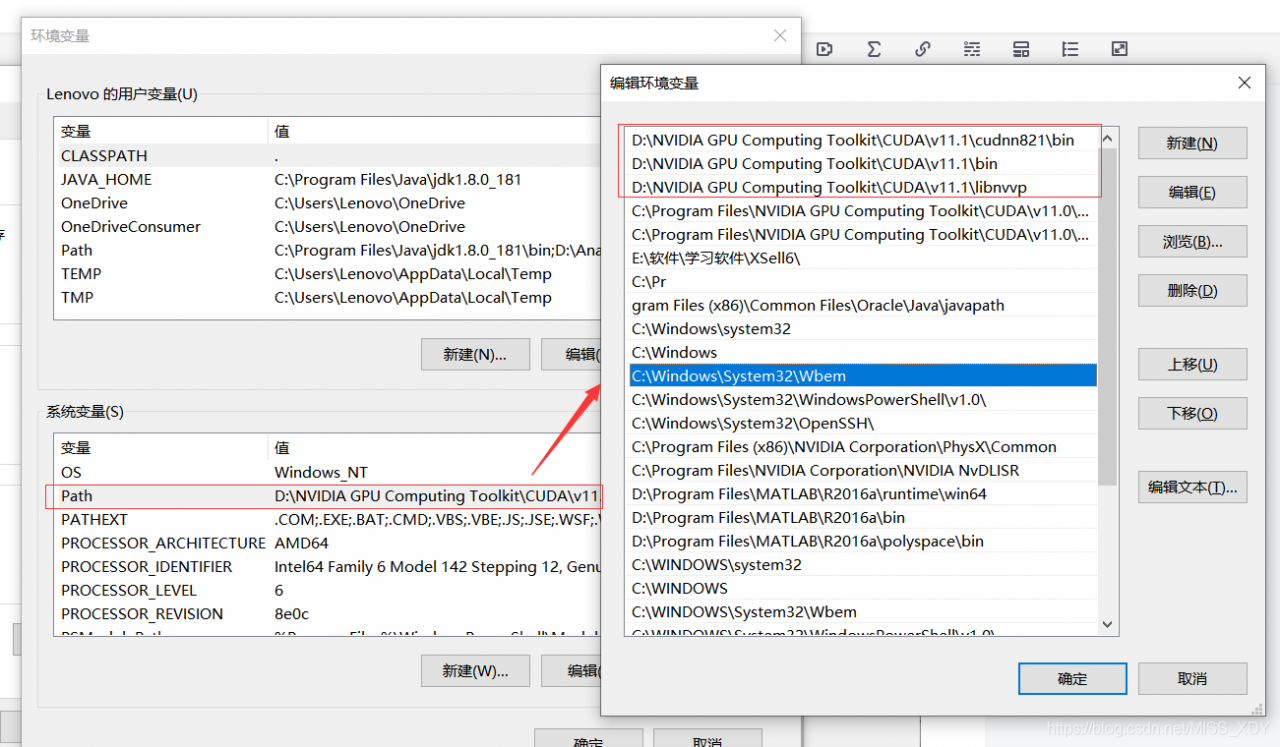
配置环境变量
安装tensorflow-gpu
pip install -U tensorflow-gpu -i https://pypi.tuna.tsinghua.edu.cn/simple在cmd的ipython中检查是否安装成功(先输入ipython进入如下交互命令)
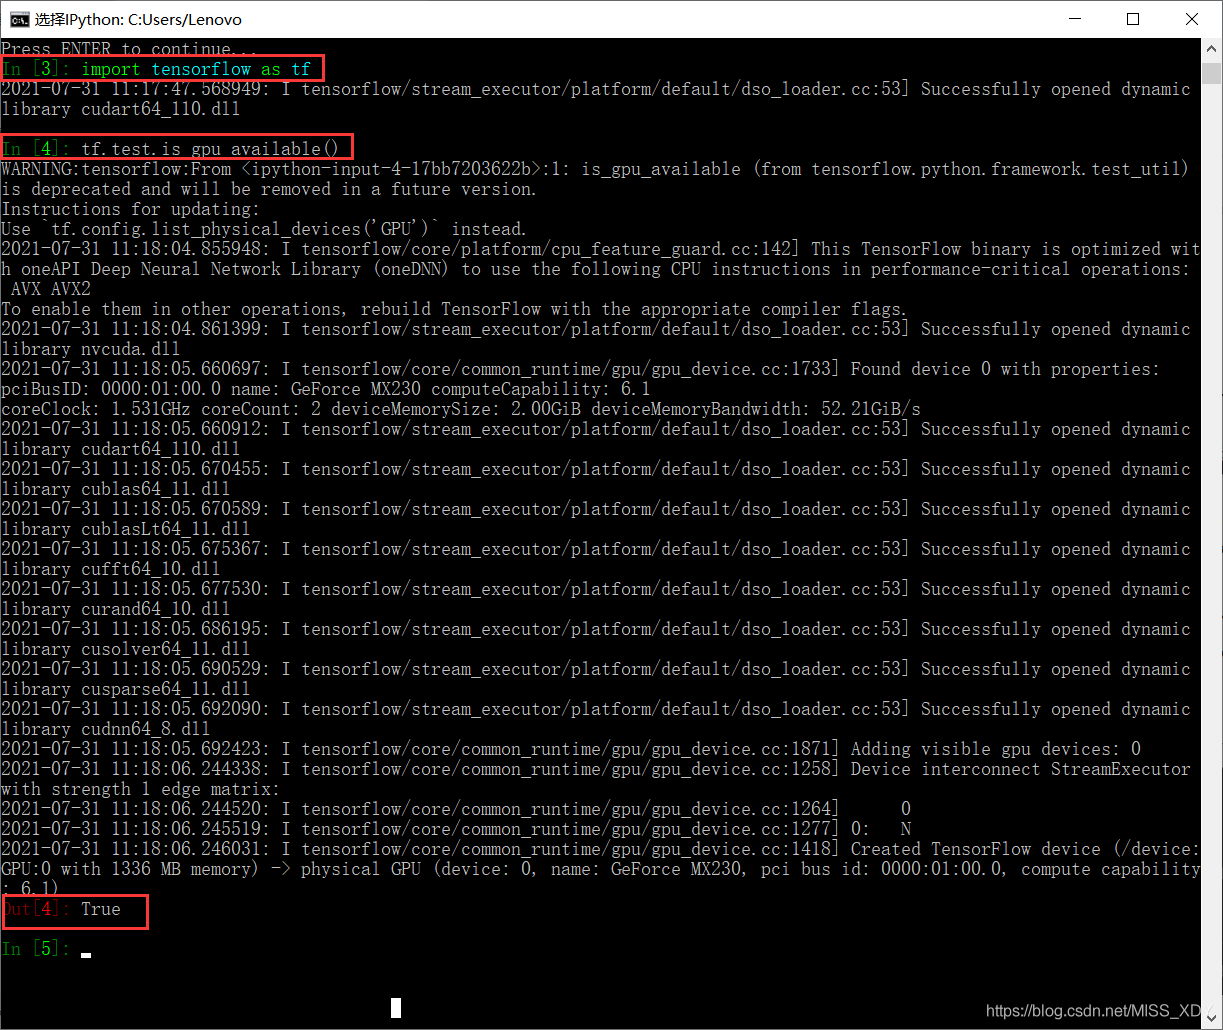
上图代表成功安装tensorflow的gpu版本
版权声明:本文为MISS_XDY原创文章,遵循CC 4.0 BY-SA版权协议,转载请附上原文出处链接和本声明。