《方式一,简单网络操作》
1.get请求:
//1.地址栏上的地址
URL url = new URL("带参数url");
//2.似回车,打开链接
HttpURLConnection conn = (HttpURLConnection)url.openConnection();
//3.得告诉服务器是什么请求方式(GET)
conn.setRequestMethod("GET");
//4.判断响应码
if(conn.getResponseCode() == 200){
//5.获取输入流
    InputStream is = conn.getInputStream();
}
2.post请求:
//1.地址栏上的地址
URL url = new URL("不带参数地址");
//2.似回车,打开链接
HttpURLConnection conn = (HttpURLConnection)url.openConnection();

//3.1.得告诉服务器是什么请求方式(POST)
//3.2.设置请求头参数:
        //3.2.1. 告诉服务器是form表单提交数据的
        //3.2.2. 告诉服务器数据的长度
conn.setRequestMethod("POST");
conn.setRequestProperty("Content-Type", "application/x-www-form-urlencoded");
conn.setRequestProperty("Content-Length", urlParams.length() + "");
//4.将参数输出到服务器上,在安卓中HttpURLCnnnection的输出流(字节流)开关默认是关闭的,的手动设置输出流开关。
conn.setDoOutput(true);
conn.getOutputStream().write(urlParams.getBytes());

//5.判断响应码
if(conn.getResponseCode() == 200){
    //6.获取输入流
    InputStream is = conn.getInputStream();
}3.get请求和post请求的区别:
1.告诉服务区是什么请求方式不同。
2.get请求只需要在url中添加参数的名称和值即可,post请求需要:
2.(1)告诉服务器是什么提交方式(表单)
2.(2)参数的长度
2.(3)参数以流的方式从客户端发送到服务器端【HttpURLConnection的输出流默认是关闭的,得手动打开】。
《方式二,Httpclient方式》
1.HttpGet请求:
//1.创建一个客户端,相当于浏览器
HttpClient client = new DefaultHttpClient();
//2.声明一个HpptGet请求
HttpGet get = new HttpGet("带参数地址");
//3.执行请求后得到响应对象
HttpResponse response = client.execute(post);
//4.通过响应对象得到响应行从而得到相应码
int statusCode = response.getStatusLine().getStatusCode();
if(statusCode == 200){
    //5.从HttpEntity中得到相应过来的输入流(不管是请求的数据还是响应过来的数据都封装到HttpEntity中)
    HttpEntity entitys = response.getEntity();
    InputStream is = entitys.getContent();
}
2.HttpPost请求:
//1.创建一个客户端,相当于浏览器
HttpClient client = new DefaultHttpClient();
//2.声明一个HpptPost请求
HttpPost post = new HttpPost("不带参数地址");
//3.添加post的参数(不管是请求的数据还是响应过来的数据都封装到HttpEntity中)
List<BasicNameValuePair> parameters = new ArrayList<>();
parameters.add(new BasicNameValuePair("username", username));
parameters.add(new BasicNameValuePair("pwd", pwd));

HttpEntity entity = new UrlEncodedFormEntity(parameters);
post.setEntity(entity);

//4.执行请求后得到响应对象
HttpResponse response = client.execute(post);

//5.通过响应对象得到响应行从而得到相应码
int statusCode = response.getStatusLine().getStatusCode();
if(statusCode == 200){
    //6.从HttpEntity中得到相应过来的输入流(不管是请求的数据还是响应过来的数据都封装到HttpEntity中)
    HttpEntity entitys = response.getEntity();
    InputStream is = entitys.getContent();
}
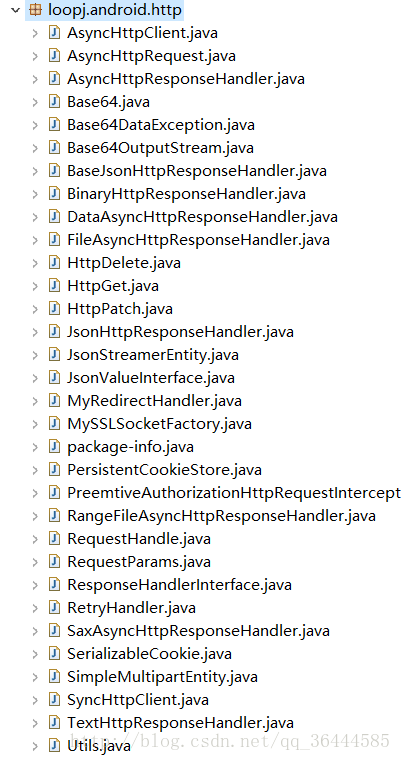
《方式三,AsyncHttpClient方式,需引入第三方文件,如图》 
1.get请求:
//1.声明一个AsyncHttpClient客户端
AsyncHttpClient client = new AsyncHttpClient();

//2.在客户端中完成参数的设置
RequestParams params = new RequestParams();
params.put("username", username);
params.put("pwd", pwd);

client.get("带参数地址", new TextHttpResponseHandler() {
    @Override
    public void onSuccess(int statusCode, Header[] headers,
            String responseString) {
        Toast.makeText(MainActivity.this, responseString, Toast.LENGTH_SHORT).show();
    }

    @Override
    public void onFailure(int statusCode, Header[] headers,
            String responseString, Throwable throwable) {
        // TODO Auto-generated method stub

    }
});
2.post请求(表单图片上传半实例):
//1.声明一个AsyncHttpClient客户端
AsyncHttpClient client = new AsyncHttpClient();


//2.在客户端中完成参数的设置
String url = "不带参数地址";

RequestParams params = new RequestParams();
params.put("fName", "myPic.png");
File file = new File(getFilesDir(), "a.jpg");
params.put("file", file);

client.post(url , params, new TextHttpResponseHandler() {
    @Override
    public void onSuccess(int statusCode, Header[] headers,
            String responseString) {
        Toast.makeText(MainActivity.this, responseString, Toast.LENGTH_SHORT).show();

    }

    @Override
    public void onFailure(int statusCode, Header[] headers,
            String responseString, Throwable throwable) {

    }
});版权声明:本文为qq_36444585原创文章,遵循CC 4.0 BY-SA版权协议,转载请附上原文出处链接和本声明。