文章目录
1.准备工作
1.1 安装gcc依赖
yum -y install gcc
[root@instance-6uz2q7zs home]# yum -y install gcc
Loaded plugins: langpacks, versionlock
Resolving Dependencies
--> Running transaction check
---> Package gcc.x86_64 0:4.8.5-39.el7 will be installed
--> Processing Dependency: libgomp = 4.8.5-39.el7 for package: gcc-4.8.5-39.el7.x86_64
--> Processing Dependency: cpp = 4.8.5-39.el7 for package: gcc-4.8.5-39.el7.x86_64
--> Processing Dependency: libgcc >= 4.8.5-39.el7 for package: gcc-4.8.5-39.el7.x86_64
--> Processing Dependency: libmpfr.so.4()(64bit) for package: gcc-4.8.5-39.el7.x86_64
--> Processing Dependency: libmpc.so.3()(64bit) for package: gcc-4.8.5-39.el7.x86_64
--> Running transaction check
---> Package cpp.x86_64 0:4.8.5-39.el7 will be installed
---> Package libgcc.x86_64 0:4.8.5-36.el7 will be updated
---> Package libgcc.x86_64 0:4.8.5-39.el7 will be an update
---> Package libgomp.x86_64 0:4.8.5-36.el7 will be updated
---> Package libgomp.x86_64 0:4.8.5-39.el7 will be an update
---> Package libmpc.x86_64 0:1.0.1-3.el7 will be installed
---> Package mpfr.x86_64 0:3.1.1-4.el7 will be installed
--> Finished Dependency Resolution

Dependencies Resolved

==================================================================================================================
 Package                   Arch                     Version                          Repository              Size
==================================================================================================================
Installing:
 gcc                       x86_64                   4.8.5-39.el7                     base                    16 M
Installing for dependencies:
 cpp                       x86_64                   4.8.5-39.el7                     base                   5.9 M
 libmpc                    x86_64                   1.0.1-3.el7                      base                    51 k
 mpfr                      x86_64                   3.1.1-4.el7                      base                   203 k
Updating for dependencies:
 libgcc                    x86_64                   4.8.5-39.el7                     base                   102 k
 libgomp                   x86_64                   4.8.5-39.el7                     base                   158 k

Transaction Summary
==================================================================================================================
Install  1 Package  (+3 Dependent packages)
Upgrade             ( 2 Dependent packages)

Total download size: 23 M
Downloading packages:
No Presto metadata available for base
(1/6): cpp-4.8.5-39.el7.x86_64.rpm                                                         | 5.9 MB  00:00:00
(2/6): libgcc-4.8.5-39.el7.x86_64.rpm                                                      | 102 kB  00:00:00
(3/6): libgomp-4.8.5-39.el7.x86_64.rpm                                                     | 158 kB  00:00:00
(4/6): libmpc-1.0.1-3.el7.x86_64.rpm                                                       |  51 kB  00:00:00
(5/6): gcc-4.8.5-39.el7.x86_64.rpm                                                         |  16 MB  00:00:00
(6/6): mpfr-3.1.1-4.el7.x86_64.rpm                                                         | 203 kB  00:00:00
------------------------------------------------------------------------------------------------------------------
Total                                                                              60 MB/s |  23 MB  00:00:00
Running transaction check
Running transaction test
Transaction test succeeded
Running transaction
Warning: RPMDB altered outside of yum.
  Installing : mpfr-3.1.1-4.el7.x86_64                                                                        1/8
  Installing : libmpc-1.0.1-3.el7.x86_64                                                                      2/8
  Installing : cpp-4.8.5-39.el7.x86_64                                                                        3/8
  Updating   : libgomp-4.8.5-39.el7.x86_64                                                                    4/8
  Updating   : libgcc-4.8.5-39.el7.x86_64                                                                     5/8
  Installing : gcc-4.8.5-39.el7.x86_64                                                                        6/8
  Cleanup    : libgomp-4.8.5-36.el7.x86_64                                                                    7/8
  Cleanup    : libgcc-4.8.5-36.el7.x86_64                                                                     8/8
  Verifying  : mpfr-3.1.1-4.el7.x86_64                                                                        1/8
  Verifying  : libgcc-4.8.5-39.el7.x86_64                                                                     2/8
  Verifying  : libgomp-4.8.5-39.el7.x86_64                                                                    3/8
  Verifying  : libmpc-1.0.1-3.el7.x86_64                                                                      4/8
  Verifying  : cpp-4.8.5-39.el7.x86_64                                                                        5/8
  Verifying  : gcc-4.8.5-39.el7.x86_64                                                                        6/8
  Verifying  : libgomp-4.8.5-36.el7.x86_64                                                                    7/8
  Verifying  : libgcc-4.8.5-36.el7.x86_64                                                                     8/8

Installed:
  gcc.x86_64 0:4.8.5-39.el7

Dependency Installed:
  cpp.x86_64 0:4.8.5-39.el7            libmpc.x86_64 0:1.0.1-3.el7            mpfr.x86_64 0:3.1.1-4.el7

Dependency Updated:
  libgcc.x86_64 0:4.8.5-39.el7                            libgomp.x86_64 0:4.8.5-39.el7

Complete!
2.下载Redis
Redis官方下载链接
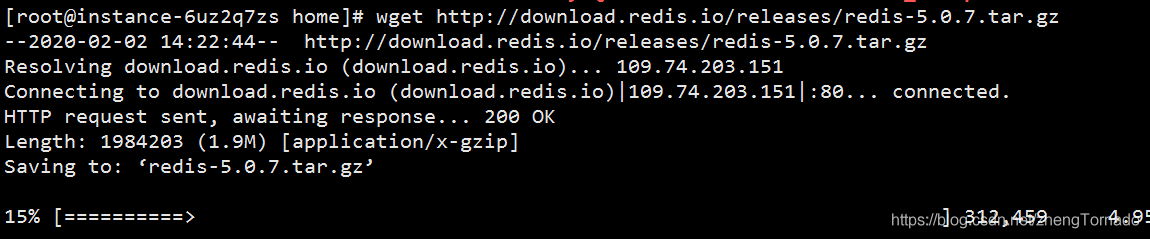
下载安装包:
wget http://download.redis.io/releases/redis-5.0.7.tar.gz
3.解压/编译/安装
- 先准备个文件夹 /usr/local/redis 将解压后的文件存放在该目录
tar -zxvf redis-5.0.7.tar.gz -C /usr/local/redis

- 等待解压完成 cd 到/usr/local/redis目录下 查看解压后的文件

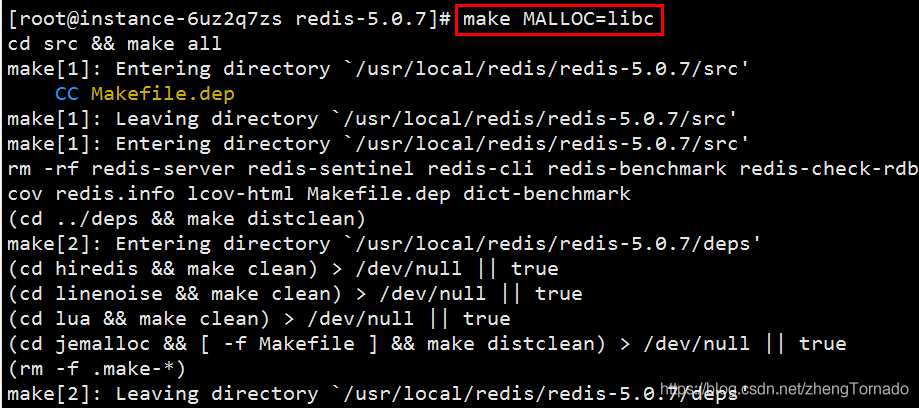
- cd到redis-4.0.9目录下 运行编译命令
make MALLOC=libc
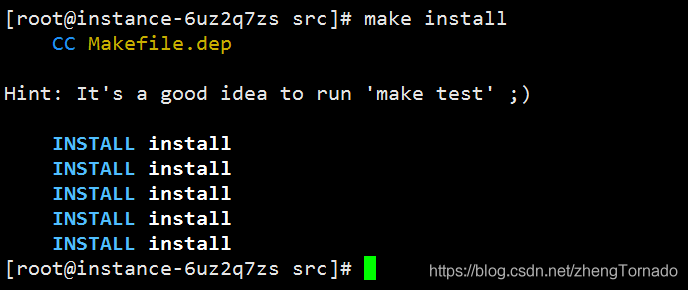
- 等待编译完成 cd 到redis-4.0.9下的src目录 运行安装命令
make install
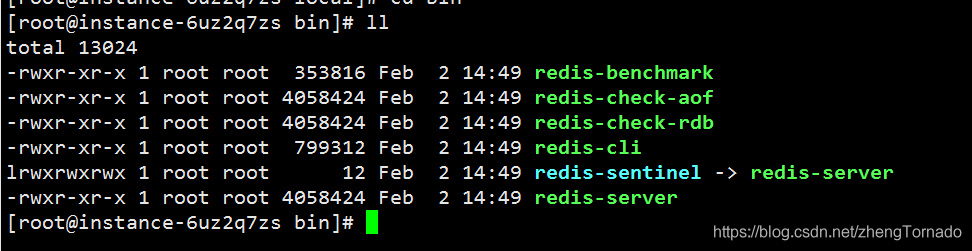
- 等待安装完成 会自动在/usr/local/bin目录下生成redis相关的可执行文件 可以cd到该目录下查看一下
4. 启动Redis(临时方式)
我们以后也可以在该目录下用./redis-server来启动redis 也可以在刚刚的src目录下运行./redis-server
无论用哪个目录下的./redis-server都可以启动redis 我们来试一下
/usr/local/bin目录 启动redis【./redis-server】
/usr/local/redis/redis-5.0.7/src 目录启动redis 【./redis-server】
[root@instance-6uz2q7zs bin]# ./redis-server
15886:C 02 Feb 2020 14:53:32.730 # oO0OoO0OoO0Oo Redis is starting oO0OoO0OoO0Oo
15886:C 02 Feb 2020 14:53:32.730 # Redis version=5.0.7, bits=64, commit=00000000, modified=0, pid=15886, just started
15886:C 02 Feb 2020 14:53:32.730 # Warning: no config file specified, using the default config. In order to specify a config file use ./redis-server /path/to/redis.conf
                _._
           _.-``__ ''-._
      _.-``    `.  `_.  ''-._           Redis 5.0.7 (00000000/0) 64 bit
  .-`` .-```.  ```\/    _.,_ ''-._
 (    '      ,       .-`  | `,    )     Running in standalone mode
 |`-._`-...-` __...-.``-._|'` _.-'|     Port: 6379
 |    `-._   `._    /     _.-'    |     PID: 15886
  `-._    `-._  `-./  _.-'    _.-'
 |`-._`-._    `-.__.-'    _.-'_.-'|
 |    `-._`-._        _.-'_.-'    |           http://redis.io
  `-._    `-._`-.__.-'_.-'    _.-'
 |`-._`-._    `-.__.-'    _.-'_.-'|
 |    `-._`-._        _.-'_.-'    |
  `-._    `-._`-.__.-'_.-'    _.-'
      `-._    `-.__.-'    _.-'
          `-._        _.-'
              `-.__.-'

15886:M 02 Feb 2020 14:53:32.731 # WARNING: The TCP backlog setting of 511 cannot be enforced because /proc/sys/net/core/somaxconn is set to the lower value of 128.
15886:M 02 Feb 2020 14:53:32.731 # Server initialized
15886:M 02 Feb 2020 14:53:32.731 # WARNING overcommit_memory is set to 0! Background save may fail under low memory condition. To fix this issue add 'vm.overcommit_memory = 1' to /etc/sysctl.conf and then reboot or run the command 'sysctl vm.overcommit_memory=1' for this to take effect.
15886:M 02 Feb 2020 14:53:32.732 # WARNING you have Transparent Huge Pages (THP) support enabled in your kernel. This will create latency and memory usage issues with Redis. To fix this issue run the command 'echo never > /sys/kernel/mm/transparent_hugepage/enabled' as root, and add it to your /etc/rc.local in order to retain the setting after a reboot. Redis must be restarted after THP is disabled.
15886:M 02 Feb 2020 14:53:32.732 * Ready to accept connections
如上图 redis就成功启动了 当然这种并不是后台启动(守护线程)的方式 因为退出该窗口redis就关闭了 接下来我来教大家如何以守护线程启动redis
5.守护线程(后台启动)方式启动redis
首先按ctrl+c退出该窗口 我们cd 到redis的解压目录下 我们可以看到有个redis.conf文件 这个文件是redis的配置文件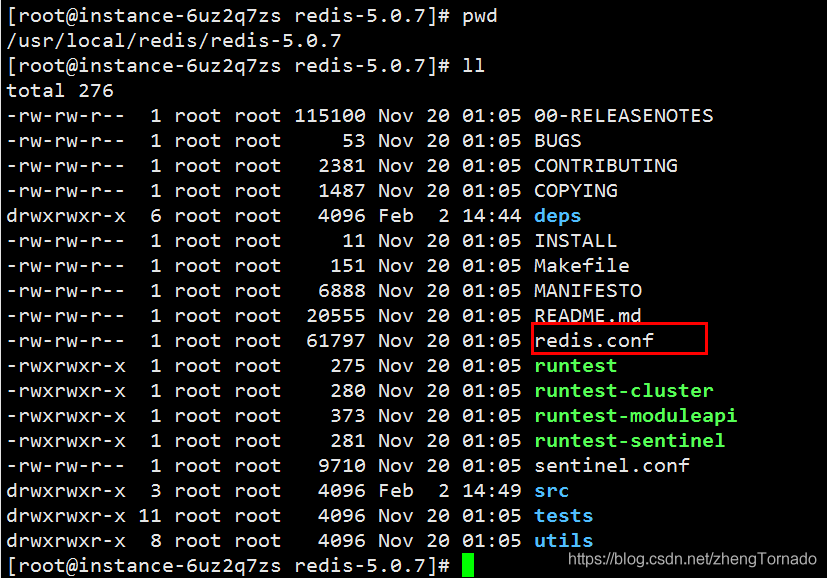
vim 打开redis.conf文件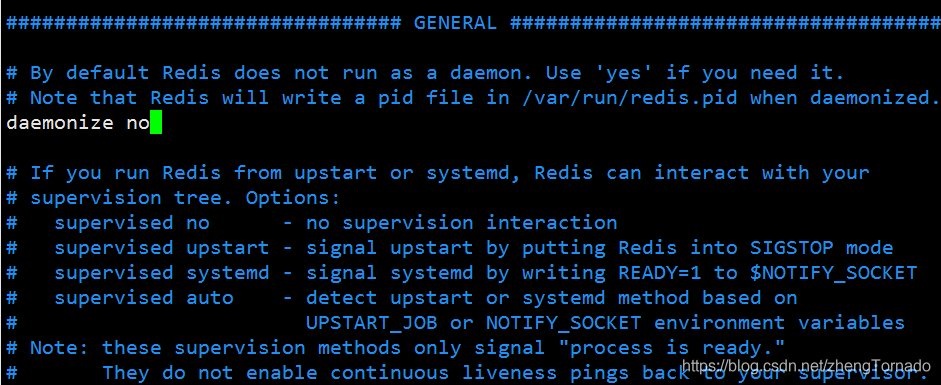
我们可以看到有个daemonize配置项 这个就是后台启动的意思 将no改成yes即可 修改完之后 保存退出(修改配置文件并保存退出这里我就不介绍了哈)
5.1 启动Redis(方式1)
这时候我们再去启动 要知道启动文件在src目录下 cd 到src目录 运行如下命令
./redis-server ../redis.conf
运行该目录下的启动文件redis-server 再将上级目录下的redis.conf配置文件带进去 就可成功后台启动redis了
5.1 启动Redis(方式2)
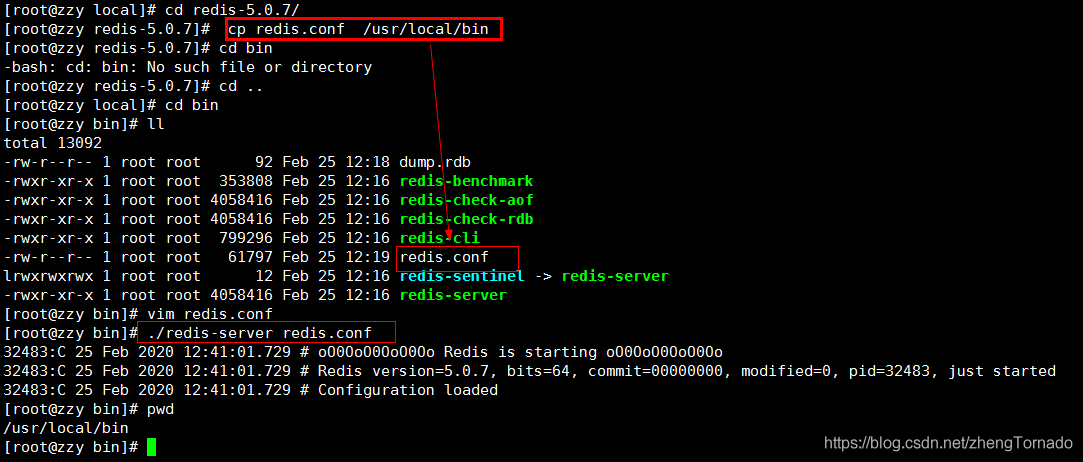
cd redis-5.0.7目录下,将redis.conf文件复制到/usr/local/bin目录下启动redis
cp redis.conf /usr/local/bin
启动Redis
[root@zzy bin]# ./redis-server redis.conf
32483:C 25 Feb 2020 12:41:01.729 # oO0OoO0OoO0Oo Redis is starting oO0OoO0OoO0Oo
32483:C 25 Feb 2020 12:41:01.729 # Redis version=5.0.7, bits=64, commit=00000000, modified=0, pid=32483, just started
32483:C 25 Feb 2020 12:41:01.729 # Configuration loaded
[root@zzy bin]# pwd
/usr/local/bin
修改 /usr/local/bin下的redis.conf配置文件可以设置
- 守护线程启动
- 远程链接redis
- 设置redis密码
这时候 我们可以去看一下redis是否启动成功
如上图 redis我们成功后台启动了
到此完成
若关闭redis 可以直接 kill -9 16582
6 远程连接redis
6.1 修改redis配置文件
找到redis的安装目录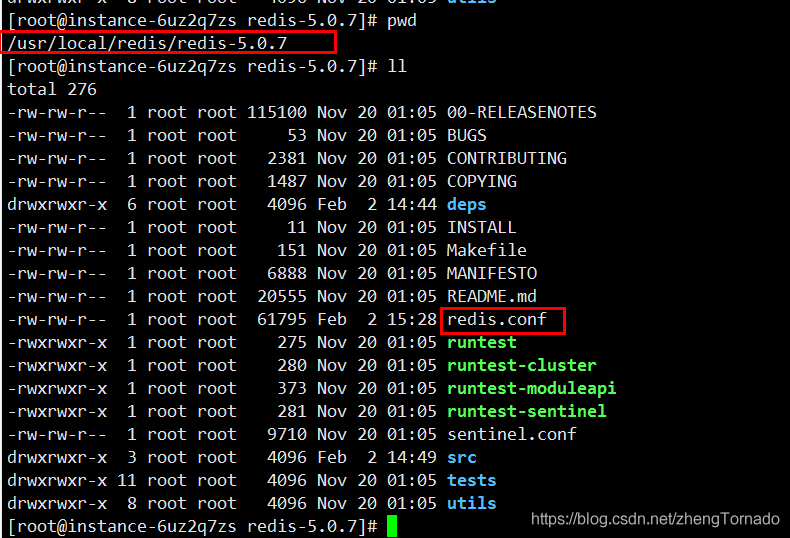
vim  redis.conf
bind  0.0.0.0
protected-mode   no
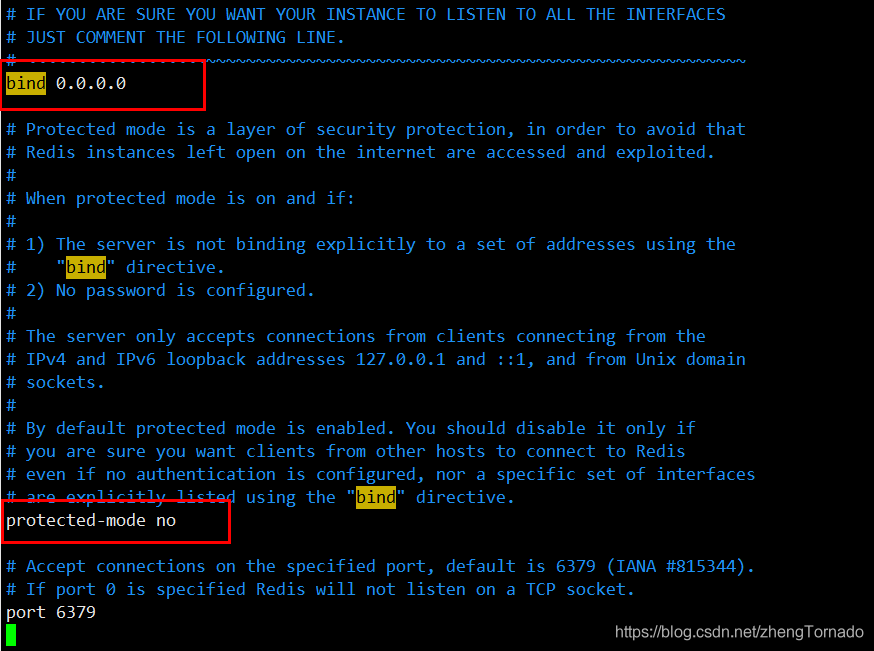
关闭redis后重启redis
远程连接Redis 成功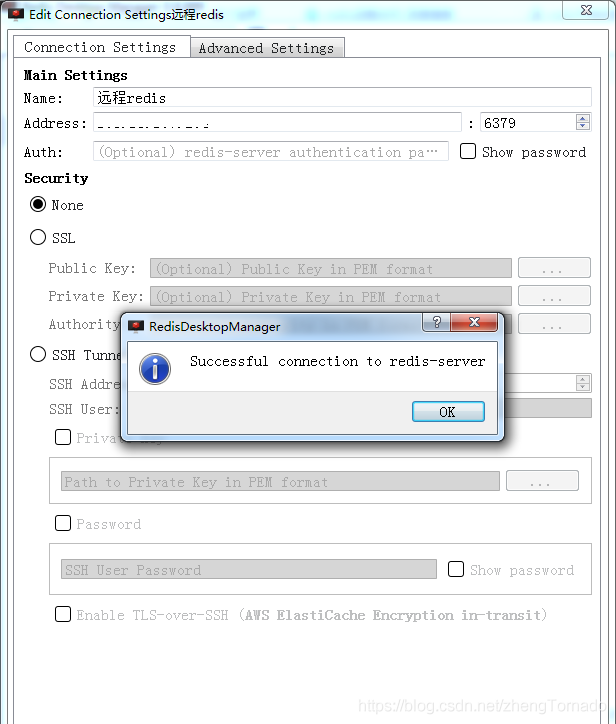
7. 设置Redis密码
在服务器上,这里以linux服务器为例,为redis配置密码。
7.1 第一种方式 (临时方式)
(当前这种linux配置redis密码的方法是一种临时的,如果redis重启之后密码就会失效)
(1)首先进入redis,如果没有开启redis则需要先开启:
[root@iZ94jzcra1hZ bin]# redis-cli -p 6379
127.0.0.1:6379>
(2)查看当前redis有没有设置密码:
127.0.0.1:6379> config get requirepass
1) "requirepass"
2) ""
(3)为以上显示说明没有密码,那么现在来设置密码:
127.0.0.1:6379> config set requirepass abcdefg
OK
127.0.0.1:6379>
(4)再次查看当前redis就提示需要密码:
127.0.0.1:6379> config get requirepass
(error) NOAUTH Authentication required.
127.0.0.1:6379>
7.2 第二种方式 (永久方式)
需要永久配置密码的话就去redis.conf的配置文件中找到requirepass这个参数,如下配置:
修改redis.conf配置文件
vim redis.conf
查找requirepass foobared(Esc :/requirepass foobared),把前面的注释去掉,
将foobared改成自己的密码
#requirepass foobared
requirepass 123   指定密码123
保存后重启redis就可以了
7.3 redis-cli连接redis
[root@iZ2ze3zda3caeyx6pn7c5zZ bin]# redis-cli
127.0.0.1:6379> keys *
(error) NOAUTH Authentication required.
#使用auth password验证密码
127.0.0.1:6379> auth 123        //指定密码
OK
127.0.0.1:6379> keys *
1) "a"
2) "cit"
3) "clist"
4) "1"
#客户端使用config get requirepass命令查看密码
127.0.0.1:6379> config get requirepass
1) "requirepass"
2) "123"