一.项目介绍:
上一篇介绍了美食杰项目的登录页面,这篇我们来介绍一下登录之后的编辑个人资料页面,感兴趣的一起来看看吧!!!
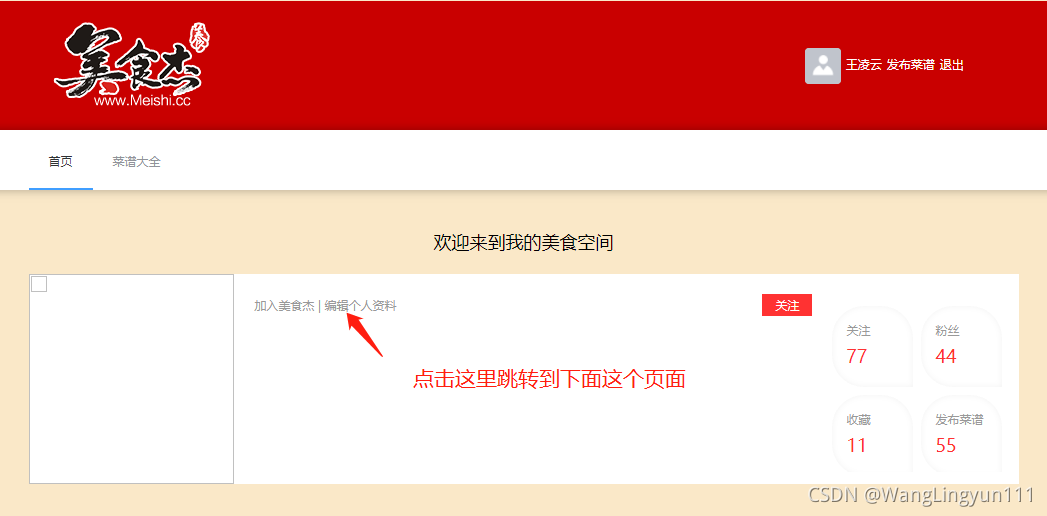
1.首先点击个人跳转到空间,然后点击编辑个人资料就会跳转到我们今天要介绍的页面。
2.技术线如下:
配置路由
设置图片的最大宽度,尺寸大小
请求接口参数
上传图片,图片展示
渲染页面
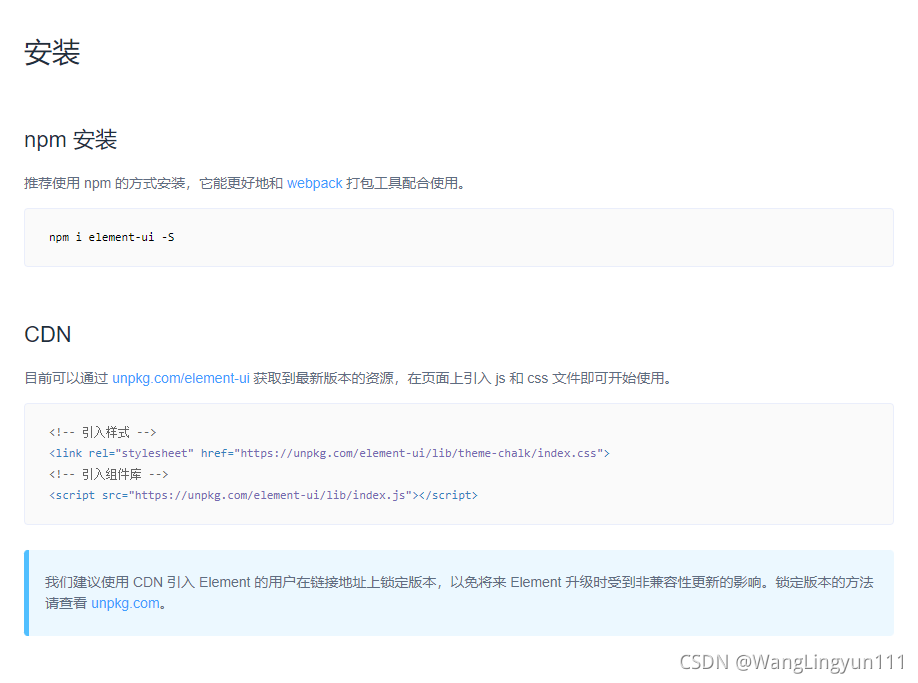
3.要用到的组件有:Element ui
安装方法如下:
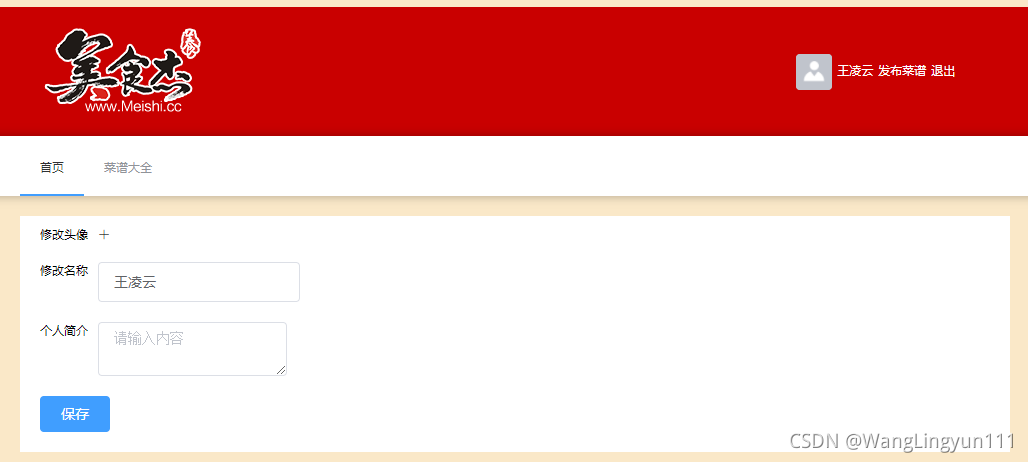
二.效果展示:
三.代码展示:
1.视图代码:
edit.vue:
<template>
  <div class="edit">
    <div class="edit-item">
      <span class="label">修改头像</span>
      <upload-img
        imgMaxWidth="210"
        action="/api/upload?type=user"
        :imageUrl="avatar"
        @res-url="data[(avatar = data.resImgUrl)]"
      ></upload-img>
    </div>
    <div class="edit-item">
      <span class="label">修改名称</span>
      <div>
        <el-input
          v-model="name"
          class="create-input"
          placeholder="请输入内容"
        ></el-input>
      </div>
    </div>
    <div class="edit-item">
      <span class="label">个人简介</span>
      <div>
        <el-input
          v-model="sign"
          type="textarea"
          class="create-input"
          placeholder="请输入内容"
        ></el-input>
      </div>
    </div>
    <div>
      <el-button class="send" type="primary" size="medium" @click="save"
        >保存</el-button
      >
    </div>
  </div>
</template>
<script>
import UploadImg from "@/components/upload-img";
import { userEdit } from "@/service/api";
export default {
  components: { UploadImg },
  data() {
    const userInfo = this.$store.state.userInfo;
    console.log();
    return {
      avatar: userInfo.avatar,
      name: userInfo.name,
      sign: userInfo.sign,
    };
  },
  methods: {},
};
</script>
<style lang="stylus">
.edit
  background-color #fff
  padding 10px 0 20px 20px
  .edit-item
    display flex
    margin-bottom 20px
    .label
      margin-right 10px
</style>
space.vue:
<template>
  <div class="space">
    <h2>欢迎来到我的美食空间</h2>
    <div class="user-info">
      <div class="user-avatar">
        <img src="" alt="" />
      </div>
      <div class="user-main">
        <h1></h1>
        <span class="info">
          <em>加入美食杰</em>
          |
          <router-link :to="{ name: 'edit' }">编辑个人资料</router-link>
        </span>
        <div class="tools">
          <!-- follow-at  no-follow-at-->
          <a href="javascript:;" class="follow-at">
            关注
          </a>
        </div>
      </div>

      <ul class="user-more-info">
        <li>
          <div>
            <span>关注</span>
            <strong>77</strong>
          </div>
        </li>
        <li>
          <div>
            <span>粉丝</span>
            <strong>44</strong>
          </div>
        </li>
        <li>
          <div>
            <span>收藏</span>
            <strong>11</strong>
          </div>
        </li>
        <li>
          <div>
            <span>发布菜谱</span>
            <strong>55</strong>
          </div>
        </li>
      </ul>
    </div>

    <!-- v-model="activeName" -->
    <el-tabs class="user-nav">
      <el-tab-pane label="作品" name="works"></el-tab-pane>
      <el-tab-pane label="粉丝" name="fans"></el-tab-pane>
      <el-tab-pane label="关注" name="following"></el-tab-pane>
      <el-tab-pane label="收藏" name="collection"></el-tab-pane>
    </el-tabs>

    <div class="user-info-show">
      <!-- 作品 & 收藏 布局 -->
      <!-- <menu-card :margin-left="13"></menu-card> -->
      <!-- 粉丝 & 关注 布局 -->
      <!-- <Fans></Fans> -->
      <router-view></router-view>
    </div>
  </div>
</template>
<script>
import {
  userInfo,
  toggleFollowing,
  getMenus,
  following,
  fans,
  collection,
} from "@/service/api";

export default {
  name: "Space",
  data() {
    return {};
  },
  watch: {},
  methods: {},
};
</script>

<style lang="stylus">
.space

  h2
    text-align center
    margin 20px 0
  .user-info
    height 210px
    background-color #fff
    display flex
    .user-avatar
      width 210px
      height 210px

      img
        width 100%
        height 100%
    .user-main
      width 570px
      padding 20px
      position relative
      h1
        font-size 24px
        color #333
        line-height 44px
      .info
        font-size 12px
        line-height 22px
        color #999
        a
          color #999
      .tools
        position absolute
        right 20px
        top 20px
        vertical-align top;
        a
          display inline-block
          padding 3px 0
          width 50px
          color #fff
          text-align center
        a.follow-at
          background-color  #ff3232
        a.no-follow-at
          background-color #999

    .user-more-info
      width 190px
      overflow hidden
      padding-top 20px
      li
        width 81px
        height 81px
        border-radius 32px
        border-bottom-right-radius 0
        margin 0px 8px 8px 0px
        float left
        div
          display block
          height 81px
          width 81px
          box-shadow 0px 0px 6px rgba(0,0,0,0.05) inset
          border-radius 32px
          border-bottom-right-radius 0

          span
            color #999
            line-height 20px
            display block
            padding-left 14px
            padding-top 14px

          strong
            display block
            font-size 18px
            color #ff3232
            font-family Microsoft Yahei
            padding-left 14px
            line-height 32px

  .user-nav
    margin 20px 0 20px 0
  .user-info-show
    min-height 300px
    background #fff
    padding-top 20px
    .info-empty
      width 100%
      min-height inherit
      display flex
      align-items center
      justify-content:center;
      p
        text-align center
        font-size 12px
      a
        text-align center
        display block
        height 48px
        width 200px
        line-height 48px
        font-size 14px
        background #ff3232
        color #fff
        font-weight bold
        margin 0px auto
  .el-tabs__item.is-active
    color: #ff3232;
  .el-tabs__active-bar
    background-color: #ff3232;
  .el-tabs__nav-wrap::after
    background-color: transparent;
</style>
2.组件代码:
upload-img.vue:
<template>
  <el-upload
    class="avatar-uploader"
    :action="action"
    :show-file-list="false"
    :on-success="handleAvatarSuccess"
    :before-upload="beforeAvatarSUpload"
  >
    <img v-if="imageUrl" src="imageUrl" class="avatar" />
    <i v-else class="el-icon-plus avatar-uploader-icon"></i>
  </el-upload>
</template>
<script>
export default {
  props: {
    action: String,
    maxSize: {
      type: Number,
      default: 2,
    },
    imgeUrl: {
      type: String,
      default: "",
    },
    imgMaxWidth: {
      type: [Number, String],
      default: "auto",
    },
  },
  data() {
    return {};
  },
  methods: {
    //图片上传成功之后
    handleAvatarSuccess(res, file) {
      console.log(file); //图片所有信息
      if (res.code === 1) {
        //看一下请求状态
        this.$message({
          message: res.mes,
          type: "warning",
        });
        return;
      }
      this.imageUrl = URL.createObjectURL(file.raw); //图片路径处理成一个字符串
      this.$emit("res-url", {
        resImgUrl: res.data.url,
      });
    },

    //图片上传之前
    beforeAvatarUpload(file) {
      //限制图片的类型
      const isJPG = file.type === "image/jpeg";

      //限制图的内存大小
      const isLt2M = file.size / 1024 / 1024 < 2;

      if (!isJPG) {
        this.$message.error("上传头像图片只能是 JPG 格式!");
      }
      if (!isLt2M) {
        this.$message.error("上传头像图片大小不能超过 2MB!");
      }
      return isJPG && isLt2M;
    },
  },
};
</script>
四.总结:
以上就是美食杰项目---编辑个人资料效果的全过程,欢迎观看,加油敲代码!!!
版权声明:本文为m0_62201566原创文章,遵循CC 4.0 BY-SA版权协议,转载请附上原文出处链接和本声明。